Table of Contents
Advertisement
Advertisement
Table of Contents

Related Manuals for Predator Predator generators 6500 Watt


Summary of Contents for Predator Predator generators 6500 Watt
- Page 2 Table of Contents Safety ............2 Maintenance ..........14 Setup ............6 Parts List and Diagram ......19 Specifications ..........6 Warranty ............ 23 Operation ............ 8 WARNING SYMBOLS AND DEFINITIONS This is the safety alert symbol. It is used to alert you to potential personal injury hazards. Obey all safety messages that follow this symbol to avoid possible injury or death.
-
Page 3: Operating Precautions
Set up Precautions (cont.) 9. Improper connections to a building electrical 10. Do not operate the Generator before grounding. system can allow electrical current from the The Generator must be earth-grounded generator to backfeed into the utility lines. in accordance with all relevant electrical Such backfeed may electrocute utility company codes and standards before operation. - Page 4 38. Keep hands and feet away from moving parts. Do 26. Use only accessories that are recommended not reach over or across generator while operating. by Harbor Freight Tools for your model. Accessories that may be suitable for one 39. Before use, check for misalignment or binding...
-
Page 5: Service Precautions
Service Precautions 1. Before service, maintenance, or cleaning: 8. Have the equipment serviced by a qualified repair person using only identical replacement parts. a. Unplug all devices from the generator. This will ensure that the safety of the equipment b. Turn the engine switch to its “OFF” position. is maintained. -
Page 6: Specifications
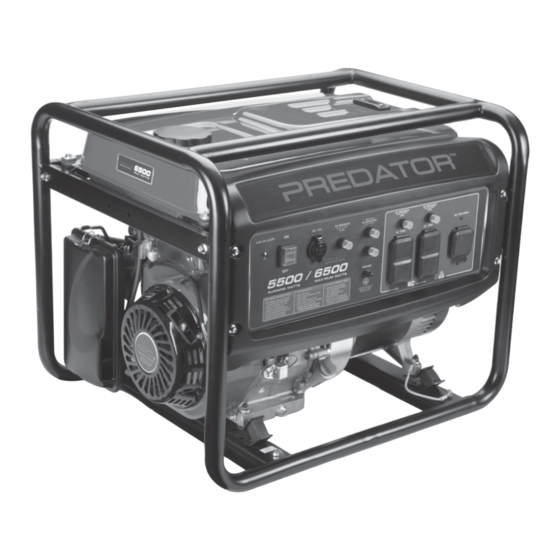
Functional Description Specifications 120/240V~, 60Hz Rated Output 5,500 Watts (6,500 max) Generator Two 3-Prong, duplex NEMA #5-20 120V Electrical Receptacle One 4-Prong, NEMA #L14-30 twistlock 120V/240V One DC Outlet 12VDC Displacement 420cc Horizontal Single Cylinder 4 stroke OHV Engine Type EPA phase III compliant Cooling System Forced air cooled... - Page 7 Components and Controls (cont.) The following are descriptions of the controls on the power panel. Your generator has sockets to power your products with circuit Circuit Breakers: The circuit breaker protects the breakers to protect the voltage flow. Generator from overloading. The rating of the breaker and the load it protects are marked near the breaker.
-
Page 8: Generator Pre-Start Checks
Initial Tool Set Up/Assembly CAUTION: This generator is not intended to power Read the ENTIRE IMPORTANT sensitive electronic equipment without the addition of an SAFETY INFORMATION section at the appropriate line conditioner and surge protector (both not beginning of this manual including included). -
Page 9: Using The Generator
Checking and Filling Fuel WARNING! TO PREVENT SERIOUS INJURY FROM FIRE: Full level Fill the fuel tank in a well-ventilated area Full level away from ignition sources. If the engine is hot from use, shut the engine off and wait for it to cool before adding fuel. -
Page 10: Starting The Engine
Starting the Engine 1. To start a cold engine, move the Choke to the CHOKE position. To restart a warm engine, leave the Choke in the RUN position. 2. Open the Fuel Valve. 3. Turn the Engine Switch to ON. 4. -
Page 11: Connecting Electrical Loads
Connecting Electrical Loads Familiarize yourself with the engine controls, power panel and how to start the engine before using the generator. Calculate the wattage of the products you will use with the generator and verify that the generator can handle the total load. - Page 12 Calculating Total Wattage of Devices Used with the Generator Wattage Estimate Charts Before using the Generator, check that the products you want to plug into the unit are below the rated and Note: Wattages listed below are estimates for that maximum wattage ratings of the Generator.
-
Page 13: Stopping The Engine Under Normal Conditions
Stopping the Engine in an Emergency 1. To stop the engine in an emergency, turn the Engine Switch off. NOTICE: Generator shut-off under load may damage the generator and attached equipment. Stopping the Engine Under Normal Conditions 1. Before turning off the Engine, turn off all electrical loads, then unplug them. -
Page 14: Cleaning, Maintenance, Lubrication
User-Maintenance Instructions TO PREVENT SERIOUS INJURY FROM ACCIDENTAL OPERATION: Turn the Power Switch of the generator to its “OFF” position, wait for the engine to cool, and disconnect the spark plug cap before performing any inspection, maintenance, or cleaning procedures. TO PREVENT SERIOUS INJURY FROM EQUIPMENT FAILURE: Do not use damaged equipment. -
Page 15: Checking And Filling Fuel
Checking and Filling Fuel Note: Do not use gasoline containing more than WARNING! TO PREVENT SERIOUS 10% ethanol (E10). Do not use E85 ethanol. INJURY FROM FIRE: Fill the fuel tank in a well-ventilated area Note: Do not use gasoline that has been stored in a away from ignition sources. -
Page 16: Spark Plug Maintenance
Spark Plug Maintenance 1. Disconnect spark plug cap from end of plug. 4. When installing a new spark plug, adjust Clean out debris from around spark plug. the plug’s gap to the specification on the Specifications chart. Do not pry against the 2. -
Page 17: Troubleshooting
Troubleshooting Problem Possible Causes Probable Solutions Engine will not start FUEL RELATED: FUEL RELATED: 1. No fuel in tank or fuel valve closed. 1. Fill fuel tank and open fuel valve. 2. Choke not in CHOKE position, cold engine. 2. Move Choke to CHOKE position. 3. - Page 18 Troubleshooting (cont.) Problem Possible Causes Probable Solutions Engine misfires 1. Spark plug cap loose. 1. Check wire connections. 2. Incorrect spark plug gap or 2. Re-gap or replace spark plug. damaged spark plug. 3. Defective spark plug cap. 3. Replace spark plug cap. 4.
-
Page 19: Parts List
Parts List and Diagram PLEASE READ THE FOLLOWING CAREFULLY THE MANUFACTURER AND/OR DISTRIBUTOR HAS PROVIDED THE PARTS LIST AND ASSEMBLY DIAGRAM IN THIS MANUAL AS A REFERENCE TOOL ONLY. NEITHER THE MANUFACTURER OR DISTRIBUTOR MAKES ANY REPRESENTATION OR WARRANTY OF ANY KIND TO THE BUYER THAT HE OR SHE IS QUALIFIED TO MAKE ANY REPAIRS TO THE PRODUCT, OR THAT HE OR SHE IS QUALIFIED TO REPLACE ANY PARTS OF THE PRODUCT. - Page 20 Parts List (cont.) Part Description Part Description Grommet, Crankcase Bolt, Flange Bolt, Flange Stay Comp., Muffler Bolt, Flange, Seal, Protector Muffler Cover, Generator End Protector Comp., Muffler Inner Bolt, Hex. Muffler Assy. Frame Comp., Side Protector, Muffler Side Bolt, Flange Bolt, Flange, 6×14 Stay, Air Cleaner Protector Comp., Muffler Outer...
-
Page 21: Assembly Diagram
Assembly Diagram For Generator technical questions, please call 1-800-444-3353. Item 69672 / 69674 Page 21 For Engine technical questions, please call 1-800-520-0882. - Page 22 Assembly Diagram (cont.) Note: Parts 114-117 and 141-143 are only on Item 69674 (EPA/CARB version) For Generator technical questions, please call 1-800-444-3353. Item 69672 / 69674 Page 22 For Engine technical questions, please call 1-800-520-0882.
- Page 23 United States Emission Control Defects Warranty Statement The United States Environmental Protection Agency (herein EPA) and Harbor Freight Tools (herein HFT) are pleased to explain the emission control system warranty on your 1997 and later Small Off-Road Engine (herein engine). Within the United States, new off-road, spark-ignition en- gines certified for model year 1997 and later, must be designed, built and equipped to meet the stringent anti-smog standards set forth by the EPA.
- Page 24 If you have any questions regarding your warranty rights and responsibilities, you should contact the Harbor Freight Tools Customer Service Department at 1-800-444-3353. Harbor Freight Tools Emission Control Defects Warranty Provisions Length of Coverage HFT warrants to a first retail purchaser and each subsequent purchaser that the engine is free from defects in materials and workmanship that cause the failure of warranted parts for a period of two (2) years after the date of delivery to the first retail purchaser.
Need help?
Do you have a question about the Predator generators 6500 Watt and is the answer not in the manual?
Questions and answers
Where is fuse box
The fuse box location is not explicitly mentioned in the provided context. However, the context does mention a "Case, Fuse Connector" and "Fuse, Rectifier (5A)," which suggests that fuses are part of the control panel assembly. Based on this, the fuse box is likely located near or within the control panel of the Predator 6500 Watt generator.
This answer is automatically generated
Where is the circuit breaker
The circuit breakers are located on the control panel of the Predator 6500 Watt generator. They are used to protect the generator from overloading and are marked near the breaker to indicate the load they protect.
This answer is automatically generated
Where is circuit braker
The circuit breaker is located on the control panel of the Predator 6500 Watt generator. It protects the generator from overloading and is marked near the breaker with its rating and the load it protects.
This answer is automatically generated
My pretador 6500 is used to power my RV but the lights keep dimming . It sounds nice and steady I checked the oil and fuel ect but it's still dimming.
Dim lights when using a Predator 6500 Watt generator to power an RV could be caused by several factors:
1. Overloaded Generator – If the total wattage of connected appliances exceeds the generator's capacity, voltage may drop, causing lights to dim.
2. Start-Up Wattage Demand – Appliances with motors, such as air conditioners or refrigerators, require extra power when starting, which can temporarily reduce available voltage.
3. Faulty or Loose Connections – Poor or loose connections between the generator and RV can cause voltage drops, leading to dimming lights.
4. Fuel or Engine Issues – If the generator's engine is not running smoothly due to fuel problems or maintenance issues, it may not produce consistent power.
5. Grounding Problems – If the generator is not properly grounded, it could cause unstable voltage output.
To troubleshoot, check the total load on the generator, ensure proper connections, and verify that the generator is running correctly.
This answer is automatically generated