
Related Manuals for Fujitsu KD96009-0648


Summary of Contents for Fujitsu KD96009-0648
- Page 1 KD96009-0648 LINE THERMAL PRINTER MODEL KD02906-12XX Series User’s Manual FUJITSU LIMITED...
- Page 2 WEEE MARK...
-
Page 3: Declaration Of Conformity
Declaration of Conformity This printer conforms to the following Standards: Low Voltage Directive 73/23/EEC, 93/68/EEC and the EMC Directive 89/336/EEC, 92/31/EEC, 93/68/EEC. LVD : EN60950-1 EMC : EN55022 EN61000-3-2 EN61000-3-3 EN55024 This declaration is applied only for 230V model. IMPORTANT: This equipment generates, uses, and can radiate radio frequency energy and if not installed and used in accordance with the instruction manual, may cause interference to radio communications. -
Page 4: General Precautions
● Note that FUJITSU LIMITED is not responsible for any operation results regardless of missing, error, or misprinting in this manual. ● Note that FUJITSU LIMITED is not responsible for any trouble caused as a result of using options or consumables that are not specified in this manual. - Page 5 ● After having read this Manual, keep it in a safe, readily accessible place for future reference. ● Some of the descriptions contained in this manual may not be relevant to some printer models. The following describes the degree of hazard and damage that could occur if the printer is improperly operated by ignoring the instructions indicated by the warning symbols.
- Page 6 • Neglecting these warnings may result in printer failure, overheating, emission of smoke, fire, or electric shock. ■ Do not drop any foreign object nor spill liquid into the printer. Do not place any object on the printer either. ■ Do not drop any metallic object such as paper clip, pin or screw into the printer.
- Page 7 ■ A state where any object is placed on the printer ■ A state where the printer is covered or wrapped by a cloth or bed clothing • Be careful about internal heat buildup, which could cause fire and deform the case.
- Page 8 If the Powered USB cable sustains damage, contact your distributor. ■ If the printer will not be used for a long time, pull out the Powered USB cable. ■ Plug or unplug the power cord or signal cable after turning off the printer and the appliance connected to the printer.
- Page 9 Caution label is attached on the position shown in the following figure. Carefully read the precautions in handling before using the printer. ■ Do not transport this printer with the paper roll inside. • Printer failure or breakage may occur.
-
Page 10: Daily Maintenance
■ Do not touch any of the moving parts (e.g., paper cutter, gears, active electrical parts) while the printer is working. ■ In case of trouble do not attempt to repair the printer. Ask FUJITSU LIMITEDservice for repair. ■ Be careful that the printer cover does not entrap your hands or fingers. -
Page 11: Table Of Contents
1.1 Features ...9 1.2 Unpacking ...10 1.3 Model Classification ... 10 1.4 Basic Specifications ... 11 2. EXPLANATION OF PRINTER PARTS... 12 2.1 Printer Appearance ... 12 2.2 Printer Cover Inside ... 14 2.3 Other Built-in Functions ... 14 3. PREPARATION ... 15 3.1 Connecting Interface Cables ... -
Page 12: General Outline
1. GENERAL OUTLINE This product is a thermal line printer designed for use with a POS terminal. With extensive features, they can be used in a wide range of applications. 1.1 Features ● Drop-in Paper Roll mechanism facilitating easy paper handling and head cleaning. -
Page 13: Unpacking
1.2 Unpacking When unpacking the printer, confirm that the following are provided: ● Printer: ● Sample paper roll: ● User’s manual (This manual): Printer 1.3 Model Classification The position of partition and color of case differ depending on the model used. -
Page 14: Basic Specifications
1.4 Basic Specifications Item Model KD02906-1200 , KD02906-1201, KD02906-1202, KD02906-1203 Print method Line thermal dot print method Print width 72 mm/576 dots, 48 mm/384 dots Dot density 8 × 8 dots/mm (203 dpi) Print speed 220 mm/s (Fastest, print density 130 %), 1760 dot lines/s Number of print columns Font... -
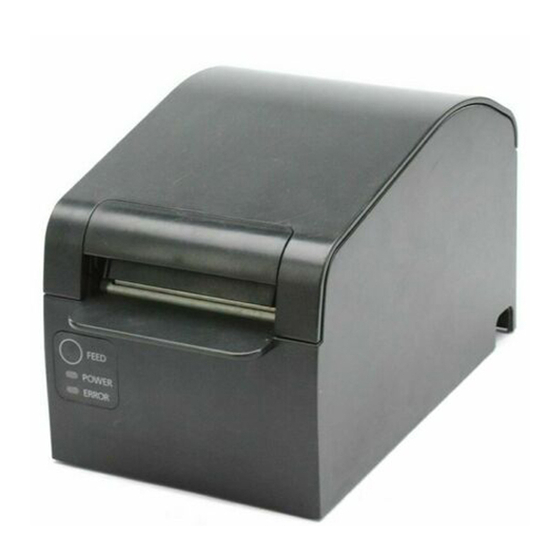
Page 15: Explanation Of Printer Parts
Printer cover (Front view) ● Printer cover Paper is loaded under this cover. ● Cover open lever To refill or replace paper, open the printer cover by lifting the cover open lever. Cover open lever Operation panel — 12 —... - Page 16 POWER LED ERROR LED ● POWER LED Illuminated when the printer power is on and off when the printer power is off. May blink or light in a special mode or in case of failure. ● ERROR LED Illuminated or blinks when paper is empty or in case of failure.
-
Page 17: Printer Cover Inside
Stops printing when this sensor detects paper end. 2.3 Other Built-in Functions ● Buzzer This printer has a built-in buzzer. It is operated in case of cutter error with memory switch SW5-1 set to be valid. ● User memory Allows downloading of user-defined characters and logo data in the nonvolatile memory. -
Page 18: Preparation
3. PREPARATION 3.1 Connecting Interface Cables Confirm that the power switch of the POS terminal is OFF and connect the interface cable. Orient the interface cable connector correctly and insert it into the POS terminal. CAUTION! ■ When disconnecting the cable, always hold the connector. ■... -
Page 19: Connecting The Cash Drawer
(3) DRSW signal The signal status can be tested with the DLE+EOT, GS+a, or GS+r command. (4) Drive Circuit (printer side) CAUTION! ■ No output is produced while printing. ■ The cash drawers 1 and 2 cannot be driven simultaneously. -
Page 20: Partition For Paper Roll
3.3 Partition for Paper Roll At the time of shipment, this partition is set to 80-mm wide (with one partition) or 58-mm wide (with two partitions) depending on the model. Do not remove the partition. 80mm type 58mm type Partition —... -
Page 21: Adjusting The Paper Near-End Sensor
3.4 Adjusting the Paper Near-end Sensor At the time of shipment, the sensor is set to “1”. 1. Lightly push in the paper near-end sensor unit. 2. Move the paper near-end sensor unit to the right and left while keeping to press it. -
Page 22: Maintenance And Troubleshooting
■ When closing the printer cover, press on the center part of the cover to close it firmly. ■ When setting paper, be careful not to have your finger injured by the paper edge. -
Page 23: Cleaning The Print Head
NOT touch the heating element of the head with a bare hand or metal object either. 4.4 Self-printing Insert paper into the printer. With the FEED button pressed and held, turn the printer power on, keep the FEED button held for about 1 second, and then release the FEED button. -
Page 24: Hexadecimal Dump Printing
● Paper end Paper empty is detected in two steps: paper near-end and paper end. It causes the ERROR LED to light. If paper end is detected, refill the paper. If the printer cover is open, a paper-end is detected. -
Page 25: Other
Lights High voltage error Lights Macro execution Lights wait *2 *1: When the printer is printing. *2: The ERROR LED may blink even in the execution of macro function. 5. OTHER 5.1 External Views and Dimensions ERROR LED Lights Lights... -
Page 26: Printing Paper
5.2 Printing Paper Use the print paper shown in the following table or the paper with equivalent quality. Paper Type Recommended thermal PD160R, PD190R from Ohji Paper paper roll HP220AB-1, PB670, PB770 from Mitsubishi Paper Paper width 80 Maximum print area 72 Paper width 58 Maximum print area 48 CAUTION! -
Page 27: Manual Setting Of Memory Switch
Not send 45 bytes Full No Print − Valid Valid Fixed Valid Valid WaitData − − Invalid Invalid − Invalid − − − Valid Command Valid − Valid − − − − Valid Invalid Printer Class − − − − −... - Page 28 Entering memory switch setting mode. Set paper to the printer and keep the printer cover open. With the FEED button pressed and held, turn the printer power on, and then press the FEED button twice. Close the cover. If the current settings of the memory switch etc.
- Page 29 The changed set value is printed. (When change of set value is repeated, the original set value is recovered). When you press the FEED button long, the set value is accepted and then the printer goes to the next setting item. Returning to the memory switch select mode When the setting of the desired content is completed, open the printer cover and then close the printer cover.
- Page 30 TA74906-00F 1.00E-0604 Printed in Japan...