
Related Manuals for Fujitsu FTP-638WSL110 Series


Summary of Contents for Fujitsu FTP-638WSL110 Series
-
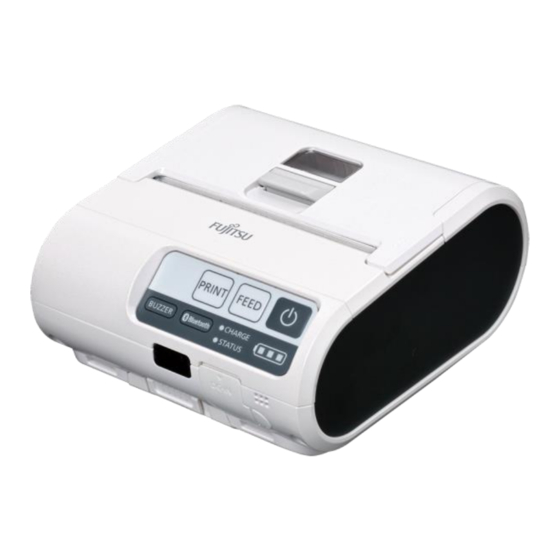
Page 1: Mobile Printer
FUJITSU Component Thermal Printer Mobile Printer FTP-638WSL110 Series User's Guide FUJITSU COMPONENT LIMITED... - Page 3 Thank you for purchasing the FTP-638WSL110 Series Mobile Printer (hereafter referred to as “this product”). This User's Guide (hereafter referred to as “this guide”) contains precautions to use it safely and correctly. Before using this product, please read the complete this guide.
- Page 4 If you wish to use this product in an environment that requires high safety, please consult with our sales representatives. ■ Copyright This product and this guide are copyrighted works of FUJITSU COMPONENT LIMITED. This product and this manual must not be reproduced, duplicated, used, or modified, partially or in full, without permission.
-
Page 5: Regulatory Compliance
■ Regulatory Compliance For Customers in USA (FCC) This device complies with Part 15 of the FCC Rules. Operation is subject to the following two conditions: 1) This device may not cause harmful interference, and 2) This device must accept any interference received, including interference that may cause undesired operation. - Page 6 For Customers in CANADA (Industry Canada) This equipment complies with Industry Canada RSS210 rules. Operation is subject to the following two conditions: 1) This device may not cause harmful interference, and 2) This device must accept any interference received, including interference that may cause undesired operation. Cet appareil numerique de est conforme aux normes canadiennes licence-exempt RSS standard(s) Son fonctionnement est soumis aux deux conditions suivantes :...
- Page 7 ■ Export This device may contain commodities, technology or software subject to export laws and regulations from the US and other countries. Diversion contrary to the country law is prohibited. ■ Warranty We shall not be responsible for any failure caused by wrong operation or usage in the wrong environment.
-
Page 8: Explanation Of Symbols
■ Explanation of Symbols The following symbols are used in this guide. Please read and understand the meaning of each symbol in this guide. If this product should malfunction, immediately stop using it, and contact your sales representative. Indicates an imminent risk of causing severe personal Danger injury or death if not used properly. -
Page 9: General Cautions
■ General Cautions Warning - Do not use in the environment with corrosive gas or salt wind is present. Break- down Failure to observe this may cause failure. - Do not modify or disassemble. Failure to observe this may cause fire, explosion or Modify breakdown. - Page 10 Caution - Do not use while driving a vehicle or walking. Failure to observe this may cause traffic accidents and injuries. Injury - Do not use the printer near the equipment that generates large radiation noise, such as a high voltage device and a large motor. Break- down Failure to observe this may cause malfunction or breakdown.
- Page 11 ■ Printer Warning - Do not use the printer in a location where radio wave generation is prohibited. Accident Might cause accidentally a malfunction of the instrument. - During or immediately after operation, do not touch the print head, the support plate and the motor. Heat is not immediately Burn discharged.
- Page 12 ■ Battery Warning - Do not use the battery for other device or purpose. Failure to observe this may cause destruction. Break- down - Do not disassemble the battery. Failure to observe this may cause heat, fire or destruction. Modify - Only use the specified battery.
- Page 13 ■ AC Adapter Warning - Do not use the AC adapter for any other devices or purposes. Failure to observe this may cause damage to the printer and/or Break- down battery. - Only connect the AC adapter to the specified voltage and/or frequency.
- Page 14 ■ Warning Label of Product This product comes with the following warning label. This label must not be peeled off or erased from the display. Moreover, please contact the distributor when the label is difficult to see due to dirt, scratching etc. Warning display Content HEAD...
-
Page 15: Table Of Contents
1 Preparation to Print ................. 14 Packaging ..................14 Getting to Know the Printer ............15 Inserting the Battery ..............19 Connecting AC Adapter (Charging) ..........20 Inserting the Paper ..............21 2 Operating Procedures ................22 Power On ..................22 Test Print .................. -
Page 16: Preparation To Print
1 Preparation to Print 1.1 Packaging The following items are included. There may be attachment of optional parts depending on a product type. If anything is missing, please contact the distributor. Printer Battery AC adapter Safety Cautions AC Cable Roll Paper... -
Page 17: Getting To Know The Printer
1 Preparation to Print 1.2 Getting to Know the Printer ■ Front Side (Cover Closed) Paper Cover : Cover to open and load paper. Paper Cutter : To cut paper. Operation Panel : Operates and Displays status of the printer. Cover Open Lever : To open the cover. -
Page 18: Operation Panel
1 Preparation to Print ■ Operation Panel Power Switch : To turn the power supply ON or OFF. FEED Switch : To feed paper. Re-Print switch : To issue recent print. Buzzer switch : To change the volume of the buzzer. Bluetooth switch : To turn the Bluetooth power supply ON or OFF. - Page 19 1 Preparation to Print ■ Front Side (Cover Open) Platen Roller : To feed paper. Warning Label : This shows warning when using printer. Paper Sensor : This sensor detects the status of paper. ■ Back view (Cover Open) Thermal Head : This applies heat to paper.
-
Page 20: Rear Side
1 Preparation to Print ■ Rear Side Screw for Soft Case : This attaches the Soft Case. (Optional) Battery cover : Cover to open and insert the battery. Product Label : Displays printer type and other product information. -
Page 21: Inserting The Battery
1 Preparation to Print 1.3 Inserting the Battery Caution Life of the battery is about 500 charges. (At the normal temperature) If an old battery is used, not only the equipment malfunctions and this might cause destruction. Cover open 1. Please slide cover lock and lift the battery cover to open. -
Page 22: Connecting Ac Adapter (Charging)
1 Preparation to Print 1.4 Connecting AC Adapter (Charging) The battery is charged by the printer's built-in charger. Caution Please stop charging immediately if an abnormal charge is generated. 1. Please connect the AC cable with the AC adapter, and connect the AC plug to an outlet. -
Page 23: Inserting The Paper
1 Preparation to Print 1.5 Inserting the Paper 1. Please push up the cover open lever to open the paper cover. Cover open lever 2. Please insert the paper in the printer. Thermal Paper (Thermosensitive Side) 2. Please put out the edge of the paper and close the paper cover. -
Page 24: Operating Procedures
2 Operating Procedures 2.1 Power On 1. Please push the POWER Switch until the LED light turns green. 2. It is possible to turn the power off by pushing the POWER Switch until the LED turns off. -
Page 25: Test Print
2 Operating Procedures 2.2 Test Print This product has a test print function. The setting of the printer can be confirmed by this test print. 1. Please turn the power off and push the FEED switch. 2. Please turn the power on while holding with the FEED switch down. - Page 26 2 Operating Procedures Check pattern The thermal head open circuit etc. can be confirmed. Version The firmware version can be confirmed. ---------------- Setting information etc 638AF Ver 1.00 The setting information etc can be ---------------- confirmed. This print example shows Serial No : 47000001 the following content.
-
Page 27: Bluetooth Communication
2 Operating Procedures Bluetooth Communication Explanation of how to communicate and print with Bluetooth device from a terminal such as a personal computer: 1. Please turn the printer on. Bluetooth 2. Please find the device in the host terminal. 3. The device name of the connected printer is displayed. Then, please select the device and connect it. -
Page 28: Printer Error
2 Operating Procedures 2.4 Printer Error The error occurs when the printer cannot print/work normally. The type of error is shown by the LED when the error is occurring. Please reset the status when the error occurs. The following example explains reasons and solutions for problems. Error Cause Solution... - Page 29 2 Operating Procedures Error Cause Solution Supply Voltage - The battery charge is low. - Please charge Error the battery. Mark Undetection - The mark of paper is not - Please use the paper on correctly printed. which mark - Particles have correctly printed.
-
Page 30: Indicator Lights
3 Indicator Lights The LED displays printer error status. Important It may be difficult to see the LED display in a bright place such as in direct sunshine etc. 3.1 Normal Operation Status LED Indications (LED Symbol ○:Lighting, ●:Blinking) Printer Status Blink Cycle (Unit [msec]) Green ●... -
Page 31: Printer Error
3 Indicator Lights 3.2 Printer Error Status LED Indications (LED Symbol ○:Lighting, ●:Blinking) Printer Status Blink Cycle (Unit [msec]) Green ● Paper End 1000 1time ● Paper Cover Open 1000 2times Thermal Head ● Temperature Error 1000 3times Blink ● Supply Voltage Error 4 times 1000 4times... -
Page 32: Charging
3 Indicator Lights 3.3 Charging Charge LED Indications (LED Symbol ○:Lighting, ●:Blinking) Printer Status Blink Cycle (Unit [msec]) Green Chargeing ○ Charging Full Charge Charging Full charge Charge Error (Over charge, ● Over discharge, Over time) 3.4 Maintenance Mode Status LED Indications (LED Symbol ○:Lighting, ●:Blinking) Printer Status Blink Cycle (Unit [msec]) Green... -
Page 33: Maintenance
4 Maintenance Please service this printer regularly. Caution Do not service the printer while the battery is inserted or the AC adapter connected. Do not completely service, disassemble and repair any parts that are not explained in this chapter. 4.1 Thermal Head Please service the thermal head once a month. -
Page 34: Platen Roller
4 Maintenance 4.2 Platen Roller Please service the platen roller once a month. 1. Please open the paper cover. (Refer to chapter 1.5) 2. Soak a cotton ball with some alcohol and wipe the platen roller gently until it is clean. Please use isopropyl alcohol. 3. -
Page 35: Troubleshooting
5 Troubleshooting ■ Power Problem Cause Solution Printer does not Is a battery inserted? or Is it Please insert the battery turn on inserted reversed? correctly. (C. 1.3) Is the battery fully charged? Please charge the battery. (C. 1.4) Is the POWER Switch Please push the POWER correctly pushed? Switch correctly. - Page 36 5 Troubleshooting ■ Communication Problem Cause Solution Printer does not Is the power turned off? Please turn on the communicate power. (C. 2.1) Is the application or the Please use the driver for this product application or the driver used? for this product.
- Page 37 5 Troubleshooting ■ Print Problem Cause Solution Printer does not Is the power turned off? Please turn on the feed the paper power. (C. 2.1) Is the paper correctly Please insert the paper Paper jam inserted? correctly. (C. 1.5) occurs Is the paper cover Please close the paper closed?
- Page 38 5 Troubleshooting ■ Others Problem Cause Solution Print starting Does the mark detection Please remove the location is operate correctly? reason for the mark incorrect (C. 3.2) detection error. (C. 2.4) Printing is slow Is the battery charge low? Please charge the battery.
-
Page 39: Specifications
6 Specifications 6.1 Printer Specifications Items Contents Print Method Thermal Line-dot Printing Resolution 8dot/mm (203dpi) Dimensions 106×116×58mm Weight About 350g (Including battery, excluding paper) Max Print Width About 72mm Print Speed Max 80mm/sec Battery full charge, Print ratio 13.8% Character Alphanumeric, Katakana : 8x16, 16x16, 12x24, 24x24 International and Special... -
Page 40: Paper Specifications
6 Specifications 6.2 Paper Specifications Items Contents Type Thermal Roll Paper Width Outer Up to φ50mm Diameter Inner φ 8mm or more Diameter Thickness 60 to 80μm Specified Type Name Manufacture Paper High Sensitive TF50KS-E45 Nippon Paper Group Standard Paper TF60KS-E Nippon Paper Group PD150R... -
Page 41: Recycle
7 Recycle This symbol means: Do not dispose of this product together with your household waste! Please refer to your local community or contact our dealers to properly handle the end-of-life of electric and electronic equipment. Recycling this product will help to conserve natural resources and prevent potential negative impact on the environment and human health caused by inappropriate handling. -
Page 42: Appendix
8 Appendix Bluetooth Communication (1) Android Terminal 1. Please turn on the power of printer. 2. Please open "Settings" - " WIRELESS & NETWORKS" from the Bluetooth menu of terminal, and turn on Bluetooth 3. Please open the " ”, and tap "FTP-638WSL…". (Please tap "SEARCH FOR DEVICES", if it does not appear) 4 Please input the PIN code, and tap "OK". - Page 43 8 Appendix (2) iOS Terminal 1. Please turn on the power of printer. Bluetooth 2. Please open "Settings" - " " from the menu of terminal, Bluetooth and turn on 3. Please tap "FTP-638WS…" from "Devices". 4. Please input the PIN code, and tap "Pair". PIN code is "9999"...
-
Page 44: Product Support
Moreover, when you request repair, please provide the model name and the product serial number in addition to information on the actual failure etc. Technical Support Section FUJITSU COMPONENT LIMITED (Japan) Global Marketing Dept.2 Tel: +81-3-3450-1645 Fax: +81-3-3474-2385 fcl-contact@cs.jp.fujitsu.com E-mail: FUJITSU COMPONENTS EUROPE,B.V. - Page 46 Mobile Printer FTP-638WSL110 Series User's Guide L0NA02266-L049RS Published by FUJITSU COMPONENT LIMITED Apr. 2015 Rev. 1...