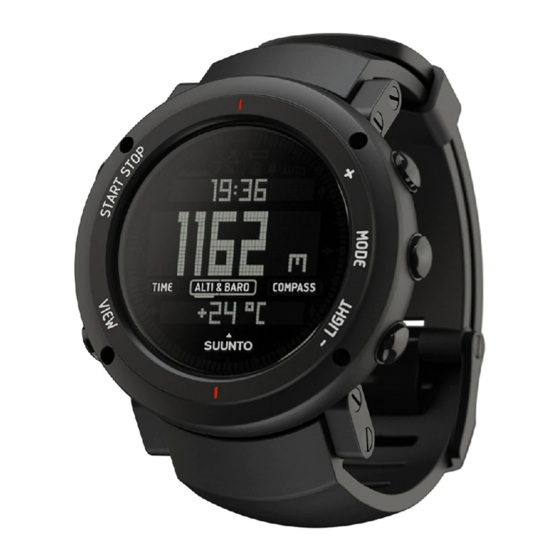
Suunto CORE User Manual
Sports watch with altimeter, barometer and an electronic compass
Hide thumbs
Also See for CORE:
- Quick manual (13 pages) ,
- User manual (55 pages) ,
- User manual (51 pages)

Related Manuals for Suunto CORE


Summary of Contents for Suunto CORE
- Page 1 SUUNTO CORE USER GUIDE...
-
Page 2: Table Of Contents
1 SAFETY ............... . 5 Types of safety precautions: . - Page 3 6.1.2 Setting date ......... . . 18 6.1.3 Setting dual time .
- Page 4 12.1 Suunto Limited Warranty ........
-
Page 5: Safety
1 SAFETY Types of safety precautions: WARNING: - is used in connection with a procedure or situation that may result in serious injury or death. CAUTION: - is used in connection with a procedure or situation that will result in damage to the product. NOTE: - is used to emphasize important information. - Page 6 CAUTION: DO NOT APPLY INSECT REPELLENT. CAUTION: TREAT AS ELECTRONIC WASTE. CAUTION: DO NOT KNOCK OR DROP.
-
Page 7: Welcome
Our instruments enable our users to reach their goals more effectively and get more out of their sports experience. Our products are often very critical to the user. Therefore we at Suunto take pride in maintaining highest quality standards for our products. -
Page 8: Introduction
3 INTRODUCTION Suunto Core has been designed for people like you, people who enjoy life outdoors and activities like climbing, hiking, snorkeling and countless others ranging from the recreational to the extreme. Your Suunto Core will help you get maximum enjoyment from your favorite outdoor activities, whatever they might be. -
Page 9: Getting Started
4 GETTING STARTED Basic settings Press any button and your Suunto Core will activate. You are then prompted to set the language, units (imperial or metric), time and date. Use the upper right [+] button and lower right [- Light] button to change the settings. Accept and move to the next menu item by pressing the right middle [Mode] button. -
Page 10: Views
Views are presented in the lower part of the display. Views contain supplementary information about the enabled mode, for example, viewing seconds as supplementary information in the mode. Some views are also TIME interactive. Suunto Core has four interactive views: ● Stopwatch ( mode) TIME ● Countdown timer ( mode) TIME ●... -
Page 11: Menu
Menu you can change values, change the general settings and units, or view MENU logs stored in the logbook. To enter , keep the middle right [Mode] button MENU pressed while in the mode. The segments in the TIME ALTI & BARO COMPASS outer part of the display indicate your transition time. -
Page 12: Button Lock
Button lock You can activate and deactivate the button lock by keeping the lower right [-Light] button pressed. NOTE: You can change views and use the backlight when the button lock is activated. Changing values To change a setting, you have to be in . -
Page 13: General Settings
5 GENERAL SETTINGS Before you start to use your Suunto Core, it's a good idea to set the measurement units and general settings according to your preferences. General settings are changed in MENU 5.1 Adjusting strap length If you need to adjust the strap length of the metal strap, please contact your nearest watch store to get the needed adjustments correctly done for you. -
Page 14: Changing General Settings
3. Change the values using [+] and [- Light], accept with [Mode]. 4. Exit with [Start Stop]. MENU 5.3 Changing general settings you set the general settings, including: GENERAL : on/off ● BUTTON TONE : on/off ● TONE GUIDE : light button/any button ●... -
Page 15: Backlight
MENU When has been selected, the backlight is activated every time you ANY BUTTON push a button. 5.3.4 Language you choose the language of your Suunto Core user interface LANGUAGE (English, German, French or Spanish). -
Page 16: Activating Button Lock
To choose a language: 1. In , select GENERAL LANGUAGE 2. Select a language from the list with [+] and [- Light]. 5.3.5 Activating button lock You can activate and deactivate the button lock by keeping [-Light] pressed down. When the button lock is activated, it is indicated with a lock symbol . NOTE: You can change views and use the backlight when the button lock is activated. -
Page 17: Using Time Mode
6 USING TIME MODE mode handles time measurement. TIME With [View] you can scroll through the following views: ● Date: current weekday and date ● Seconds: seconds as numbers ● Dual time: time in another time zone ● Sunrise and sunset : time of sunrise and sunset at a specific location ●... -
Page 18: Setting Time
To enter time settings in MENU 1. Enter by keeping [Mode] pressed down. MENU 2. Scroll down to using [- Light]. TIME-DATE 3. Enter with [Mode]. 6.1.1 Setting time you set the time. TIME To set the time: 1. In , select TIME-DATE TIME... -
Page 19: Setting Sunrise And Sunset Times
Now you always know the local time and you can quickly check what time it is at home. 6.1.4 Setting sunrise and sunset times you select a reference city that your Suunto Core uses to give you SUNRISE sunrise and sunset times. -
Page 20: Using Stopwatch
6.2 Using stopwatch The stopwatch measures time. Its resolution is 0.1 seconds. To use the stopwatch: 1. In the mode, select the stopwatch view. TIME 2. Start, stop and restart the stopwatch with [Start Stop]. 3. Keep [+] pressed to reset the stopwatch. Possible real life situation: Timing the 100m dash Your friend is training for a running competition, and needs to know how long it takes him to run the 100 m dash. -
Page 21: Setting Alarm
You set the countdown timer to 8 minutes with your eggs in the pot and wait for the water to come to a boil. When the water boils, you engage the countdown timer. At the eight-minute point, your Suunto Core gives the alarm. Presto! Perfect 8-minute eggs. - Page 22 Possible real life situation: Waking up in the morning You want to wake up early tomorrow morning. You set your Suunto Core alarm for 6:30 before you go to bed. The alarm wakes you up at 6:30 the next morning but you want to sleep for another 5 minutes.
-
Page 23: Using Alti & Baro Mode
, it is important to understand how ALTI & BARO Suunto Core calculates altitude and sea level air pressure. Suunto Core constantly measures absolute air pressure. Based on this measurement and reference values, it calculates altitude or sea level air pressure. -
Page 24: Getting Correct Readings
If you are engaged in an outdoor activity that requires you to know the air pressure, you need to enter the altitude reference value for your location. This is found on most topographic maps. Your Suunto Core will now give you the correct readings. -
Page 25: Setting Profiles And Reference Values
Suunto Core are wrong. So, you hike to the nearest location shown on your topographic map for which a altitude reference value is provided. You correct your Suunto Core altitude reference value accordingly. -
Page 26: Setting Profiles
You can either let Suunto Core decide which profile is most suitable for you at the moment, or you can choose a suitable profile yourself. 7.2.2 Setting profiles To set the profile: 1. In , select MENU ALTI-BARO 2. -
Page 27: Using Weather Trend Indicator
You set the altitude reference value on your Suunto Core to match that of the sign. 7.3 Using weather trend indicator The weather trend indicator is located on the upper side of the display. It is displayed in the... -
Page 28: Activating Storm Alarm
Possible real life situation: Getting surprised by a storm while hiking You are hiking in a dense forest when your Suunto Core activates the storm alarm. The weather has taken a turn for the worse in the last 3 hours - the sky is getting dark. -
Page 29: Using Altitude Difference Measurer
altitude reference value. When the profile is activated, the word ALTIMETER ALTI is underlined on the display. When the profile is activated, you can access the following views ALTIMETER with [View]: ● Log recorder: records the altitude changes into logs ●... -
Page 30: Recording Logs
Suunto Core. You start climbing, checking your altitude occasionally to see how far you are from the next check point. At some point you start to get tired. - Page 31 Log height difference: shows the measured altitude difference between a log starting point and a log finishing point with the following icons: In the additional views: is displayed when your altitude is above the starting point. is displayed when your altitude is the same as at the starting point. is displayed when your altitude is below the starting point.
-
Page 32: Using Barometer Profile
You’re going on another mountain hike. This time you want to record how much you ascend and descend so as to compare the figures with previous hikes. You set your Suunto Core to the profile and start the log recorder when you ALTIMETER begin the hike. -
Page 33: Recording Logs
NOTE: If you are wearing your Suunto Core on your wrist, you will need to take it off in order to get an accurate temperature reading because your body temperature will affect the initial reading. A 7-day log of changes in sea level air pressure can be viewed in... -
Page 34: Using Automatic Profile
changes. The altitude log will therefore be flat during this period. For information on using the log recorder, see Section 7.5.2 Recording logs on page 30. You can start, stop and reset the altitude measurement while in the BAROMETER profile. Possible real life situation: Recording logs in the profile BAROMETER... -
Page 35: Using Depth Meter Profile
7.8 Using depth meter profile You use the profile when snorkeling. It shows your current depth DEPTH METER and the maximum depth you reached during a snorkeling dive. The maximum depth of the device is 32.8 ft (10m). When the profile is activated, DEPTH METER a wave icon appears on the upper left part of the display. - Page 36 2. Start, stop and restart it with [Start Stop]. Begin a snorkeling dive. 3. When you return to the surface, reset by holding [+] pressed. CAUTION: Do not push buttons while the device is under water. NOTE: You need to reset your log recorder in the profile before using ALTIMETER the log recorder in the...
-
Page 37: Using Compass Mode
8 USING COMPASS MODE mode allows you to orient yourself in relation to magnetic North. COMPASS mode you can access the following views with [View]: COMPASS ● Time: shows the current time ● Cardinals: shows the current heading in cardinal directions ●... - Page 38 To calibrate the compass: 1. Keep the device level, do not tilt it in any directions. 2. Slowly rotate the device clockwise (around 15 seconds per round) until the compass is activated. NOTE: If you notice deviations in the compass, you can recalibrate it by keeping it level and rotating it slowly clockwise 5-10 times while in compass mode.
-
Page 40: Setting Declination Value
8.1.2 Setting declination value Paper maps point to true North. Compasses, however, point to magnetic North a region above the Earth where the Earth’s magnetic fields pull. Because magnetic North and true North are not at the same location, you must set the declination on your compass. -
Page 41: Using Compass
8.2 Using compass When you are in the mode, you see two moving segments on the COMPASS rim of the display. These point towards North. The hairline at 12 o’clock shows your heading and functions as a compass direction arrow. The numerical value of your heading is shown in the center of the display. -
Page 42: Using Bezel
8.2.1 Using bezel You can use your Suunto Core as a traditional compass by moving the outer bezel according to the moving segments showing North and then following the heading. To use the bezel: 1. In the mode, point the North indicator towards your heading. - Page 43 You decide to hike to the cabin through the valley. You point the direction arrow of your Suunto Core compass towards the cabin and lock the bearing. Once you’re in the valley, the arrows in the display’s top row show you where to go.
-
Page 44: Using Memory
2. Use [+] and [- Light] to browse through the records. Possible real life situation: Predicting the weather You are camping in the mountains. You want to predict tomorrow’s weather, so you switch your Suunto Core to the profile for the night. In the morning BAROMETER... -
Page 45: Viewing Logs
When you view logs, you are first shown a list of available logs complete with times and dates. You can scroll and then enter each log to view its summary information and details. 9.2.1 Viewing logs When viewing log summaries, you are shown ●... -
Page 46: Locking And Unlocking Logs
NOTE: Only altimeter logs include summaries. 9.2.2 Locking and unlocking logs To lock or unlock the logs: 1. In , select MEMORY LOGBOOK 2. Choose a log from the list. 3. Select LOCK / UNLOCK 4. Lock/unlock the log with [Mode] Cancel with [View]). - Page 47 TIP: Short lasting activities with fast changes in altitude is better to record with faster recording interval (e.g. downhill skiing). Again, long time activities with slower changes in altitude is better to record with slower recording interval (e.g. hiking)
-
Page 48: Replacing Battery
NOTE: If the threads of the battery compartment cover are damaged, send your device to an authorized Suunto representative for service. NOTE: Suunto original battery replacement and strap kits must be used if available for your product. Kits are available at Suunto webshop and some authorized Suunto dealers. -
Page 50: Specifications
11 SPECIFICATIONS 11.1 Technical data General ● Operating temperature -20°C ... +60 °C / -4°F ... +140°F ● Storage temperature -30 °C ... +60 °C / -22°F ... +140°F ● Water-resistant 30 m / 100 ft (according to ISO 2281) ●... -
Page 51: Trademark
Suunto Oy and are intended solely for the use of its clients to obtain knowledge and key information regarding the operation of Suunto Core products. Its contents shall not be used or distributed for any other purpose and/or otherwise communicated, disclosed or reproduced without the prior written consent of Suunto Oy. -
Page 52: Patent Notice
11.4 CE The CE mark is used to mark conformity with the European Union EMC directive 89/336/EEC. 11.5 Patent notice This product is protected US Patent application serial number 11/152,076 and corresponding patents or patent applications in other countries. Additional patent applications are pending. -
Page 53: Warranty
12 WARRANTY 12.1 Suunto Limited Warranty Suunto warrants that during the Warranty Period Suunto or a Suunto Authorized Service Center (hereinafter Service Center) will, at its sole discretion, remedy defects in materials or workmanship free of charge either by a) repairing, or b) replacing, or c) refunding, subject to the terms and conditions of this Limited Warranty. -
Page 54: Limitation Of Liability
Suunto does not warrant that the operation of the Product will be uninterrupted or error free, or that the Product will work with any hardware or software provided by a third party. -
Page 55: Index
Index button lock, 16 button tone, 14 alarm, 21 language, 15 ALTI & BARO mode, 23 time settings, 17 altimeter profile , 28 tone guides, 14 altitude difference measurer, 29 units, 13 automatic profile, 34 compass calibrating, 37 using, 41 backlight, 15 countdown timer, 20 barometer profile , 32... - Page 56 units, 13 getting correct readings, 37 profiles altimeter, 28 automatic, 34 incorrect readings, 24 barometer, 32 depth meter, 35 language, 15 lap, 45 readings locking and unlocking logs, 46 correct, 24 locking logs, 44 incorrect, 24 logs recording interval, 46 locking, 44, 46 recording logs, 30, 33 recording, 30, 33, 35...
- Page 57 adjusting length, 13 altimeter, 28 sunrise and sunset, 19 automatic, 34 barometer, 32 depth meter, 35 technical data, 50 using TIME mode, 17 time, 18 alarm, 21 TIME mode, 17 countdown timer, 20 tone guides, 14 date, 18 trademark, 51 dual time, 18 stopwatch, 20 sunrise and sunset, 19...
- Page 58 SUUNTO HELP DESK Global +358 2 284 1160 USA (toll free) 1-800-543-9124 Canada (toll free) 1-800-267-7506 www.suunto.com © Suunto Oy 5/2011 Suunto is a registered trademark of Suunto Oy. All Rights reserved.
Need help?
Do you have a question about the CORE and is the answer not in the manual?
Questions and answers