Table of Contents
Advertisement
Advertisement
Table of Contents

Related Manuals for Suunto D4I


Summary of Contents for Suunto D4I
- Page 1 SUUNTO D4I USER GUIDE...
-
Page 2: Table Of Contents
1 Safety ....................5 2 Getting started ................11 2.1 Display states and views ............11 2.2 Set up ..................11 2.3 Icons ..................12 2.4 Software version check ............13 3 Features ..................15 3.1 Activation and pre-checks ............15 3.1.1 Wireless Transmitter pre-check ........ - Page 3 3.18 Sample rate ................47 3.19 Stopwatch ................47 3.20 Surface and no-fly time ............49 3.20.1 Dive numbering ............51 3.21 Suunto RGBM ............... 51 3.21.1 Diver Safety ..............52 3.21.2 Altitude diving ............. 53 3.21.3 Oxygen exposure ............54 3.22 Tank pressure ...............
- Page 4 5.2 Compliance ................68 5.2.1 CE ..................68 5.2.2 EN 13319 ................. 68 5.2.3 EN 250 and FIOH ............68 5.3 Trademark ................69 5.4 Patent notice ................69 5.5 Warranty ................. 69 5.6 Copyright ................71 5.7 Terms ..................72 Index ....................
-
Page 5: Safety
Make sure that you fully understand the use, displays and limitations of your dive instruments. If you have any questions about this manual or the dive computer, contact your Suunto dealer before diving with the dive computer. Always remember that YOU... -
Page 6: Safety Precautions
Safety precautions WARNING: ONLY TRAINED DIVERS SHOULD USE A DIVE COMPUTER! Insufficient training for any kind of diving, including freediving, may cause a diver to commit errors, such as incorrect use of gas mixtures or improper decompression, that may lead to serious injury or death. - Page 7 (DCS). Therefore, Suunto strongly recommends that the device not be used for any commercial or professional diving activities. WARNING: USE BACKUP INSTRUMENTS! Ensure that you use...
- Page 8 WARNING: PERFORM PRE-CHECKS! Always check that your dive computer is functioning properly and has the correct settings before diving. Check that the display is working, the battery level is OK, tank pressure is correct, and so forth. WARNING: Check your dive computer regularly during a dive. If there is any apparent malfunction, abort the dive immediately and safely return to the surface.
- Page 9 WARNING: Do not disassemble or remodel Suunto USB Cable in any way. Doing so may cause an electric shock or fire. WARNING: Do not use Suunto USB cable if cable or parts are damaged. CAUTION: DO NOT allow the connector pins of the USB cable to touch any conductive surface.
-
Page 10: Emergency Ascents
Emergency ascents In the unlikely event that the dive computer malfunctions during a dive, follow the emergency procedures provided by your certified dive training agency to immediately and safely ascend. -
Page 11: Getting Started
[DOWN] and [UP]. 2.2 Set up To get the most out of your Suunto D4i, take some time to read this manual and familiarize yourself with the modes and settings. Make absolutely sure you have it set up as you want before getting into the water. -
Page 12: Icons
5. Set units. See 6. Press [MODE] to exit settings. The default dive mode is Air. For more information on dive modes, 3.12 Dive modes . 2.3 Icons Suunto D4i uses the following icons: Icon Description Daily alarm Dive alarm... -
Page 13: Software Version Check
2.4 Software version check Please note that this user guide is for the latest software version of Suunto D4i. If you have an older version, some features operate differently. To check the software version: 1. Keep [DOWN] pressed to enter settings. - Page 14 To change settings for a dive mode, keep [DOWN] pressed while in that mode. For further information about dive mode settings, please refer to the respective dive mode section of this user guide. Stopwatch Access the stopwatch in time or dive mode as explained in . To use the stopwatch: 1.
-
Page 15: Features
Each time your Suunto D4i enters dive mode, a series of automatic checks are performed. All graphical display elements are turned ON, and the backlight and the beep are activated. - Page 16 12:00 DIVE 1. 1 2 TH 66. 2 Battery 1. 6 Between consecutive dives, the automatic checks also show current tissue saturation. 66. 2 1. 6 Before leaving on a dive trip, it is highly recommended that you switch to dive mode to make sure everything is functioning properly.
-
Page 17: Wireless Transmitter Pre-Check
6. There is enough air for your planned dive. Check the pressure reading against your back-up pressure gauge. 3.1.2 Battery indicators Temperature or internal oxidation can affect the battery voltage. If you store your Suunto D4i for a long period or use it in cold... -
Page 18: Air Time
temperatures, the low battery warning may appear even though the battery has enough capacity. In these cases, re-enter dive mode and check the battery power. If the battery is low, the Low Battery warning comes on. 12:00 Replace Battery Battery 1. -
Page 19: Alarms, Warnings And Notifications
5. Press [MODE] to exit. 3.3 Alarms, warnings and notifications Suunto D4i has audible and visual alarms designed to let you know when important limits or presets are being reached. The two audible alarm types indicating high or low priority:... - Page 20 High priority alarms: Alarm Explanation High priority alarm followed by 'Start PO 2 value greater than the adjusted ascending' beep, value. Current depth is too deep for repeated for maximum the gas in use. You should immediately three minutes ascend or change to a lower O 2 % gas. PO 2 value blinks High priority alarm followed by 'Start...
- Page 21 Alarm type Alarm reason ascending' beep, below the decompression floor level. sounded two times. You should ascend to, or above, the ASC TIME blinks and an floor. arrow points upwards. Low priority alarm followed by 'Start Mandatory deepstop violated. You descending' beep.
- Page 22 Alarm type Alarm reason Tank pressure value pressure, 50 bar (700 psi). blinks. Acknowledge the alarm by pressing any button. Low priority alarm, OLF value at 80% or 100% (Nitrox dive repeated twice. mode only). Acknowledge the alarm by pressing any button. OLF% value blinks if PO 2 value is greater than 0.5 bar.
-
Page 23: Apnea Timer
Visual alarms Symbol on display Indication Attention - extend surface interval Violated decompression ceiling or bottom time is too long Do not fly 3.4 Apnea timer You can use the apnea timer for interval training when freediving. You can adjust the following settings: Vent.: ventilation time;... - Page 24 START TIMER 1:00 12:00 Apena 15: 0 0 1. 1 2 TH TIME 2. Keep [DOWN] pressed to enter apnea timer settings. 3. Adjust the ventilation time with [UP] or [DOWN] and confirm with [SELECT]. 4. Adjust the increment time with [UP] or [DOWN] and confirm with [SELECT].
-
Page 25: Ascent Rate
The apnea timer supports up to 20 intervals, but this is dependent on the ventilation and increment times. The last ventilation cycle cannot be shorter than 0:05 seconds or longer than 20:00 minutes. WARNING: Anyone who engages in any form of breath hold diving is in danger of shallow-water blackout (SWB), the sudden loss of consciousness caused by oxygen starvation. -
Page 26: Backlight
Continuous ascent rate violations result in mandatory safety stops. 3.17 Safety stops and deepstops . WARNING: DO NOT EXCEED THE MAXIMUM ASCENT RATE! Rapid ascents increase the risk of injury. You should always make the mandatory and recommended safety stops if you have exceeded the maximum recommended ascent rate. -
Page 27: Bookmarks
Each bookmark records present depth, time, water temperature, heading (if the compass is enabled), and tank pressure (if available). 3.8 Calendar clock The calendar clock is the default mode of Suunto D4i . 3.8.1 Time In the time settings, you can set the hours, minutes, seconds, and format (12 or 24-hour). -
Page 28: Units
1. While in time mode, keep [DOWN] pressed. 2. Press [UP] to scroll to Date and press [SELECT]. 3. Set year with [DOWN] or [UP] and accept with [SELECT]. 4. Repeat for month and day. 5. Press [MODE] to exit. 3.8.3 Units In the units setting, choose whether the units are displayed in the metric or Imperial system. -
Page 29: Alarm Clock
3.8.5 Alarm clock Suunto D4i has a daily alarm which can be set to activate once, on weekdays or every day. When the daily alarm activates, the screen blinks and the alarm sounds for 60 seconds. Press any button to stop the alarm. -
Page 30: Depth Alarm
Acknowledge the alarm by pressing any button. 3.11 Dive history Suunto D4i has a detailed logbook and dive history available in memory mode. The logbook contains a sophisticated dive profile for each recorded dive. The time between each data point saved in the log is based on 3.18 Sample rate ). - Page 31 3. When you are viewing the history or logbook, you can press [MODE] to go back and select the other one. Press [MODE] a second time to exit. History When you have entered the dive history view, you can switch between Scuba History and FREE DIVE HISTORY with [DOWN] and [UP].
- Page 32 3. Press [DOWN] or [UP] to scroll to the log you wish to look at and press [SELECT]. 4. Press [SELECT] to scroll through the pages. 5. Press [MODE] to exit. Each log has three pages: 1. Main page maximum depth •...
- Page 33 consumed pressure (if enabled) • warnings • OLF% (if applicable) • 3. Dive profile graph water temperature • tank pressure (if enabled) • depth/time profile of the dive • Press [UP] to step through the dive profile graph or keep [UP] pressed to auto-scroll.
-
Page 34: Dive Modes
NOTE: Several repetitive dives are considered to belong to the same repetitive dive series if the no-fly time has not ended. 3.12 Dive modes Suunto D4i has the following dive modes: Air: for diving with regular air • Nitrox: for diving using oxygen-enriched gas mixtures •... -
Page 35: Air Mode
3. Change to the desired mode with [UP] or [DOWN] and confirm with [SELECT]. 4. Press [MODE] to exit. Each dive mode has its own settings which you need to adjust while in the given mode. To modify dive mode settings: 1. -
Page 36: Nitrox Mode
• In NITROX mode, both the percentage of oxygen in your tank and the oxygen partial pressure limit must be entered into Suunto D4i. This ensures correct nitrogen and oxygen calculations and the correct maximum operating depth (MOD), which is based on your entered values. - Page 37 To modify gas mix settings: 1. While in Nitrox mode, keep [DOWN] pressed. 2. Press [SELECT] to enter the Nitrox setting. 3. Scroll to Mix1, Mix2 or Mix3 as desired and press [SELECT]. 4. Define the selected mix as Primary, Secondary or Off with [UP] or [DOWN] and confirm with [SELECT].
-
Page 38: Free Mode
3.12.3 Free mode With Free mode, Suunto D4i can be used as a freediving instrument. The dive time is indicated in minutes and seconds in the center of the display. The free dive starts at 1.2 m (4 ft) and ends when your depth is less than 0.9 m (3 ft). -
Page 39: Dive Planning Mode
3.12.3.2 Surface countdown timer While freediving, you can use the surface countdown timer to help you prepare yourself for you next dive. Suunto D4i starts the countdown as soon as you reach 1.2 m (4 ft). To set the surface countdown timer: 1. -
Page 40: Dive Time Alarm
150 ft). The no-decompression time limit for the selected depth is shown in the center of the display. If you have dived at least once with Suunto D4i, the SURFTIME + field appears. You can adjust the surface time with [UP]. -
Page 41: Error State (Algorithm Lock)
5. Press [MODE] to exit. 3.15 Error state (algorithm lock) Suunto D4i has warning indicators that alert you to react to certain situations that would significantly increase the risk of DCI. If you do not respond to these warnings, Suunto D4i enters an error state and shows Er on the display. -
Page 42: Personal And Altitude Adjustments
In this state, you significantly increase your risk of decompression sickness (DCS). Decompression information is not available for the next 48 hours after surfacing. It is possible to dive with the device when the algorithm is locked, but instead of the decompression information, ER is shown. If you dive again in this error state, the algorithm lock time resets to 48 hours when you surface. - Page 43 Conservative. Some risk factors or conditions exist. More conservative. Several risk factors or conditions exist. In addition to the personal setting, Suunto D4i can be adjusted for diving at different altitudes. This adjusts the decompression calculation according to the selected altitude adjustment. Altitude adjustment Explanation 0 –...
-
Page 44: Safety Stops And Deepstops
With every dive over 10 meters (30 feet), there is a three-minute countdown for the recommended safety stop. This stop is taken in the 3-6 m (10-20 ft) range. Suunto D4i shows a STOP icon and a three-minute countdown. - Page 45 In this situation, Suunto D4i adds a mandatory safety stop to the dive. The time of this stop depends on the speed violation of the ascent rate.
- Page 46 After deepstop is over, the user can change between deepstop and the timer by long pressing the MODE button. Deepstops are presented the same way as safety stops. Suunto D4i notifies you that you are in the deepstop area by displaying: CEILING in the top •...
-
Page 47: Sample Rate
2. Press [DOWN] to scroll to Deepstop and enter with [Select]. 3. Press [UP] to toggle on/off. 4. Press [MODE] to exit. 3.18 Sample rate The sample rate controls how often information from the dive is saved to the active log. The default sample rate is 20 seconds in air and nitrox modes, and 2 seconds in free dive mode. - Page 48 2. Press [SELECT] to start/stop the stopwatch. 3. Press [DOWN] to take split times. 4. Keep [SELECT] pressed to reset the stopwatch. After stopping the stopwatch, you can scroll through the split times with [DOWN]. You can also use the stopwatch while diving for various timing purposes.
-
Page 49: Surface And No-Fly Time
To access further information about your surface and no-fly times, enter dive mode. Suunto D4i shows the time since you surfaced in the Surf t. field. The airplane symbol indicates that you should not fly. The countdown until you will be safe to fly is shown in the No Fly field. - Page 50 WARNING: YOU ARE ADVISED TO AVOID FLYING ANY TIME THE COMPUTER COUNTS DOWN THE NO-FLY TIME. ALWAYS ACTIVATE THE COMPUTER TO CHECK THE REMAINING NO-FLY TIME PRIOR TO FLYING! Flying or traveling to a higher altitude within the no-fly time can greatly increase the risk of DCS. Review the recommendations given by Divers Alert Network (DAN).
-
Page 51: Dive Numbering
3.20.1 Dive numbering If the Suunto D4i has not counted the no-fly time down to zero, then repetitive dives belong to the same dive series. Within each series, the dives are given numbers. The first dive of the series is DIVE 1, the second DIVE 2, and so on. -
Page 52: Diver Safety
Incorporating consistency with real physical laws for gas kinetics • The Suunto RGBM predicts both dissolved and free gas in the blood and tissues of divers. It is a significant advancement on the classic Haldane models, which do not predict free gas. The Suunto RGBM provides additional safety through its ability to adapt to a variety of situations and dive profiles. -
Page 53: Altitude Diving
are available for divers who dive constantly and are ready to accept greater personal risk. CAUTION: Always use the same personal and altitude adjustment settings for the actual dive and for the planning. Increasing the personal adjustment setting from the planned setting as well as increasing the altitude adjustment setting can lead to longer decompression times deeper and thus to larger required gas volume. -
Page 54: Oxygen Exposure
Both fractions are scaled so that the diver’s maximum tolerated exposure for each is 100%. Suunto D4i does not display CNS% or OTU% but instead displays the larger of the two in the OLF% field. OLF% value is the Oxygen limit fraction or Oxygen Toxicity Exposure. -
Page 55: Tank Pressure
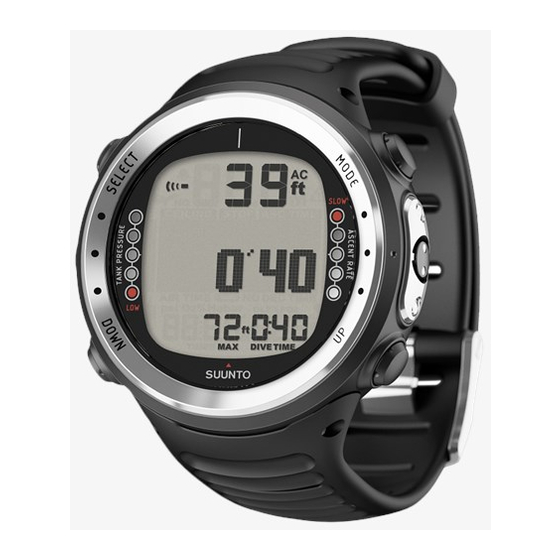
3.22 Tank pressure When using the optional Suunto Wireless Transmitter, the pressure of your tank is shown in the lower left of the display. Whenever you start a dive, the remaining air time calculation begins. -
Page 56: Wireless Transmission
50 bar (700 psi). Two (2) double beeps sound when the tank pressure reaches the defined alarm pressure and when the remaining time reaches zero. 3.22.1 Wireless transmission To enable wireless transmission of tank pressure data to Suunto D4i requires:... -
Page 57: Installing And Pairing Transmitter
15 bar (300 psi). The transmitter then starts sending pressure data together with a code number. When your Suunto D4i is within 0.3 m (1 ft) of the transmitter, it receives and stores that code. The transmitter and Suunto D4i are now paired. - Page 58 6. Press [MODE] to exit. With the system pressurized to above 15 bar (300 psi), bring your Suunto D4i close to the transmitter. When pairing is completed, the dive computer displays the new code number and the transmitted tank pressure.
-
Page 59: Transmitted Data
3.22.3 Transmitted data After pairing, your Suunto D4i receives tank pressure data from the transmitter. Any time the Suunto D4i receives a signal, one of the following symbols is shown in the lower left corner of the display. Display Indication... -
Page 60: Tank Pressure Alarm
Display Indication 3. Transmitter is on another channel. To correct this: batt Pressure transmitter battery voltage is low. Change the transmitter battery! 3.22.4 Tank pressure alarm There are two tank pressure alarms. The first is fixed at 50 bar (700 psi) and cannot be changed. -
Page 61: Tones
The water contact is located on the side of the case. When submerged, the water contact poles are connected by the conductivity of the water. Suunto D4i switches to dive state when water is detected and the depth gauge senses water pressure at 1.2... - Page 62 The AC is shown until the water contact deactivates. It is important to keep the water contact area clean. Contamination or dirt can 4.1 Handling prevent automatic activation/deactivation. See guidelines . NOTE: Moisture build-up around the water contact may cause the dive mode to activate.
-
Page 63: Care And Support
Never try to open the case of the dive computer. Have your Suunto D4i serviced every two years or after 200 dives (whichever comes first) by an authorized Suunto service center. -
Page 64: Water Resistance
Store your dive computer in a dry place when you are not using it. 4.2 Water resistance Suunto D4i is water resistant to 100 meters (328 ft) in compliance with the dive watch standard ISO 6425. WARNING: Water resistance is not equivalent to maximum operating depth. -
Page 65: Battery Replacement
• 4.3 Battery replacement Suunto D4i displays a battery symbol as a warning when the power gets too low. When this happens, your Suunto D4i should not be used for diving until the battery has been replaced. -
Page 66: Reference
5 REFERENCE 5.1 Technical specifications Dimensions and weight Length: 50 mm (1.97 in) • Width: 50 mm (1.97 in) • Height: 16.0 mm (0.61 in) • Weight: 85 g (3.0 oz) • Operating conditions Water resistance: 100 m (328 ft) (complying with ISO 6425) •... - Page 67 Display range: -20 °C to +50 °C (-4 °F to +122 °F) • Accuracy: ± 2 °C (± 3.6 °F) within 20 minutes of temperature • change Nitrox mode Oxygen: 21-50% • Partial pressure of oxygen (pO2): 0.2 – 3.0 •...
-
Page 68: Compliance
Maximum depth of operation: 120 m (393 ft) • 5.2 Compliance 5.2.1 CE Suunto Oy hereby declares that this product is in compliance with the essential requirements and other relevant provisions of Directive 1999/5/EC. 5.2.2 EN 13319 EN 13319 is a European diving depth gauge standard. Suunto dive computers are designed to comply with this standard. -
Page 69: Trademark
5.3 Trademark Suunto D4i, its logos, and other Suunto brand trademarks and made names are registered or unregistered trademarks of Suunto Oy. All rights are reserved. 5.4 Patent notice This product is protected by pending patent applications and their corresponding national rights: US 5,845,235, US 7,349,805, US 8,660,826. -
Page 70: Exclusions And Limitations
4. has been exposed to chemicals including but not limited to mosquito repellents. Suunto does not warrant that the operation of the Product will be uninterrupted or error free, or that the Product will work with any hardware or software provided by a third party. -
Page 71: Copyright
Suunto Contact Center at the phone number listed on the last page of this document. Suunto’s qualified customer support staff will help you and, if needed, troubleshoot your product during the call. Limitation of Liability To the maximum extent permitted by applicable mandatory laws, this Limited Warranty is your sole and exclusive remedy and is in lieu of all other warranties, expressed or implied. -
Page 72: Terms
Suunto Oy. While we have taken great care to ensure that information contained in this documentation is both comprehensive and accurate, no warranty of accuracy is expressed or implied. This document content is subject to change at any time without notice. - Page 73 Term What it means Compartment See "Tissue group". Suunto DM5 with Movescount, a software for managing your dives. Time spent at a decompression stop, or range, Decompression before surfacing, to allow absorbed nitrogen to escape naturally from tissues. On a decompression stop dive, the depth range...
- Page 74 Term What it means Helium percentage or helium fraction in the breathing gas. Maximum operating depth of a breathing gas is the depth at which the partial pressure of oxygen (PO 2 ) of the gas mix exceeds a safe limit. A single or repetitive dive that includes time spent at various depths and whose no Multi level dive...
- Page 75 Term What it means Limits the maximum depth to which the nitrox mixture can be safely used. The maximum partial Partial pressure pressure limit for enriched air diving is 1.4 bar (20 of oxygen (O2) psi). The contingency partial pressure limit is 1.6 bar (23 psi).
-
Page 77: Index
INDEX Depth alarm, 30 display, 11 Activation Display pre-checks, 15 contrast, 29 Air mode, 35 Dive history Alarm, 29 Memory mode, 30 Alarms, 19 Dive modes, 34 Altitude adjustment, 42 Air, 35 Apnea timer, 23 Free, 38 Ascent rate, 25 Nitrox, 36 Dive numbering Backlight, 26... - Page 78 RGBM, 51 Glossary, 72 safety stop, 25 Sample rate, 47 handling Set up, 11 care, 63 Stopwatch, 47 high-altitude diving, 53 Surface time, 49 Icon, 12 Tank pressure, 55 Wireless transmission, 56 Logbook, 30 Tank pressure alarm, 60 Time, 27 Dual time, 28 modes Time mode, 27...
- Page 79 SPAIN +34 91 11 43 175 SWEDEN +46 8 5250 0730 SWITZERLAND +41 44 580 9988 +44 20 3608 0534 +1 855 258 0900 © Suunto Oy 10/2012, 12/2015 Suunto is a registered trademark of Suunto Oy. All Rights reserved.
Need help?
Do you have a question about the D4I and is the answer not in the manual?
Questions and answers