Table of Contents
Advertisement
Correct Disposal of This Product
(Waste Electrical & Electronic Equipment)
(Applicable in the European Union and other European countries with separate collection systems)
This marking shown on the product or its literature, indicates that it should not be disposed with other household wastes at
the end of its working life. To prevent possible harm to the environment or human health from uncontrolled waste disposal,
please separate this from other types of wastes and recycle it responsibly to promote the sustainable reuse of material
resources.
Household users should contact either the retailer where they purchased this product, or their local government office, for
details of where and how they can take this item for environmentally safe recycling.
Business users should contact their supplier and check the terms and conditions of the purchase contract. This product
should not be mixed with other commercial wastes for disposal.
Code No. AB68-00686B-02
8/16 Channel DVR
user manual
imagine
the possibilities
Thank you for purchasing a Samsung product.
To receive a more complete service, please
register your product at
www.samsung.com/global/register
SHR-5080/5082
SHR-5160/5162
Advertisement
Table of Contents

Related Manuals for Samsung SHR5160500 - Electronics Gvi - Dvr 16ch Mpeg4 120ips Real Time


Summary of Contents for Samsung SHR5160500 - Electronics Gvi - Dvr 16ch Mpeg4 120ips Real Time
-
Page 1: User Manual
This marking shown on the product or its literature, indicates that it should not be disposed with other household wastes at Thank you for purchasing a Samsung product. the end of its working life. To prevent possible harm to the environment or human health from uncontrolled waste disposal,... -
Page 2: Features
key features of your DVR The Digital Video Recorder (DVR) compresses the acquired images of 8/16 video channels from cameras using MPEG-4 technologies, and compresses the 4 channel audio inputs into ADPCM audio file to record them on the hard disk or retrieve them from the hard disk simultaneously. In addition, it transfers the video and audio data through a network and allows you to remotely monitor them using your PC. - Page 3 safety regulations Please be sure to keep the following in mind for the right use of the product to prevent proprietary risk or damage. Do not use multiple plugs at once. This may cause abnormal heat generation or fire ...
-
Page 4: System Shutdown
You may download open source codes from the following website: http://www.samsung.com. Before installing any external device such as external memory or HDD, please check the compatibility of the device with Samsung DVR. The list of the compatible devices with Samsung DVR can be obtained from your vendor. -
Page 5: Table Of Contents
contents continued next page INTRODUCING YOUR 8/16 Controls on the DVR Rear panel jacks CHANNEL DVR Remote control INSTALLATION Checking installation environment Hdd addition CONNECTING WITH OTHER Connecting video, audio, and monitor DEVICES Connecting the network Connecting the USB Connecting the alarm input/output Connecting the RS-485 device LIVE Operating the system... - Page 6 SEARCH AND PLAY Before use Calendar search Event search Date time search Go to first search Go to last search Backup search Playback SMART VIEWER Introduction Main features PC specification (recommended) Smart Viewer installation Smart Viewer program execution Smart Viewer initial screen Setup mode Monitoring mode Search mode...
-
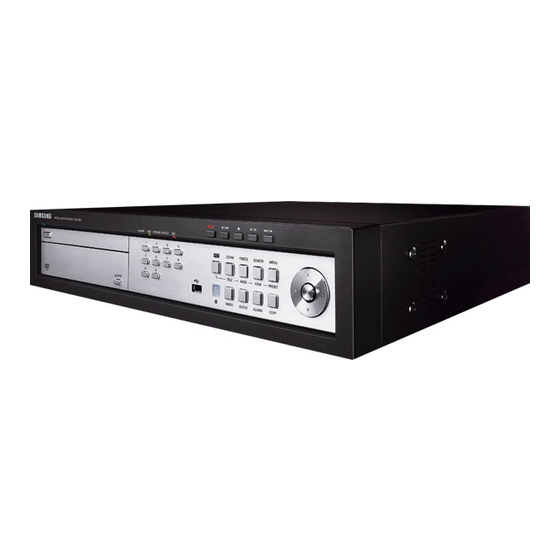
Page 7: Introducing Your
I n troduci n g your 8/16 Channel DVR CONTROLS ON THE DVR 5080 5082 5160 5162 introducing _03... -
Page 8: Zoom Button
1. ALARM LED Lights when an event occurs. HDD LED Lights when the hard disk is operating. When the HDD is accessed, LED repeatedly blinks. NETWORK LED Lights when the data is transferred through the network. BACKUP LED Lights when a backup is in progress. REC LED Lights when a recording is in progress. -
Page 9: Rear Panel Jacks
REAR PANEL JACKS 5080/5082 REAR 5160/5162 REAR VIDEO OUT Composite video output port (BNC type connector) AUDIO OUT Audio output port (RCA jack) VGA video output port S-VIDEO S-VIDEO video output port NETWORK Network connection port AUDIO IN Audio input port (RCA jack) SPOT1: 1 channel exclusive SPOT output SPOT SPOT2: The same output as the Main VIDEO OUT (OSG is not displayed) -
Page 10: Remote Control
REMOTE CONTROL 06_ introducing... - Page 11 introducing _07...
-
Page 12: Installation
For the product with an input ground, use a power plug with a ground pin. CHECKING INSTALLATION Please keep the following instructions for rack- mounting the Samsung DVRs to proceed with ENVIRONMENT the installation. Samsung Digital Video Recorder (hereinafter 1. - Page 13 The jumper setting method is illustrated on the The Manufacturer is not responsible surface of the purchased HDD. for missing data or defects caused Using SAMSUNG hard disk, the jumper setting by the user’s mishandling. method is as follows: Note: Adding Extra HDD. Check in advance that the HDD ...
- Page 14 3. There are brackets (Bracket-HDD) mounted on the right and left sides where you can mount HDDs. Remove the screws holding each bracket to mount an HDD onto. BRACKET- HDD(B) 5. To add a hard disk, the built-in HDD (Primary Master) should have been installed.
- Page 15 6. To add another hard disk after adding a hard 8. When adding hard disks completes, connect disk completes, remove the Bracket-HDD(B) the power supply cable, signal transmission on the DVD-RW driver. cable (IDE Cable), and fan cable to the hard disks.
- Page 16 SHR-5080, SHR-5160 Before starting this work, remove the power cord from the outlet. 1. Take out the screws on the left and right sides (5 spots for each side) and on the rear (1 spot). 4. If you want to add a hard disk, remove Bracket- HDD, power supply cable, signal transmission cable (IDE Cable), and fan cable.
- Page 17 5. To add a hard disk, the built-in HDD (Primary 7. When adding hard disks completes, connect the Master) should have been installed. Basically a power supply cable, signal transmission cable built-in HDD has been installed as the Primary (IDE Cable), and fan cable to the hard disks. Master.
-
Page 18: Connecting With Other Devices
connecting with other devices The illustrations are described based on SHR-5162. CONNECTING VIDEO, AUDIO, AND MONITOR CONNECTING THE NETWORK Connecting to Internet through Ethernet (10/100BaseT) 14_ connecting... -
Page 19: Connecting The Usb
Connecting to Internet through ADSL CONNECTING THE USB CONNECTING THE ALARM INPUT/OUTPUT 1. There are two USB connecting ports on the front and rear panels of the product. The Alarm IN/OUT ports on the rear of the product have the following elements: 2. -
Page 20: Connecting The Rs-485 Device
CONNECTING THE RS-485 DEVICE You can connect an RS-485 device through a rear port of the product. For example, you can connect and control PTZ cameras supporting the RS-485 communication. You can also adopt either Half Duplex or Full Duplex method for exchanging data. PTZ device Rear Half Duplex Type... -
Page 21: Live
OPERATING THE SYSTEM LIVE SCREEN MODE Turn on the power and the following Samsung Live screen icons logo appears. The live screen icons display the status of current setup or function. Upon completion of initializing procedure, the live screen appears with a beep sound. (It takes CAM 01 about one minute until a live screen comes up.) - Page 22 : PTZ icon : Auto Sequence icon This icon appears when setting the PTZ device This icon appears in Auto Sequence mode. and it changes to yellow when operating the PTZ. : Backup Play icon : Audio icon This icon appears when the backup data is now This icon represents the ON/OFF status of audio played.
-
Page 23: Selecting Live Screen Mode
Full Screen (Single) mode: In the 9-split screen mode, the first screen Displays the selected channel in full screen. shows 9 channels (CH 1 to CH 9) and the 4, 6, 7, 8, and 9 Split mode: second screen shows the rest 7 channels Displays 4, 6, 7, 8, 9 channels in each split (CH 10 to CH 16) after pressing the RIGHT... -
Page 24: Event Monitoring
Audio On/Off setting in 4, 6, 7, 8, and 9-split modes and PIP mode As in 16-split mode, when pressing the ENTER button in 4, 6, 7, 8, and 9-split modes and PIP mode, the selection cursor appears for you to select a channel. -
Page 25: Spot-Out Monitoring
SPOT-OUT MONITORING If the built-in HDD is not connected or it is out of order, the system CAUTION Spot-out monitoring has nothing to do displays an error ( ) saying “built- with the live screen output. It monitors a in HDD error”... -
Page 26: Menu Setup
menu setup BEFORE USE SEARCH, BACKUP, PTZ, POWER buttons in Live mode To perform the search, backup, PTZ controls, The menu structure is as follows: or shutdown function, press the following button in Live mode. Then the window asking for an ID and password appears for user MENU SETUP validation. - Page 27 [Date/Time Change] After the date and time has been CAUTION Password changed, the data recorded before the change can be removed. For Admin Password New Password Confirm example, if the current time is Password Lock changed from 8 to 7, all the data Record Lock recorded between 7 and 8 will be User Password...
-
Page 28: Load Factory Default
Load Factory Default Time Change Changes the Date/Time. Load Factory Default Initializes the system. It is used to initialize all the settings to the factory default values. The recorded video data will not System Upgrade Changes the system S/W. be removed. Select OK to start initialization. Disk Full No Space in the HDD MENU SETUP... -
Page 29: Storage Setup
System Information and Setup Disk End Mode - Stop: Stops recording when the disk is full while recording is still in progress. - Overwrite: Deletes the previously recorded data System Information and Setup to store new data when the disk is full during System Information recording. - Page 30 This is used for external HDD connection. The external HDD is connected through this USB port on the front or rear panel. This menu enables you to use the Samsung system keyboard or remote control. Export/Import the Configuration Device It indicates a remote control device that is connected to the RS485 port.
-
Page 31: Camera
Video You cannot use the PTZ device and - On: The camera image from the selected remote control device together at the channel appears. same time due to communication - Off: The camera image from the selected problem. In PTZ control mode, the channel disappears. -
Page 32: Monitoring
For selection, press the ENTER button. Use the UP/DOWN direction buttons to Protocol that is supported by the PTZ device. Available protocols are Samsung, Vic., Pan., change the value from 0 to 100. When Default is selected, the value 50 is to be AD, Phi., Ern., Pel-D, Pel-P, Vcl., Dia., Kal., and... -
Page 33: Record Mode
OSG Display [Video Out] - Date: The date is displayed on the screen You may experience low display when it is set to On. CAUTION quality while the dual video output is - Time: The time is displayed on the screen in use. -
Page 34: Record Quality
Record Quality - If the resolution is set to CIF and the number You can set the recording picture quality of Video On cameras is 1 to 4, the IPS limit selecting of Level8(High) ~ Level1(Low). is 30 ips for NTSC and 25 ips for PAL. ... -
Page 35: Event Record Mode
EVENT RECORD MODE Motion Detection Setup You can configure the motion detection related The detailed list for event mode settings is as settings. When the detection area is set, the follows: system detects any motion in that area. MENU SETUP System Motion Detection Setup Camera... -
Page 36: Schedule
Sensitivity Record Schedule This is used to set the sensitivity for motion detection. Available values are Low, Medium, The scheduling is enabled by selecting days and Very High. and time blocks. The default setting is Event Alarm-Out Recording. Recording automatically starts It is used to set the Alarm-Out location when according to the schedule. -
Page 37: Network
Alarm Out Schedule Connection Mode Select a network type that is connected to the You can schedule the automatic output for main body of the product. alarms. - Static IP: When the main body is connected to the network using the static IPs. - Dynamic IP: When the main body is Alarm Out Schedule connected to the network using the dynamic... - Page 38 If you select Off, the IP will not be connected to the product. Please registered in DDNS. contact the network manager or - If you select Samsung DDNS, register ADSL company personnel to get the the TCP IP in DDNS that is operated by correct setting values.
- Page 39 Transfer Video Loss: Set it to On to display If you set up the public DDNS (dyndns. video loss events on Smart Viewer. com, no-ip.com, or changeip.com), it will Transfer System Log: Set it to On to display take approximately 30 to 60 seconds system logs such as critical system failures.
-
Page 40: Configuring Network
CONFIGURING NETWORK In case of UDP transfer protocol The TCP ports will be used for Smart Viewer Port configuration for connecting connection and the UDP ports will be used for Smart Viewer stream transfer. When Multicast is set ... -
Page 41: Backup
In case of back-up devices, please check the compatibility list of the storage devices. The list of the compatible devices with Samsung In case of SHR-5160 and SHR-5080, they DVR can be obtained from your vendor. -
Page 42: Ptz Camera Control
When using a remote control, it is possible to control the camera with the remote control run by Samsung protocol. If there is no PTZ control for 5 minutes from the DVR, this mode is automatically cancelled. Then it is controlled by WIDE VIEW PRESET the Smart Viewer. -
Page 43: Preset Setup
PTZ control. 1. Press the PRESET button on the front panel Only the Pan. and Samsung protocol or remote control in Single Screen PTZ cameras are authorized for this setup. Camera Control Mode ad select Preset. -
Page 44: Preset View
OTHER VIEW Press the VIEW button on the front panel or remote control in Single Screen PTZ Camera Control Mode to use other viewing controls. Samsung, Pan., Pel.-P, and Pel.-D protocol PTZ cameras support the following operations: Preset Auto Pan... -
Page 45: Recording
recording REC (NORMAL RECORDING) If Event Recording is active, the recording starts at each event. In this case, the recording is executed according to the settings (video size, Pressing the RECORD button starts recording recording quality, frame rate, pre-alarm, and as set in the Record Mode. -
Page 46: Search And Play
search and play BEFORE USE To perform a calendar search 1. Use the Direction buttons to select each channel, then press the ENTER button. Search Calendar If you press CH >, all channels are Event selected. Date/Time Go to First 2. -
Page 47: Date Time Search
To perform an event search 2. Use the DOWN direction button to move to the time box. To set the time you want, press the ENTER button. Then the year value is 1. Use the UP/DOWN direction buttons to highlighted for change. To change the value, place the cursor to the wanted channel and use the UP/DOWN direction buttons. -
Page 48: Go To Last Search
GO TO LAST SEARCH To perform this function 1. Use the UP/DOWN direction buttons to place the cursor to the wanted backup file Go to Last and press the ENTER button. The selected Cam. End Date End Time backup file is marked. Selection of multiple 2007-03-11 09:43:51 items is possible. - Page 49 Playback mode can set the location of the play channel from You can change the screen display method the menu. using the MODE button and NUMERIC Speed play buttons as shown in the figure. The 16-split, To play the recorded images at a faster speed, 12+1 split, and 15+1 split screens are shown press the Fast Forward () or Fast Rewind only in SHR-5162/5160.
-
Page 50: Smart Viewer
Smart Viewer INTRODUCTION Smart Viewer INSTALLATION Smart Viewer is a program to be installed on 1. Insert the Smart Viewer program CD into the your PC. Using this program, you can monitor CD ROM drive. the video and audio data through the network 2. -
Page 51: Smart Viewer Program Execution
5. After reading the license agreement, click 8. When installation is complete, click Finish to Yes to proceed to next step. exit from the process. 6. Set the destination folder to install the Smart Viewer program and click Next. Smart Viewer PROGRAM EXECUTION Double-click the Smart Viewer icon on the Desktop to execute the program. -
Page 52: Smart Viewer Initial Screen
Smart Viewer INITIAL SCREEN 1. This screen shows the monitoring sites. 12. These buttons enable you to perform the PTZ-related operations. 2. Using these buttons, you can enter the Search mode in which you can search 13. These buttons display the status of the and play the remote video file that has current channels. -
Page 53: Dvr Setup
1. These buttons enable you to select setup You can access to DVR Setup with the items for DVR Setup, Viewer Setup, Site Admin privilege. The button will not be Setup, and S/W Version. activated when you are connected to the DVR with a user privilege. - Page 54 If you change the values for date and For more details, see Chapter 5, “Menu time, the DVR automatically disconnects Setup.” the communication with Smart Viewer - Admin Password to apply the settings. You can change the Admin password ...
- Page 55 - Storage Setup - Remote Control Device It displays the information of the HDD that You can configure the settings for the is contained in your DVR. Also you can remote control that is installed in the DVR determine whether or not to repeat recording system.
- Page 56 The Delete key and key combinations like CTRL+C and CTRL+V in the keyboard are not supported for input of camera title. For deletion of any input value, use the BACKSPACE key. - PTZ Device You can configure the settings for PTZ cameras, which include camera ID, protocol, baud rate, parity, data bit, and stop bit.
- Page 57 - Video Loss Setup It configures the video loss related settings. - Alarm Detection Setup It configures the settings for alarm recording. Schedule You can configure schedule-related settings. For more details, see Chapter 5, “Menu Setup.” - Record Schedule You can change the schedule recording- related settings.
- Page 58 Network Be sure to inquire of the network manager about the settings. You can configure the network-related settings. CAUTION Both ADSL ID and password can For more details, see Chapter 5, “Menu Setup.” be input up to 40 letters including - Network Password alphabets, numbers, and special You can set both Admin password and user...
-
Page 59: Viewer Setup
- Web Viewer Port Setting Video Recording You can configure the port number for Web - Naming convention Viewer. When recording the currently displayed video data into DVR files, you can assign the file naming rule to DVR files. - Location Set the directory for saving the DVR files. -
Page 60: Site Setup
Auto Connection DVR List You can set if Smart Viewer is automatically connected to the selected DVR or site when starting the program. If you check Auto Connection Enable, available DVRs and sites are displayed in the pull-down list. After selecting one from the list, Smart Viewer connects to the selected DVR or site whenever it is started. - Page 61 Network Settings menu of DVR or used an IP splitter to register a URL using DDNS, you can connect through the designated URL. If you want to connect through the URL, select URL in Address Type and enter the URL set in URL. Set the port number in Port No.
- Page 62 The site name can be input up to 15 characters in English or number and 7 characters in Korean. To delete an existing site or DVR, use Delete. To add a DVR to the site, select a DVR and click Add.
-
Page 63: Monitoring Mode
Upgrade. You can download the upgraded DVR firmware from the CCTV part at www.samsung.com. The progress of the upgrade is displayed at the bottom of the screen. MONITORING MODE To connect a DVR or site, select a DVR or site from the list and click the connection button as shown in the picture. - Page 64 If you change the settings such as video size and color quality while CAUTION Smart Viewer is running, Smart Viewer may fall into an unexpected state. In this case, you must terminate Smart Viewer. Mode Conversion Button If the network password of a DVR differs from the connection password set in Smart Viewer, a login message appears to let you input the These buttons enables you to switch between...
- Page 65 3. When audio signal is available, the audio The displayed events are: mark appears. Connecting..: When trying to connect to a DVR is in progress. 4. It displays whether the PTZ controls are Connected..: When connection is active. made to a DVR.
- Page 66 Camera Connection Indication Monitoring State Display Window The screen split status and playing status are displayed on the screen. : When monitoring in Quad Mode The window displays the connection state of DVR and the connected cameras. Yellow: When Smart Viewer is successfully connected to a DVR.
-
Page 67: Next Button
NEXT Button FAVORITE Button When this button is clicked, next screen follows. If you press this button, the favorite window is In Single Mode, the channel numbers are activated. sequentially switched from 1 to 16. In Quad (4-split) Mode, the screens are changed like 1st 4 channels (1,2,3,4) -->... - Page 68 The PTZ (Pan/Tilt/Zoom) controls are available in all cameras. But, this Power Zoom controls are supported by Samsung smart dome cameras only, and they support the tilting operation below 45°. You can adjust the audio volume level (0 to 10) of a channel or mute it.
- Page 69 1. You can configure the camera-related some product. settings using the PTZ camera menu. Samsung cameras support those functions. In case of Panasonic cameras, the names of AUTOPAN, SCAN, and PATTERN are as following: 2 SEQUENCE 3 AUTOPAN 4 SORT.
-
Page 70: Search Mode
SEARCH MODE The Search mode has two separate modes such as Remote mode to search/play the DVR video data, and Local mode to play the DVR files that have been saved in the designated directory on your PC. 1. The screen shows the playback channels. 12. - Page 71 Remote Mode Screen Split Selection Buttons This mode transfers the video data recorded on You can use any of full screen, single, quad DVR through the network for playback. Up to 4 (4-split), 9-split, and 16-split modes. channels are allowed for simultaneous search and playback.
- Page 72 2. File Conversion button When this button is clicked, the system converts a DVR file into JPEG or AVI format. To perform this function 4. Setup Mode button a. Click Open to select a DVR file to be This button brings up the Setup Mode converted.
- Page 73 6. Time Line 7. Next button It displays the recorded video data status on DVR after a date is selected. The normal mode displays the time ranging from 0 to 24 O’clock while the extension mode displays It operates the same as the Next button in the time every 2 hours.
-
Page 74: Web Viewer
Web Viewer INTRODUCING Web Viewer SYSTEM REQUIREMENTS The following lists the minimum suggested hardware and operating system requirements WHAT IS Web Viewer? needed to run the Web Viewer. Windows XP Professional Windows 2000 Windows Vista Home Basic / Premium Internet Explorer Browser 6.0.2900.2180 or higher Intel Pentium 4 with 2 GHz... -
Page 75: Connecting Web Viewer
SETUP menu. • You can change the password for Administrator and user privileges in IP Settings menu of the DVR. SAMSUNG DVR 7. Installation is complete. Now you can see the main screen of Live Viewer. 3. Click “Install ActiveX Control…”... -
Page 76: Using Live Viewer
USING Live Viewer The Live Viewer screen consists of following : OSD INFORMATION DISPLAY 1 This displays the IP address and the model name of the connected DVR. 2 These menus consist of LIVE, SEARCH, SETUP, ABOUT. 3 These buttons are used for the screen split and full screen mode. -
Page 77: Full Screen Mode
6 It displays whether the PTZ controls are FULL SCREEN MODE active. Click button. • If you have set PTZ cameras for the DVR, The screen displays the selected camera “PTZ” is displayed on the screen. Select a PTZ connected to the DVR in “FULL SCREEN camera channel and use the PTZ button for MODE”. - Page 78 In SINGLE MODE, the channel numbers are • The default saving path is “C:\Program Files\ sequentially switched from 1 to 16. Samsung\Dvr Web Viewer\SnapShot\Live”. In QUAD MODE, the screens are changed like To change the saving path, click “SAVE PATH”...
-
Page 79: Using Ptz Camera
• To record it, it is required at least 1GB of available space. • The default saving path is “C:\Program Files\Samsung\Dvr Web Viewer\VideoClip\ Live”. To change the saving path, click “SAVE PATH” button( ) and then select the path you want. - Page 80 • All function of PTZ is same as one of DVR. • Power pan/tilt function operates only with supported cameras. (Example: Samsung SCC-6475) • Drag down to zoom in or drag up to zoom PRESET: Moves the lens direction to a preset out by power pan/tilt function.
-
Page 81: Using Search Viewer
USING Search Viewer The Search Viewer screen consists of following: • SEQUENCE, PREVIOUS, NEXT buttons are not available in SEARCH menu. 1 This displays the IP address and the model • Non-admin users do not have access to name of the connected DVR. SEARCH and SETUP menu. - Page 82 • Only SINGLE and QUAD MODE are available • The default saving path is “C:\Program in SEARCH menu. Files\Samsung\Dvr Web Viewer\SnapShot\ • Om 16-kanals DVR är ansluten, kan du välja Search”. To change the saving path, click kanalerna som ligger från 1 till 16.
- Page 83 • To record it, it is required at least 1GB of available space. • The default saving path is “C:\Program Files\Samsung\Dvr Web Viewer\VideoClip\ Search”. To change the saving path, click “SAVE PATH” button( ) and then select the path you want.
-
Page 84: Controlling Playback
SEARCHING THE RECORDED CONTROLLING PLAYBACK VIDEO IN THE TIMELINE It displays the recorded video data status on the DVR after a date is selected. The normal mode displays the time ranging from 0 to 24 Hours while the extension mode displays the time every 2 hours. -
Page 85: About
ABOUT Click “ABOUT”. Displays the model name of connected DVR and the version of Web Viewer. Web Viewer _81... -
Page 86: Appendix
appendix PRODUCT SPECIFICATION Specs Details Notes Operating System Embedded OS Broadcasting NTSC / PAL System Input Voltage AC 100 ~ 230V (PAL) AC 110 ~ 220V (NTSC) Power Usage Composite 16(8) Channel Video Video Input - 1.0Vp-p - 75Ω Hi Z Termination BNC Type Loop Through Out 16(8) Channel - Auto Termination... - Page 87 Specs Details Notes Recording Compression Video : MPEG4 Method Audio : ADPCM Resolution & Recording Highest Image Recording Specs Resolution Recording Speed Specs (Picture quality) CIF(C) Level8(High) 30ips(NTSC)/ 352X240(NTSC) ~ Level1(Low) 25ips(PAL) /352X288(PAL) Half D1(N) Level8(High) 30ips(NTSC)/ 720X240(NTSC) ~ Level1(Low) 25ips(PAL) /720X288(PAL) Recording...
- Page 88 Specs Details Notes Display Mode Single 1Channel Decoding 16 split (played cameras10-16) 9 split (played cameras 5-9) 4 split (played cameras 2-4) PIP 1 Channel Decoding + 1Channel Live Triplex 9 split 8 Channel Live + 1Channel PB Triplex 16 split ...
-
Page 89: Outline Drawings
OUTLINE DRAWINGS 5080 Outline Drawings appendix _85... - Page 90 5082 Outline Drawings 86_ appendix...
- Page 91 5160 Outline Drawings appendix _87...
- Page 92 5162 Outline Drawings 88_ appendix...
-
Page 93: Factory Default
FACTORY DEFAULT This returns the factory default settings. The settings are made as follows; Use System/Load Factory Default in MENU In Live mode, press and hold down MODE and then PTZ on the front panel for 6 seconds to reset the settings. - Page 94 Classification Detailed Items Factory Setup Monitoring Event Monitoring Duration Date Time OSD Display Title Status Spot Out Channel Spot Out Event Monitor Monitor Out Dual Out Play channel location Lower right-hand corner Multi-channel change 5 seconds Record Mode Record Quality & Auto Normal Quality Level4 Setup...
- Page 95 Classification Detailed Items Factory Setup Connection Mode Static IP Bandwidth 2Mbps Admin Password 4321 User Password 4321 192.168.001.200 IP Settings Gateway 192.168.001.001 Subnet Mask 255.255.255.000 168.126.063.001 ADSL User ID Password Protocol type Port(TCP) 554.555.556.557 Port(UDP) 8000-8159 Unicast / Multicast Unicast Multicast IP 224.126.063.001 Transfer Protocol Settings...
-
Page 96: Troubleshooting (Faq)
TROUBLESHOOTING (FAQ) PROBLEM SOLUTION The system power is dead and Please check the power connection. LEDs on the front of the set do not Check the power voltage. operate at all. If all your efforts as above end up with nothing, check or exchange the power supply. - Page 97 PROBLEM SOLUTION Alarms keep continuously issued Press the MENU button and do the following: so you cannot cancel using the 1) To cancel Event Monitoring: Monitoring > Event ALARM button. Monitoring Duration Off 2) To cancel Buzzer: Event Record > Alarm (Motion Detection/Video Loss) >...
- Page 98 HDDs. The list of the compatible devices with Samsung DVR can be obtained from your vendor. The connection status is not shown Make sure that the external storage device installed is...
-
Page 99: Open Source License Report On The Product
OPEN SOURCE LICENSE REPORT ON THE PRODUCT This product uses software provided under the name of GPL and LGPL. You can receive the following GPL and LGPL source codes by email request to www.sec.co.kr. GPL Software Kernel, Busybox, Sysvinit, dvd+rw-tools, cdrtools, dosfstools ... - Page 100 constitute a work based on the Program rights or contest your rights to work written (independent of having been made by running entirely by you; rather, the intent is to exercise the right to control the distribution of derivative or the Program).
- Page 101 otherwise to copy, modify, sublicense or and a licensee cannot impose that choice. distribute the Program is void, and will This section is intended to make thoroughly clear automatically terminate your rights under this what is believed to be a consequence of the rest License.
- Page 102 REPAIR OR CORRECTION. If the program is interactive, make it output a short notice like this when it starts in an 12. IN NO EVENT UNLESS REQUIRED BY interactive mode: APPLICABLE LAW OR AGREED TO IN WRITING Gnomovision version 69, Copyright (C) year WILL ANY COPYRIGHT HOLDER, OR ANY name of author Gnomovision comes with OTHER PARTY WHO MAY MODIFY AND/OR...
- Page 103 and change free software to make sure the General Public License. We use this license for software is free for all its users. certain libraries in order to permit linking those libraries into non-free programs. This license, the Lesser General Public License, applies to some specially designated software When a program is linked with a library, packages--typically libraries--of the Free Software...
- Page 104 a notice placed by the copyright holder or other be licensed at no charge to all third parties authorized party saying it may be distributed under the terms of this License. under the terms of this Lesser General Public d) If a facility in the modified Library refers to a License (also called “this License”).
- Page 105 of the code of the Library into a program that is containing portions of the Library, and distribute not a library. that work under terms of your choice, provided that the terms permit modification of the work for 4. You may copy and distribute the Library (or the customer’s own use and reverse engineering a portion or derivative of it, under Section 2) in for debugging such modifications.
- Page 106 executable. reason (not limited to patent issues), conditions are imposed on you (whether by court order, It may happen that this requirement contradicts agreement or otherwise) that contradict the the license restrictions of other proprietary conditions of this License, they do not excuse libraries that do not normally accompany the you from the conditions of this License.
- Page 107 Foundation. be of the greatest possible use to the public, we recommend making it free software that everyone can redistribute and change. You can 14. If you wish to incorporate parts of the do so by permitting redistribution under these Library into other free programs whose terms (or, alternatively, under the terms of the distribution conditions are incompatible with...
-
Page 108: Openssl License
OpenSSL LICENSE * HOWEVER CAUSED AND ON ANY THEORY OF LIABILITY, WHETHER IN CONTRACT, * STRICT LIABILITY, OR TORT (INCLUDING * Copyright (c) 1998-2006 The OpenSSL Project. NEGLIGENCE OR OTHERWISE) All rights reserved. * ARISING IN ANY WAY OUT OF THE USE OF * Redistribution and use in source and binary THIS SOFTWARE, EVEN IF ADVISED forms, with or without... - Page 109 “This product includes cryptographic software written by Eric Young (eay@cryptsoft.com)” The word ‘cryptographic’ can be left out if the rouines from the library being used are not cryptographic related :-). * 4. If you include any Windows specific code (or a derivative thereof) from the apps directory (application code) you must include an acknowledgement:...