
Related Manuals for FujiFilm 2650


Summary of Contents for FujiFilm 2650
- Page 1 2650 Getting Ready Basic Photography Advanced Features Photography Advanced Features Playback Settings Software Installation Camera Connection Using FinePixViewer BL00201-200 ( 1 )
-
Page 2: Warning
Notes on the Grant: To comply with Part 15 of the FCC rules, this product must be used with a Fujifilm-specified ferrite-core USB cable and DC supply cord. For customers in Canada CAUTION This Class B digital apparatus complies with Canadian ICES - 003. -
Page 3: Table Of Contents
Contents ERASING SINGLE FRAME ... 34 Warning ... 2 Preface ... 6 3 Advanced Features Photography Accessories and Attaching the Strap ... 7 Nomenclature ... 8 MODE SELECTING PHOTOGRAPHY MENU OPERATION ... 37 1 Getting Ready PHOTOGRAPHY AND MOVIE MENU OPTIONS ... 38 LOADING THE BATTERIES AND xD-Picture Card ... -
Page 4: Preface
I Exif Print (Exif ver. 2.2) Flush your mouth thoroughly with water. Drink large quantities of water and induce vomiting. Then seek Exif Print Format is a newly revised digital camera file format that medical assistance. contains a variety of shooting information for optimal printing. -
Page 5: Nomenclature
Nomenclature ✽ Refer to the pages in parentheses for information on using the camera features. Mode Switch Still photography mode Select this mode for still photography. Playback mode This mode provides playback zoom and multi-frame playback as well as normal single-frame playback. You can also use this mode to erase frames, format xD-Picture Card and specify DPOF settings. -
Page 6: Getting Ready
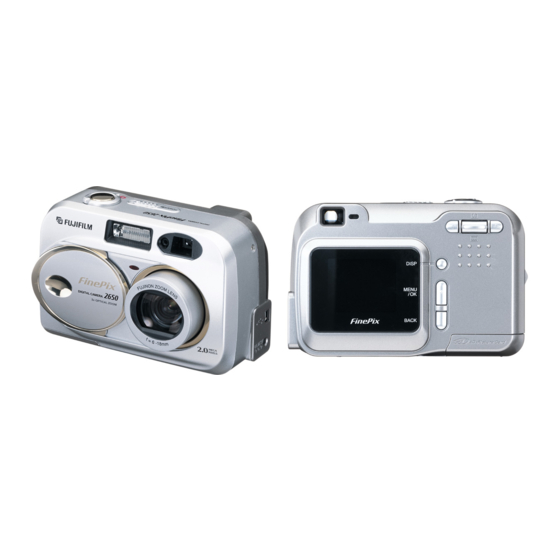
Front Back Operation of this camera is only guaranteed when it is used with FUJIFILM xD-Picture Card. Because xD-Picture Cards are small, they can be accidentally swallowed by small children. Be sure to store xD-Picture Cards out of the reach of small children. - Page 7 LOADING THE BATTERIES AND xD-Picture Card 1Slide the battery cover out to open it. 2Load the batteries correctly as shown. Check that the camera is switched off, open the battery cover and then remove the battery. Do not apply excessive force to the battery cover. Do not open the battery cover while the camera is still switched on.
-
Page 8: Switching On And Off
SWITCHING ON AND OFF When you slide the “POWER” switch sideways to switch the camera on, the green viewfinder lamp lights. To switch the camera off, slide the “POWER” switch sideways again. 1Use the Mode switch to select the mode you want to use. -
Page 9: Changing The Date And Time
SETTING THE DATE AND TIME Changing the date and time DATE/TIME DATE/TIME YYYY MM DD YYYY MM DD 2002 10 29 2002 10 29 8 8 40 40 AM AM OK OK OK OK BACK BACK Once you have set the date and time, press the “MENU/OK” button. Pressing the “MENU/OK” button switches the camera to still photography To change the date and time: or Playback mode. -
Page 10: Selecting The Language
SELECTING THE LANGUAGE OPTION OPTION SET−UP SET−UP LCD BRIGHTNESS AUTO AUTO MANUAL MANUAL 1Press the “MENU/OK” button to display the 1The “SET–UP” screen appears. Use “a” or menu screen. “b” to select “LANGUAGE”. 2Use “a”, “b”, “d” or “c” to select “SET–UP” 2Use “c”... -
Page 11: Taking Pictures
BASIC OPERATION GUIDE Using the Menus Display the menu. Press the “MENU/OK” button. Select a menu option. Select a setting. Press the “d” or “c”. Press the “a” or “b”. QUALITY QUALITY 2M F 25 2M F 25 2M N 39... - Page 12 TAKING PICTURES ( AUTO MODE ) MODE Ensure that your fingers or the camera strap do not obscure the lens or flash control sensor. To zoom in on the subject, press “a” ( There may be some unevenness in the brightness at the lower edge of the LCD monitor.
-
Page 13: Auto Mode)
Subjects Not Suitable for Autofocus Though the FinePix 2650 uses an accurate autofocus mechanism, it may have difficulty focusing or not be able to focus at all for the types of subject and situation listed below. In such cases, the image may be out of focus. -
Page 14: Number Of Available Frames
AF (Autofocus)/AE (Auto exposure) Lock On the FinePix 2650, when you press the shutter button down half way, the focus and exposure settings are fixed (AF/AE lock). If you want to focus on a subject that is off to one side of the image or if you want to set the exposure before you compose the final shot, lock the AF and AE settings and then compose and shoot your picture to get the best results. -
Page 15: Mode Using The Zoom
USING AF/AE LOCK MODE Without moving the camera, press the shutter Continue to hold the shutter button down button down halfway (AF/AE lock). Check that halfway. Move the camera back to the original the AF frame on the LCD monitor has shrunk image and then fully press down on the shutter and the green viewfinder lamp has stopped button. -
Page 16: Framing Guideline Function
When you set the Mode switch to “ image shot is displayed. You can use this camera to view still images recorded on the FinePix 2650 or still images (excluding some uncompressed images) recorded on a FUJIFILM digital camera that supports xD-Picture Cards. -
Page 17: Multi-Frame Playback
MULTI-FRAME PLAYBACK MODE Text displayed No text displayed Multi-frame playback In playback mode, the display shown on the LCD monitor switches each time you press the “DISP” button. Press the “DISP” button until the multi-frame playback screen (9 frames) appears. You cannot display text during multi-frame playback. -
Page 18: Erasing Single Frame
ERASING SINGLE FRAME MODE ERASE ERASE FORMAT FORMAT ALL FRAMES ALL FRAMES FRAME FRAME FRAME BACK BACK BACK BACK 1 Set the Mode switch to “ Select “FRAME” in the “ ”. 2 Press the “MENU/OK” button to display the press the “MENU/OK” button. See P.54 for more information on “ALL FRAMES”... -
Page 19: Advanced Features Photography
Advanced Features SELECTING MODE Photography Set the Mode switch to “ ”. See P.48 for information on shooting movies. AUTO This is the easiest mode for taking pictures and 1Press the “MENU/OK” button to display the can be used in a wide range of conditions. menu. -
Page 20: Photography And Movie Menu Options
PHOTOGRAPHY AND MOVIE MENU OPTIONS This section gives a quick overview of the various functions you can use when the mode switch is set to “ ” or “ ”. Mode Sample LCD monitor display Accessible menu settings QUALITY QUALITY QUALITY FLASH 2M・F... -
Page 21: Flash
FLASH PHOTOGRAPHY MENU FLASH FLASH AUTO AUTO Factory default This mode can be selected in the AUTO “ ”, “ ” still photography Use this mode for ordinary photography. The modes. flash fires automatically as required by the shooting conditions. Use the flash mode that best suits your shot. -
Page 22: Suppressed Flash
FLASH PHOTOGRAPHY MENU Suppressed Flash Use this mode for photography using indoor This is a flash mode that uses a slow shutter lighting, for shots taken through glass, and for speed. This allows you to take pictures of people photography in venues such as theaters or at at night that clearly show both your subjects and indoor sporting events where the distance is too the night time backdrop. -
Page 23: Self-Timer Photography
SELF-TIMER PHOTOGRAPHY PHOTOGRAPHY MENU SELF−TIMER ON OFF Factory default 49 1M This mode can be selected in the “ ” still photography mode. When you set the self-timer to “ON”, “ ” appears on the LCD monitor. 1 Position the AF frame over your subject. In this mode, a timer runs for roughly 10 seconds before the shutter is released. -
Page 24: White Balance (Selecting The Light Source)
PHOTOGRAPHY MENU WHITE BALANCE ( SELECTING THE LIGHT SOURCE ) AUTO: Automatic adjustment WHITE BALANCE WHITE BALANCE Factory default AUTO AUTO This mode can be selected in the “ ” still photography mode. Change the white balance setting when you want to take a picture with the white balance ✽... -
Page 25: Mode
MOVIE ( VIDEO ) MODE Set the Mode switch to “ ”. This mode allows you to shoot movies up to 20 seconds (at the setting) or 80 seconds (at the The available shooting time and the “ setting) without sound. (See P.51 for message are shown on the LCD monitor. -
Page 26: Quality Settings For Movies
MOVIE ( VIDEO ) MODE REC 19s REC 19s During shooting, “hREC” appears on the LCD monitor with a counter showing the remaining time displayed in the top-right corner. If you press the shutter button during shooting, shooting ends and the movie is stored on the xD-Picture Card. -
Page 27: Advanced Features Playback
Playing back movie files i This camera may not be able to play back movie files (10 fps) that were recorded on a camera other than FinePix 2650. i To play back movie files on a computer, save the movie file on the xD-Picture Card to the computer’s hard disk and then play back the saved file. -
Page 28: Playback Menu
ERASING SINGLE ALL FRAMES/FORMATTING PLAYBACK MENU • 1Set the Mode switch to “ ”. 2Press the “MENU/OK” button to view the menu screen. Use “d” or “c” to select “ Note that mistakenly erased images cannot be recovered. You should copy important files that you do not want to be erased to your computer or another media. - Page 29 ERASING SINGLE ALL FRAMES/FORMATTING PLAYBACK MENU • FRAME ALL FRAMES FRAME FRAME ERASE OK? ERASE OK? OK OK OK OK YES YES BACK BACK NO NO Pressing the “MENU/OK” button erases all the 1Use “d” or “c” to select the file to be erased. unprotected files.
-
Page 30: Protecting Images Frame/All
PROTECTING IMAGES FRAME/ALL PLAYBACK MENU 1Set the Mode switch to “ ”. 2Press the “MENU/OK” button to view the menu screen. Use “d” or “c” to select “ Multi-frame playback is an easy way to select images to be protected (➡P.32). Protection is a setting that prevents images from being accidentally erased. - Page 31 PROTECTING IMAGES FRAME/ALL PLAYBACK MENU FRAME SET/RESET FRAME SET/RESET PROTECT OK? PROTECT OK? BACK BACK BACK BACK To remove the protection, press the “MENU/OK” 1 Press “d ” or “c ” to select the file to be button. protected. 2 Press the “MENU/OK” button to protect the file currently displayed.
-
Page 32: Playback Menu
Card. The recorded specifications include information on which frames are to be printed. This section gives a detailed description of how to order your prints with the FinePix 2650. On the FinePix 2650, you can specify only one print per image in the DPOF settings. - Page 33 DPOF SET FRAME PLAYBACK MENU DPOF DPOF OK OK DATE ON DATE ON 1Press “a” or “b” to select “ DATE”. 1Press “a” to select “OK”. 2Use “d ” or “c ” to select “DATE ON” or 2Press the “MENU/OK” button. “DATE OFF”.
-
Page 34: Settings
DPOF SET FRAME PLAYBACK MENU DPOF DPOF FINISH OK? FINISH OK? BACK BACK If you select a frame for which DPOF settings have already been specified, the “ message appears. Pressing the “MENU/OK” button erases all the DPOF settings already specified. You must then specify the DPOF settings again. -
Page 35: Using Set-Up
USING SET– UP OPTION OPTION SET−UP SET−UP LCD BRIGHTNESS AUTO AUTO MANUAL MANUAL You can set the SET–UP in “ ”, “ ” and “ ” 1Press “a” or “b” to select a menu option and mode. then press “d” or “c” to change the setting. 1Press the “MENU/OK”... -
Page 36: Set-Up
2 minutes. 6 Software Installation 6.1 The Software Components USB Mass Storage Driver Allows a digital camera to be used as USB Mass Storage (removable disk drive, card reader). Connect the camera with “DSC” selected as the USB setting (➡P.84). -
Page 37: Installation On A Windows Pc
4. The Setup screen appears. Click the 6.2 Installation on a Windows PC [Installing FinePixViewer] button. ✽ For more information on what is installed, click the 6.2.1 Load the CD-ROM into your PC Do not connect the camera to your PC until the software installation is completed. - Page 38 2. A confirmation message appears asking whether you want to continue with the installation. Click the [OK] button. 3. The software version is checked. If the window shown below appears, click the 3 Check the installation destination folder and then [OK] button to uninstall the software.
-
Page 39: Installation On A Mac Os 8.6 To 9.2
12. After you restart your PC, install DirectX as 15. Proceed with the installation as directed directed by the on-screen instructions and by the on-screen instructions. then restart your PC again. If the latest I To install Acrobat Reader later... version of DirectX is already installed on your PC, this installation is not performed. - Page 40 6. Select the installation destination for 7. Install QuickTime as directed by the on- FinePixViewer and ImageMixer VCD for screen instructions and then restart your FinePix. Macintosh. ✽ If you have already installed QuickTime version 1 Click the [Open] button to open the installation destination folder.
-
Page 41: Installation On A Mac Os X
4. Click the “ 6.4 Installation on a Mac OS X 6.4.1 From FinePixViewer installation to restart Only FinePixViewer is installed on Mac OS X. NOTE AVI movies cannot be played back on version 10.0.4. 1. Switch your Macintosh on and start up Mac OS X. -
Page 42: Camera Connection
If the power cuts out during data transmission, supported on Macintosh computers. the data will not be transmitted correctly. Always ✽ Connection is only possible with a FUJIFILM camera use the AC power adapter when connecting the equipped with a “PC Camera” function. -
Page 43: Use At Dsc Mode
7.2 Use at DSC mode Camera SET−UP SET−UP 5. Switch your PC on. 6. Use the special USB cable to connect the POSTVIEW ON ON POWER SAVE POWER SAVE ON ON camera to your computer. DSC DSC USB MODE USB MODE 7. Switch the camera on. DATE/TIME... -
Page 44: Use At Pc-Cam Mode
I When FinePixViewer is not included Windows XP in the list of actions to perform 1. The “Found New Hardware” help message Select “Take no action” and then select the “Always appears in the bottom-right corner of your do the selected action” checkbox. (This checkbox screen. - Page 45 I Camera Operation I PC Operation 1. FinePixViewer automatically starts up and the PictureHello window opens (Windows only). i When the camera and computer are exchanging data, the self timer lamp flashes and the viewfinder lamp flashes alternately green and orange. i “PC CAM”...
-
Page 46: Disconnecting The Camera
7.4 Disconnecting the Camera Windows 98/98 SE No PC operation is needed. Windows Me/2000 Professional/XP 1. Right-click the removable disk icon in the “My Computer” window and select Eject. This step is only required in Windows Me. 1. Quit all applications (FinePixViewer etc.) that are using the camera. -
Page 47: Using Finepixviewer
8 Using FinePixViewer 8.1 Saving Images on Your Computer and viewing images This section gives a brief overview of how to use Mac OS 8.6-9.2 FinePixViewer. Refer to these instructions while you are using FinePixViewer. 1. Connect the camera to your computer in DSC mode (➡P.84). -
Page 48: Using The Finepix Internet Service
8.3 Using the FinePix Internet Service 8.3.2 User Registration I For Windows and Mac OS 8.6 to 9.2 NOTE Mac OS X users should refer to P.96. NOTE Using FinePixViewer also allows you to access the Your user ID and password are very important. Make FinePix Internet Service via the Internet. - Page 49 5. Enter the required information in the user Once you complete the registration, a confirmation E-mail is sent. Wait a few moments until the registration page. message is sent. I For Mac OS X To use the FinePix Internet services, users must first register.
-
Page 50: Mastering Finepixviewer
8.4 Mastering FinePixViewer For more information on FinePixViewer functions not fully explained in this manual, refer to “How to Use FinePixViewer” in the Help menu for details. I To read “How to Use FinePixViewer”... You must install Adobe Acrobat Reader. See P.79 for information on installing Acrobat Reader. -
Page 51: System Expansion Options
FinePixViewer folder to the Trash. Then click “Empty Trash” in the “Special” menu. System Expansion Options e By using the FinePix 2650 together with other optional FUJIFILM products, your system can be expanded to fill a wide range of uses. FinePix 2650... -
Page 52: Accessories Guide
Accessories Guide e The optional accessories (sold separately) can make taking pictures with the FinePix 2650 even easier. For information on how to attach and use the accessories, refer to the instructions provided with the accessory used. Visit the FUJIFILM web site for the latest information on camera accessories. -
Page 53: Notes On Using Your Camera Correctly
Do not scratch hard objects against the lens, LCD I Notes on Immersion in Water or Sand monitor screen or viewfinder as these surfaces are easily The FinePix 2650 is particularly adversely affected by damaged. water and sand. When you are at the beach or close to h Clean the body of the camera with a soft, dry cloth. -
Page 54: Ac Power Adapter
Plug the connection cord plug securely into the DC input terminal of the FUJIFILM Digital camera. h Turn off the power switch of the FUJIFILM Digital camera before disconnecting the connection cord from the FUJIFILM Digital camera’s DC input terminal. -
Page 55: Notes On The Xd-Picture Card
Data may be lost or destroyed in the following fingerprints, etc.), wipe it clean with a soft, dry cloth. situations. Please note that FUJIFILM assumes no h Clean the memory card with a soft dry piece of cloth responsibility for data that is lost or destroyed. -
Page 56: Warning Displays
It may be necessary to format the xD-Picture Card. If the error message is still displayed, replace the xD-Picture Card. i Contact your FUJIFILM dealer. i Wipe the contact area on the xD-Picture Card with a soft dry cloth. It may be necessary to format the xD-Picture Card. -
Page 57: Troubleshooting
Warning Displays Warning Displayed Explanation Camera malfunction or fault. The lens cover is not open. Troubleshooting Remedy Troubleshooting No power. i Switch the camera on again, taking care not to touch the lens. i Switch the camera off and on again. Open the lens cover. - Page 58 Troubleshooting e If you think the camera is faulty, check the following once more. Troubleshooting Possible causes Can’t use the flash to take i The shutter button was pressed while the pictures. flash was charging. i The batteries are exhausted. i The Suppressed Flash mode is selected.
-
Page 59: Specifications
✽ These specifications are subject to change without notice. i 2AA-size Ni-MH (nickel metal hydride) batteries (sold separately) FUJIFILM shall not be held liable for damages resulting i AC Power Adapter AC-3V (sold separately) from errors in this Owner’s Manual. -
Page 60: Explanation Of Terms
DPOF is a format used for recording information on a storage media (image memory card, etc.) that allows you to specify which of the frames shot using a digital camera are printed and how many prints are made of each image. - Page 61 Do not This can cause a fire or electric shock. disassemble. Do not use the batteries except as Contact your FUJIFILM dealer. specified. Never attempt to take pictures while in Load the batteries with the poles positioned motion.
-
Page 62: Important
IMPORTANT All copyrights and other proprietary rights to Software and Documentation are owned and retained by FUJIFILM or the third party suppliers as indicated on or in Be sure to read this page before using theSoftware. Software or Documentation. Nothing contained herein shall be construed, expressly or implicitly, as transferring or granting any right, license, or title to you other than those explicitly granted under this Agreement. - Page 63 Printed on recycled paper. 26 - 30, Nishiazabu 2 - chome, Minato - ku, Tokyo 106 - 8620, Japan Printed in Japan FGS-204107-FG...
Need help?
Do you have a question about the 2650 and is the answer not in the manual?
Questions and answers