
Related Manuals for FujiFilm FinePix 2800 Zoom


Summary of Contents for FujiFilm FinePix 2800 Zoom
- Page 1 This manual will show you how to use your FUJIFILM DIGITAL CAMERA BL00071-200 ( 1 ) FinePix2800 ZOOM correctly. Please follow the instructions carefully.
-
Page 2: Warning
Notes on the Grant: To comply with Part 15 of the FCC rules, this product must be used with a Fujifilm-specified ferrite-core USB cable and DC supply cord. For customers in Canada CAUTION This Class B digital apparatus complies with Canadian ICES - 003. -
Page 3: Table Of Contents
Contents PLAYBACK MODE Warning ... 2 VIEWING YOUR IMAGES (PLAYBACK) ... 30 Preface ... 6 PLAYBACK ZOOM ... 31 Camera Features and Accessories ... 7 MULTI-FRAME PLAYBACK ... 32 Nomenclature ... 8 ERASING SINGLE FRAME ... 33 1 Getting Ready 3 Advanced Features Photography PREFACE ... -
Page 4: Preface
• Special USB cable with Noise Suppression core (1) h Built-in PC Camera function • Software Quick Start Guide (1) h Conforms to the new standard for digital camera file ✽ system h Owner’s Manual ( this manual ) ( 1 ) -
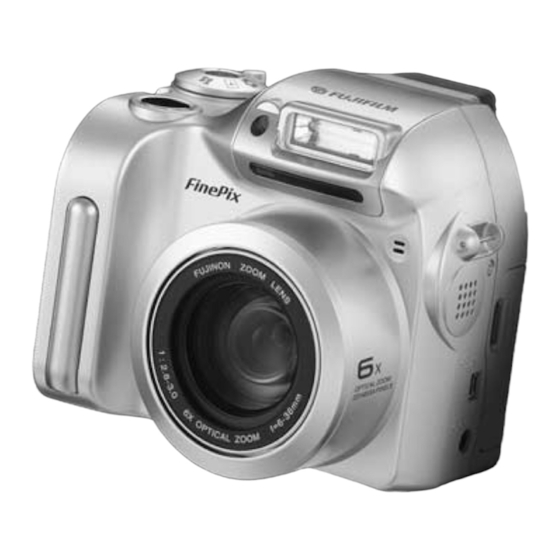
Page 5: Nomenclature
Nomenclature ✽ Refer to the pages in parentheses for information on using the camera features. Mode switch Playback mode (P.30) Still image mode (P.20) Shutter button Flash control sensor Self-timer lamp (P.43) Microphone Lens Speaker Movie mode (P.49) POWER button (P.16) EVF/LCD button Viewfinder( E VF ) -
Page 6: Getting Ready
Nomenclature Example of screen Text Display:Still image Macro Flash Photography mode Zoom bar Date Example of screen Text Display:Playback Playback mode Date Getting Ready Selecting the Language White balance Number of remaining shots File size/Image quality Battery low warning Camera shake warning AF Warning AF frame You can use the “SET–UP”... -
Page 7: Loading The Batteries
PREFACE Attach the Lens Cap To prevent the lens cap from appearing in the shot when you take pictures, attach the lens cap Attach the shoulder strap to the strap mounts on to the shoulder strap. the camera. Once you have attached both ends of the strap, check carefully to ensure that the strap is firmly secured. -
Page 8: Loading The Smartmedia
If you open the slot cover while the camera is still Operation of this camera is only guaranteed when it switched on, the camera is automatically switched off to is used with FUJIFILM SmartMedia. protect the SmartMedia. Some 3.3V SmartMedia are labelled as “3V” or ID”... -
Page 9: Switching On And Off
SWITCHING ON AND OFF Switch the camera on and check the batteries charge indicator. 1Batteries have ample charge (No indicator displayed). 2The batteries charge is low. Have a new set of batteries ready. The batteries are exhausted. The display will shortly go blank and the camera will stop working. -
Page 10: Using The Optional Ac Power Adapter
USING THE OPTIONAL AC POWER ADAPTER AC power adapter (optional) Always use a FUJIFILM AC Power Adapter AC-5V. Use the AC power adapter in situations when a loss of power will cause problems, such as during file downloading (via the USB connection). -
Page 11: Basic Photography
Basic TAKING PICTURES ( AUTO MODE ) STILL IMAGE MODE Photography Immediately after you select Photography mode, Set the Mode switch to “ ”. the viewfinder (EVF) switches on. You can h Focal range: Approx. 80 cm (2.6 ft.) to infinity choose whether to use the viewfinder (EVF) or the LCD monitor to take pictures by pressing the “EVF/LCD”... - Page 12 TAKING PICTURES ( AUTO MODE ) STILL IMAGE MODE Frame the shot so that the subject fills the entire AF (Auto Focus) frame. Zoom bar To zoom in on the subject, press “ ” (TELE). In some conditions it may be difficult to see your To zoom out, press “...
-
Page 13: Iindicator Lamp Display
TAKING PICTURES ( AUTO MODE ) STILL IMAGE MODE I Indicator Lamp Display Though the FinePix2800 ZOOM uses an accurate Color Status Meaning autofocus mechanism, it may have difficulty focusing or not be able to focus at all for the types Ready to shoot. -
Page 14: Using Af/Ae Lock
USING AF/AE LOCK In a shot with this type of composition, the Move the camera slightly so that one of the subjects (two people in this case) are not in the subjects in the AF frame. AF frame. If the shot is taken at this point, the subjects will not be in focus. -
Page 15: Digital Zoom
DIGITAL ZOOM The “ If the file size (image size) setting is “ ” or mode. “ ”, you can use the digital zoom. h If the “ h Digital zoom focal distance (35 mm camera zoom is being used. If it is below the line, the equivalent) optical zoom is being used. -
Page 16: Playback Mode
Images That Can be Viewed on the FinePix2800 ZOOM You can use this camera to view (excluding some uncompressed data) images recorded on a FinePix2800 ZOOM or images recorded onto a 3.3V SmartMedia using a FUJIFILM FinePix series, MX series or DX series digital camera. -
Page 17: Multi-Frame Playback
MULTI-FRAME PLAYBACK Normal playback No text displayed Multi-frame playback Pressing the “DISP” button during playback switches the screen to the next display mode. Press the “DISP” button several times to select multi-frame (9 frames) playback. You cannot display text during multi-frame playback. -
Page 18: Advanced Features Photography
ERASING SINGLE FRAME Press the “MENU/OK” button to erase the displayed image. When erasing is complete, the next image appears and the “ message is displayed. Press “d” or “c” to display the image to be erased. “ settings and they cannot be erased (➡P.85). If the “... -
Page 19: Still Image Mode
SELECTING PHOTOGRAPHY MENU ( STILL IMAGE MODE 1Set the Mode switch to “ ”. 2Press the “MENU/OK” button to display the menu on the screen. AUTO This is the easiest mode for taking pictures and can be used in a wide range of conditions. 1Use “a ( “... -
Page 20: Flash
FLASH PHOTOGRAPHY MENU This mode can be selected in the “ ”, “ ” still AUTO Auto Flash Mode image modes. Use the flash mode that best suits your shot. Use this mode for ordinary photography. The flash fires automatically as required by the h 5 modes: “AUTO, ”... -
Page 21: Suppressed Flash
FLASH PHOTOGRAPHY MENU Suppressed Flash Use this mode for photography using indoor This is a flash mode that uses a slow shutter lighting, for shots taken through glass, and for speed. This allows you to take pictures of people photography in venues such as theaters or at at night that clearly show both your subjects and indoor sporting events where the distance is too the night time backdrop. -
Page 22: Self-Timer Photography
SELF-TIMER PHOTOGRAPHY PHOTOGRAPHY MENU This mode can be selected in the “ ”, “ ” still image modes. In this mode, a timer runs for roughly 10 seconds before the shutter is released. Use this mode for shots such as photographs of yourself. Locate the subject in the screen and frame the shot. -
Page 23: Voice Captioning
VOICE CAPTIONING PHOTOGRAPHY MENU Take a picture as normal. The “ This function can be selected in the “ ” still message then appears on the screen. image mode. Voice Captioning allows you to record a voice captioning (comment) up to 30 seconds long for an image immediately after you take the shot. -
Page 24: Ev (Exposure Compensation)
EV ( EXPOSURE COMPENSATION ) PHOTOGRAPHY MENU Guide to using + (positive) compensation h Copying of printed text (black characters on white paper) (+1.5 EV) h Backlit portraits (+0.6 EV to +1.5 EV) h Very bright scenes (such as snowfields) and highly reflective subjects (+0.9 EV) h Shots made up predominantly of sky This mode can be selected in the “... -
Page 25: Continuous Shooting
CONTINUOUS SHOOTING PHOTOGRAPHY MENU When you finish shooting, the photographed CONT. images are displayed in order and automatically In this mode, the camera shoots up to 4 saved. continuous frames at intervals as short as 0.5 seconds. Shots are taken continuously while you hold the shutter button down fully. -
Page 26: Movie
MOVIE MOVIE MODE Shooting begins when you fully depress the shutter button. Zoom bar In Movie mode, the lens is locked at the wide- When you press the shutter button, there is a very angle setting and only the digital zoom can be short delay before actual shooting begins. -
Page 27: Advanced Features Playback
The FinePix2800 ZOOM can play back movie files shot on a FinePix2800 ZOOM and movie files up to 60 seconds long that were shot on a FUJIFILM digital camera and stored on a 3.3V SmartMedia. If you attempt to play back a movie that is longer than 60 seconds, the “... -
Page 28: Playing Back Voice Captioning
) to play the voice captioning. Compatible Voice Captioning Files The FinePix2800 ZOOM can play back voice captioning files recorded on an FinePix2800 ZOOM and voice captioning files up to 30 seconds long recorded on a 3.3V SmartMedia using a FUJIFILM digital camera. Control Description The voice captioning automatically stops when playback ends. -
Page 29: Playback Menu
ERASING SINGLE • ALL FRAMES/FORMATTING PLAYBACK MENU FRAME Erase only the selected file. The file for which “ ” was displayed cannot be erased. Unprotect the frame using the camera on which the protection was first applied. “ ” is displayed for frames with DPOF settings and they cannot be erased (➡P.85). -
Page 30: How To Specify Print Options (Dpof)
DPOF stands for Digital Print Order Format and refers to a format that is used for recording printing specifications for images shot using a digital camera on media such as SmartMedia. The recorded specifications include information on which frames are to be printed and how many prints of each frame are required. -
Page 31: Dpof Set Frame
DPOF SET FRAME PLAYBACK MENU You can only specify one print per frame (image) 1If you select a frame for which DPOF settings in the DPOF settings. have 1Press the “MENU/OK” button to display the “ menu. 2Pressing the “MENU/OK” button erases all 2Use “d”... -
Page 32: Settings
SETTINGS Settings s” chapter describes all at functions available from “ The “Setting Image, “ ” movie and “ ” playba ck modes. I List of Settings Still Image mode Movie mode AUTO — MANUAL — — CONT. QUALITY (P.64) —... -
Page 33: Setting The File Size And Quality (Compression Ratio)
SETTING THE FILE SIZE AND QUALITY ( COMPRESSION RATIO ) You can choose any combination of 3 file sizes and 3 image quality settings. Use the table below as a guide to the best settings for your shots. File size FINE NORMAL BASIC... -
Page 34: Set-Up Power Save
POWER SAVE SET–UP Once you enable this function, the screen is When the Power Save function is operating, temporarily switched off to save power if you do press the shutter button down halfway to return not use the camera for 30 seconds. Use this the camera to the ready-to-shoot status. -
Page 35: Connecting At Dsc Mode
CONNECTING AT DSC MODE DC IN 5V Socket Camera 1Switch your PC on. 2Use the special USB cable to connect the camera to your PC. 3Switch the camera on. On Windows PCs, if the “Add New Hardware” wizard appears, close the wizard and switch off the camera. -
Page 36: Connecting At Pc-Camera Mode
CONNECTING AT PC-CAMERA MODE DC IN 5V Socket Camera 1Switch your PC on. 2Use the special USB cable to connect the camera to your PC. 3Switch the camera on. On Windows PCs (excluding Windows XP), if the “Add New Hardware” wizard appears, close the wizard and switch off the camera. -
Page 37: Disconnecting From The Pc (Important - Always Use This Procedure.)
DISCONNECTING FROM THE PC ( Important — always use this procedure. ) Windows 98 or 98 SE No PC operation is needed. Windows Me/2000 Professional/XP 1Quit all applications (FinePixViewer, 1Right-click the removable disk VideoImpression, etc.) that are using the Computer" window and camera. -
Page 38: System Expansion Options (Sold Separately)
System Expansion Options ( Sold Separately ) e By using the FinePix2800 ZOOM together with other optional FUJIFILM products, your system can be expanded to fill a wide range of uses. FinePix2800 ZOOM Digital Camera SmartMedia ( Floppy disk drive ) -
Page 39: Notes On Using Your Camera Correctly
If any soiling remains, apply a small amount of lens cleaning liquid to a piece of FUJIFILM lens cleaning paper and wipe gently. h Do not scratch hard objects against the lens, LCD monitor screen or viewfinder as these surfaces are easily damaged. -
Page 40: Notes On The Power Supply
Notes on the Power Supply h Do not use the batteries that are leaking, deformed, Applicable Batteries discolored or exhibit any other obvious abnormality. h AA-size alkaline, Ni-MH (nickel-metal hydride) can be h Do not store the batteries in very warm or moist locations. used with this camera. -
Page 41: Notes On Using The Ac Power Adapter
Plug the connection cord plug securely into the DC input terminal of the FUJIFILM Digital camera. h Turn off the power switch of the FUJIFILM Digital camera before disconnecting the connection cord from the FUJIFILM Digital camera’s DC input terminal. To disconnect, take hold of the plug and pull it out (do not disconnect it by pulling on the cord). -
Page 42: Warning Displays
SmartMedia. If the error message is still displayed, replace the SmartMedia. i Camera fault. i Contact your FUJIFILM dealer. i The SmartMedia contact area is i Wipe the contact area on the SmartMedia with soiled. a soft dry cloth. It may be necessary to format i The SmartMedia is damaged. - Page 43 Wipe the contact surface on the SmartMedia thoroughly with a soft, dry cloth. In some cases, you may have to format the SmartMedia. i Contact your FUJIFILM dealer. i You cannot play movies that are more than 60 seconds long.
-
Page 44: Troubleshooting
Troubleshooting eIf you think the camera is faulty, check the following once more Problem Cause No power. i The battery is exhausted. i The AC power adapter plug has come out of the power outlet. Power cuts out during i The battery is exhausted. operation. -
Page 45: Explanation Of Terms
DPOF is a format used for recording information on a storage media (image memory card, etc.) that allows you to specify which of the frames shot using a digital camera are printed and how many prints are made of i Unprotect the frame using the camera on each image. -
Page 46: Specifications
✽ ✽ Approx. 270 frames Approx. 350 frames FUJIFILM shall not be held liable for damages resulting from errors in this Owner’s Manual. ✽ With fully charged battery ✽ The LCD monitor on your digital camera is manufactured using advanced high-precision technology. Even so, small bright points and anomalous colors (particularly around text) may appear on the monitor and viewfinder. -
Page 47: Safety Notes
Contact your FUJIFILM dealer. product is used incorrectly as a result. Do not allow water or foreign objects to This icon indicates that death or enter the camera. -
Page 48: Ec Declaration Of Conformity
Build-up of dust in your camera can cause power adapter is still connected. a fire or electric shock. This can damage the power cord or cables h Contact your FUJIFILM dealer to request and cause a fire or electric shock. EC Declaration of Conformity CAUTION... - Page 49 Printed on recycled paper. 26 - 30, Nishiazabu 2 - chome, Minato - ku, Tokyo 106 - 8620, Japan FGS - 103108 - FG Printed in Japan...
Need help?
Do you have a question about the FinePix 2800 Zoom and is the answer not in the manual?
Questions and answers