Table of Contents

Related Manuals for THOMSON THT501


Summary of Contents for THOMSON THT501
- Page 1 THT501 Digital High Definition Terrestrial Receiver User manual Manuel d’Utilisateur Manuale Utente Manual del usuario Manual do Usuário Felhasználói Look, Listen & Live kézikönyv Instrukcja obsługi Руководство www.thomsonstb.net пользователя...
-
Page 4: Table Of Contents
ThomsondeclaresthatthisitemcomplieswiththebasicrequirementsandotherrelevantregulationsofdirectivesCE2004/108/EC and73/23EC;rohs2002/95EC Subject to alterations. In consequence of continuous research and development technical specifications, design and appearance of products may change. All product names are trademarks or registered trademarks of their respective owners. © THOMSON 2012. All rights reserved. ... -
Page 5: Introduction
1.0InTroduCTIon 1.1safetyInstructions donoTInsTallYourrECEIvEr: In a closed or poorly ventilated cabinet; directly on top of or under any other equipment; on a surface which might obstruct the ventilation slots. donoTEXPosEThErECEIvErorITsaCCEssorIEs: To direct sunlight or any other equipment that generates heat; to rain or intense moisture;... -
Page 6: Equipment Set-Up
It is advised not to store important information on USB storage devices used with the receiver. Always make backups of data on your USB storage device before using it with this receiver. THOMSON will not take responsibility for any loss of information or circumstances caused by loss of information. -
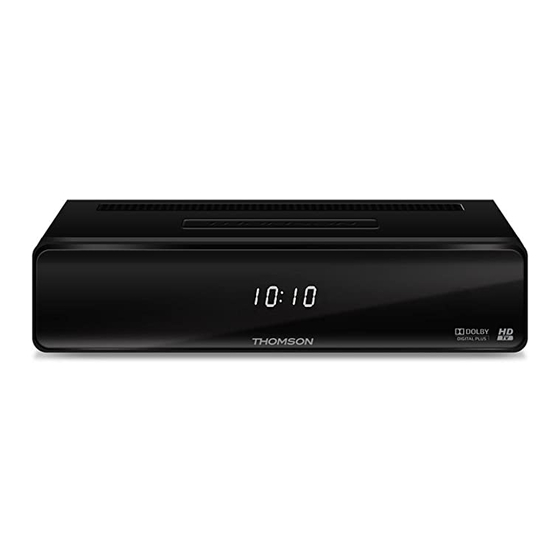
Page 7: Rear Panel
1. 4digitsdisplay: Indicates current time in STANDBY mode Indicates current channel number or action in OPERATING mode 2. Irsensor: Point your remote control towards this sensor. 3. modeindicator: Red indicates that the receiver is in STANDBY mode. In OPERATING mode it is off. 2.3rearPanel Fig. 2 1. -
Page 8: Connection
10. ok Menu Off: Displays the current channel list Menu On: Activates the highlighted menu item. 11. mEnu Opens the main menu, in menu you will get one step back 12. EXIT/sorTIE Exits from the menu or submenu 13. guIdE Shows the EPG (Electronic Programme Guide) in TV mode 14. -
Page 9: Connecting To Tv With Hdmi Cable
The TV set shall be connected with the receiver using a good quality HDMI 1.3 or higher cable. This connection gives the highest possible quality. 3.3ConnectingtoTvwithsCarTcable Fig. 4 THT501 is also equipped with a SCART connector; alternatively, the TV set can be connected to the receiver using a good quality SCART cable. 3.4ConnectingtoTvwithCinchcable Fig. 4 TV sets without SCART or HDMI input(s) can be connected to the receiver using suitable cinch cables. -
Page 10: Startingupforthefirsttime
With the infrared sensor you can place the receiver out of sight (e.g. a closed cabinet) while still being able to control it. Plug the infrared sensor into the “IR” connector on the back of the receiver. Locate the sensor at a position allowing a direct sight to the remote control. -
Page 11: Quickguidetousingyourreceiver
Load Factory Setting (Default PIN 0000) 5.0QuICkguIdETousIngYourrECEIvEr We at THOMSON understand that you can’t wait to enjoy your new high definition digital terrestrial receiver. The following quick guide will make you familiar with the basic operation of this device. We do, however, advice you to read the full manual to get the best performance from your receiver. -
Page 12: Info Banner
6.1.2Channellist Press ok in viewing mode to display the Channel List. Use pq in the Channel List to highlight your channel of choice and press ok once to select the highlighted channel. Press ok again to leave the Channel List. Use tu to toggle between the All Channel list and favourite lists or TIP: press fav for a list of available favourite lists. -
Page 13: Epg (Electronic Programme Guide)
screen. Press 1 to resume Timeshifted playback. Press 5 6 for Fast rewind/Fast forwards. Press 3 to return to live TV. Time Shift needs a connected USB storage device with sufficient noTE: free space and sufficient speed in order to work properly. 6.7EPg(ElectronicProgrammeguide) The Electronic Programme Guide is a very useful function that allows you to view event schedules and information and to mark programmes for recording. - Page 14 7.1.1TvChannellist In Edit Channel menu select TV Channel List with pq and press ok to enter. Use tu to change the channel group (assumed you have already set up favourite groups). Select the desired channel with pq. Press ok to view the selected channel in the preview box.
- Page 15 the channel is on the desired position, press ok again. The channel is now fixed on its new position. Once all changes are made, press EXIT/sorTIE twice. A confirmation banner will pop up. Select Yes to save the changes or No to discard. 7.1.1.5Editingchannels The Edit function allows you to Sort, Rename or Delete channels.
-
Page 16: Installation
confirmation window select Yes with tu and press ok to delete or select No to cancel. WarnIng! The Delete all function will permanently delete all current channels and all favourite lists from your receiver, and you are not able to leave the menu until you search for channels again. -
Page 17: System Setup
7.2.4lCn(logicalChannelnumbering) If LCN (Logical Channel Numbering) is activated and an LCN signal is provided by the operator, channels will be stored in an operator defined order. Set LCN to On to activate operator defined channel numbering or Off to store channels in found order. - Page 18 type HDMI is selected, then on TV SCART only the CVBS signal is available. Digital Audio Output: Toggles between PCM and Bitstream output. When PCM is selected, all audio will be converted to stereo audio. Bitstream enables multi-channel audio on the digital output to be used with home cinema sets.
- Page 19 Timer Service: Choose between Channel (Timer will wake up the receiver) or Record (Timer will start to record the scheduled event). Wakeup Channel: Use tu to select the channel the timer will wake up with. Wakeup Date: Use the 0~9 buttons to input the date for the timed event.
-
Page 20: Tools
7.3.8autostandby Auto Standby is a new feature that helps you with reducing power consumption. When set to On, the receiver will turn to standby if it doesn’t receive any commands from the remote control for three hours. Set Auto Standby to Off to avoid the automatic shut down. -
Page 21: Games
The upgrade menu will now be displayed. Use pq to select Upgrade Mode and choose option Allcode. Use pq to select Upgrade File and choose the file containing the new software. Once all settings are made, move the highlight to Start and press ok to start the upgrade process. - Page 22 WarnIng! Formatting will permanently delete ALL data stored on the connected device. Please make a backup copy of all data you wish to keep before entering the HDD Format menu. THOMSON cannot be held responsible for loss of data from USB devices used with this receiver.
-
Page 23: Troubleshooting
Select HDD Format from the Media+ menu and press ok to enter. Use tu to select the partition you wish to format (Partition 1 is set per default) and press q to highlight Format. Press ok to proceed, select FAT or Cancel, or press EXIT/ sorTIE to leave without formatting. -
Page 24: Technicalspecifications
Problem Possiblecause Whattodo No picture or HDMI is not selected on Switch to correct TV input sound on TV your TV or Amplifier or is Select lower resolution on set to higher resolution as receiver TV supports Switch TV on TV is not switched on Scrambled channel Channel is scrambled... - Page 25 Audio playback – MP3 and FLAC formats* Picture view – JPEG format* *THOMSON cannot guarantee the playback of video files although extensions are listed, as it depends on codec used, data bit rate and resolution (all MPEG codec formats are supported).
Need help?
Do you have a question about the THT501 and is the answer not in the manual?
Questions and answers
Can you watch and Records other channels
The THOMSON THT501 can watch and record digital Free-To-Air TV and radio programs. It has a USB port for recording TV programs. However, there is no mention of the ability to watch one channel while recording another, so it is likely limited to recording the channel being watched.
This answer is automatically generated