Table of Contents
Advertisement
Advertisement
Table of Contents

Related Manuals for Cambridge Audio azur 540R V2.0


Summary of Contents for Cambridge Audio azur 540R V2.0
- Page 1 540R V2.0 AV receiver User’s manual...
-
Page 2: Table Of Contents
CONTENTS Introduction ....................3 Limited warranty ..................4 Safety precautions ..................5 Important safety instructions ..............6 Front panel connections ................8 Rear panel connections ................10 Remote control ..................12 Surround Sound modes ................14 Loudspeaker positioning .................15 Loudspeaker connections ...............16 Audio connections ...................17 Video connections ..................17 Digital connections ..................18 6.1 Direct In .. -
Page 3: Introduction
DVD/CD players or other source equipment elevating the sound quality of the unit. The Video switching has also from the Cambridge Audio Azur range, which have been designed to the been completely re-designed to give higher bandwidth compatible with same exacting standards as our receivers. -
Page 4: Limited Warranty
Cambridge Audio product, THIS PRODUCT. EXCEPT TO THE EXTENT PROHIBITED BY LAW, THIS it can be returned by your dealer to Cambridge Audio or an authorised WARRANTY IS EXCLUSIVE AND IN LIEU OF ALL OTHER EXPRESS AND Cambridge Audio service agent. -
Page 5: Safety Precautions
Should it be necessary to fit a 3-pin BS mains plug to the power cord the wires the fuse carrier the correct part must be reordered from your Cambridge Audio should be fitted as shown in this diagram. The colours of the wires in the mains dealer. -
Page 6: Important Safety Instructions
IMPORTANT SAFETY INSTRUCTIONS Please take a moment to read these notes before installing your 540R Grounding and polarisation V2.0, as they will enable you to get the best performance and prolong The unit may be equipped with a polarised alternating current line plug the life of the unit. - Page 7 540R V2.0 AV receiver Overloading Attachments Do not overload wall outlets or extension cord as this can result in a risk Do not use attachments not recommended by your dealer as they may of fire or electric shock. Overloaded AC outlets, extension cords, frayed cause harm to the unit.
-
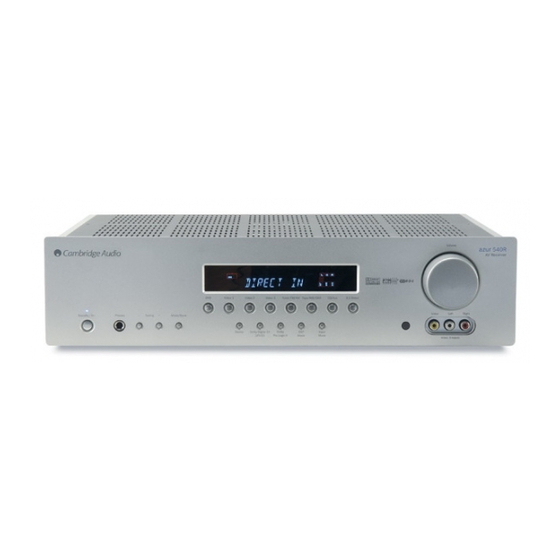
Page 8: Front Panel Connections
FRONT PANEL CONTROLS Volume azur 540R AV Receiver Video 1 Video 2 Video 3 Tuner FM/AM Tape/MD/CDR CD/Aux 6.1 Direct Video Left Right Standby / On Phones – Tuning Mode/Store Stereo Dolby Digital EX/ Pro Logic II/ Input DTS ES Neo 6 Mode Mode... - Page 9 540R V2.0 AV receiver Pro Logic II / Neo:6 Tuner FM/AM Press to decode suitable encoded analog stereo source material into Press to select the tuner for output through the 540R V2.0. In Tuner surround sound. Autodetection for these modes is not possible and they mode also use this button to switch between FM and AM modes.
-
Page 10: Rear Panel Connections
REAR PANEL CONNECTIONS azur 540R V2.0 Component Video In TV/Mon Out S-Video In Optical In Optical Component Video Out Video 1/Video 2 AV Receiver Designed in London, England Video 2 Video 1 Video 1/Video 2 DVD www.cambridge-audio.com Reset Cr/Pr Cb/Pb... - Page 11 540R V2.0 AV receiver Optical In Speaker terminals Connect to the digital optical (Toslink) outputs from source equipment. Connect to loudspeakers with an impedance of between 4-8 ohms. Optical Out 6.1 Preamp Out Connect to the digital optical (Toslink) input of an external recording Connect to the 6.1 (or 5.1) channel input terminals of another amplifier device (eg MD/CDR etc) to record from the selected digital audio source.
-
Page 12: Remote Control
REMOTE CONTROL The 540R V2.0 is supplied with an Azur Navigator remote control. CH Select Insert the supplied AAA batteries to activate. For full details of the Input Mode Press to select individual channels, then use volume to balance various adjustment functions available from the remote, refer to speakers. - Page 13 540R V2.0 AV receiver Tune Stereo Mono Press the right arrow to increase tuner frequency/change preset. Press When listening to FM, press to alternate between stereo and mono the left arrow to decrease tuner frequency/change preset. Also used to modes. scroll left/right in the OSD setup menu.
-
Page 14: Surround Sound Modes
SURROUND SOUND MODES The 540R V2.0 has several music and home-cinema listening modes for greater image depth and more solid sound localisation behind the available, all designed to reproduce “surround sound” effects, listener. All channels are discretely encoded digitally for the best dependant on the input signal and speaker setup: possible surround sound effect. -
Page 15: Loudspeaker Positioning
540R V2.0 AV receiver LOUDSPEAKER POSITIONING The diagram shows a typical example of a 5.1/6.1 loudspeaker setup. Always adjust the speaker and listening positions until you are happy with the sound. Please refer to the loudspeaker and subwoofer manuals for more detailed positioning information. Front Left and Right speakers For stereo and multi-channel sound. -
Page 16: Loudspeaker Connections
LOUDSPEAKER CONNECTIONS To avoid damaging the speakers with a sudden high-level signal, be sure Front right Front left to switch the power off before connecting the speakers. Check the speaker speaker impedance of your speakers. Speakers with an impedance of between 4 and 8 ohms (each) are recommended. -
Page 17: Audio Connections
540R V2.0). Tape player/recorder TV/Monitor DVD player DVD player S-Video Component cable Phono cable (2RCA-2RCA) cable (3RCA-3RCA) azur 540R V2.0 TV/Mon Out S-Video In Optical In Optical Component Video In Component Video Out azur 540R V2.0 TV/Mon Out S-Video In... -
Page 18: Digital Connections
5 seconds the unit saves the settings and returns to its normal state. Note that any changes made are saved and will affect all surround sound modes. Optical cable (OPT-OPT) azur 540R V2.0 azur 540R V2.0 Component Video In Component Video Out TV/Mon Out... -
Page 19: Preamp Out
Stereo Dolby Digital EX/ Pro Logic II/ Input DTS ES Neo 6 Mode Mode Video 3 inputs azur 540R V2.0 Component Video In Component Video Out TV/Mon Out S-Video In Optical In Optical AV Receiver Video 1/Video 2 Designed in London, England... -
Page 20: Aerial Connections
(recommended). To access this menu, press the On-screen until you get the best reception. For continued use, we strongly Display button on the remote control. recommended using a 75 ohm outdoor FM aerial. azur 540R V2.0 Menu AM loop aerial Speaker Config Speaker Dealy... -
Page 21: Osd Menus
540R V2.0 AV receiver OSD MENUS Speaker Configuration OSD Setup Assign the size of the speakers in your system (Small, Large or None if TV format - Choose PAL (UK/Europe) or NTSC (Canada/USA) depending not used). on your TV type. Background - Choose a blue screen or video source as the background Speaker Delay image for the OSD setup menu. -
Page 22: Surround Sound Setup
SURROUND SOUND SETUP To setup the 540R V2.0 for surround sound use it is necessary to using. For example, if you choose not to use a Centre Channel speaker perform 3 steps to match the unit to your speaker package type and you can set this to 'None' in the settings and the 540R V2.0 will configuration. - Page 23 540R V2.0 AV receiver In the second case the 540R V2.0 displays each speaker type (FL/R must be situated equidistant from the listener/viewer. Large to indicate the Front Left and Right as ‘Large’ etc.) each time the In addition Dolby Pro Logic II playback also requires an extra 15 SPK Setup button is pushed.
- Page 24 SURROUND SOUND SETUP CONT. Set the distances in the OSD Speaker Delay menu to the nearest value The menu will then drop down to the first channel (Front Left) and the in metres (delays of 0-60mS are possible). The 540R V2.0 OSD shows test tone will be heard to come from this channel only.
- Page 25 540R V2.0 AV receiver For setup via Front Panel: Dynamic Range Control Consult the previous section for the overall procedure. Press the Test This setting controls the dynamic range of Dolby Digital movie Tone button on the remote control. soundtracks by compressing the dynamics in four stages to limit the difference in level between loud and quiet passages in the movie.
-
Page 26: Operating Instructions
OPERATING INSTRUCTIONS To activate the 540R V2.0, switch the Power button on the rear panel to material. These modes are for use with the digital outputs On then press the Standby/On button on the front panel. (Bitstream/Raw) from DVD players or satellite receivers SPDIF outputs etc. - Page 27 540R V2.0 AV receiver Two FM modes are available, stereo and mono - Press the Stereo Mono Note: Clock - Time will be only transmitted from local radio station once button on the remote to alternate between Stereo mode and Mono a minute.
-
Page 28: Custom Installation Use
FM and AM commands to allow switching to Component Video Out a specific band. Designed in London, England www.cambridge-audio.com A full code table for this product is available on the Cambridge Audio website at www.cambridge-audio.com. Reset r/Pr Cb/Pb... -
Page 29: Troubleshooting
540R V2.0 AV receiver TROUBLESHOOTING A low hum or buzz sound can be heard Noise is excessive in both stereo and monaural broadcasts Power cords or lighting placed near this product. Poor location and/or direction of the antenna. Analog inputs not connected securely. Transmitting station is too far away. -
Page 30: Technical Specifications
AM Tuner 522-1629kHz, Cambridge Audio's policy is one of continuous improvement, therefore design and specifications are subject to change without prior notice. If you notice any errors please feel free to email us 300 ohm loop aerial at: support@cambridgeaudio.com... - Page 31 540R V2.0 AV receiver Azur AV receiver 31...
- Page 32 540R V2.0 www.cambridge-audio.com Part No. AP19118/1...
Need help?
Do you have a question about the azur 540R V2.0 and is the answer not in the manual?
Questions and answers