Venstar T2900 Owner's Manual
7-day programmable digital thermostat
Hide thumbs
Also See for T2900:
- Installation instructions manual (24 pages) ,
- Specification (1 page) ,
- Calibration manual (4 pages)
Table of Contents
Advertisement
Digital
Digital
Thermostat
Thermostat
Control up to 3 Heat &
2 Cool Stages
3 Configurable Outputs
Adjustable 2nd & 3rd Stage
Timers & Deadbands
Backlit Display & Button
Legends
Aux Heat Indicator
Dry Contact Equipped
Accepts Comfort Call
Phone Control Accessory
Meets Commercial California Title 24
Use with most Air Conditioning & Heating Systems including: 1 or 2 Stage
Electric Cooling & 3 Stage Gas Heating, Heat Pump, Electric or Hydronic Heat.
OWNER'S
OWNER'S
MANUAL
MANUAL
Venstar Inc. 04/08
commercial
THERMOSTAT
T2900
7-DAY
7-DAY
PROGRAMMABLE
PROGRAMMABLE
up to 3-heat
up to 3-heat
& 2-cool
& 2-cool
HEAT
HEAT
COOL
PUMP
Outdoor Sensor Ready with
High/Low Readouts for the Day
Set Point Limiting
Accepts EZ Programmer
Economizer Control
Preoccupancy Fan Purge
Remote Averaging
Programmable Output
Light Activation Equipped
Accepts Optional Humidity Module:
Controls Humidification,
Dehumidification and Reheat
Accepts Optional IR Remote Control
Advertisement
Chapters
Table of Contents

Related Manuals for Venstar T2900


Summary of Contents for Venstar T2900
- Page 1 Phone Control Accessory Meets Commercial California Title 24 Use with most Air Conditioning & Heating Systems including: 1 or 2 Stage Electric Cooling & 3 Stage Gas Heating, Heat Pump, Electric or Hydronic Heat. OWNER’S OWNER’S MANUAL MANUAL Venstar Inc. 04/08...
- Page 2 (1) this device may not cause harmful interference, and (2) this device must accept any interference received, including interference that may cause undesired operation. Thermostat T2900 Tested to Comply with FCC Standards FOR HOME OR OFFICE USE...
- Page 3 How to Use This Manual The Table of Contents divides the thermostat features into sections making it easier to quickly find information. The first page of each section contains a more detailed Table of Contents for each section, such as the example page shown below. SECTION 14 Timers and Deadbands Header shows section #...
-
Page 4: Glossary Of Terms
Glossary of Terms Auto-Changeover: A mode in which the thermostat will turn on the heating or cooling based on room temperature demand. Configurable Output Jumper: Using jumpers on the thermostat you can configure the MISC1, MISC2, and MISC3 terminals to control humidification, dehumidification, 2nd stage cooling, 3rd stage heating, and a programmable output. -
Page 6: Table Of Contents
Table of Contents Quick Start Getting to Know Your Thermostat Setting Clock and Day Basic Operation Viewing Outdoor and Remote Temperature and Humidity Programming the Daily Schedule Programming the Fan Operation Thermostat Display Options Humidification Dehumidification Viewing Equipment Run-Times Electric Heat and Heat Pump Operation Timers and Deadbands Using the... -
Page 7: Quick Start
SECTION 1 Quick Start Section 1 Contents: Setting the Clock and Day...1.2 Selecting the Heat or Cool Mode..........1.3 Selecting Your Desired Temperature........1.4 Using the Fan Button....1.4 Note: Following the instructions in this section will allow you to operate your thermostat using the factory default settings. These settings are depicted in the illustrations throughout this manual. -
Page 8: Setting The Clock
HUMIDITY MODE During Setup & Programming: SET CLOCK Press the MODE and HUMIDITY buttons Pressing the UP or DOWN at the same time buttons will modify the flashing selection. Setting the Clock Setup 12:00 To adjust the Clock or Day use Press Setting the Day MODE... -
Page 9: Selecting The Heat Or Cool Mode
Selecting the Heat or Cool Mode Select Mode by Pressing the MODE Button 12:00 Heating Only The HEAT setting indicates the temperature the room has to reach before the furnace will Press turn on to heat the room. MODE 12:00 Cooling Only The COOL setting indicates the temperature the room has to... -
Page 10: Selecting Desired Temperature
Selecting Your Desired Temperature (adjusting the setpoints) AUTO OR PROGRAM MODE Pressing the UP or DOWN buttons in Auto or Program mode will adjust both the heat and cool set temperatures simultaneously. Adjust the desired set temperature with the 12:00 AUTO buttons. -
Page 11: Getting To Know Your Thermostat
SECTION 2 Getting to Know Your Thermostat Section 2 Contents: Front Panel Buttons.....2.2 Display Features......2.3 Page 2.1... -
Page 12: Front Panel
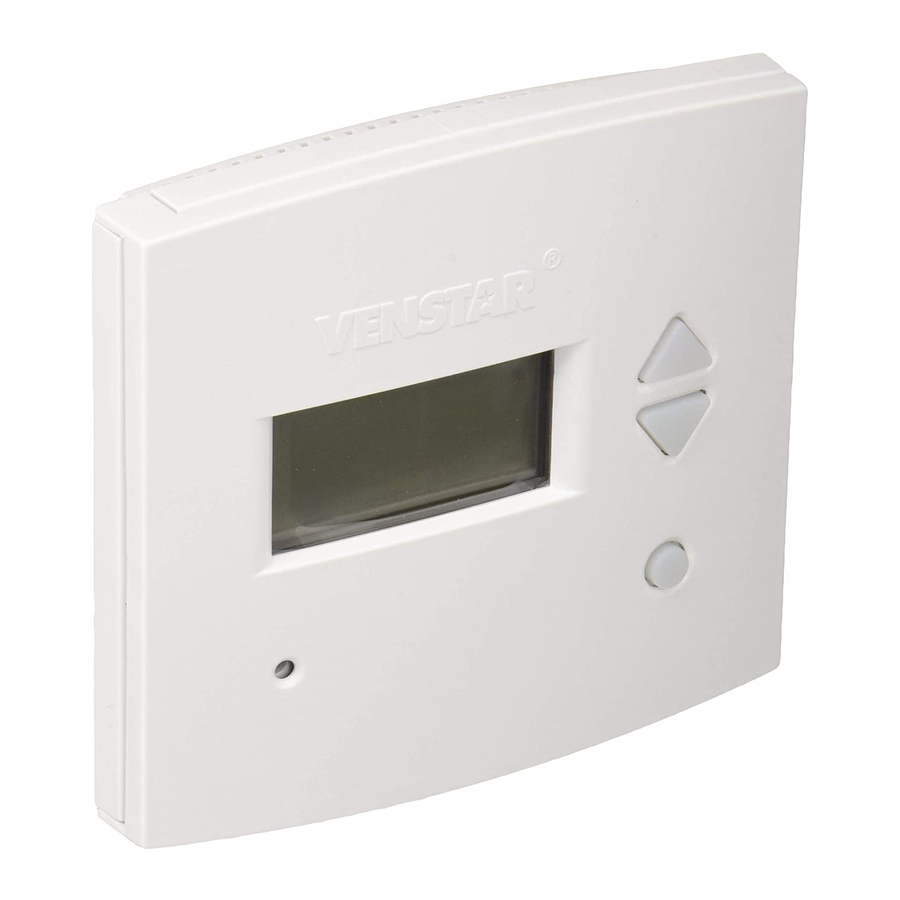
Front Panel Warmer Button Backlit LCD Display (glows red) sometimes referred to as the UP button 12:00 AUTO Cooler Button sometimes refer- (glows blue) red to as the DOWN button Override Heat or Cool Demand Indicator Button Red = Heat, Green = Cool eries PLATINUM COMMERCIAL PROGRAMMABLE THERMOSTAT... -
Page 13: Display Features
Display Features Program On Setup 18:88 StartStop SuMoTuWeThFrSa DeHumidify Service Filter Pan UV Light Outside AUTO Remote OFFON Unoccupied Override FanOn Mode Indicators - Section 4 Selects the operational mode of the equipment. HEAT - Indicates the heating mode. COOL - Indicates the air conditioning mode. AUTO - Indicates the system will automatically changeover between heat and cool modes as the temperature varies. - Page 14 Display Features Program On Setup 18:88 StartStop SuMoTuWeThFrSa DeHumidify Service Filter Pan UV Light Outside AUTO Remote OFFON Unoccupied Override FanOn Occupied & Unoccupied icons - Section 6 Indicates the program number: Occupied 1,2,3,or Unoccupied. Override icon - Section 6 Indicates the program is currently being overridden for up to 4 hours.
- Page 15 Display Features Program On Setup 18:88 StartStop SuMoTuWeThFrSa DeHumidify Service Filter Pan UV Light Outside AUTO Remote OFFON Unoccupied Override FanOn UV Light icon - Section 11/19 Appears when the UV bulb should be serviced under normal conditions. Adjustable from 0 - 1950 days of operation. Remote icon - Page 22.4 Indicates the remote sensor reading of the thermostat is being viewed.
-
Page 16: Setting Clock And Day
SECTION 3 Setting the Clock and Day Section 3 Contents: Setting the Clock......3.2 Setting the Day......3.2 Note: During setup & programming pressing the UP or DOWN buttons will modify the flashing selection. Page 3.1... - Page 17 HUMIDITY MODE During Setup & Programming: SET CLOCK Press the MODE and Pressing the UP or DOWN HUMIDITY buttons at the same time buttons will modify the flashing selection. Setting the Clock Setup 12:00 To adjust the Clock or Day use Press Setting the Day MODE...
-
Page 18: Basic Operation
SECTION 4 Basic Operation Section 4 Contents: Programming for Auto or Program Operation....4.2 Selecting the Proper Operating Mode......4.3 Selecting Your Desired Temperature.......4.7 Note: During setup & programming pressing the UP or DOWN buttons will modify the flashing selection. Page 4.1... -
Page 19: Programmable/Non-Programmable Thermostat
Programmable or Non-Programmable Thermostat When the very simplest operation is desired, this thermostat may be configured to be non-programmable, with or without Auto-Changeover. Follow the step below. If ‘NO’ is selected, the thermostat will lockout the Program On screen; only the Off, Heat, Cool, and Auto screens may be accessed by pressing the MODE button. - Page 20 Manual or Auto-Changeover Thermostat When the very simplest operation is desired, this thermostat may be configured to be a manual heat and cool thermostat, with or without time period programmability. Follow the step below. The thermostat may be programmed to function as a Heat Only or Cool Only thermostat by selecting ‘NO’...
- Page 21 Operating Mode when the Thermostat is Configured to be: NON-PROGRAMMABLE WITH MANUAL CHANGEOVER - If the thermostat is configured to be a non-programmable thermostat with Manual Changeover, the following screens will be available by pressing the MODE button. Select the Mode by Pressing the MODE Button 12:00 Heating Only The HEAT setting indicates the...
- Page 22 Operating Mode when the Thermostat is Configured to be: NON-PROGRAMMABLE WITH AUTO-CHANGEOVER - If the thermostat is configured to be a non-programmable thermostat with Auto-Changeover, the following screens will be available by pressing the MODE button Select the Mode by Pressing the MODE Button 12:00 Heating Only The HEAT setting indicates the...
- Page 23 Operating Mode when the Thermostat is Configured to be: PROGRAMMABLE WITH MANUAL CHANGEOVER - If the thermostat is configured to be a programmable thermostat with Manual Changeover, the following screens will be available by pressing the MODE button. Select the Mode by Pressing the MODE Button 12:00 Heating Only The HEAT setting indicates the...
- Page 24 Operating Mode when the Thermostat is Configured to be: PROGRAMMABLE WITH Auto-Changeover - If the thermostat is configured to be a programmable thermostat with Auto-Changeover, the following screens will be available by pressing the MODE button. Select the Mode by Pressing the MODE Button 12:00 Heating Only The HEAT setting indicates the...
- Page 25 Selecting Your Desired Temperature (adjusting setpoints) AUTO OR PROGRAM MODE Pressing the UP or DOWN buttons in Auto or Program modes w ill a djust both the h eat a nd c ool s et t emperatures simultaneously. For more information on this see page 13.2. Adjust the desired set temperature with the 12:00...
- Page 26 SECTION 5 Viewing the Temperature and Humidity Sensors Section 5 Contents: Viewing the Outdoor Temperature......5.2 Viewing the Indoor Humidity........5.3 Page 5.1...
-
Page 27: Viewing The Outdoor Temperature
Viewing the Outdoor Temperature Requires an outdoor sensor (optional accessory) to be installed (see page 15.2 for wiring instructions). To read the temperature from the outdoor sensor, press the PROGRAM and HOLIDAY buttons. The display will then show the current outdoor temperature along with the highest and lowest temperatures for the day. - Page 28 Viewing the Indoor Humidity Requires the Humidity Module (optional accessory) to be installed. To display the current humidity at the thermostat, press the HUMIDITY button. The display will then show the current indoor humidity along with the humidification setpoint (Section 9). Note: The humidity reading will not appear unless the Humidity Module has been installed.
-
Page 29: Programming The Daily Schedule
SECTION 6 Programming the Daily Schedule Section 6 Contents: Programming a Daily Schedule........6.2 Overriding the Daily Schedule........6.6 Page 6.1... -
Page 30: Programming A Daily Schedule
Programming a Daily Schedule Press Press the PROGRAM button to enter time period programming. PROGRAM Use the Programming Worksheet on the back cover to help with this section. Select the maximum # of occupied periods to be used on any one day. Typically most installations occupied use only Occupied 1. - Page 31 Adjust the heating set- point for Unoccupied periods. Unoccupied (OF, 35 - 99 ) Press MODE Select the day for Occupied 1. occupied (Mo - Su) Press MODE 7:00 Start Adjust the start time for Occupied 1. occupied Press MODE 6:00 Stop Adjust the stop time...
- Page 32 The copy command becomes available after the maximum # of occupied periods are programmed in a day. This example uses only one occupied period. Select Yes to copy the previous day’s program to this day. If No is selected: If Yes is selected: Selecting Yes, then pressing mode will copy the previous day’s program.
- Page 33 Select Occupied 1 to run on this day (On), or not to run on this day (Off). occupied Select Yes to copy the previous day’s program to this day. If No is selected: If Yes is selected: Selecting Yes, then pressing mode will copy the Press previous day’s program.
-
Page 34: Overriding The Daily Schedule
Overriding the Daily Schedule The OVERRIDE button may be used to interrupt the normal time schedule programming of the thermostat. Override may only be used when the thermostat is running the time schedule, in Program On mode. Unoccupied Operation - During programmed, unoccupied periods, pressing the OVERRIDE button will temporarily force the thermostat into Occupied 1 comfort settings for 30 minutes. -
Page 35: Programming The Fan Operation
SECTION 7 Programming the Fan Operation Section 7 Contents: Using the Fan Button....7.2 Smart Fan Operation....7.2 Setting the Fan-Off Time Delay..........7.3 Fan Purge Operation....7.4 Page 7.1... -
Page 36: Using The Fan Button
Using the Fan Button When the fan is set for automatic operation it will energize any time there is a call for heating or cooling, otherwise the fan will remain off. Pressing the FAN button will energize the fan and display the FanOn icon on the thermostat display. -
Page 37: Setting The Fan-Off Time Delay
Setting the Fan-Off Time Delay To increase the cooling efficiency of your unit, the thermostat may be programmed to continue running the fan after a call for cooling has been satisfied. This delay may be set for 30, 60, or 90 seconds. If the Fan Off Delay is set for zero seconds, the fan will not energize after a call for cooling has been satisfied. -
Page 38: Fan Purge Operation
Fan Purge Operation When this feature is activated, the fan will turn on during an unoccupied period at a preset amount of time prior to Occupied 1. This preoccupancy fan purge timer may be set from zero to three hours, in 15 minute increments. Zero means this feature is turned off. Press the MODE button. -
Page 39: Thermostat Display Options
SECTION 8 Thermostat Display Options Section 8 Contents: Turning On/Off the Backlight........8.2 Programming the Thermostat to Display Temperature in Fahrenheit or Celsius....8.2 Locking/Unlocking the Keypad........8.3 Programming a Security Level..........8.4 Page 8.1... -
Page 40: Turning On/Off The Backlight
Turning On/Off the Backlight Press the MODE button. While holding MODE Note: Press the MODE the MODE, press the PROGRAM button momentarily to move through the button to enter Setup screens. PROGRAM setup screens. Press and hold the MODE button to move back- Press the MODE button repeatedly wards through the MODE... -
Page 41: Locking/Unlocking The Keypad
Locking/Unlocking the Keypad To prevent unauthorized use of the thermostat, the front panel buttons may be disabled. To disable, or ‘lock’ the keypad, press and hold the MODE button. While holding the MODE button, press the UP and DOWN buttons together. The icon will appear on the display, then release the buttons. -
Page 42: Programming A Security Level
Programming a Security Level When a security level has been programmed, the thermostat will allow limited adjustment to the setpoints (steps #8 and #9). In security levels 2 and 3, the thermostat is forced into the Program On mode. To disable the security feature, set the value in step #7 to 0; this will cause steps #8 and #9 not to appear. -
Page 43: Humidification
SECTION 9 Humidification Section 9 Contents: Installing the Humidity Module........9.2 Setting a Thermostat Jumper for Humidity Operation....9.3 Adjusting the Humidification Setpoint........9.4 NOTE: The humidification functions described in this section will only be available if a Humidity Module has been properly installed. Disclaimer: The manufacturer of this thermostat cannot be liable for misinstall- ation, improper connection or improper programming of the hum-... - Page 44 HUM as shown in Figure 1 below. This will allow you to access the humidification and dehumidification setup steps. For proper humidity operation, this jumper must be set for HUM. Figure 1 Back of T2900 ELEC NO HUM DEHUM (MISC1...
- Page 45 Setting a Thermostat Jumper for Humidity Operation To control a MISC output for humidification, place the MISC1, MISC2, or MISC3 jumper on the terminal labeled HUM (see diagram below). This will supply 24VAC to the selected MISC terminal based on the humidification programming in the following pages.
- Page 46 Adjusting the Humidification Setpoint If your HVAC unit is equipped with a humidification system and the Humidity Module has been installed, the thermostat will provide power to the appropriate terminal on the backplate of the thermostat when the humidity in the home falls below the setpoint you have chosen.
-
Page 47: Dehumidification
SECTION 10 Dehumidification Section 10 Contents: Configuring a Thermostat Output Jumper for Dehumidification Operation........10.2 Adjusting the Dehumidification Setpoint........10.3 Using Your Air Conditioner to Dehumidify......10.4 Using the Reheat Function........10.5 Using the DEHUM Terminal........10.6 NOTE: The dehumidification functions described in this section will only be available if a Humidity Module has been properly installed. -
Page 48: Operation
Setting a Thermostat Jumper for Dehumidification Operation To control a MISC output for dehumidification, install the Humidity Module and place the Humidity Jumper on HUM (see page 9.2). Then place the MISC1, MISC2, or MISC3 jumper on the terminal labeled DEHUM (see diagram below). This will supply 24VAC to the selected MISC terminal based on the dehumidification programming in the following pages. -
Page 49: Adjusting The Dehumidification Setpoint
Adjusting the Dehumidification Setpoint Dehum Terminal: If a MISC terminal selected for DEHUM operation (see page 10.2) then the thermostat will provide power to this terminal the when the humidity in the home is above the setpoint you have chosen. See page 10.6 for detailed programming instructions. Cool to Dehumidify: If the thermostat is programmed for Cool to Dehumidify operation, then the thermostat will energize the cooling system any time the humidity in the home is above the setpoint you... -
Page 50: Using Your Air Conditioner To Dehumidify
Using Your Air Conditioner to Dehumidify If Cool to Dehumidify is on and the Humidity Module is installed, the thermostat has the ability to initiate a cooling cycle for advanced dehumidification operation. When the thermostat detects the humidity percentage is above the setpoint for dehumidification, and heating or cooling is not on, the thermostat will force the compressor to run with the fan, thus reducing moisture in the air. -
Page 51: Using The Reheat Function
Using the Reheat Function This feature allows the thermostat to turn on Electric Heating (W2) during Cool to Dehumidify to maintain room temperature until the dehumidification setpoint is reached. The cooling cycle will allow for the dehumidification of the air to occur while the Electric Heating will allow for a constant room temperature. -
Page 52: Using The Dehum Terminal
Using the Dehum Terminal If you configure a MISC output jumper for DEHUM, it may be programmed to operate in one of two ways: 1) Normally Closed (NC): The thermostat will de-energize the DEHUM terminal to allow the fan to run in low speed when there is a call for 1st stage cooling and the room humidity is greater than the dehumidification setpoint. -
Page 53: Viewing Equipment Run-Times
SECTION 11 Viewing Equipment Run-Times Section 11 Contents: Viewing the Heat Run-Time.........11.2 Viewing the Cool Run-Time.........11.3 Viewing the Override Run-Time.........11.4 Viewing the Humidifier Run-Time........ 11.5 Viewing the UV Light Run-Time.........11.6 Page 11.1... - Page 54 Viewing the Heat Run-Time - Energy Watch This display will track the number of hours that your heating system has been operating. Press the FAN button to reset the counter. Press the MODE button. While holding MODE Note: Press the MODE the MODE, press the PROGRAM button momentarily...
- Page 55 Viewing the Cool Run-Time - Energy Watch This display will track the number of hours that your cooling system has been operating. Press the FAN button to reset the counter. Press the MODE button. While holding MODE the MODE, press the PROGRAM Note: Press the MODE button momentarily...
- Page 56 Viewing the Override Operation Run-Time This display will track the number of hours that your thermostat has been operating in the Override mode (see page 6.6). Press the FAN button to reset the counter. Press the MODE button. While holding MODE the MODE, press the HUMIDITY button Note: Press the...
- Page 57 Viewing the Humidification Run-Time After your humidification system has been operating for the number of days set in step #17 below, the Service Humidify icon will appear. This counter keeps track of the number of days since the Service Humidify icon was reset.
- Page 58 Viewing the UV Light Run-Time After the UV light has been operating for the number of days set in step #18 below, the Service UV Light icon will appear. This counter keeps track of the number of days since the UV light icon was last reset.
-
Page 59: Electric Heat And Heat Pump Operation
SECTION 12 Electric Heat and Heat Pump Operation Section 12 Contents: Viewing the Heat Pump and Reversing Valve Jumper Setting........12.2 Viewing the Electric Heat Jumper Setting.......12.3 Using Emergency Heat....12.4 Page 12.1... -
Page 60: Reversing Valve Jumper Settings
Viewing the Heat Pump and Reversing Valve Jumper Settings Steps 19 and 20 are ‘Read Only’ and may only be set with the jumpers on the circuit board of the thermostat (see page 5.4 of the Installation Instructions). Press the MODE button. While holding MODE Note: Press the MODE... - Page 61 Viewing the Electric Heat Jumper Setting Placing the jumper on ELEC will cause the thermostat to turn on the fan immediately any time there is a heat demand. Since most gas furnaces control the fan, this feature should be off unless it is necessary for the thermostat to energize the fan with first stage heat.
- Page 62 Using Emergency Heat ENTER EMERGENCY HEAT: Only available if you have a Heat Pump installed. To initiate the Emergency Heat feature, press the FAN button. While holding the FAN button press the UP button. The Cool setpoint display will read ‘EH’ (emergency heat).
-
Page 63: Timers And Deadbands
SECTION 13 Timers and Deadbands Section 13 Contents: Adjusting the Heat/Cool Differential......13.2 Adjusting the Cycles Per Hour........13.3 Adjusting the Deadband..13.4 Adjusting the Minutes of Run-Time Before the Next Stage.......13.6 Selecting 2nd Stage Turn Off Temperature.....13.7 Page 13.1... -
Page 64: Adjusting The Heat/Cool Differential
Adjusting the Heat/Cool Differential The Heat and Cool setpoints will not be allowed to come any closer to each other than the value in this step. This minimum difference is enforced during Auto-Changeover operation. Press the MODE button. While holding MODE the MODE, press the PROGRAM Note: Press the... -
Page 65: Adjusting The Cycles Per Hour
Adjusting the Cycles Per Hour The Cycles Per Hour setting may limit the number of times per hour your HVAC unit may energize. For example, at a setting of 6 cycles per hour the HVAC unit will only be allowed to energize once every 10 minutes. -
Page 66: Adjusting The Deadband
Adjusting the Deadband MULTI-STAGE OPERATION - Controls up to three Heat and two Cool stages. The 2nd Stage of heat or cool is turned on when: (A) The 1st Stage has been on for the time required (step #27, page 13.6). It is adjustable from 0-60 minutes and the default is two minutes. - Page 67 Adjusting the Deadband For more detailed information, please see the explanation on the previous page. Press the MODE button. While holding MODE Note: Press the MODE the MODE, press the PROGRAM button momentarily button to enter Setup screens. PROGRAM to move through the setup screens.
-
Page 68: Adjusting The Minutes Of Run-Time Before The Next Stage
Adjusting the Minutes of Run-Time Before the Next Stage For more detailed information, please see the explanation on page 13.4. Press the MODE button. While holding MODE Note: Press the MODE the MODE, press the PROGRAM button momentarily button to enter Setup screens. PROGRAM to move through the setup screens. -
Page 69: Selecting 2Nd Stage Turn
Selecting nd Stage Turn Off Temperature If ON is selected, the second stage of cooling or heating will remain energized until the thermostat reaches the setpoint on the thermostat display. If OFF is selected, the second stage of cooling or heating will turn off after reaching the 1st stage deadband (see page 13.4 for more information). -
Page 70: Using The Programmable Output
SECTION 14 Using the Programmable Output Section 14 Contents: Configuring a Thermostat Output Jumper for Programmable Output Operation....14.2 Time-Based Control of the Programmable Output...14.3 Temperature-Based Control of the Programmable Output..14.6 Phone Control of the Programmable Output...14.7 Page 14.1... - Page 71 Setting a Thermostat Jumper for Programmable Output Operation To control one of the MISC outputs using time, temperature, or phone based operation, place the MISC1, or MISC2, or MISC3 MISC3 jumper on the terminal labeled PROG (see diagram below). This extra output will supply 24VAC to the selected MISC terminal based on the programming described in the following pages.
-
Page 72: Programmable Output
Time-Based Control of the Programmable Output To operate one of the MISC outputs using time-based operation, set Advanced Setup step #30 (below) for Time 18:88 . This extra output will supply 24VAC to the selected MISC terminal, which is especially useful for devices that require a start and stop time. - Page 73 Setup Programmable Output Polarity: NC = Normally Closed to turn off between the start and stop times in steps 34 and 35. NO = Normally Open to operate Press between the start and stop times in steps 34 and 35. MODE Setup 7-Day...
- Page 74 Time-Based Control of the Programmable Output Setup 9:00 Stop Adjust the programmable output stop time for Monday Press If Step 32 is set for 1-Day, then Day of the Week and Copy functions do not appear or apply. MODE Select Yes to copy the previous day’s program to this day.
- Page 75 Temperature-Based Control of the Programmable Output To operate a MISC output using temperature-based operation, program advanced setup step #30 (below) for temperature This extra output will supply 24VAC to the selected MISC terminal based on the temperature of RS1 and the setpoint in step #36 (below). Possible TEMPERATURE scenario: 1) An exhaust fan in the attic of a store that needs to be energized when the attic temperature is above 85 degrees.
- Page 76 Phone Control of the Programmable Output To operate a MISC output using phone-based operation, program advanced setup step #30 for Aux (below). This terminal is especially useful for devices that can be energized via the phone. Possible AUX scenarios: 1) Arm the alarm system in your home after you have left for the day.
-
Page 77: Programming Remote Sensor Operation
SECTION 15 Programming Remote Sensor Operation Section 15 Contents: Installing the Remote Sensors........15.2 Controlling or Reading the Remote Temperature (RS1)...15.3 Averaging the Remote Sensor (RS1) with the Thermostat Sensor........15.4 Page 15.1... - Page 78 24VAC thermostat wiring. Electrical interference may cause the sensor to give incorrect temperature readings. With the T2900 thermostat, you can connect up to eight wired remote sensors. Each of these sensors must be wired in a linear or daisy chain fashion; do not use stub connections or form a star Network.
- Page 79 Controlling or Reading the Remote Temperature (RS The thermostat may be programmed to only READ the remote sensor or CONTROL to the remote sensor. Refer to advanced setup step #37 below. Read Only Sensor (RS1): If step #37 is set to only READ to the remote sensor, the thermostat will not use this sensor for temperature control.
- Page 80 Averaging the Remote Sensor (RS ) with the Thermostat Sensor If step #37 is set to control to the remote sensor, the thermostat will ignore the reading of its internal temperature sensor and only display the temperature reading from the remote sensor. The degree icon on the thermostat will blink once per second to indicate that a remote sensor reading is being displayed.
-
Page 81: Programming The Dry Contact
SECTION 16 Programming the Dry Contact Section 16 Contents: Dry Contact Operation.... 16.2 Dry Contact Polarity....16.2 Dry Contact Programming..16.3 Random Start Operation..16.4 Page 16.1... -
Page 82: Dry Contact Operation
Dry Contact Operation If the dry contact is going to be used, select YES in step #39. If the dry contact is not going to be used, select NO in step #39 below. DRY CONTACT POLARITY - The terminals may be set to be Normally Open (NO) or Normally Closed (NC) in step #40. - Page 83 Dry Contact Programming OCCUPIED 1 OR SERVICE THE CONDENSATE DRAIN PAN - If O ccupied 1 is selected in step #41 (below), when the dry contact is energized the thermostat will be forced into Occupied 1 setpoints and the Occupied 1 icon will blink (Section 6). The thermostat must be in Program On mode for this feature to have any effect.
-
Page 84: Light Activated Operation
Random Start Operation This feature allows a 2 to 30 second delay before energizing the thermostat outputs after any of these events: Loss of Power to the thermostat: When power to the thermostat is interrupted and then restored, Random Start will lockout the outputs of the thermostat for a random amount of time. -
Page 85: Light Activated Operation
SECTION 17 Light Activated Operation Section 17 Contents: Setting up the Thermostat for Light Activated Operation........17.2 Adjusting the Light Sensor..17.3 Page 17.1... -
Page 86: Light Activated Operation
Press the PROGRAM button to leave the Setup screens. If no buttons are pressed, the display will leave the setup screens after 30 seconds. The Light Sensor is located on the top of the thermostat. T2900 Light Sensor Page 17.2... - Page 87 Adjusting the Light Sensor The light sensor can be adjusted for variable degrees of sensitivity. The sensitivity adjustment screw is located on the side of the thermostat, as illustrated below. Turning the screw clockwise increases the sensitivity of the sensor to light. To check for correct sensitivity, place the thermostat in the Program On mode.
-
Page 88: Energy Save Operation
6am in an effort to bring the temperature to its correct setting at exactly 6am. The T2900 learns from experience, so please allow 4-8 days after a program change or after initial installation to give Energy Save time to adjust to local weather, the construction of your home, and your heating and cooling system. -
Page 89: Programming Run-Time Alerts
SECTION 19 Programming Run-Time Alerts Section 19 Contents: Setting and Resetting the Service Filter (Fan Run-Time) Alerts........19.2 Setting and Resetting the UV Light Run-Time Alerts.....19.3 Setting and Resetting the Humidify Run-Time Alerts..19.4 Page 19.1... - Page 90 How to Set and Reset the Service Filter (Fan Run-Time) Alert This counter keeps track of the number of hours of fan run-time whether the fan is energized in the Heating or Cooling modes, or in stand alone fan operation. The Service Filter icon will appear after the preset number of hours of fan run-time in step #45 (below) has been achieved.
- Page 91 How to Set and Reset the UV Light Run-Time Alert This counter keeps track of the number of days since the UV Light counter has been reset. The UV Light icon will appear after the number of days has been achieved, as shown in step #46 (below). Setting the counter to zero in Step #46 will prevent the Service UV Light icon from ever appearing.
- Page 92 How to Set and Reset the Humidifier Run-Time Alert This counter keeps track of the number of days since the Service Humidify icon was last reset; this icon will appear after the number of days set in step #47 (below) has elapsed. Setting this counter to zero in step #47 will prevent the Service Humidify icon from ever appearing.
-
Page 93: Programming Holiday Mode
SECTION 20 Programming Holiday Mode When the thermostat is programmed for a Holiday mode, it will take effect at 12:00 am of the next day. In order for the Holiday mode to take effect the thermostat must be in the Program On mode. The thermostat will control to the Unoccupied cooling and heating set- points set in Section 6, pages 6.2 and 6.3. - Page 94 Programming Holiday Mode (continued) HOLIDAY DISPLAY - When the thermostat is placed into the Holiday mode, the thermostat will display the screen shown below. To return the thermostat to normal operation from Holiday mode, press the HOLIDAY button and adjust the number of days in step #1 to zero (see previous page).
-
Page 95: Configuring The Misc Outputs
SECTION 21 Configuring the MISC Outputs Section 21 Contents: Configuring the Jumpers..21.2 Explanation of Jumper Settings........21.3 Page 21.1... - Page 96 Configuring the Jumpers For additional flexibility, your thermostat has three configurable outputs. These outputs are designed to have different functions depending on how the jumpers are set (below). Each output, labeled MISC1, MISC2, and MISC3 may be set for one of the five choices available.
- Page 97 Explanation of Jumper Settings W3 JUMPER SETTING If the jumper for MISC1, MISC2, or MISC3 is set to W3, the corresponding MISC screw terminal on the backplate will control a third stage of heat. W3 MULTI-STAGE OPERATION EXPLAINED - Section 13 The 3rd Stage of Heat is turned on when: (A) The 1st and 2nd stages have been on for the time required (steps #27 and #28, page 13.6).
- Page 98 Explanation of Jumper Settings (continued) HUM JUMPER SETTING If the jumper for MISC1, MISC2, or MISC3 is set to HUM, the corresponding MISC screw terminal on the backplate will control a humidification system. HUMIDIFICATION OPERATION - Section 9 If your HVAC unit is equipped with a humidification system the thermostat will provide power to the MISC1, MISC2, or MISC3 terminal of the thermostat when the humidity in the home falls below the humidity setpoint you have chosen.
- Page 99 Explanation of Jumper Settings (continued) ECON JUMPER SETTING If the jumper for MISC2 or MISC3 is set to ECON, the corresponding MISC screw terminal on the backplate will be connected to an economizer. ECONOMIZER OPERATION - If your HVAC unit is equipped with an economizer system, the thermostat will provide power to the MISC2 or MISC3 terminal of the thermostat when the thermostat is in an occupied time period.
-
Page 100: Factory Defaults, Calibration, And Sensors
SECTION 22 Factory Defaults, Calibration, and Sensors Section 22 Contents: Resetting the Thermostat to the Factory Default Settings..22.2 Calibrating the Temperature and Humidity Sensors...22.3 Viewing the Remote Temperature Sensors....22.4 Page 22.1... -
Page 101: Factory Default Settings
Resetting the Thermostat to the Factory Default Settings (for default values see page 24.1) If, for any reason, you desire to return all the stored settings back to the factory default settings, follow the instructions below. WARNING: This will reset all Time Period and Advanced Programming to the default settings. -
Page 102: Calibrating The Temperature And Humidity Sensors
Calibrating the Temperature and Humidity Sensors Under normal circumstances it will not be necessary to adjust the calibration of the temperature and humidity sensors. If calibration is required, please contact a trained HVAC technician to correctly perform the following procedure. 12:00 Place the thermostat in the MODE... - Page 103 Viewing the Remote Temperature Sensors Each sensor is programmed with a “hard-coded” address that the thermostat “scans” in order from lowest to highest. Therefore, in order to determine which sensor corresponds to the number on the setup screen you will need to disconnect each sensor from the group in order to determine which sensor number reads dashes.
-
Page 104: Accessories
SECTION 23 Accessories ACCESSORY PORT - The RJ11 Jack is used to connect the T2900 to the IR Receiver (ACC0431) for wireless communication or the EZ Programmer (ACC0432) for easy downloading or uploading of thermostat information. The Accessory Port is located on the bottom of the thermostat. -
Page 105: Advanced Setup Table
SECTION 24 Advanced Setup Table Step# Description Range Step# Description Range Df* Yes/No Minutes Between Programmable 13.6 0-60min Thermostat Stage 1 & 2 Yes/No Minutes Between 13.6 0-60min Auto-Changeover Thermostat Stage 2 & 3 Fan Off Delay 0, 30, 60, 2nd Stage turn off at 13.7 On/Off... - Page 106 SECTION 25 Index front panel, 2.2 dehum, 10.6 humidity, 2.2, 5.3, minutes of run- 9.4, 10.4 time, 13.4, 13.6 Holiday, 2.2, 5.2, 21.5, 24.1 15.3, 20.1 turn off Accessory Port, 23.1 Alerts mode, 1.3, 2.2, 4.2, temperature, 8.3, 22.2 13.7, 24.1 see Run-Time Auto outdoor, 2.2, 5.2...
- Page 107 SECTION 25 SECTION 25 Index Index display, 2.4 service pan, 16.3 Fan, setting, 1.2, 3.2 Random start, 16.4 button function, see Deadband Buttons 1st stage, 13.4-13.5, off time delay, 7.3, 24.1 24.1 2nd stage, 13.4-13.5, on during heat, see 21.3, 21.5, 24.1 Electric Heat 3rd stage, 13.4-13.5, Economizer...
- Page 108 SECTION 25 Index 12.4 minutes of run- icon, 2.5, 5.2 time, 13.4, 13.6, security setpoint, 8.4 24.1 temperature, 5.2 2nd stage Holiday Jumpers deadband, see button, see Buttons DEHUM, 21.4 Deadband light activation, 17.2 ECON, 21.5 emergency heat, mode, 20.1-20.2 ELEC, 12.3 12.4 programming, 20.1-...
- Page 109 SECTION 25 SECTION 25 Index Index random start, 16.4 Thermostat, 4.2, Off Mode, 1.3, 2.3 sensor, 17.2 4.4-4.5 Outdoor adjustment, 17.3 Normally button, see Buttons Locked Indication Open/Closed, icon, 2.3 see Keypad Lockout dry contact, 16.2 sensor, 2.3, 5.2, 13.1- programmable 13.2, 15.2, 22.4 icon, 2.5, 5.2...
- Page 110 SECTION 25 Index override, see Override outdoor temperature, setpoint limits, 8.4 see Outdoor tips, 6.5 read to, 15.3 worksheet, back page viewing, 22.4, 24.1 wiring, 15.2 Programmable Output Schedule, Daily, phone control, 14.7 Reset see Program jumper setting, 14.2, thermostat settings, 2nd stage turn off 21.3 see Factory Defaults...
- Page 111 SECTION 25 SECTION 25 Index Index security, 8.4 unoccupied, 6.2-6.3 Setup Icon, 2.4 Simplest Operation, 4.2-4.3 Unoccupied Smart Fan, 7.2 icon, 2.3 Smart Recovery, see operation, 6.5 Energy Save override, see Override setpoint, 6.2-6.3 UV Light icon, 2.5 resetting, see Reset Terminal, MISC, see run-time, see Run- Time...
- Page 112 Section 26 Warranty One-Year Warranty - This Product is warranted to be free from defects in material and workmanship. If it appears within one year from the date of original installation, whether or not actual use begins on that date, that the product does not meet this warranty, a new or remanufactured part, at the manufacturer’s sole option to replace any defective part, will be provided without charge for the part itself provided the defective part is returned to the distributor through a qualified servicing dealer.
- Page 113 Programming Worksheet see Section 6 DAY PERIOD START TIME COOL HEAT Unoccupied Occupied 1 Occupied 2 Occupied 3 Unoccupied Copy Mon Occupied 1 Occupied 2 Occupied 3 Unoccupied Copy Tue Occupied 1 Occupied 2 Occupied 3 Unoccupied Copy Wed Occupied 1 Occupied 2 Occupied 3 Unoccupied...
Need help?
Do you have a question about the T2900 and is the answer not in the manual?
Questions and answers