Table of Contents
Advertisement
Advertisement
Table of Contents

Related Manuals for Roberts solarDAB 2


Summary of Contents for Roberts solarDAB 2
- Page 1 DAB / FM RDS digital solar radio Please read this manual before use...
-
Page 2: Table Of Contents
Contents Controls ...............2-3 Scan sensitivity - FM ............20 Battery operation using rechargeable batteries ....4 Software version ............21 Battery operation using alkaline batteries ......5 System reset ..............22 Using the AC adaptor .............6 Headphone socket ............23 Using solar power ............7 Auxiliary input socket ............23 Operating your radio - DAB ..........8 A few words about batteries ........24-25 Selecting a station - DAB ..........9... -
Page 3: Controls
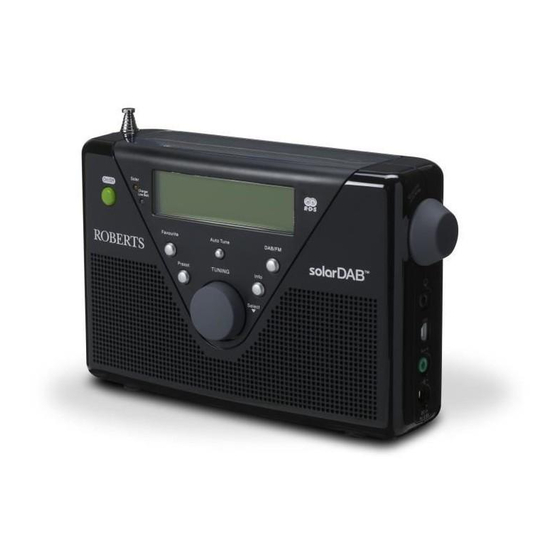
Controls (Front) 1. Tuning control 5. Telescopic aerial 9. Auto Tune button 2. Preset button 6. Solar indicator 10. DAB / FM button 3. Favourite button 7. Charge / Low battery indicator 11. Info button 4. On / Off button 8. - Page 4 Controls 13. Volume control 14. Headphone socket 15. USB socket 16. Auxiliary input socket 17. DC input socket 18. Battery compartment...
-
Page 5: Battery Operation Using Rechargeable Batteries
Battery operation using rechargeable batteries - included (also see page 24) 1. Remove the battery cover on the back of the unit by pushing the battery door in slightly and then downwards in the direction of the arrows in the diagram. 2. -
Page 6: Battery Operation Using Alkaline Batteries
• We would recommend for economy that the solarDAB 2 is used via the AC adaptor whenever possible with battery operation for occasional or stand-by use only. If extended listening using batteries is anticipated,... -
Page 7: Using The Ac Adaptor
Using the AC adaptor 1. Insert the adaptor plug into the DC in socket on the right hand side of your radio. 2. Plug the adaptor into a standard 13A mains socket outlet. Whenever the adaptor is plugged in to the radio and switched on at the mains the batteries are automatically disconnected. -
Page 8: Using Solar Power
Using solar power Important - The radio does not need to be switched on in order NOTE: Best performance of the solar panel will be achieved when the sun for the solar panel to operate. is directly overhead, and the sunlight is unobstructed by clouds, foliage, curtains, and the like. -
Page 9: Operating Your Radio - Dab
Operating your radio - DAB 1. Carefully extend the telescopic aerial. 2. Press the On/Off button to switch on your radio. The display will show "Welcome to DAB". 3. If this is the fi rst time the radio is used a quick scan of the Band III DAB channels will be carried out. -
Page 10: Selecting A Station - Dab
Selecting a station - DAB 1. The top line of the display shows the name of the station currently selected. 2. Rotate the Tuning control to scroll through the list of available stations on the lower line of the display. Stop rotating the Tuning control when you fi... -
Page 11: Display Modes - Dab
Display modes - DAB Your radio has a range of display modes:- 1. Press the Info button to cycle through the various modes. a. Scrolling text Displays scrolling text messages such as artist/track name, phone in number etc. b. Program Type Displays the type of station being listened to e.g. -
Page 12: Finding New Stations - Dab
Finding new radio stations - DAB As time passes new stations may become available. To fi nd new stations proceed as follows:- 1. Press and release the Auto Tune button. The display will show "Scanning..." and your radio will perform a scan of the Band III DAB channels. -
Page 13: Manual Tuning - Dab
Manual Tuning - DAB Manual tuning allows you to tune directly to the various DAB Band III channels. UK DAB stations located in the range 11B to 12D. 1. Press and hold in the Info button until the display shows "Manual tune". -
Page 14: Dynamic Range Control (Drc) Settings - Dab
Dynamic Range Control settings - DAB Dynamic Range Control (also known as DRC) can make quieter sounds easier to hear when your radio is used in a noisy environment. 1. Press the On/Off button to switch on your radio. 2. Press and hold in the Info button. The display will show “Manual tune.”... -
Page 15: Operating Your Radio - Search Tuning - Fm
Operating your radio - Search tuning - FM 1. Carefully extend the telescopic aerial fully. 2. Press the On/Off button to switch on your radio. 3. Press the DAB/FM button to select the FM band. 4. Press and immediately release the Auto tune button, your radio will scan in an upwards direction (low frequency to high frequency) and stop automatically when it fi... -
Page 16: Manual Tuning - Fm
Manual tuning - FM 1. Press the On/Off button to switch on your radio. 2. Press the DAB/FM button to select the FM band. Carefully extend the telescopic aerial fully for FM reception. 3. Rotate the Tuning control to tune to a station. With each click of the control the frequency will change up or down by 50 kHz. -
Page 17: Display Modes - Fm
Display modes - FM In FM mode the bottom line of the display can be set to any of the following display options:- 1. Press the Info button to cycle through each of the options. a. Scrolling text Displays scrolling text messages such as artist/track name, phone in number etc. -
Page 18: Favourite Button
Favourite button Your radio is fi tted with a button which when pressed will automatically select the required waveband and tune to your Favourite radio station. With this button you can store one favourite station from either the DAB or FM wavebands. To set up your favourite station, follow these steps: 1. -
Page 19: Preset Stations Dab And Fm
Preset stations - DAB and FM To make it easier for you to tune your radio to the stations that you prefer, you may store selected radio stations as presets. Your radio holds presets separately for DAB and FM radio modes. You may set as many or as few presets as you like in each mode. -
Page 20: Fm Stereo/Mono (Headphones Only)
FM Stereo/Mono (Headphones only) 1. If a station being received is weak some hiss may be audible (especially when listening using headphones). To reduce this, press and release the Tuning control so that the display shows "Switch to Mono". Your radio will switch to mono mode. -
Page 21: Scan Sensitivity - Fm
Scan sensitivity setting - FM Your radio will normally scan for FM broadcasts which are strong enough to give good reception. However, you may wish the Auto-scan function to also be able to fi nd weaker signals, possibly from more distant radio transmitters. -
Page 22: Software Version
Software version The software display cannot be altered and is just for your reference. 1. To view the software version on the display, ensure your radio is in DAB mode and press and hold the Info button for 2 seconds. 2. -
Page 23: System Reset
System reset If your radio fails to operate correctly, or some digits on the display are missing or incomplete, it may be possible to restore normal operation by carrying out a System Reset operation on your radio. This will restore the radio's settings to their factory defaults. -
Page 24: Headphone Socket
Headphone socket A 3.5mm Headphone Socket located on the right hand side of your radio is provided for use with either headphones or an earpiece. Inserting a plug automatically mutes the internal loudspeaker. IMPORTANT: Excessive sound pressure from earphones and headphones can cause hearing loss. -
Page 25: A Few Words About Batteries
A Few Words about Batteries… Rechargeable batteries Your Roberts solarDAB 2 radio has been designed to use a choice of Your solarDAB 2 radio uses a range of methods to ensure correct and power sources. You may plug it into the mains using the supplied high- safe charging of Rechargeable Nickel-Metal-Hydride or Nickel Cadmium effi... - Page 26 If you use the radio powered from the batteries, the battery light will be To avoid danger and risk of injury, please follow off until the batteries are exhausted. The battery light will then show red these guide lines for a short while before the radio switches itself off. It does this in order that the batteries are not excessively discharged.
-
Page 27: Display Backlight
USB socket for software upgrade Software updates for your solarDAB 2 may be available in the future. If you register your product at www.robertsradio.co.uk/register and include a valid e-mail address you will receive notifi cation of software updates. -
Page 28: General
• Your radio should not be exposed to dripping or splashing and that General no objects fi lled with liquids, such as vases, shall be placed on the Do not allow this radio to be exposed to water, steam or sand. Do not leave radio. -
Page 29: Specifi Cations
Specifi cations Circuit Features Power Requirements Loudspeaker 63mm Mains AC 100 240V 50/60Hz (adaptor) Batteries 3 x LR6 (AA size) Output Power 1 Watt Battery Life Headphone socket 3.5mm dia. Up to 20 hours of listening for 4 hours a day at normal volume using alkaline cells. -
Page 30: Notes
Notes ................................................................................................................................................................................................................................................................................................................................................................................................................................................................................................................................................................................................................................................................................................................................................................................................................................................................ -
Page 31: Guarantee
In the event that it is not possible to return the instrument to the Roberts' dealer from whom it was purchased, please contact Roberts Radio Technical Services at the address shown on the rear of this manual. - Page 32 ROBERTS RADIO TECHNICAL SERVICES 97-99 Worton Road Isleworth Middlesex TW7 6EG Technical Helpline :- 020 8758 0338 (Mon-Fri during offi ce hours) http://www.robertsradio.co.uk © 2009 Roberts Radio Limited Issue 1...
Need help?
Do you have a question about the solarDAB 2 and is the answer not in the manual?
Questions and answers