Table of Contents
Advertisement
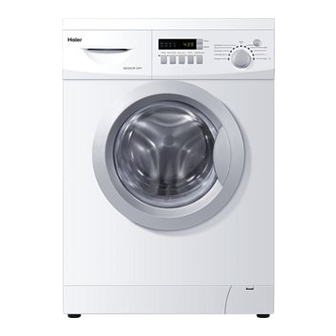
WASHER DRYER
HWD–C1000TXVE-U
HWD–C1200TXVE-U
USER MANUAL
HWD–C1000TXVE ME-U
HWD–C1200TXVE ME-U
Wash
Rinse
Spin Dry
Delay
Extra
Wash+Dry
Eco
rinse
SENSOR DRY
Temp
Temp
Wash
Wash
Speed
Speed
Quickwash
Quickwash
Rinse
Rinse
Wool
Wool
Spin
Spin
Start/
Synthetics
Synthetics
Dry
Dry
Pause
Cotton&Linen
Cotton&Linen
Iron
Iron
Prewash
Prewash
Air wash
Air wash
Advertisement
Table of Contents

Related Manuals for Haier HWD–C1200TXVE-U


Summary of Contents for Haier HWD–C1200TXVE-U
- Page 1 WASHER DRYER USER MANUAL HWD–C1000TXVE ME-U HWD–C1000TXVE-U HWD–C1200TXVE ME-U HWD–C1200TXVE-U Temp Temp Wash Rinse Spin Dry Wash Wash Speed Speed Quickwash Quickwash Rinse Rinse Wool Wool Spin Spin Delay Extra Start/ Synthetics Synthetics Wash+Dry rinse Pause Cotton&Linen Cotton&Linen Iron Iron Prewash Prewash Air wash...
-
Page 2: Table Of Contents
04 - 09 10 - 15 16 - 20 BEFORE USE USiNg thE AppLiANcE MAiNtENANcE ¬ Important Safety Information . .03 ¬ Operational functions . . . . . . . . 10 ¬... -
Page 3: Before Use
BEFORE USE ImpoRtAnt SAfEtY InfoRmAtIon Do not use a multiple socket extension cord . A separate earthed socket is required which shall be accessible at all times . If the mains cord becomes damaged, it must be replaced by the manufacturer, its service agent or similarly qualified person ELEctRicAL cONNEctiON (UK ONLY) with a lead of the same type and rating to avoid a hazard . -
Page 4: Components
BEFORE USE ComponEntS thANKS FOR pURchASiNg A hAiER pRODUct please read these instructions carefully before using this appliance . The instructions contain important information which will help you get the best out of the appliance and ensure safe and proper installation, use and maintenance . -
Page 5: Preparation
BEFORE USE pREpARAtIon pREpARiNg thE MAchiNE Remove all the packing materials to prevent unsteadiness, including the polystyrene base . Upon opening the package, water drops may be seen on the plastic bag and the porthole . This is normal phenomenon resulting from water tests in the factory . DEScRiptiON Power switch Drain hose... -
Page 6: Safety Instructions
BEFORE USE SAfEtY InStRuCtIonS BEFORE SWitchiNg thE AppLiANcE ON FOR thE FiRSt tiME DO ... DO NOt ..ensure you connect the appliance directly to a . . . touch or use the appliance when barefoot or with wet or domestic mains water supply . -
Page 7: Installation
BEFORE USE InStALLAtIon ADjUStiNg thE BOttOM cOvER Before removing the transportation bolts, please fix the bottom cover to the bottom of the washer dryer . Lay down the machine (fig . 1 . ) , screw off the feet and adjust the bottom cover with the four holes corresponding the screw fig.1 holes of the feet . - Page 8 BEFORE USE InStALLAtIon iNLEt hOSE 1 . Connect the nut on the inlet hose to the connector on the water valve . 2 . Apply inlet hose to a water tab with cold, fresh water . Note: Use the hose-set supplied with the appliance.
-
Page 9: Control Panel
BEFORE USE ContRoL pAnEL Temp Wash Wash Rinse Spin Quickwash Rinse Speed Wool Spin Synthetics Delay Extra rinse Wash+Dry ECO Start/Pause Cotton&Linen Iron Prewash Air wash SENSOR DRY Power button Display Dry button Program selection dial Wash status indicator Extra rinse button Detergent distribution drawer Start/Pause button Delay button... -
Page 10: Operational Functions
USiNg thE AppLiANcE USiNg thE AppLiANcE ContRoL pAnEL OpERAtiONAL FUNctiONS _ Instructions are printed on the front of the drawer . ¬ Detergent distribution drawer Open the drawer, three compartments can be seen: compartment 1: Pre-wash detergent compartment 2: Standard washing - extra-fast washing compartment 3: Softener, conditioning agent,perfume, etc . -
Page 11: Program Selection
USiNg thE AppLiANcE pRogRAm SELECtIon pROgRAM MODES 1 Detergent compartment for prewash mode 2 Detergent compartment 3 Compartment for softener and other additives TEMPERATURE DEFAULT PROGRAM MAXIMUM PRESET RECOMMENDED LAUNDRY SPIN SPEED 1 ¬ Prewash 0 ° to 90 °C 40 °C Heavy soiled laundry 1000 rpm 2 ¬... -
Page 12: Technical Data
USiNg thE AppLiANcE USiNg thE AppLiANcE ConSumptIon AnD tECHnICAL DAtA cONSUMptiON tABLE The wash cycle times are intended as a guide only . The actually used time may vary due to different water pressure, initial water temperature, etc . pRogRAm EnERgY ConSumptIon WAtER ConSumptIon WASHIng tImE ¬... -
Page 13: Washing & Drying
USiNg thE AppLiANcE WASHIng & DRYIng pOWER SUppLY Connect the washer dryer to the power supply (220V to 240V~/50Hz) . WAtER cONNEctiON Turn on the tap . The water must be clean and clear . Note: Before use, check for leakage in the joints between the tap and the inlet hose by turning on the tap . - Page 14 USiNg thE AppLiANcE USiNg thE AppLiANcE WASHIng&DRYIng LOADiNg thE MAchiNE Mixe d Jeans Intens e Speed Comfort 40 Spor t W ool Hand Powe r wash Speed u p Te mp Synt- Rinse hetic Cotton Spin Delay E xtra Rinse Highwash Rinse Hold Start/ Paus e...
- Page 15 USiNg thE AppLiANcE WASHIng & DRYIng SEttiNg WAShiNg tEMpERAtURE Temp Wash Rinse Spin Quickwash Press and hold down the temperature button until the desired temperature is Speed Wool Synthetics Delay Extra rinse Start/Pause selected or the symbol for no water heating . Cotton&Linen Prewash SEttiNg SpiN SpEED...
- Page 16 USiNg thE AppLiANcE WASHIng&DRYIng cARE chARt Bleachable in cold water Resistant material Don't dry clean Delicate fabric Do not bleach Dry flat Washable at 95° C Iron at 200° C Hung to dry Washable at 60° C Iron at 150° C Dry on clothes hanger Iron at 100°...
-
Page 17: Maintenance
MAiNtENANcE CLEAnIng & CARE AFtER WAShiNg Turn off the water supply and pull out electricity plug after each wash . Open the washer dryer door to prevent formation of moisture and odours . If the washing machine is left idle for a long period, drain the water in the machine and replace the drain hose . - Page 18 MAiNtENANcE CLEAnIng&CARE WAtER iNLEt AND iNLEt FiLtER To prevent blockage to the water supply by ingress of foreign substances, clean the water inlet and inlet filter regularly . MOviNg thE MAchiNE If the machine is to be moved to a distant location, replace the transportation locks removed before installation to prevent damage as shown below .
-
Page 19: Display Codes
MAiNtENANcE DISpLAY CoDES DiSpLAY cODES AND SpEciAL FUNctiONS CoDES CAuSES SoLutIonS _ Shut the door properly Err1 ¬ Washer door is not properly shut . _ Clean the filter and check the drain hose for blockage . Err2 ¬ Drainage error . Water is not emptied within 4 minutes . -
Page 20: Trouble Shooting
MAiNtENANcE tRoubLE SHootIng tROUBLEShOOtiNg In the unlikely event of difficulties with your appliance please follow the troubleshooting guide below . If the problem persists, contact the retailer if the machine is still within the guarantee period . If the appliance is out of guarantee, contact an approved service agent on 0845 025 3025 . - Page 21 We apologise for any inconvenience caused by minor inconsistencies in these instructions, which may occur as a resultof product improvement and development . KESA ELECTRICALS U .K HU1 3AU 01/07/2009 Haier Europe Trading S . r . l . Tel + 39 0332 24511 Via De Cristoforis 12...