Table of Contents
Advertisement
Quick Links
® ®
®
CUSTOM EDITION
Please read this manual and save it
with your original sales receipt.
Tools needed for assembly: Phillips Screwdriver
(not included); Assembly Tool (included). Use only with
a Power Wheels
®
12 Volt Lead Acid Rechargeable
Battery with Built-in Thermal Fuse and Power Wheels
®
12 Volt Charger with Type 12V Connector (both included).
Requires four "C" (LR4) alkaline batteries (not included)
for FM Radio/Simulated CD Player/Digital Clock/
Microphone operation.
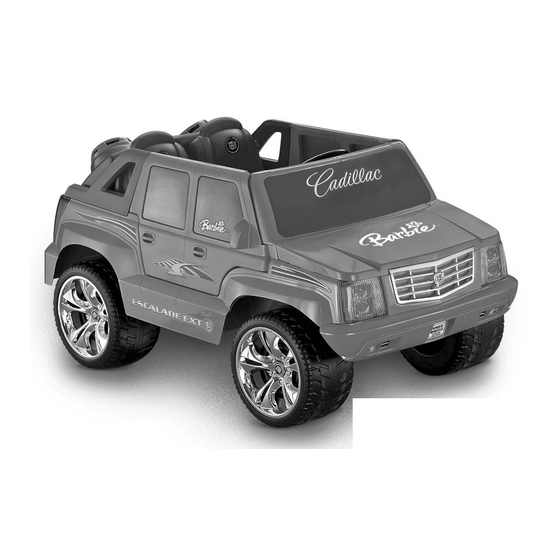
Product features may vary
from the picture above.
Owner's Manual
with Assembly
Instructions
For Model J5246
Advertisement
Table of Contents

Related Manuals for Power Wheels CADILLAC ESCALADE CUSTOM EDITION J5246


Summary of Contents for Power Wheels CADILLAC ESCALADE CUSTOM EDITION J5246
- Page 1 ® ® ® CUSTOM EDITION Please read this manual and save it with your original sales receipt. Tools needed for assembly: Phillips Screwdriver (not included); Assembly Tool (included). Use only with a Power Wheels ® 12 Volt Lead Acid Rechargeable Battery with Built-in Thermal Fuse and Power Wheels ®...
-
Page 2: Table Of Contents
• Use this vehicle ONLY outdoors. Most interior flooring can be damaged by riding this vehicle indoors. Fisher-Price responsible for damage to the floor if the vehicle is used indoors. • To prevent damaging the motors and gears, teach your child to stop the vehicle before switching direction. -
Page 3: B Warnings And Cautions
WARNINGS AND CAUTIONS ELECTRICAL HAZARD • Battery can fall out and injure a child if vehicle tips over. Always use battery retainer. • PREVENT FIRE - Never modify the electrical system. Alterations could cause a fire resulting in serious injury and could also ruin the electrical system. -
Page 4: C Parts
• If you experience a problem with this product, or are missing a part, please call us at 1-800-348-0751, rather than return this product to the store. • Please identify all parts before assembly and save all packaging material until assembly is complete to ensure that no parts are discarded. Vehicle Grille PARTS... - Page 5 PARTS Steering Column 2 Front Wheels (Left and Right) Steering Wheel 2 Wheel Covers Steering Wheel Cap 2 Wings Speaker Box (Left and Right) Assembly 2 Headlights 2 Door Plates Steering Column Cap (Left and Right) 2 Bushings 2 Hubcaps 2 Taillights (Left and Right) J5246pr-0921...
- Page 6 PARTS 12 Volt Battery 2 Short Seat Belts 12 Volt Charger " Washer – 2 " -16 Lock Nut – 2 Long Seat Belt " x 1 " Pin – 1 #8 x " Screw – 37 Assembly Tool " Screw – 2 For your convenience, we included extra fasteners! Note: Tighten and loosen all screws with a Phillips screwdriver.
-
Page 7: Parts Picture
Note: Some parts shown are assembled on both sides of the vehicle. Vehicle Door Plates - 2 Front End Seat Bumper Short Seat Belts - 2 Grille Long Seat Belt Headlights - 2 Wings - 2 Doors - 2 Front Wheels - 2 Hood Wheel Covers - 2 Windshield/Dash... -
Page 8: E Battery Charging
ELECTRICAL HAZARD WARNING • Battery can fall out and injure a child if vehicle tips over. Always use battery retainer. • PREVENT FIRE - Never modify the electrical system. Alterations could cause a fire resulting in serious injury and could also ruin the electrical system. -
Page 9: Ebattery Charging
BATTERY CHARGING Battery • Plug the charger connector into the battery • Plug the charger into a standard wall outlet Note: If power flow to the wall outlet is controlled by a switch, make sure the switch is “ON”. Use the charger only in a wall outlet. Do not plug the charger into a ceiling outlet. - Page 10 Hint: There is a right and a left front wheel. Place the right wheel (marked R) on the passenger side of the vehicle, and the left wheel (marked L) on the driver side of the vehicle. • Place a front wheel onto each front axle. Wheel Cover •...
-
Page 11: Top View
Vehicle • Fit the front end onto the vehicle. • Insert the tabs on the back edge of the front end into the slots in the vehicle. " screws through the front end and into the • Insert two #8 x vehicle. - Page 12 " screws into the bumper and tighten. • Insert seven #8 x • Fit the grille onto the bumper. • Push down to fit the tabs on the grille into the slots in the bumper. ASSEMBLY Bumper • Insert two #8 x Grille Bumper •...
- Page 13 • Fit the headlights (left and right) onto the bumper. " screws into the top edge of each headlight. • Insert two #8 x Tighten the screws. J5246pr-0921 ASSEMBLY Headlights • Fit the door pegs onto the holes near the front end of the vehicle. Hint: There is a left and right door.
-
Page 14: Back View
" screws into each plate and tighten. • Insert three #8 x Dash Connector BACK VIEW • Separate the radio and dash connector wires from the motor harness connector. • Position the motor harness connector towards the front of the vehicle and into the battery compartment. -
Page 15: Bottom View
" screws into the base of the windshield/dash. • Insert four #8 x Tighten the screws. DASH VIEW " screws into the sides of the windshield/dash. • Insert two #8 x Tighten the screws. • Close the doors on the vehicle. J5246pr-0921 ASSEMBLY IMPORTANT! Turn the vehicle on its side or over to complete... - Page 16 Large Opening Steering Wheel DASH VIEW • Position the steering wheel so that the large opening is UP. • Fit the steering wheel onto the steering column. Press Wheel Press Wheel Press Wheel Lift Steering Column • While pressing down on the steering wheel, grasp the steering column under the dash and pull it up as far as it will go.
- Page 17 Assembly • Insert and "snap" the key assembly into the slot in the dash. Loosen These Screws • Locate the FM Radio/Simulated CD Player/Digital Clock on the dash. • Loosen both screws in the battery compartment door. • Remove the battery compartment door. •...
- Page 18 Slot • Lower and fit the side tabs on the hood into the slots on each side of the front end of the vehicle. Short Seat Belts Long Seat Belt • Insert the fastener end of a short seat belt strap through the slot near the outer edge of the seat.
- Page 19 • Before applying the labels, wipe the surface of the vehicle with a clean, dry cloth to remove any dust or oils. • First apply the inside edge of a label to the back end of the vehicle. Next, apply the outside edge of the label to the side of the vehicle.
- Page 20 Speaker Box Assembly Speaker Connector • Position the speaker box assembly over the back end of the vehicle. • Plug both speaker connectors together. Hint: If the connectors do not fit together, do not force them. Simply turn one of them over and try again! Speaker Box Assembly •...
- Page 21 DECORATION Proper label application will help to keep the labels looking their best! When applying labels, keep the following guidelines in mind: • Wash your hands before applying the labels. • Before applying the labels, wipe the surface of the vehicle with a clean, dry cloth to remove any dust or oils. •...
-
Page 22: Gdecoration
DECORATION REAR VIEW X1000 DASH VIEW J5246pr-0921... -
Page 23: Battery Installation
BATTERY INSTALLATION IMPORTANT! Use only a Power Wheels ® 12 volt lead-acid rechargeable battery. Use of any other battery will damage your vehicle. Make sure that you charge the battery for at least 18 hours using the enclosed Power Wheels ®... -
Page 24: Ibattery Care And Disposal
BATTERY CARE AND DISPOSAL Care If a battery leak develops, avoid contact with the leaking acid and place the damaged battery in a plastic bag. See information below for proper disposal. If acid comes in contact with skin or eyes, flush with cool water for at least 15 minutes and call a physician. -
Page 25: Safe Driving Rules
SAFE DRIVING RULES RIDING HAZARD WARNING • Prevent Injuries and Deaths • Direct Adult Supervision Required • Never Ride at Night. • Keep Children Within Safe Riding Areas. These areas must be: - away from swimming pools and other bodies of water to prevent drownings - generally level to prevent tipovers - away from steps, steep inclines, cars, roads and alleys. -
Page 26: Vehicle Operation
IMPORTANT! Use this vehicle ONLY outdoors. Most interior floor- ing can be damaged by riding this vehicle indoors. Fisher-Price will not be responsible for damage to the floor if the vehicle is used indoors. Beginner Use - Low Speed Drive As assembled, your vehicle is ready to roll in low speed mph, maximum). -
Page 27: L Fm Radio/Simulated Cd Player/Digital Clock/Microphone Use
FM RADIO/SIMULATED CD PLAYER/ DIGITAL CLOCK/MICROPHONE USE Volume Power Eject Simulated Power/Volume • Press the power button to turn on or off. • Turn the volume dial to adjust to a comfortable listening level. Hint: The FM Radio will turn off automatically after about one hour of non-use. The Simulated CD Player will turn off automatically after about 10 minutes of non-use. -
Page 28: Mcharge Indicator
CHARGE INDICATOR Button 12 VOLT BATTERY CHARGE INDICATOR • Press the 12 volt battery charge indicator button to check the power level of your battery: All four lights means the 12 volt battery is 100% (fully) charged. Three lights means the 12 volt battery is 75% (mostly) charged. Two lights means the 12 volt battery is 50% charged. -
Page 29: Ofcc Note
FCC NOTE (United States Only) Note: This equipment has been tested and found to comply with the limits for a Class B digital device, pursuant to Part 15 of the FCC Rules. These limits are designed to provide reasonable protection against harmful interference in a residential installation. -
Page 30: Qproblems And Solutions Guide
PROBLEMS AND SOLUTIONS GUIDE IMPORTANT! If you experience a problem with your vehicle, first check the Problems and Solutions Guide below. If you still experience a problem, please contact Power Wheels Friday and 11 AM and 5 PM (EST) Saturday. Or, contact your local Power Wheels please visit us on-line at www.powerwheels.com, or call 1-800-348-0751. -
Page 31: Problems And Solutions Guide
PROBLEMS AND SOLUTIONS GUIDE PROBLEM POSSIBLE CAUSE Vehicle was running but Loose wires or loose connectors suddenly stopped Tripped thermal fuse Short run time (Less than Undercharged battery 1 - 3 hours per charge) Overcharged battery Battery is old and will not accept full charge Tripped thermal fuse J5246pr-0921... - Page 32 PROBLEMS AND SOLUTIONS GUIDE PROBLEM Vehicle runs in low speed, but does not run in high speed Please Note: The vehicle is designed to operate in low speed only in reverse When the foot pedal is pressed one rear wheel spins Vehicle runs sluggishly POSSIBLE CAUSE High speed lock-out not disconnected...
- Page 33 PROBLEMS AND SOLUTIONS GUIDE PROBLEM POSSIBLE CAUSE Sometimes the vehicle doesn’t Loose wire or connector run, but other times it does Motor or electrical switch damage When the foot pedal is pressed, Loose wire or connector the vehicle won’t run without a push “Dead Spot”...
- Page 34 PROBLEMS AND SOLUTIONS GUIDE PROBLEM FM Radio does not function FM Radio station changes automatically Simulated CD Player does not function Digital Clock display is faint or not visible I still hear sounds, but the display is blank on the FM Radio/ Simulated CD Player/Digital Clock FM Radio/Simulated CD Player/ Digital Clock function erratically...
-
Page 35: H4433Pr-0920 J5246Pr
H4433pr-0920 J5246pr-0921... - Page 36 For the location nearest you, visit us on-line at www.powerwheels.com. Fisher-Price, Inc., a subsidiary of Mattel, Inc., East Aurora, New York 14052 U.S.A. ©2005 Mattel, Inc. All Rights Reserved. Fisher-Price and Power Wheels are US trademarks of Mattel, Inc. Cadillac, the Wreath & Crest Emblem, Escalade, all related Emblems...
Need help?
Do you have a question about the CADILLAC ESCALADE CUSTOM EDITION J5246 and is the answer not in the manual?
Questions and answers