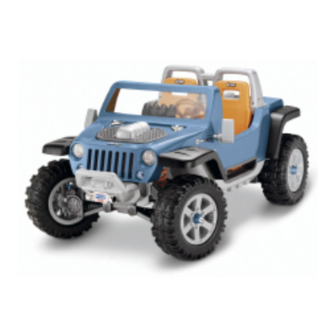
Power Wheels Hurricane K7112 Owner's Manual
Ultimate terrain traction
Hide thumbs
Also See for Hurricane K7112:
- Owner's manual with assembly instructions (32 pages) ,
- Owner's manual (32 pages)
Table of Contents
Advertisement
Jeep
®
Meijer.com
• Please read this manual
• Please read this manual
and save it with your original
and save it with your original
sales receipt.
sales receipt.
• Tools needed for assembly:
• Tools needed for assembly:
Phillips Screwdriver and Safety
Phillips Screwdriver and Safety
Scissors (both not included).
Scissors (both not included).
• Use only with the included
• Use only with the included
Power Wheels
Power Wheels
® ®
12 Volt Lead-
12 Volt Lead-
Acid, Rechargeable, orange
Acid, Rechargeable, orange
Battery with Built-in Thermal
Battery with Built-in Thermal
Fuse and a Power Wheels
Fuse and a Power Wheels
12 Volt Charger with type 12V
12 Volt Charger with type 12V
connector (both included).
connector (both included).
• Requires four "C" (LR14)
• Requires four "C" (LR14)
alkaline batteries for
alkaline
batteries for
FM Radio/Digital Clock
FM Radio/Digital Clock
operation (not included).
operation (not included).
Owner's Manual
with Assembly Instructions
For Models J4394 and K7112
® ®
Advertisement
Table of Contents

Related Manuals for Power Wheels Hurricane K7112


Summary of Contents for Power Wheels Hurricane K7112
- Page 1 (both included). • Requires four "C" (LR14) • Requires four "C" (LR14) alkaline alkaline batteries for batteries for FM Radio/Digital Clock FM Radio/Digital Clock operation (not included). operation (not included). Owner's Manual with Assembly Instructions For Models J4394 and K7112...
-
Page 2: Table Of Contents
Limited Warranty..................... 31 IMPORTANT INFORMATION • Your new vehicle requires adult assembly. Please set aside at least • If you have any questions about your Power Wheels ® vehicle, 60 minutes for assembly. -
Page 3: Warnings And Cautions
® ® - Use of Power Wheels components in products other than Power Wheels vehicles could cause overheating, fire or explosion. • The battery must be handled by adults only. The battery is heavy and contains sulfuric acid (electrolyte). -
Page 4: Parts
Meijer.com PARTS • If you experience a problem with this product, or are missing a part, please call us at 1-800-348-0751, rather than return this product to the store. • Please identify all parts before assembly and save all packaging material until assembly is complete to ensure that no parts are discarded. •... - Page 5 Meijer.com Steering Wheel Cap Steering Wheel 2 Side Mirrors (Left and Right) Rear Grille 4 Hubcaps Steering Column Rear Axle 2 Taillights 2 Wheel 4 Front Steering Retainers Axle Caps Column Cap 12 Volt Charger 12 Volt Orange Battery Part Not Shown: Label Sheet - 2 #8 x "...
-
Page 6: Parts Picture
Meijer.com PARTS PICTURE Note: Some parts shown are assembled to both sides of the vehicle. Vehicle Seat Bar Steering Column Short Seat Belt - 2 Front Grille Rear Grille Taillights - 2 Long Seat Belt Brush Guard Fender - 4 Wheel Retainer - 2 Parts Not Shown Rear Clip... -
Page 7: Battery Charging
If a thermal fuse in a battery continually trips under normal driving conditions, please contact your local Power Wheels ® Authorized ® - Use of Power Wheels components in Service Center. -
Page 8: Assembly
Meijer.com ASSEMBLY WARNING Children can be harmed by small parts, sharp edges and sharp points in the vehicle's unassembled state, or by electrical items. Care should be taken in unpacking and Orange Battery assembly of the vehicle. Children should not handle parts, including the battery, or help in assembly of the vehicle. - Page 9 Meijer.com Motor Harness Connector Rear Clip REAR VIEW • Pull the motor harness connector through the opening in the rear clip and into the trunk. • Fit the rear clip onto the rear end of the vehicle and over the rear bumper.
- Page 10 Meijer.com Seat Bar Taillights Seat • “Snap” both taillights to the rear clip. • Fit the seat bar to the back of the seat. • Insert four screws through the seat bar and into the seat. Tighten the screws. Short Seat Belt Seat Long Seat Belt •...
- Page 11 Meijer.com TOP VIEW TOP VIEW TOP VIEW SIDE VIEW • Insert four screws through the seat bar and into the vehicle. Tighten the screws. Note: The seat is adjustable and has three positions. You can move the seat back as your child grows. •...
- Page 12 Meijer.com Front Grille Brush Guard TOP VIEW • Fit the front grille to the grooves in the top of the brush guard, as shown. • Fit the four fenders marked 1, 2, 3 and 4, to the vehicle, as shown. •...
- Page 13 Meijer.com Steering Column Steering Column Cap Steering Column FRONT BOTTOM VIEW INSIDE VIEW • Fit the steering column cap onto the end of the steering column. • Wipe the steering column with a paper towel to remove any excess lubricant. •...
- Page 14 Meijer.com Front Axle Post Front Axle Cap Wheel Well • Fit a front axle cap onto the front axle post and hold it in place. • Insert a screw through the large opening in the front axle cap and Fender the hole in the front axle.
- Page 15 Meijer.com Front Axle Cap Rear Axle REAR BOTTOM VIEW • Fit a front axle cap onto the end of the front axle. • Slide the rear axle through the large opening near the rear of the vehicle, as shown. "Lug Nuts" •...
- Page 16 Meijer.com Wheel Retainer Steering Column Steering Wheel Tab • Fit a wheel retainer onto the end of the rear axle. INSIDE VIEW • Position the steering wheel so that the tab is upright. • Fit the steering wheel onto the end of the steering column. "...
- Page 17 Meijer.com Steering Wheel Cap Post Side Mirror Recessed Area • Fit the steering wheel cap onto the center of the steering wheel. • Insert two screws into the steering wheel cap and tighten. Right Side Mirror SIDE VIEW • Position the right side mirror with the recessed area facing up, as shown.
- Page 18 Meijer.com 1.5V x 4 "C" (LR14) Battery Safety Information In exceptional circumstances batteries may leak fluids that can cause a chemical burn injury or ruin your toy. To avoid battery leakage: • Do not mix old and new batteries or batteries of different types: alkaline, standard (carbon-zinc) or rechargeable (nickel-cadmium).
-
Page 19: Decoration
Meijer.com DECORATION • Before applying the labels, wipe the surface of the vehicle with a clean, dry cloth to remove any dust or oils. • Place the labels exactly as shown in the illustrations. For best results, avoid repositioning a label once it has been applied to the vehicle. •... - Page 20 Meijer.com BACK VIEW SIDE VIEW J4394pr-0921...
-
Page 21: Battery Installation
Use of any other battery will damage your vehicle. Make sure that you charge the battery for at least 18 hours using the enclosed Power Wheels ® volt charger before operating your vehicle for the first time. Charge Battery Retainer the battery for at least 14 hours after each use of the vehicle. -
Page 22: Battery Care And Disposal
• Return an exhausted battery to a federal or state approved lead- • After the first charge, recharge the battery for at least 14 hours acid battery recycler, such as a Power Wheels ® authorized service after each use. Never charge the battery longer than 30 hours. -
Page 23: Safe Driving Rules
Meijer.com SAFE DRIVING RULES Teach Safety Rules to Children RIDING HAZARD While children can quickly develop the skill necessary to drive this vehicle, it is important to remember that their judgment skills are still WARNING very immature. Unsupervised driving by children can lead to serious injury. -
Page 24: Vehicle Operation
Meijer.com VEHICLE OPERATION As assembled, your vehicle is ready to roll in low speed (2 mph, maximum). After your child has mastered the basic skills of driving and understands the rules for safe driving, it’s time to remove the high speed lock-out screw to allow the vehicle to operate in low or high speed. See the instructions on this page to remove the high speed lock-out screw. -
Page 25: Vehicle Care
• To ensure that your vehicle stays in good operating order, we recommend that you periodically have your vehicle checked by a ® Power Wheels authorized service center. For the location of the 12 VOLT BATTERY CHARGE INDICATOR authorized service center nearest you, please visit us on-line at www.powerwheels.com or call 1-800-348-0751. - Page 26 Meijer.com FM RADIO/DIGITAL CLOCK USE FM Radio Station/ Minute Adjust Hour Adjust Mute Main Reset Volume Time Display Power Scan Scan Reset Power/Volume • Press the power button to turn on or off. • Turn the volume dial to adjust to a comfortable listening level. Hint: The FM Radio will turn off automatically after several minutes of non-use.
-
Page 27: Problems And Solutions Guide
Consumer Relations, toll-free at 1-800-348-0751 between 9 AM - 7 PM (EST) Monday through Friday ® and 11 AM - 5 PM (EST) Saturday. Or, contact your local Power Wheels authorized service center. For the location nearest you, please visit us ®... - Page 28 If ® a thermal fuse continually trips, contact your local Power Wheels authorized service center. You have replaced the 12 volt orange battery that came with this ®...
- Page 29 Average battery life is 1 to 3 years depending on the vehicle use ® and use conditions. Replace the battery with a new Power Wheels 12 volt orange battery. Do not substitute parts. Vehicle is overloaded Make sure you do not overload the vehicle by allowing more than one rider at one time, by exceeding the 130 lb.
- Page 30 PROBLEM POSSIBLE CAUSE SOLUTION ® Loud clacking or grinding noise Broken gears Contact your local Power Wheels authorized service center for from a motor-gearbox diagnosis and repair. Charger gets warm during use It is normal for some chargers to get No action required.
-
Page 31: Fcc Statement
The six month limited reception, which can be determined by turning the equipment off and warranty applies only to the 12 volt battery included by Power Wheels ® on, the user is encouraged to try to correct the interference by one with the original purchase of the vehicle. - Page 32 Jeep Hurricane and its trade dress are used under license from DaimlerChrysler. ©DaimlerChrysler Corporation 2006 ® Fisher-Price and Power Wheels are U.S. trademarks of Mattel, Inc. Fisher-Price, Inc., a subsidiary of Mattel, Inc., East Aurora, New York 14052 U.S.A. ©2006 Mattel, Inc. All Rights Reserved.
Need help?
Do you have a question about the Hurricane K7112 and is the answer not in the manual?
Questions and answers