Jet JSG-6DC Operating Instructions And Parts Manual
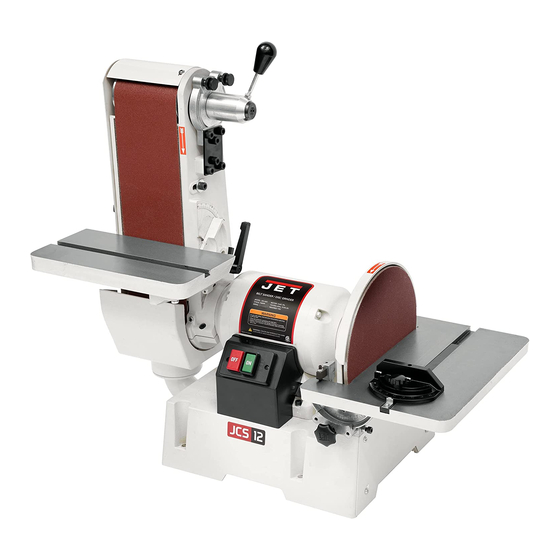
Combination belt/disc sander
Hide thumbs
Also See for JSG-6DC:
- Operator's manual (20 pages) ,
- Operating instructions and parts manual (28 pages)
Table of Contents
Advertisement
This .pdf document is bookmarked
Operating Instructions and Parts Manual
Combination Belt/Disc Sander
Model JSG-6DC
with optional open stand
with optional closed stand
WALTER MEIER (Manufacturing) Inc.
427 New Sanford Road
LaVergne, Tennessee 37086
Part No. M-708598
Ph.: 800-274-6848
Revision G 03/2010
www.waltermeier.com
Copyright © 2010 Walter Meier (Manufacturing) Inc.
Advertisement
Table of Contents

Subscribe to Our Youtube Channel
Related Manuals for Jet JSG-6DC


Summary of Contents for Jet JSG-6DC
- Page 1 This .pdf document is bookmarked Operating Instructions and Parts Manual Combination Belt/Disc Sander Model JSG-6DC with optional open stand with optional closed stand WALTER MEIER (Manufacturing) Inc. 427 New Sanford Road LaVergne, Tennessee 37086 Part No. M-708598 Ph.: 800-274-6848 Revision G 03/2010 www.waltermeier.com...
-
Page 2: Warranty And Service
Walter Meier is consistently adding new products to the line. For complete, up-to-date product information, check with your local Walter Meier distributor, or visit waltermeier.com. WARRANTY JET products carry a limited warranty which varies in duration based upon the product (MW = Metalworking, WW = Woodworking). WHAT IS COVERED? This warranty covers any defects in workmanship or materials subject to the exceptions stated below. -
Page 3: Table Of Contents
Optional Accessories ........................19 Replacement Parts ........................... 19 JSG-6DC Belt/Disc Sander Assembly ..................... 20 Parts List for JSG-6DC Belt/Disc Sander Assembly ................. 21 Closed Stand Assembly (Optional) ....................24 Open Stand Assembly (Optional)....................25 Parts List for Open Stand Assembly (Optional) ................25... -
Page 4: Warning
Warning 1. Read and understand the entire owner’s manual before attempting assembly or operation. 2. Read and understand the warnings posted on the machine and in this manual. Failure to comply with all of these warnings may cause serious injury. 3. - Page 5 20. Cluttered areas and benches invite accidents. Keep the area around the machine clean and free of scrap material, oil and grease. 21. Keep visitors a safe distance from the work area. Keep children away. 22. Make your workshop child proof with padlocks, master switches or by removing starter keys. 23.
-
Page 6: Introduction
Introduction This manual is provided by Walter Meier (Manufacturing) Inc., covering the safe operation and maintenance procedures for a JET Model JSG-6DC Belt/Disc Sander. This manual contains instructions on installation, safety precautions, general operating procedures, maintenance instructions and parts breakdown. This machine has been designed and constructed to provide years of trouble free operation if used in accordance with instructions set forth in this manual. -
Page 7: On/Off Switch Padlock
A padlock, stock no. 709012-A, is available from your local authorized JET distributor, or by calling Walter Meier (Manufacturing) Inc., at the phone number on the cover of this manual. -
Page 8: Grounding Instructions
Figure 3. It is recommended that the JSG-6DC Belt/Disc Sander, when operated at 115 volt, be connected to a grounded and dedicated, minimum 30 amp circuit with a 30 amp circuit breaker or time delay fuse. Local codes take precedence over recommendations. -
Page 9: Extension Cords
If you are not sure, have a registered electrician check the receptacle. It is recommended that the JSG-6DC Belt/Disc Sander, when operated at 230 volt, be connected to a grounded and dedicated, minimum 15 amp circuit with a 15 amp circuit breaker or time delay fuse. Local codes take precedence over recommendations. -
Page 10: Unpacking
Unpacking Open shipping carton(s) and check for shipping damage. Report any damage immediately to your distributor and shipping agent. Do not discard any shipping material until the Sander is assembled and running properly. Compare the contents of your carton(s) with the following parts list to make sure all parts are intact. - Page 11 Contents of Closed Stand Carton: (Optional Accessory – p/n 708598) See Figure 9. Stand Owner’s Manual (not shown) Hardware Bag*, containing: 4 Hex Cap Screws, M10 x 80 8 Flat Washers, M10 4 Lock Washers, M10 4 Hex Nuts, M10 (*Note: The closed stand hardware bag contains Figure 9 the same fasteners as the sander hardware bag,...
-
Page 12: Assembly
2. Carefully position the machine workbench or one of the optional JET stands. (Consult the assembly instructions that accompanied the stand.) 3. Bolt the unit firmly to secure it in position. Figure 11 shows it being bolted to the optional closed stand. -
Page 13: Belt Table
Note: The trunnion brackets are not identical; make sure the bracket with the raised indicator line is installed on the left side of the table. 4. Install a lock knob (D) on each threaded stud and tighten to hold the table in position. 5. -
Page 14: Workstop Assembly
4. Rotate disc a half turn and press other half of abrasive into place. Make sure to remove any entrapped air by pressing all parts of the abrasive against the disc. Abrasive Belt 1. Disconnect machine from power source. 2. Raise the belt arm to vertical position. 3. -
Page 15: Dust Collection
450 CFM (cubic feet per minute) is recommended. A variety of JET dust collectors is available; see our website at www.waltermeier.com. Adjustments Tools required for adjustments: 3mm hex key... -
Page 16: Belt Arm Orientation
Adjust 90° Stop 6. With the table locked at 90°, loosen the hex nut on the 90° stop, and adjust the set screw to seat against the stop block. See Figure 19. Re-tighten hex nut to secure the setting. 7. If angle indicator adjustment is necessary, loosen the screw and shift the pointer to zero, and re-tighten the screw. -
Page 17: Miter Gauge
4. If table is not parallel, loosen the four screws holding the table to the trunnions (B, Figure 25) with a 12mm wrench, and nudge the table until parallel. Re-tighten screws. Note: Always maintain approximately 1/16” between the table edge and the abrasive disc. -
Page 18: Belt Tracking Adjustment
Belt Tracking Adjustment The belt should run at the center of the belt arm without veering to the left or right. Check this as follows: 1. Disconnect machine from the power source. 2. Rotate the belt by hand and observe how it tracks. -
Page 19: Troubleshooting
Optional Accessories 708566 ..JSG-6SA, Open Stand 708598 ..JSG-6DC-CS, Closed Stand Dust Collectors and Accessories..see your JET distributor Replacement Parts Replacement parts are listed on the following pages. To order parts or reach our service department, call 1-800-274-6848, Monday through Friday (see our website for business hours, www.waltermeier.com). -
Page 20: Jsg-6Dc Belt/Disc Sander Assembly
JSG-6DC Belt/Disc Sander Assembly... -
Page 21: Parts List For Jsg-6Dc Belt/Disc Sander Assembly
Parts List for JSG-6DC Belt/Disc Sander Assembly Index No. Part No. Description Size 1 ....612001W ....Base ....................1 2 ....612002W ....Base Plate ..................1 3 ....SF069300 ....Pan Head Screw (w/flange) ......M6x12......6 4 ....612003W ....Front Plate ..................1 5 .... - Page 22 55 .... 612028....Hinge ....................1 56 .... TS049200 ....Tapping Screw ...........M4x8 ....... 8 57 .... 612029W ....Access Door ..................1 58 .... 612030....Hinge ....................2 59 .... ST049200 ....Tapping Screw ...........M4x8 ....... 8 60 .... 612031....Lock Knob ..................1 61 .... SF069300 ....Pan Head Screw (w/flange) ......M6x12......6 62 ....
- Page 23 115 ..NH101700 ....Nut * ............M10 ......... 4 116 ..SH101600 ....Hex Cap Bolt * ..........M10x80 ......4 117 ..WF102825 ....Flat Washer..........M10 ......... 9 118 ..WS100000 ....Lock Washer * ..........M10 ......... 4 119 ..612052....Trunnion Holder .................. 1 120 ..
-
Page 24: Closed Stand Assembly (Optional)
Closed Stand Assembly (Optional) Index No. Part No. Description Size ....708598....Closed Stand Assembly Complete ............1 1 ....AB612062 ....Closed Stand..................1 2 ....TS-0060111 ....Hex Cap Screw ..........3/8” x 2-1/2”...... 4 3 ....TS-1550071 ....Flat Washer..........M10 x 20 ......9 4 .... -
Page 25: Open Stand Assembly (Optional)
Open Stand Assembly (Optional) Parts List for Open Stand Assembly (Optional) Index No. Part No. Description Size ....708566....Open Stand Assembly Complete ............1 A ..... 612049....Stand Top (blue) ................. 1 ....612049W ....Stand Top (white) ................1 B ..... 150603....Stand Leg (blue) ................. 4 .... -
Page 26: Electrical Connections
Electrical Connections... - Page 28 WALTER MEIER (Manufacturing) Inc. 427 New Sanford Road LaVergne, Tennessee 37086 Phone: 800-274-6848 www.waltermeier.com...
Need help?
Do you have a question about the JSG-6DC and is the answer not in the manual?
Questions and answers