Table of Contents
Advertisement
Advertisement
Table of Contents

Related Manuals for ProForm XP 590S


Summary of Contents for ProForm XP 590S
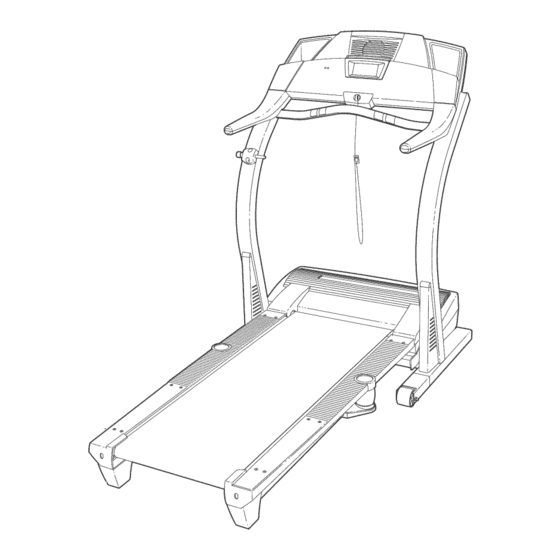
- Page 1 Mode! No. 83! .295060 SedaJ No. SeriaUNumber DecaU User's Manual Assembly Operation Maintenance Part List and Drawing ,_ CAUTION Read aH precautions and instruc- tions in this manual before using this equipment. Save this manual for future reference. Sears, Roebuck and Co., Hoffman Estates, IL 60179...
- Page 2 TABLE OF CONTENTS iMPORTANT PRECAUTIONS ..............BEFORE YOU BEGIN ..............ASSEMBLY ................OPERATION AND ADJUSTMENT ............. HOW TO FOLD AND MOVE THE TREADMILL ..........TROUBLESHOOTING ..............CONDiTiONiNG GUiDELiNES ............... PART LiST ................ORDERING REPLACEMENT PARTS ..........Back Cover FULL 90 DAY WARRANTY ............
- Page 3 13.Keepthe power cord and the surge suppres- 23. inspect and properly tighten all parts of the sor away from heated surfaces, treadmill regularly. 14. Never move the walking belt while the power 24. Never insert any object into any opening. is turned off.
- Page 4 BEFORE YOU BEGIN Thank you for selecting the revolutionary PROFORM _ ing this manual, call 1-800-4-MY-HOME _ (1-800-469- XP 590s treadmill, The XP 590s treadmill offers an im- 4663),To help us assist you, please note the product model number and serial number before calling, The...
- Page 5 ASSEMBLY Assembly requires two persons. Set the treadmHUin a cUeared area and remove aUU packing materiaUs, Do not dispose of the packing materiaUs until assembUy is compUeted, Note: The underside of the treadmiUU waUking beUtis coated with high-pedormance Uubricant, During shipping, a smaUU amount of Uubricant may be transferred to the top of the waUking beUtor the shipping carton, This is a normaU condition and does not affect treadmiUU pedor- mance, Ufthere is Uubricant on top of the waUking beUt,simpUy wipe off the lubricant with a soft cloth and a mild, non-abrasive cleaner,...
- Page 6 2, WiththeheUp o fa second person, c arefully tipthe Uprights ( 97)down as shown, ( Note: i t maybeheUpfW t o pUace y ourfootononeoftheExtension L egs[92]asyou tipthe Uprights,) Makesurethatthe Extension Legs remainin the Uprights. AttacheachExtension L eg(92)withtwoExtension L eg BoUts (96)andtwo1/4"Washers ( 39)as shown, T hread a Leveling Foot(95)intoeachsideof theUpright B ase (97);do not threadthe LevelingFeetfully into the UprightBase.
- Page 7 5, Set the ConsoUe Base (101) on the Uprights (97), Thread the four Upright BoUts(76) with four UnternaU Star Washers (77) into the Uprights and the ConsoUe Base, Be careful not to pinch the Wires (not shown) in the Uprights. Tighten the two Upright BoUtsindicated by the arrows first;...
- Page 8 OPERATmON AND ADJUSTMENT THE PRE-LUBRmCATED WALKmNG BELT an equipment-grounding conductor and a grounding plug, Plug the power cord into a surge suppressor, Your treadmHUfeatures a waUking beUtcoated with high- and plug the surge suppressor into an appropriate performance Uubrbant, IMPORTANT: Never apply sil- outlet that is propedy installed...
- Page 9 CONSOLE DmAGRAM QUICK SPEED Note: if there is a thin sheet of pHastb on the face of the console, remove it, FEATURES OF THE CONSOLE sonal trainer in your home, Using a stereo audio cable, you can connect the treadmill to your portable stereo, The treadmHi console offers an impressive array of home stereo, computer, or VCR and play special features designed to heip you get the most from your...
- Page 10 HOWTOTURNONTHEPOWER walking belt as desired by pressing the Speed + and - buttons, Each Huginthepower c ord(seepage8), time a button is pressed, the speed setting will Locate thereset/off change by 0,1 mph; if a circuit b reaker n ear button is held down, the speed setting wiii change thepower cord,Make in increments of 0,5 mph, Note: After the buttons Position...
- Page 11 The bft side of the dis- your heart rate, stand on the foot level of the treadmill, the _,r_ raiJs and play wiii showthe incline _NCL_NE elapsed time, the ap- T_ME hold the proximate number of grams of carbs you have metal con- Contacts tacts on the...
- Page 12 When only three seconds remain in the first seg- HOW TG USE A PRESET _ROGRAM ment of the program, both the Current Segment column and the column to the right wiii flash and a insert the key fulty into the console. series of tones will sound, if the speed and/or in- cline of the treadmill is about to change, the speed See HOW TO TURN ON THE POWER on page...
- Page 13 Fottow your progress with the display. HOW TO USE A HEART RATE PROGRAM See step 5 on page 10. CAUTION: i you have h eart Measure your heart rate if desired. prob- lems, or if you are over 60 years of age and See step 6 on page 11.
- Page 14 play to alert you, When the first segment ends, all Enter your age. target heart rate settings wifl move one column to the left. The target heart rate setting for the sec- When a heart rate pro- ond segment will then be shown in the flashing is selected, the gram Current Segment column,...
- Page 15 HOW TO CONNECT YOUR PORTABLE STEREO HOW TO CONNECT THE TREADMILL TO USE mFIT.COM PROGRAMS Note: If your stereo has an RCA-type AUDIO OUT jack, see instruction A below. If your stereo has a 1/8" LINE OUT jack, see instruction B.
- Page 16 HOW TO CONNECT YOUR HOME STEREO HOW TO CONNECT YOUR COMPUTER Note: mfyour stereo has an unused LmNEOUT jack, A, Hug one end of aiong 1/8" to 1/8" stereo audio see instruction A below, mfthe LmNEOUT jack is came (avaHabie at sHsctronbs stores) into the input jack on the consorts, Hug the other end of the cams being used, see instruction into the LiNE OUT jack on your computer, Hug your...
- Page 17 HOW TO CONNECT YOUR VCR HOW TO USE AN mFIT.COM MP3, CD, OR VmDEO PROGRAM Note: if your VCR has an unused AUDIO OUT jack, see instruction A below, if the AUDIO OUT jack is being used, see instruction B. ff you have a TV To use an iFIT,com MP3, CD, or video program, the with a built-in VCR, see instruction...
- Page 18 if the speed or incline settings are too high or too ,, Make sure that the audio cable is properly connected. low, you can manually override the settings at any time by pressing the Speed or Incline buttons on • If you are using a portable CD player and the the console, However, when the next "chirp"...
- Page 19 Return to the treadmill and stand on the foot HOW TOUSE AN IFIT:COM PROGRAM rails. Find the clip attached to the key and sJide DIRECTLY FROM OUR WEB SiTE the clip onto the waistband of your clothes. When the on-screen countdown ends, the program Our Web site at wwwJFiT,com allows you to access wiii begin and the walking belt wiii begin to move,...
- Page 20 THE mNFORMATmONMODE/DEMO MODE THE OPTmONAL CHEST PULSE SENSOR The consob features an information mode that keeps An optional chest pulse sensor adds even more fea- track of the totaUnumber of hours that the treadmHUhas tures to the console, The chest pulse sensor offers been operated and the totaUnumber of miles that the hands-free operation, and enables you to use the con- waUking beUthas moved, The information mode aUsoaP...
- Page 21 HOW TO FOLD AND MOVE THE TREADMILL HOW TO FOLD THE TREADMmLL FOR STORAGE Before folding the treadmill, adjust the incline to the lowest position, ff tMs is not done, the treadmill may be per- manently damaged. Next, unplug the power cord. CAUTmON: You must be able to safely lift 45 pounds (20 kg) to raise, tower, or move the treadmill.
- Page 22 Most treadmill problems can be solved by following the simple steps below. Find the symptom that applies, and follow the steps listed, mf f urther assistance is needed, call toll-free 1-800-4-MY-HOME ® (1-800-469-4663}. PROBLEM: The power does not turn on SOLUTION: a, Make sure that the power cord is plugged into a surge suppressor, and that the surge suppressor is plugged into a properly grounded outlet (see page 8), Use only a single°outlet surge suppressor...
- Page 23 With the heUpof a second person, carefully raise the Upright Base (97) as shown, Carefully pivot the Hood (113) off, Locate the Reed Switch (22) and the Magnet (19) on the left side of the Pulley (18), Turn the Pulley until the 1/8"--+-_ _._-.
- Page 24 CONDiTiONiNG GUmDEUNES begin to use stored fat calories for energy, if your goal WARNJNG: Before beginning th s is to burn fat, adjust the speed and incline of the tread= mill until your heart rate is near the lowest number in or any exercise program, consult...
- Page 25 SUGGESTED STRETCHES The correct form for several basic stretches is shown at the right, Move slowly as you stretch--never bounce, 1. Toe Touch Stretch Stand with your knees bent slightly and slowly bend forward from your hips, Allow your back and shoulders to relax as you reach down toward your toes as far as possible, Hold for 15 counts, then relax, Repeat 3 times, Stretches: Hamstrings, back of knees and back,...
- Page 26 PART LIST--ModeJ No. 831.295060 Ro9o4B To Uocate the parts Hsted beUow,see the EXPLODED DRAWUNG attached in the center of this manual Key No. Qty. Description Key No. Qty. Description Left Foot Rail Static Decal Foot Rail Screw 3/4" Tek Screw UsoUator BoUt(Top) Belly Pan Clip UsoUator DecaU...
- Page 27 Key No. Qty. Description Key No. Qty. Description Console Base Photo Switch Nut Optic Disk Left Bottom Handgrip Ground Screw/Choke Screw Right Top Handgrip 10" Blue Wire, 2F Key Clip Fan Screw 10" Blue Wire, M/F 4" Blue Wire, 2F Console 10' Green Wire, F/Ring Screw...
- Page 28 39 114 © 44 "'8 _ -_::::-52 .D -2r _.1 108...
- Page 29 1 O 3 ..© ¢# /, i i08 !_ "\s; :_108...
- Page 30 Your Home For repair - in your home - of all major brand appliances, lawn and garden equipment, or heating and cooling systems, no matter made it, no matter who sold For the replacement parts, accessories, and user's manuals that you need to do-it-yourself. For Sears professional installation of home appliances...
Need help?
Do you have a question about the XP 590S and is the answer not in the manual?
Questions and answers