Advertisement
OWNER' S MANUAL
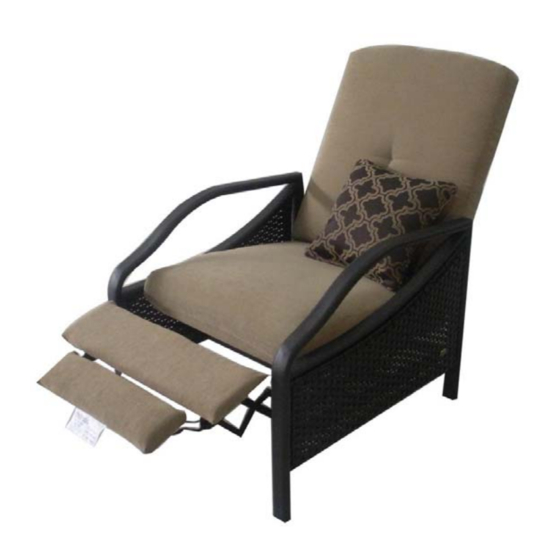
Kmart Chelsea Recliner
Product Code: 780-01291206-9
UPC Code: 7-2293807709-0
Date of Purchase: __ / __ / __
If you have any problems with this product, DO NOT RETURN IT TO THE STORE.
CALL OUR CUSTOMER SERVICE HOT-LINE AT
866-851-2393
8am-5pm (EST), Monday-Friday.
View the expanded assortment of outdoor living product on-line at
WWW.lazboyoutdoor.com
and
WWW.kmart.com
Page 1 of 6
Advertisement
Table of Contents

Related Manuals for LAZBOY 780-01291206-9


Summary of Contents for LAZBOY 780-01291206-9
- Page 1 OWNER’ S MANUAL Kmart Chelsea Recliner Product Code: 780-01291206-9 UPC Code: 7-2293807709-0 Date of Purchase: __ / __ / __ If you have any problems with this product, DO NOT RETURN IT TO THE STORE. CALL OUR CUSTOMER SERVICE HOT-LINE AT 866-851-2393 8am-5pm (EST), Monday-Friday.
- Page 2 WARRANTY This warranty is a limited warranty, and applies to the original purchase only. Proof of purchase is required. This is a residential warranty and does not apply to commercial use. This collection carries a 5 year limited warranty and is valid from original date of purchase to the original owner (proof of purchase required): NOTE: Glass breakage is not a warranted item.
- Page 3 Important Safety Instructions: Important: Read these instructions thoroughly before using WARNING — To reduce the risk of burns, fire or serious injury: • Always keep open flame and lit cigarettes away from outdoor furniture. Outdoor furniture may burn rapidly with toxic gas and thick smoke. •...
-
Page 4: Parts List
PARTS LIST Item Part Name Picture Seat frame Back frame Seat cushion Back cushion Toss pillow Step1 : Place the seat frame (A) on a flat surface. Attach the back frame (B) to the seat frame (A) as shown in figure 3, then press down the buckle. - Page 5 Step2: Put seat cushion (C), back cushion (D) and toss pillow (E) in turn on the chair. See Figure 4. Now your chair is ready to use. Figure 4 Page 5 of 6...
- Page 6 Figure 5 (the closed position) Figure 6 (the 1 position) Figure 7 (the 2 position) Page 6 of 6...
Need help?
Do you have a question about the 780-01291206-9 and is the answer not in the manual?
Questions and answers