JVC GR-DV3 Instructions Manual
Hide thumbs
Also See for GR-DV3:
- User manual (13 pages) ,
- Instructions manual (88 pages) ,
- Instructions manual (88 pages)

Related Manuals for JVC GR-DV3


Summary of Contents for JVC GR-DV3
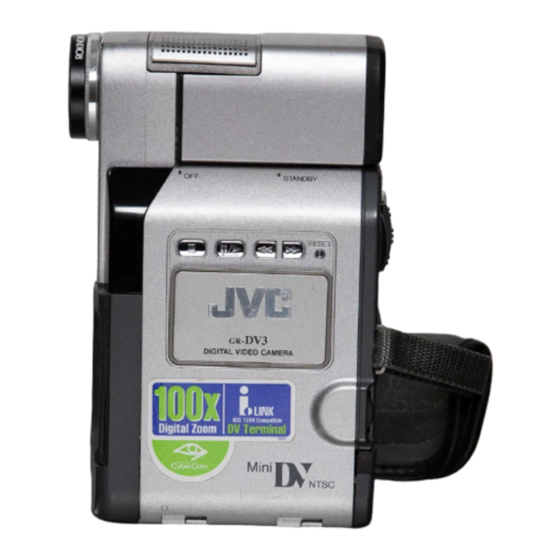
- Page 1 DIGITAL VIDEO CAMERA GR-DV3 ENGLISH Please visit our CyberCam Homepage on the World Wide Web and answer our Consumer Survey (in English only): • • Mini_rYpA INSTRUCTIONS LYTO192-OO1B...
- Page 2 Dear Customer, Thank you for purchasing this Digital Video Camera. Before use, [)lease read the safety information precautions contained in tile following [)agesto ensure safe use of this product. Using This Instruction Manual ° All major sections and subsections are listed ill the Table Of ( r)ntents (_z_ pg.
-
Page 3: Safety Precautions
SAFETY PRECAUTIONS About Batteries DANGER! Do not attempt to take the batteries Do not point tile lens or the viewfinder directly into apart, or expose them to flame or excessive heat, as the sun. This can cause eye injuries, as well as lead there is a rid<... - Page 4 DC cord AC Charger Station AA-V60EG Grlp/Hand strap Battery pack BN-V607U VIDEO/AUDIO cable VIDEO/AUDIO cable (AC Charger Station to TV or VCR, (camcorder to TV or VCR, RCA plug I_ RCA plug) 03.5 mini-plug I_ RCA plug) S-VIDEO cable Editing cable (03.5 mlnl-plug, 2 poles)
- Page 5 Remote control unit MiniDV Cassette Tape 30 mln RM-VT12U (DVM-30) M-DV30ME Cable adapter Lithium battery CR2025 (for remote control unit)
- Page 6 Tile digital video camera converts incoming audio video signals into digital form for recording. A video signal is composed of a luminance signal (Y) and colour signals (R-Y and B-Y). These signals identified and recorded digitally (Digital Conlponent Recording). The A/D (Analogue to Digital) converter samples the Y signal at 1L5...
- Page 7 iiiiiiiillililllllllllilii!iiiiiiiiiiiii!!i iiii EN 7 _ii_!_i_ii_i_i_ii_ii_!_!_!_!_!_!_!_!_!_!_!_!_!_!_ PRO VIDED A CCESSORIES ABOUT AFTER USE CONTROLS, INDICATIONS CONNECTORS Camcorder..................ACCharger S tation ................Indications During Recording ..............Indications DuringPlayback ..............Wnrning Indications ................CAUTIONS SPECIFICATIONS GLOSSARY OF TERMS INDEX...
-
Page 8: Charging The Battery Pack
Charging TheBatteryPack The battery pacl< has not been charged at the t\_ctory. Before using it, be sure to charge it with the A( Charger Station. ATTACH DETACH Battery pack BN-V607U To AC outlet Power cord Power cord AC Charger Station AA-V60EG Charger indicator DC OUT... - Page 9 _i_i_i_i_i_iii_:_:_:_:_:_:_:_:_:_:_:_: Charging Environment Perform charging where the temperature is between I0' and 30'C. 20' to 25'C is the ideal temperature range for charging. If the environment is too cold, charging may be incomplete. Continuous Shooting Continuous shooting is possible (See table below for recording time) under...
- Page 10 ] OEN IndoorUse When using tile c,lmcorder indoors, you can use the A( Charger Station (provided) instead of a battery. Slide clown the open switch. Power lamp When power is supplied, To AC outlet the power lamp lights. Power cord To DC OUT jack AC Charger Station...
-
Page 11: Date/Time Settings
Date/Time Settings Date and time will automatically be recrlrded on tape at _dl times. It is your choice to display it or not during playback (_-7 pg. 5 I). Display Lock button Power Dial Recordlng Menu Select Dial MEN U button Date/Time Menu Regurdin 9 Built-in Rechurgeub[e Buttery... -
Page 12: Loading/Unloading A Cassette
] 2EN iSJJJJJJJ i i iJ i i ;iiii ' Loading/Unloading A Cassette The camcorder needs to be pllwered up to load or eject a cassette. OPEN/EJECT switch Cassette holder Cassette cover Make sure the window PUSH HERE side is facing out. Erase protection switcll**-- NOTES:... -
Page 13: Recording Mode Setting
Recording M odeSetting Set depending on your preference. Display Loci( button R.e_-ording Menu Power dial MENU button Select Dial Recording mode indicator NOTES: SELECT OPERATION MODE • It the reo_rding mode is switched during Set the Power Dial to "_" while pressing down... -
Page 14: Grip Strapattachment
14 . Grip StrapAttachment START/STOP Sub hand strap eyelet Bottom c_lnl_oi'del- ATTACH GRIP STRAP TO HAND ATTACH GRIP STRAP TO SUB ST_P EYELET HAND STRAP EYELET Open tile pad and pull tile grip strap in the Open the pad mid thread the grip strap through direction of the arrow... -
Page 15: Tripod Mounting
Tripod Mounting Align tile tripod's screw with tile socket n/ounting Bottom of on tile bottom of the cameoF(_]er. ('am(:order DioptreAd[estment Adjust tile viewfinder display for best viewing. Display Diopter adjust lever E> SELECT OPERATION MODE Set the Power Dial to "[]" or "@]". - Page 16 RemoteControl Unil You can use the RM-V712U to control the camcorder. When using the remote control, be sure to point it at the remote sensor. The transmitted beam effective area for indoor use is apprr)x. 5 m. Tile transmitted beam may not be effective or may cause incorrect operation...
-
Page 17: Operation Mode
OperationMode Tuning the Power Dial allows you to chr)ose the api)rr)priate ol)eration mode amr)ng the follr)wing modes: Full Auto mr)de (Q), Manual mode (@}), 5 second mode recording (5S), Self-Timer mode (_3) and "PLAY". Accr)rding to the Power Dial position you have selected, "F.AUTO" or "MANUAL"... -
Page 18: Start Recording
You should already have p erformed the necessary preparations (_-? % .8 17). Set tilePower Dial to"[1" and tryrecording that w ay before attempting touse more a dvanced features. NOTE: Bef;)r_ St,lrtin_ r_c_rrhn_, make sure y;_u set tile date arid time (_ / p_. 11), Even it they don't alJpear during recordint4,... -
Page 19: Brightness Control
NOTES: TopeRemaining Indkotor • Be careful not to c_>ver the camera sens_r; built-in The time remaining (in the tape is automatically here is the sensor necessary f_r shooting. iT/onitored and displayed ('_ / pg. 77). When • 115 rnirlutes elapse in the Record-Starldby mode, tape ends, "TAPE END"... - Page 20 Rec0rdin 9 [rent TheMiddle Of A Tape When rernoving a tape on which you were recording, or when resume recording on a tape after playing bacl< tile recording previously made (without tal<ing tile tape ()tit between recordings), perform this proce- dure.
- Page 21 iiiiiiiiiiiiliii ii ii ii ii il iii!iiiilililililililililililililili EN¸2 ] TimeCode During recording, a time code is recorded on tile tape. This code is to cr)nfirm tile location of tile recrlrded scene on the tape during playbacl<. If recording starts from a blank portion, the time code begins...
- Page 22 Select any one of the three powers of magnification and get "closer" to tile subject (_T _ pg. _0). Simply set tile zoom switch tr! either zoom in (towards "T") or zor_m out (towards "W"). The zoom speed variable the quicl<er you set the zoom switch, the quicl<er...
-
Page 23: Select Function
Displaying The Date AndTime During Recording When the Power Dial is set to "[]', "5S" or "_", you can choose whether to display the date and time during recording or not. You must first set the date and time (see "Date/Time Settings"... - Page 24 Scene (5-secondrecerdin9) Record a vacation fir an important event in S-second clips to keep the action moving. The S-Second functJrln may also be activated during Full Auto operation. But the _!hJLe Bal_mce rem_fins in the previously adjusted c_,ldition. While tile S-Second mode is activated, Fade/Wipe...
-
Page 25: Select Operation
Self-Timer Once the camcorder is seL the c_u_ncorder oper_tor c_m become D_rt of the scene in a more natural adding the final touch to a memorable picture. Display Lock button Self-Timer indication After 15 sec, START/STOP button the START/STOP button is pressed, During recording the tally lamp... -
Page 26: Take Snapshot
Snapshot Use your camcorder like a regular camera and take a snapshoL or several of them in succession. Disphy During snapshot Recordlng Menu System Menu SNAPSHOT button button MENU huron SELECT OPE_TION MODE SELECTSNAPSHOT MODE First turn :he Power Dial to "[_" while pressing Move... - Page 27 FRAME* PIN-UP FULL* (Snapshot mode (Pin-Up mode) (Snapshot mode with no frame) with frame) MULTI 4 MULTI 9 (Multi-Analyzer (Multi-Analyzer m...mmm...mmm * : There is a i_1omei4tary camera shutter-tyl)e hlacl<out. NOTES: Motor Drive mode: Keeping the SNAPSHOT Button pressed provides •...
- Page 28 Menus Tile Recording Menu allows you to set these functions: Recording Mode, Wide Mode, Magrlification, Digital Image Stabilizet, Gain Up, Date/Time Merlll, System Menu. The following selection procedure applies to Recording, Morld, Wirle Mode, Z;oln Magr-lifica- tion, Stabi/izatior_ and Gain Please refer to pages 29, 30 for details.
-
Page 29: Rec Mode(Recording Mode)
_UEEZE []_.-_ClNEMAF--1 REC MODE(Recording mode) You can change the tape recording speed. LP tape speed is slower than SP, allowing LP to record 1.5 times longer than SP. If you have shot in SP mode, Audio Dubbing will be possible later. - Page 30 30E. ZOOM (Zoom magnification) You can select 10X, 40X, or 1 O0X R/aXilT/LIITI ZOOm I'nagnifications. Optical zoom that does not degrade the quality of the recording. Electronic [>rocessing (Digital zoom) that lets you get closer 100X Electronically-processed images at 100-times i_lagllification.
- Page 31 EN¸3 -I SystemMenu The System Menu allows you to set the following functions: Photo Mode, Scene, Beep/_//_ Wind Cut, Solmct Mode, ID numbers Demor_stratior_ Mode (_-5_ pg. 32). Display Lock button Power Dial Seled Dial MENU button System Menu SELECT OPERATION MODE SET FUNCTION PARAMETERS First turn the Power...
-
Page 32: Photo Mode
y when connecting the camcorder to a computer [01 to 99]. WIND CUT PHOTO MODE Seepages26 and 27. helps When activated, this mrlde cut down on nrlise created by wind. SCENE (5=Second Mode) pg. 24) When shooting in high winds, set to "ON"... - Page 33 FADE/WIPE E ffects IMPORTANT: It certain P.AE/Efl_ct_ (2 / iJ_. 40) ar_ actiw_ted, some Fade/Wipe Effects cannot be used. lt you select a Fad_/ Wipe Effect that is unusable in the current situation, the indication blinks. Use these to spice up tile transition frorn one scene to tile next.
- Page 34 Fadesand Wipes A scene gradually appears on a black or white screen (Fade In/VVJpe In), or dJsapl_eal% leaving a black white screen (Fade Out/VVipe C)uO. Select Fade or Wipe at tile Fader/Wipe Menu (_T_ pg. _). Select any one effect from [W_I, i-_1, i-'_"[, _ I_--[, I_1, _,...
- Page 35 PictureWipe/Diss0lve Combine tile Picture Wipe and Dissolve functions for a professional trdllsJtJon effect. There dre C) _Jcttlre Wipe effects and I Dissolve effect. Select the Picture Wipe effect at the Fader/Wipe Menu (_-Z _ pg. _). Select any one effect from i-_--]P, 1_'TP, I_lp, I_[p,...
- Page 36 3 6 E. Random Variations the _de_/wipes at random. E3 FI START RECORDING Press START/STOP. The camcorder does the rest, selecting an effect at random. • The recording starts with a Fade In or Wipe In. If you press START/STOP during record- ing, Record-Standby mode is preceded by a Fade Out or Wipe Out;...
- Page 37 [ADERANDWIPE MENU MENU EFFECT FADER WHITE Fade in or out widl a white screen. FADER BLACK Fade in or out with a black screen. FADER MOSAIC Fade in or out with a full-screen mosaic effect. FADER Fade ill to a colotlr screen from a bl,lcl<...
- Page 38 FADER AHDWIPE MEHLI(€onl.) MENU EFFECT Tile new scene gradually appears as tile old one gradually DISSOLVE disappears. Tile new scene wipes in over tile previo/i5 one frrlm tile upper WIPE CORNER right cr)rner to tile lower left cr)rner. The next scene gradually wipes in frr)m the centre...
- Page 39 P.AE/Effeds IMPORTANT: If certairl Fades or Wipes (_ / pg. 37, 389 are activated, some F_AE/Efl_cts carlrlot be used. If you select RAE/Efl_ct that is unusable irl the current situatiorl, the effect% symbol begins flashing. You can choose any one of the effects _-T_ pg.
- Page 40 I_,,._. ] SHUTTER ..00 (Variab[eShutter <_ Speed) '_,: .._" \k"_" CLASSIC FILM ..1/50 Tile shutter speed is fixed at 1/50th of a Gives recorded scenes a strobe effect. second. Black bands that usually appear when shooting a TV screen become narrower.
- Page 41 ManualFocus A diustment The camcorder, in most cases, adjusts the focus from approx. 5 cm to infinity automatically. However, when frlcusing is difficult or when the subject is not in the middle of the viewfinder, adjust the focus manually. Factory [)reset is "AUTO".
-
Page 42: Adjust Exposure
ExposureControl Usually this is adjusted automatically. However, when tile background is too bright or too dark in comDiri- son with the subject, the exposure could be corrected manually. Factory preset is "AUT()". Display Lock button Power Dial Manual Mode Item Menu Exposure SELECT OPERATION MODE To Return... - Page 43 IrisLock Use this function when shooting a moving subject, when zooming, when the subject changes its distance (thus its size in the viewfinder), or when you want to loci< the brightness level. When the subject is close, I<eep the Ms Iocl<ed. Even when the subject moves...
- Page 44 White Balance Adjustment A term that refers to the correctness of colour reproduction under various lighting. If the white balance correct, all other colours will be accurately reproduced. The white balance is usually adjusted automatically. Howevel_ the more adwnced camcorder operator would prefer...
- Page 45 Manual White Balance Operation If the camera is operathlg in manual mode, perform a Manual White Balance when shooting under various types of lighting Display White paper button Manual Mode [tern Menu Manual White Balance Adjustment SELECT OPERATION MODE To Change Tint For Recording...
-
Page 46: End Playback
You carl watch what you've recorded in tile viewfindet: Display Power Dial Tape running indicator iiiiiiiiiiiiiiiiiiiiiiiiiiiiiiiiiiiiiiiiiiiiiiiiiiiiiiiiiiiiiiiiiiiiiiiiiiiiiiiiiiiiiiiii iiiiiiiiiiiiiiiiiiiiiiiiiiiiiiiiiiiiiiiiiiiiiiiiiiiiiiiiiiiiiiiiiiiiiiiiiiiiiiiiiiiiiiiii Loci<button SELECT OPERATION MODE Press llI/l_. I_ appears _nd the recorded Turn the Power Died to "PLAY" while pressing down the lock button located on the dial. The footage can be viewed. - Page 47 SI0w-M0ti0n Playback To Perform High-Speed Search..press _ or _ after pressing Ill/l_. The tape • TI! perforn/ SIow-n/rltilln pl_ybacl<, tile remote will move at approximately 9 times the norm_d control is necessary, pL_ybacl< speed. Watch in the viewfinder and, •...
- Page 48 Playback Z oom The recorded pictures can be magnified up to 10X at any time during playback. Remote sensor Press T Press m[_ (Right) to Normal playback move hnage Stop button Play button Down buttons FIND THE SCENE OF INTEREST Pressthe PLaybutton to stuart p layb_d¢.
-
Page 49: Playback E Ffects
Playback E ffects These effects _dlow you to be creative with the pl%_back picture. You c_m use any one of tile 4 effects. PLAYBACK EFFECT Select Menu Remote sensor Play button /OFF NOTES: START PLAYBACK • To deactiw_te tile selected effect, press EFFECT Press the Play button... -
Page 50: Playback Menu
Playback Menu The Playback Menu allows you to set the following functions: Playback Sound (32 kHz, 48 kHz), Synchro Comp, Display _lnd Time Code. The fr)llr)wing prr)cedure _lpplies to all _ Synchro Comp (z7 _ pg. 64, 65). Display FULL SOUND SOUND2 SOUND1 LOFF... - Page 51 EN¸5 ] Playback Sound During playback, tile c_u_/corder detects tile sound mode in which the recording m_de, and plays the sound b_d<. Select the type of sound to accomp_uly your playb_d< picture. (_2 kHz is preset to "SOUND 1" _md 48 kHz is preset to "FULL SOUND".) RECORDING SOUND DISPLAY...
- Page 52 VCR/TVConnection ( whenconnecting directly to the cmcorder} Please refer to _our V(R and/or TV instruction manual(s) when connecting. Cable adapter (provided) If your TV or VCR the 21-pin AV input connector (SCART), tile provided cable adapter. To AUDIO connector (L/R) White to AUDIO L "F TV or VCR...
- Page 53 VCR/TVConnection ( usingM Charger S tation} Attach tile camcorder to the A( Lharger Station, then connect the AC Uharger Station to a TV or V(R (_-T _ pg. 54, 55), as described in the following steps. To AC outlet Power cord Mark Power lamp...
- Page 54 VCR/TVconnection (using the ACCharger Station) ( Cont.) Please refer to your V(R and/or TV instruction manual(s) when connecting. Connection to a TV or VCR equipped with a SCART connector compatible only with regular video signal Cable adapter (provided) To AUDIO To AUDIO connectors (L/R)
-
Page 55: Turn On Power
connector To S-VIDEO S-VIDEO cable To S-VIDEO connector Core filter (provk|ed) connedor NOTES; CONNECT AC CHARGER STATION TO TV OR VCR • Never connect VIDEO/A UDIO cable or S- VIDEO cable other than those provkled to the ( onnect as shown in tile illustration q[_, q[_ or O AC Charger... - Page 56 (0nne¢fl0n To A Video IJnil EquippedWilh A BV (0nned0r ( onnection t() the Digital Printer GV-DT1 (optional) allows you t(> print out the images or to transfer ca )tured image from the Digital Printer to a personal corn )uter. It is also possible to copy recorded scenes...
- Page 57 CONFIRM POWER-OFF STATUS M_l<esureall tile units _re turned off, Plug tile AC ( harger Station's power cord into an A( outlet. ATTACH CAMCORDER TO AC TURN ON POWER CHARGER STATION Turn tile Call/corder's Power Dial to "PLAY", Attach tile camcorder to tile Charger UPPLY POWER...
-
Page 58: Make Connections
Dubbing You can copy recorded scenes from tile camcorder ontl! a videotape. Refer to your V(R's instruction manual for details. Recorder NOTES: MAKE CONNECTIONS • You can use Playback Zoom (_ / pg. 48) or Connect tile A( Charger Station to your Playback Effects (_ / p_. - Page 59 Digi|al D ubbing It is also possible to copy recorded scenes from tile camcorder onto other video unit equipped with a DV connector. Since a digital signal is sent, there is little if any image or sound deterioration. To AC outlet Connector under the cover.
- Page 60 BrandSetting Beiore you can periorm Random Assemble Editing (_T_ pg. 61 6_}, or control the VCR using the remote control, you Fnust set the VCR brand. SET RI:MOff/V(R CODE Befllre operatiol% make sure the lithium battery installed in the remote control (_T_ pg.
-
Page 61: Random Assemble Editing
• If you use a ]VC VCR riot equipped with a remote • ( onnections shr>uld be made while the power pause terminal or a non-JVC VCR, connect the AC is off. Malting connections with the power Charger Station's EDIT corlnector... - Page 62 Remote sensor Random Asseinble Editing Menu FADE/WIPE- --PLAY EFFECT- -- R.A.EDIT ON/OFF EDIT IN/OUT- CANCEL- NOTES: SET EDff-IN POINT • To cancel tile registered scene, press the CANCEL At tile beginning of the scene, press EDIT button on the remote control.
- Page 63 Rel_lOte Sensor button Power Dial Pause button Rewind button START/STOP button FADE/WIPE- --PAUSE EFFECT- Random Assemble EDIT IN/OUT- --R,A, EDIT ON/OFF Editing menu --VCR REC STBY CANCEL- REGISTER ADDITIONAL SCENES START EDITING Press tile START/STOP button on the Repeat steps 4 7 (_-T_ pg.
-
Page 64: For More Accurate Editing
ForMoreAccurate Editing Some VC:Rs mal<e tile transition fr(>m Record-Standby to Record mode faster than (>tilers. Even if you begin editing for the camcorder and the VCR at exactly the same time, you may lose scenes you wanted, or find tl/at you've recorded scenes you didn't... - Page 65 Adjustment of VCR'suguinst(recorder Timing Display Playback Menu Se[ed Dial ACCESS PLAYBACK MENU Point tile remote control at the camcrlrder's Press tile Select Dial twice. remote sensor and press R.A. EDIT ON/OFF CLOSE MENU • Now perfr)rm Random Assemble Editing mal<e the Random Assemble Editing menu...
-
Page 66: Audio Dubbing
Audio Dubbing The audio tr_ek can be customized only when recorded on the _2 kHz mode/_T _ pg. 32). NOTES: • Audio Dubbing is not possible on a tape recorded at 48 I<Hz, on a tape recorded in the LP mode or on a blank portion... - Page 67 NOTES: •Audi(> dubbing is possible using an optional micr(>ph(>ne c(;nnected to the external micr_>phone input connector (MIE;. • While an optional inioophone is corlrlected, the built-in n'licr(_phone is disabled. • When editing onto a tape &at was recorded at _2 kHz, the old and new soundtracks are reck*reed...
- Page 68 If,after following tilesteps intilechart below, tileproblem still e xists, please consuh your nearest dealer. No power is supplied. • Tile power is not connected • Connect the AC Charger properly. Station securely (_ ," pg. 10). °The battery is dead. Replace tile dead battery...
- Page 69 10. • Set the TV to the mode or 10. °Your TV has AV input 10. Tile tape is moving, terFninals, but is not set to its channel appropriate for video there's no picture. VI DE(_) mode. playback C_,_pg. 52 55).
- Page 70 70 N 18. The Picture Wipe 18. °The last selected editing 18. • Select Picture Wipe Dissolve functions don't scene is ending. Dissolve before beginning • At the end of the last recording. The effects work, selected scene for editing, then automatically activated...
- Page 71 iiiiiiiiiiiiliii ii ii ii ii il iii!iiiilililililililililililililili EN¸71 26. Du ring recording, sou nd • Tile optional headphones "Connect tile optional cannot be heard. not connected to tile head- headphones to tile head- phones connecto. phones connector (_ ,_ pg. 74). 27.
- Page 72 :/2. The viewfinder indications :/2. • During playback of the are distorted. unrecorded portion, High- speed Search and still playback, viewfinder indications appear distorted. This is not a defect. 33. • Check the section of the 33. An unusual marl< appears in tile viewfinder.
-
Page 73: Remove Power Supply
Cleaning The (recorder Bottom of viewfinder Open switch (BATTERY) Battery cover Battery pack REMOVE POWER SUPPLY Remove the battery pack or disconnect the AC Slide the cover in the direction of the arrow q[_. Insert a lens blower or a soft cloth into the gap Charger Station... - Page 74 (recorder Connedor cover Pull this out to open. @ Stereo microphone Fast-Forward button (c__ pg. 46) For use when recording. Fast-Forwards the tape. (2) Lens hood _) Reset button (_L_ pg. 72) Turn this counterclocl<wise to release. When a malfunction occurs, press this button after removing the power supply (battery etc.).
- Page 75 Bottom of camcorder _6_ Viewfiuder pg. 15) _2_Battery cover open switch (BATTERY) Pull out when recording. (_L _ pg. 9) Slide down to open the battery cover. @ Power dlal (_L_ pg. 17) Turning the carecorder on/off, recording or Function Navigator Dial (Select Dial)
-
Page 76: Accharger Station
ACCharger Station @ S-VIDEO OUT connector @ DC charger (_Le pg. 8) Attach the battery pacl< to charge. (_L_' pg. 54, 55, 61 ) • Outputs S-Video signal. (Z) Camcorder attachment part (_L7' pg. • ( onnect to a video unit equipped with an Attach tile camcorder to this part when... -
Page 77: Indicationsduring Recording
IndicationsDuring Recording FUNCTION Displays the operation mode position. (_w pg. 17) Appears when taking a Snapshot. (;T _ pg. 26) Appears when in the Squeeze or Cinema mode. (;T _ pg. 29) Appears when in the Record-Standby mode. (;T _ pg. 18) Appears when Digital Image StabiLizer is engaged. - Page 78 [.dimtions Duri.gP[ayback FUNCTION Displays the sound mode. (_-T _ pg. 51 ) DispEays the recording mode. Appears whi]e a tape is running. : Playback : Fast-Forward/High-speed search "_4 : Rewind/High-speed search : Forward slow-motion "_|| : Reverse slow-motion : Pause : Audio Dubbing Displays the date/time.
- Page 79 Pressthe reset button after removing the power supply (battery, etc.), and wait a few minutes for the indication to clear. When it does, you can resume using the ('amcorder. if the indication remains, consult your nearest JVC dealer. (v-z _ pg. 72)
-
Page 80: Battery Packs
80EN Cassettes Battery Packs The supplied battery pacl< is a To properly use and store your cassettes, be sure to lithium-ir)n battery. Before using read the following cautions: tile supplied battery pacl< or an 1. During use... optional battery pack, be sure to .. -
Page 81: Main Unit
If malfunctioning occurs, stop using the unit the camcorder is inside immediately and consult your local JVC dealer. The camcorder is a micrr)computer-controlled device. External noise and interference (froth TV, a radio, etc.) might... - Page 82 (mcoBer : DC 6.3 V---'==(using AC Charger Station) DC 7.2 V---'==(using Battery) : Approx. 6 W Power consumption Format : DV Format (SD mode) : PAL Standard Signal format Video signal recording format : Digital (omponent Recording : MINI DV ( assette Cassette : SP: 18.8 mm/s Tape Speed...
- Page 83 A( Charger Station Genel'al Power AC 110 to 240 V'_, 50/60 Power consumption output power DC 7.2 V--'==, 0.77 A (charge) 6.3 V---==, 1.8 A (VTR) Operating temperature to 40'C (when charging, 10°C to 35'() Dimensions 80 mm (W) x _9 mm (H) x 146 cnm (D) Weight...
- Page 84 Irls Works like the pupil of tile human eye. In a well-lit environment, tile human pupil contracts to keep too much light from entering. In low lighting, the pupil dilates to allow more light in. Colour temperature A measurement in Kelvin degrees which indicates...
- Page 85 On-Screen Menus .._T* pg. 28 33, 39, 49, 50 Animation .........._T* pg. 32 Operation Mode ........_-T _ pg. 17 Auto Focus .........._-T_ pg. 41 Auto Shut off ........... _-T_ pg. ] 9 P.AE/Effects ........_T* pg. 39, 40, 49 Picture Wipe/Dissolve ......
- Page 86 VICTOR COMPANY JAPAN, LIMITED Printed in Japan _0598HOV_UN COPYRIGHT@ 1998 VICTOR COMPANY OF JAPAN, LTD.