Table of Contents
Advertisement
Advertisement
Table of Contents

Related Manuals for Honda HT4213


Summary of Contents for Honda HT4213
-
Page 3: Safety
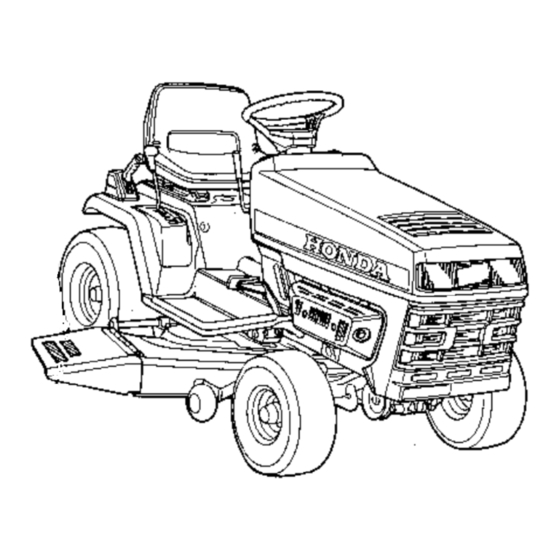
Honda HT4213 Lawn Tractor, type SA (side discharge). Honda Motor Co., Ltd. reserves the right to make changes at any time without notice and without incurring any obligation. No part of this publication may be reproduced without written permission. -
Page 4: Table Of Contents
CONTENTS 1. SAFETY INSTRUCTIONS ............2. - Page 5 1. SAFETY INSTRUCTIONS WARNING LABEL LOCATIONS Read these WARNING LABELS before you operate!
- Page 6 GASOLINE IS FLAMMABLE STOP ENGINE, AVOID HEAT, SPARKS, AND OPEN FLAME WHEN REFUELING. READ OWNER’S MANUAL BEFORE OPERATING. OPERATOR ONLY. DO NOT CARRY PASSENGERS. MAXIMUM SAFE OPERATING ANGLE 10 DEGREES. (17% GRADE) lo-MAX. G REDUCE SPEED WHEN TURNING OPERATING SLOPES. STOP ENGINE BEFORE...
- Page 7 LAWN TRACTOR SAFETY Operating a lawn tractor requires special efforts on your part ensure your safety and the safety of others. Know these requirements before you operate the lawn tractor. SAFE OPERATING RULES Always make a pre-operation inspection (page 15) before you start the engine.
- Page 8 BEFORE MOWING Before mowing, always clear the lawn of stones, sticks or other debris. These objects could be thrown out by the spinning blade and cause an in- jury or equipment damage. Select a safe operating speed (gear position) for the area to be mowed. 5th gear should be used only while driving to and from the storage area.
- Page 9 .* If mowing on a sloping surface, always drive up and down the face of the grade. Never turn or drive across the face of the slope. To prevent loss of control or overturning, always reduce speed and exer- cise extreme caution when operating on sloping or uneven surfaces. Avoid turning or stopping on sloping surfaces;...
-
Page 10: Component
2. COMPONENT IDENTIFUCATION POWER TAKE-OFF (P.T.O.) LEVER =F-L’ ‘STEERING WHEEL ?99?!?% HEADLIGHT PARKING BRAKE LEVER BRAKE PEDAL MUFFLER CUTTER DECK CUfTER DRIVE BELT DECK ADJUSTING KNOB OVERHEAT ALERT PARKING INDICATOR INDICATOR LAMP THRQ ~~-bTTLE LAlM: LEVER ENGINE ^._.._^. . DECK HEkHT ADJUSTING LEVER FUEL FILLER CAP... - Page 11 Engine compartment BATTERY AIR CLEANER FUSE BOX RESERVE TANK, PLUGS OIL FI OIL DRilN PLUG RADIATOR DRAIN PLUG...
-
Page 12: Controls
3, CONTROLS 1. Engine switch Always remove the key from the engine switch whenever lawn tractor is unattended to prevent children or unauthorized persons from starting the engine. This lawn tractor is equipped with an automotive type ignition switch, which controls all the electrical circuits. - Page 13 3. Cutter deck height adjusting lever This lever is used to raise and lower the cutter deck. To adjust the cutting height, squeeze the handle lock and then press in and hold the set button. Raise or lower the lever until the desired cutting height appears on the in- dicator.
- Page 14 5. Shift lever This lever is .used to select one of the five forward speeds, neutral, reverse. The drive clutch automatically disengages while the lever is being moved. The clutch will then engage automatically when put into gear unless the brake pedal is depressed. CAUTION: Bring the tractor to a complete stop before shifting...
- Page 15 6. Headlight switch The switch turns the headlights ON and OFF. CAUTION: To avoid discharging the battery, run the engine with the throttle in the FAST position when using the headlights. Shift the transmission to a lower speed range to maintain a safe speed when visibility is poor.
- Page 16 8. Parking brake lever This lever is used to set the brake when the lawn tractor is parked. Pull the lever fully up until the ratchet locks, and be sure that the parking in- dicator lamp on the control panel is ON. NOTE: The parking brake...
-
Page 17: Pre-Operation
4. PRE-OPERATPON CHECKS For safe and efficient mowing, always make a pre-operation inspection before mowing: prevent accidentat start-up, remove the engine switch key, and disconnect the spark plug caps before performing the pre-operation inspection. CAUTION: Inspect with the Lawn Tractor on level ground. - Page 18 Check the oil level shown on the dipstick. If near or below the lower level mark, fill to the upper level mark with the recommended oil. Use Honda 4-stroke oil, or an equivalent high detergent, premium quality motor oil certified to meet or exceed U.S.
- Page 19 Honda dealer. Failure to do so is con- sidered misuse, and damage caused by misuse is not covered by Honda’s Limited Warranty. Occasionally you may experience light spark knock while operating under heavy loads. This is no cause for concern,...
- Page 20 Honda cannot endorse the use of fuels containing methanol since evidence of their suitability is as yet incomplete. Before buying fuel from an unfamiliar station, try to find out if the fuel con- tains alcohol, if it does, confirm the type and percentage of alcohol used.
- Page 21 4. Check the coolant level. If there is no coolant in the reserve tank, check the cooling system leaks and repair if necessary. Add coolant to the radiator and the reserve tank, then check the coolant level in the reserve tank after the engine reaches...
- Page 22 Press firmly on the brake pedal with your hand and then check the position of the brake wear indicator. If the indicator is near the wear limit point, take the lawn tractor to an authorized Honda lawn tractor dealer for repair. CAUTION: CAUTION: Under no circumstances Under no circumstances...
- Page 23 7. Check the cutter deck drive belt. 1. Lower the cutter deck by using the cutter deck height adjusting lever, and open the engine hood. 2. Inspect the belt for wear or damage. If worn qr damaged, replace the belt as described on pages 50- SET BUTTON 3..
- Page 24 8. Check the battery Open the engine hood and check the battery electrolyte level. The electrolyte level must be maintained between the upper and ‘lower level lines on the side of the battery. If the electrolyte level is low, remove the battery filler caps and carefully add distilled...
- Page 25 9. Adjust the seat position. 1. Loosen the four seat mounting bolts. 2. Move,the seat to a position that allows you to reach all controls easily and comfortably. 3.Tighten the seat mounting bolts securely. 10. Check the tire pressure. CAUTION: Improper inflation may lead to premature...
- Page 26 11. Blade condition Before each use, check the general condition of each cutter blade, for damage or abnormal wear. To avoid severe personal injury, remove the ignition key and disconnect the spark plug caps to prevent accidental starting; wear heavy gloves to protect your hands from the cutter blades.
- Page 27 CAUTION: Use a genuine Honda replacement blade, or equivalent. To reduce the possibility of weakening the blade, or catising imbalance or poor cutting performance, sharpening should be performed by an authorized Honda lawn tractor dealer.
- Page 28 5. OPERATION Starting the engine Exhaust contains poisonous carbon monoxide gas that cause loss of consciousness and lead to death. Never run the engine in an enclosed area. Be sure to provide adequate ventilation. 1. Sit on the seat and check that the transmission is in neutral and the...
- Page 29 3.Turn the engine switch to START. CAUTION: Do not use the starter motor for more than 5 seconds. If the engine fails to start, release the key, and wait at least 10 seconds before operating the starter motor again. 4. After the engine starts, let the engine switch return to ON.
- Page 30 To prevent engine overheating, this lawn tractor is equipped with OVERHEAT ALERT System. If the overheat- alert indicator la’mp comes on and the buzzer sounds, stop engine immediately, and clean radiator screen thoroughly. (see p. 151 To prevent accidental start-up, remove the engine switch...
- Page 31 Mowing Before operating this lawn tractor you should read and under- stand the Lawn Tractor Safety section on pages 5-7. CAUTION: In tall grass, first mow with the cutter deck fully raised (4.0 in); this will expose any hidden obstacles. When you are sure the area is completely cleared, re-mow...
- Page 32 2. Move the throttle lever to the FAST position. CAUTION: When mowing ovei-rbugh ground or on hillsides, select gear that will give a safe ground speed when the engine is operating at full throttle. THROTTLE LEVER NOTE: The tractor can be operated intermediate throttle settings...
- Page 33 CAUTION: If clutch engagement occurs immediately or takes longer than one second, have the lawn tractor serviced by your HONDA dealer. SHIFT LEVER UPHILL STARTING PROCEDURE If possible, avoid stopping the tractor while driving uphill. If it is necessary to stop on a.hill, follow the special procedure...
- Page 34 5. Cutting Pattern. This cutting pattern is only recommended for a flat, level lawn surface. See safe ope%ing rules, pige To spread grass cuttings evenly, mow the outside perimeter of the lawn in a clockwise direction, then rest of the lawn counterclockwise.
- Page 35 Stopping the Engine In an emergency;. Turn the engine switch OFF. In normal use; Move the P.T.O. lever to OFF (Disengaged). OFF (Disengaged) (2) Move the shift lever to the Neutral position. (3) Set the parking brake. (4) Turn the engine switch OFF.
- Page 36 If you always operate the Lawn Tractor at altitudes higher than 6,000 feet above sea level, ask your authorized Honda Lawn Tractor dealer to perform these carburetor modifications. Even with suitable carburetor jetting, engine horsepower will decrease proximately 3.5%...
- Page 37 6. TRANSPORTING/STORAGE Transporting Transport the lawn tractor on a flat, level heavy duty trailer. Spilled fuel may ignite. To avoid fuel and oil spillage, keep the tractor level when transporting. Turn the engine switch OFF and set the parking brake. Tie the lawn tractor down securely,...
- Page 38 Preparation for storage The following steps should be taken to protect the tractor whenever it will be stored for longer than 30 days. 1. Drain all gasoline from the fuel tank into a suitable gasoline container. Do not drain the fuel tank when the exhaust system is hot.
- Page 39 2. Change the engine oil (See p.42). NOTE: If the lawn tractor will .be stored for longer than 3 months, remove the spark plugs and pour three tablespoons (approximately 1 oz.) of cleati motor oil into each cylinder. -------- MOTOR OIL Place the P.T.O.
- Page 40 4. Lower the cutter deck and loosen the belt tension adjusting knob (page, 21). Raise the pulley on the tensioner arm side, then remove the belt from the pulleys starting with the one on the opposite side. Remove the belt from the cutter deck driven pulley.
- Page 41 7. Reinstall the cutter deck. .,-e.J @ LOCK CUTTER DECK (0.39 in) 14 mm 14 mm (0.55 in) (0.55 in) 8. Store the tractor on a level surface in a dry, dust-free area with the park- ing brake lever set. 9.
-
Page 42: Maintenance
Replacement parts which are not of equivalent quality may damage the tractor. Periodic inspection and adjustment of the Honda HT4213 is essential high level performance is to be maintained..Regular maintenance will also ensure a long service life. The required service... - Page 43 These items should be serviced by an authorized Honda dealer, unless the owner has proper tools and is mechanically proficient. See the Honda Shop Manual. For professional commercial use, log hours of operation to determine proper maintenance intervals.
- Page 44 1. Engine oil change Used motor oil may cause skin cancer if repeatedly left in con- CAUTION: tact with the skin for prolonged periods. Although this is unlikely unless you ‘handle used oil on a daily basis, it is still advisable to thoroughly wash your hands with soap and water...
- Page 45 2. Air cleaner service A dirty air cleaner will restrict air flow to the carburetor. To prevent car- buretor malfunction, service the air cleaner regularly. Service more fre- quently when operating the tractor in extremely dusty areas. Never use gasoline or low flash point solvents for cleaning the air, cleaner element.
- Page 46 3. Spark plug service Recommended spark plug: BPR4HS (NGK) To ensure proper engine operation, the spark plugs must be properly gap- ped and free of deposits. 1. Open the engine hood and remove the spark plug caps. 2. Clean any dirt from around’the spark plug bases.
- Page 47 6.Thread the plug in by hand to prevent cross threading. 7. After spark plugs have been seated by hand, they should tightened turn with a wrench to compress their washers. If used plugs ark being reinstalled, they should only require to l/4 turn after being seated.
- Page 48 4. Battery electrolyte level check Open the engine hood and check the electrolyte level in each battery cell. Fill the battery with distilled water to the upper level li.ne. Never overfill the battery. Any corrosion around the positive and negasive terminals should be washed...
- Page 49 5. Fuel filter Remove the fuel filter by pulling it out of its clip under the fuel tank and visually inspect it through the opening in the hitch plate. Replace the filter if it is contaminated with dirt or water. r‘...
- Page 50 6. Headlight bulb replacement ‘Open the et-@in-e hood and turn up the bulb connector rubber cover. Push and twist the bulb connector counterclockwise, then remove connector and bulb. Install the bulb, and then align the tab on the bulb connector with the cutout in the headlight...
- Page 51 7. Wheel removal Do riot attempt to remove a wheel unless the lawn tractor is on firm and level ground. Do not attempt to remove or replace a tire unless you have the equipment and knowledge to do so properly. Block wheels securely.
- Page 52 8. Cutter deck drive belt replacement Never attempt to change drive belts while the engine is running. Remove the engine key from the ignition and disconnect the spark plug caps to prevent accidental start up. CAUTION: Wear heavy gloves to protect your hands when replacing drive belts when working...
- Page 53 FLANGE NUT 10mm CUTTER DE& DRIVE BELT CUTTER DECK DRIVEN PULLEY ’...
- Page 54 9. Blade belt replacement 1. Lower the cutter deck, remove the six yellow colored lock pins (see p.38) and remove the cutter deck. 2. Remove the bolts and nuts and remove the pulley covers. 3. Pull the belt section between pulley A and pulley B toward you, then remove...
- Page 55 10. Blade bolt. tightness/Blade replacement To avoid severe personal iniury, remove the ignition key and disconnect the spark plug cabs to prevint accidental starting; wear heavy gloves to protect your hands from the cutter blade. Blade bolt tightness - 1. Remove the cutter deck from the tractor (see page 38).
- Page 56 W Blade installation CAUTION: Use a genuine Honda replacement blade or equivalent. - 1. Clean dirt and grass from the blade, blade holder, and the inside of the cutter deck. Install the blade holder, blade, washer, and blade bolt. CAUTION:...
- Page 57 Honda Power Equipment dealer. Spark ar- resters are required in some areas; check local laws and regulations before operating this Honda product. The muffler becomes very hot during operation and remains hot for a while after the engine &tops: Be carefucnot to touch the muffler while it is hot.
-
Page 59: Troubleshooting
(see p. 44). improperly gapped. Check spark plug wire. 5. Spark plug wire loose- or disconnected. 6. Fuel not reaching w See your authorized HONDA lawn carburetor. tractor dealer. 7. Discharged battery or - Charge battery or retighten terminal. loose terminal. - Page 60 Erratic operation; b See your authorized HONDA lawn 1. Dirty fuel. tractor dealer. Clean, air cleaner elements. 2. Dirty air cleaner elements. Regap plug or replace. 3. Spark plug faulty improperly gapped. Excessive vibration; 1. Loose blade or engine -...
- Page 61 Clogged cutter deck discharge chute. b.Use genuine Honda blade or equiv- 1. Wrong blade. alent. ) Raise deck and adjust deck height 2. Deck too low: properly. Operate at full throttle. Use lower 3. Engine overloaded.- speed range. Set cutter deck higher...
- Page 62 IO. SPECIFICATIONS MODEL HT42 13 ENGINE Model GX36OKl OHC Twin cylinder Type Displacement 359 cm3 (21.9,cu Bore and stroke 58 x 68 mm (2.28 x 2.68 Ignition timing 24’ BTDC Ignition system Transistorized magneto Cooling system Liquid.cooled Coolant 1.752 ,(1.85 US qt) Engine oil capacity 1.4P (1.48...
-
Page 63: Warranty
Your purchase of a Honda product is greatly appreciated by both your dealer and American Honda Motor Co., Inc. We want to assist you in every way possible to assure your complete satisfaction with your purchase. - Page 64 When you write or call, please provide the following information: • Model and serial numbers • Name of the dealer who sold the Honda power equipment to you • Name and address of the dealer who services your equipment •...
- Page 65 MEMO...
- Page 66 MEMO...
- Page 67 MEMO...
Need help?
Do you have a question about the HT4213 and is the answer not in the manual?
Questions and answers