Table of Contents
Advertisement
Available languages
Available languages
Operator's Manual
1800 PSI
1.6 GPM
ELECTRIC PRESSURE WASHER
Model No. 580.752020
HOURS: IVlon.- Fri. 8 a.m. to 5 p.m. (CT)
WARNING
Before using this product, read this
manual and follow all Safety Rules
and Operating Instructions.
ADVERTENCIA
Antes de utilizar el producto, lea este
manualy siga todas las Reglasde
Seguridad e Instrucciones de Uso.
Sears, Roebuck and Co., Hoffman Estates, IL 60179 U.S.A.
Visit our Craftsmanwebsite: www.craftsman.com
Part No. 202543GS Draft E (11/04/2009)
• Safety
• Assembly
• Operation
• Maintenance
• Parts
• Espafiol,p. 18
Advertisement
Table of Contents

Related Manuals for Craftsman 580.752020


Summary of Contents for Craftsman 580.752020
- Page 1 Safety Rules manualy siga todas las Reglasde • Parts and Operating Instructions. Seguridad e Instrucciones de Uso. • Espafiol,p. 18 Sears, Roebuck and Co., Hoffman Estates, IL 60179 U.S.A. Visit our Craftsmanwebsite: www.craftsman.com Part No. 202543GS Draft E (11/04/2009)
- Page 2 OneYear Full Warranty on CraftsmanPressureWasher When assembled, operated and maintained according to all supplied instructions, if this Craftsman Pressure Washer fails due to defect in material or workmanship within one year from the date of purchase, return it to any Sears store for replacement.
- Page 3 WARNING A WARNING Risk of eye injury. Contact with power source can cause electric Risk of electrocution. Spray can splash back or propel objects, shock or burn. including incorrectly attached accessories. • NEVERspray near power source. • Always wear safety goggles when using this equipment or in •...
- Page 4 Motor Overload SafetyIssues The electric motor in this pressure washer is equipped with an overload protection device. This device will automatically GroundFault Circuit InterrupterProtection shut off the motor if the motor overheats or draws excessive This product must be properly grounded. This electric current.
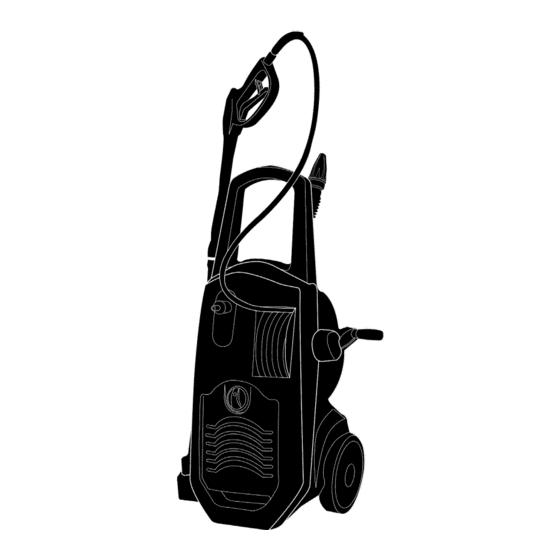
- Page 5 Know YourPressureWasher Read the Operator's Manual and safety rules before operating your pressure washer. Comparethe illustrations with your pressure washer to familiarize yourself with the locations of various controls and adjustments. Savethis manual for future reference. A - Spray Gun -- Controls the application of water onto F - Master ON/OFFSwitch -- ON is fully clockwise.
- Page 6 (800) 222-3136. 3. Insert bottom spray gun holder into slots at the bottom AssemblingPressure Washer unit. Your Craftsman pressure washer will need assembly before 4. Push holder towards front of unit to lock it into operation: position. • Fill out and send in registration card 5.
- Page 7 Assemble Water Inlet Coupling NOTICE DONOT run the pump without the water supply connected and turned on. • Damage to equipment r esultingfrom failureto follow this instructionwill voidwarranty. 1. Confirm water inlet screen is installed in the male quick connect coupling. IMPORTANT:Do Not siphon standing water for the water use if damaged.
- Page 8 How to Start Your Pressure Washer 8. Rotate the unit's ON/OFF switch to the OFFposition (fully counterclockwise.) Follow the instructions below in the order presented. If you have any problems operating your pressure washer, please call the pressure washer helpline at (800) 222-3136. 1.
- Page 9 The pressure washer isnowready f oruse. I nstructions for Slide nozzle backward (A) to achieve high pressure. useofthesupplied accessories aregiven later i nthis Slide nozzle forward (B) when you wish to adjust spray section. to low pressure mode. How to Stop Your Pressure Washer The pressure washer motor runs only when the trigger is engaged.To stop the pressure washer and turn off the motor:...
- Page 10 Usage Tips Allow detergent to "soak in" for 3-5 minutes before washing and rinsing. Reapply as neededto prevent • For most effective cleaning, keep spray nozzlefrom 8 to surface from drying. Do Not allow detergent to dry on 24 inches (20 to 61 cm) away from cleaning surface. (prevents streaking).
- Page 11 How to Use the Turbo Nozzle Other CleaningTips The turbo nozzle spins a 0° nozzle stream in a circular pat- • Never leavethe pressure washer unattended while it is tern, providing an intense wide-spray pattern for scouring plugged into an electrical outlet and while water is large surface areasfast and efficiently.
- Page 12 Maintenance S chedule Follow the hourly or calendar intervals, whichever occurs first. More frequent service is required when operating in adverse conditions noted below. OPERATING INTERVALS SERVICE DATES Every 25 Every 50 Every 100 Before Hours or Hours or Hours or MAINTENANCE TASK Each Use Hours...
- Page 13 Before EachUse CheckGun and Nozzle Extension 1. Cleandebris. Examine hose connection to spray gun and make sure it is secure. Test trigger by pressing it and making sure it springs 2. Checkwater inlet screen for damage. back into place when you releaseit. Put safety latch in 3.
- Page 14 Pump and Motor Maintenance 7. Disconnect garden hose from pressure washer. This pressure washer does not require any maintenance on 8. Rewind high pressure hose onto hose reel. the pump or motor. Both assemblies are pre-lubricated and 9. Store unit in a clean, dry area. If storing in sealed, requiring no additional lubrication ever.
- Page 15 Problem Cause Correction Water inlet is blocked. Clear inlet. Inadequatewater supply. Provide adequatewater flow. Inlet hose is kinked or leaking. Straighten inlet hose, patch leak. Checkand clean inlet hose strainer. Pump has following problems: Clogged inlet hose strainer. failure to produce pressure, Water supply is over 100°F.
- Page 16 Craftsman 1800 PSI Pressure Washer 580.752020 Main Unit -- Exploded View and Parts List ,/35 2 0 _\\\\ \\\\\\\ Item Part # Item Part# Description Description 203209GS HANDLE 203102GS DECAL 203210GS 203644GS KNOB HOLDER-ACC-Upper 203211GS HOLDER-ACC-Lower 203647GS COVER-FRONT 203212GS AXLE...
- Page 18 Si, tras haberla montado, utilizado y mantenido de acuerdo con todas las instrucciones facilitadas, la limpiadora a presi6n Craftsman falla debido a defectos de materiales o de mano de obra en el plazo de un aSo a partir de la fecha de compra, devu61vala a cualquier almac6n Sears, punto de venta de Craftsman o centro de reparaci6ny repuestos de Sears de los Estados Unidos para su reparaci6n gratuita o, en caso de que 6sta no sea posible, para su sustituci6n.
- Page 19 ADVERTENCIA ADVERTENCIA El chorro de agua a alta presi6n que este equipo El uso de limpiadora a presi6n puede crear produce, puede atravesar la piel y los tejidos los charcos y superficies resbalosas. subcut_.neos,provocando lesiones de gravedad El retroceso de la pistola rociadora que podrfan dar lugar a la amputaci6n de un puede provocar caidas.
- Page 20 Cuestiones relativasa la seguridad Sobrecargadel motor El motor el6ctrico de la limpiadora a presi6n dispone de un dispositivo de protecci6n contra sobrecarga. El dispositivo Protecci6n mediante interruptorde circuitode fallo de conexi6na tierra parar_,autom_ticamente el motor en caso de recalentamiento o de consumo excesivo de corriente. AI cabo de un tiempo, Este producto se debe conectar a tierra correctamente.
- Page 21 Conozca su limpiadoraa presi6n Lea el Manual del Operarioy las reglas de seguridadantes de porteren marcha su limpiadora a presiOn. Compare las ilustraciones con su sistema de limpiezapara familiarizarse con las ubicaciones de los diferentes controles y ajustes. Guarde este manual para referenciasfuturas. A - Pistola rociadora:permite controlar la aplicaci6n de agua F - Interruptorprincipal ON/OFF:las posiciones ONy OFFse con un gatillo.
- Page 22 9resi6n, 1-800-222-3136. IVlontajede la limpiadora a presiOn Antes de utilizar la limpiadora a presion Craftsman, es 3. Inserte el soporte inferior de la pistola rociadora en la necesario montarla: parte inferior de la unidad.
- Page 23 Conecte la manguera de riego a la bomba empujando AVISO el acoplamiento con conector dtpido contra el NO ha0a funcionar la bomba si no tiene el suministro acoplamiento con conector r_.pidomacho conectado a .conectado y abierto. _ ..la limpiadora a presi6n. Escuchar_. o sentir_,dos clics distintos cuando la conexi0n sea correcta.
- Page 24 Puesta e n funcionamientola limpiadora a presi6n 8. Sit_e el interruptor ON/OFFde la unidad en la posici6n OFF(gire a tope hacia la izquierda). Siga estas instrucciones en el orden indicado. En caso de problemas durante el uso de la unidad, Ilame a la linea de asistencia de la limpiadora a presi6n, 1-800-222-3136.
- Page 25 apunte c onlapistola h acia u na direcci6n segura y ADVERTENCIA apriete e lgatillo. Elmotor d elalimpiadora apresi6n arrancar_.. El chorro de agua a alta presi6n que este equipo Lalimpiadora apresi6n y aest,. l ista para suuso. L as produce, puede atravesar la piel y los tejidos instrucciones deusodelosaccesorios suministrados conla...
- Page 26 Sugerenciasde uso de lavar y aclarar. Vuelva a aplicar la soluci6n cuando sea necesario para evitar que la superficie se seque. No • Para obtener un resultado 6ptimo, mantenga la boquilla permita que el detergente Ilegue a secarse (impide la rociadora a una distancia de entre 20 y 61 cm de la formaci6n de vetas).
- Page 27 C6mo utilizar la boquillaturbo Otrassugerenciaspara la limpieza La boquilla turbo centrifuga una corriente de 0° para • No abandone nunca la limpiadora a presi6n cuando proporcionar un amplio e intenso patr6n de rociado circular est6 conectada a una toma el6ctrica y con la que permite limpiar grandes superficies de forma r_.piday alimentaci6n de agua abierta.
- Page 28 RESPONSABILIDADES DELPROPIETARIO Siga el programa de mantenimiento seg_n el n_mero de horas o seg_n el calendario, Io que suceda primero. Se requiere de servicio con mayor frecuencia cuando opere la unidad en las condiciones adversasdescritas a continuaci6n. INTERVALODE OPERACIONPOR HORA INTERVALODE OPERACI()NPOR HORA Cada 25 Antes de...
- Page 29 Antesde cada uso Compruebela pistola y el prolongador de la boquilla 1. Limpie los residuos. Examine la conexi6n de la manguera con la pistola rociadora y aseg_rese de que es correcta. Pruebe el gatillo apret_.ndolo 2. Compruebe si el filtro de entrada est,. da_ado. para asegurarse de que vuelve a su posici6n original cuando 3.
- Page 30 Mantenimientode la bomba y del motor 7. Desconectela manguera de riego de la limpiadora a presi6n. La bombay el motor de la limpiadora a presi6n no necesitan mantenimiento. Ambos conjuntos est_.nprelubricados y 8. Enrolle la manguera de alta presi6n en su carrete. sellados, y no requieren lubricaci6n adicional.
- Page 31 Causa Problema Soluci6n Elimine laobstrucci6n. La entrada de agua est,. obstruida. La alimentaci6n de agua es Utilice alimentaci6n de agua adecuada. inadecuada. La manguera de entrada est,. retorcida Estire la manguera, repare los puntos de La bombatiene los siguientes o pierde agua. fuga.
- Page 32 Your Home For expert troubleshooting and home solutions advice: www.managemyhome.com For repair - in your home - of all major brand appliances, lawn and garden equipment, or heating and cooling systems, no matter made it, no matter who sold For the replacement parts, accessories owner's manuals that you need to do-it-yourself.