Table of Contents
Advertisement
Owner's Manual
CRRFTSHRN®
ALL-IN-ONE
CUTTING TOOL
Model No.
183.172540
Important
Safety
Notice
[_, WARNING I
Always have one hand firmly
placed on the tool body while
operating, Never operate the
tool by holding only the tool
handle.
CAUTION:
Before
using this Cutting
Tool,
read this manual
and follow
all its Safety
Rules and Operating
Instructions,
•
Safety Instructions
•
Accessories
•
Assembly
•
Operation
•
Maintenance
•
Parts
List
•
Espanol
Sears, Roebuck and Co., Hoffman Estates,
IL 60179 USA
Part, No, 183172540001
Rev. 0 07/21/03
Advertisement
Table of Contents

Related Manuals for Craftsman 183.172540


Summary of Contents for Craftsman 183.172540
- Page 1 Owner's Manual CRRFTSHRN® ALL-IN-ONE CUTTING TOOL Model No. 183.172540 Important Safety Notice [_, WARNING I Always have one hand firmly placed on the tool body while operating, Never operate the tool by holding only the tool handle. • Safety Instructions CAUTION: •...
- Page 2 Safety and Assembly Instructions ASSEMBLY INSTRUCTIONS CRRFTSMRN® Turn cutting tool motor switch OFF and remove plug from the power source. FLEX SHAFT for Lock main shaft (3) by rotating the collet nut (1) ALL-IN-ONE while pressing on the spindle lock button (4) until the spindle lock prevents shaft from CUTTING TOOL...
- Page 3 SECTION PAGE SECTION PAGE Warranty ........ACCSS_ ........ProductSpecifications ...... Carton Contents ......7 - 8 PowerTool Safety ......Know Your Cutting Toct ....9 - 10 CuttingToct & AccessorySafety ..Assembly & Operation ...... 11 - 23 ElectricalRequirement& Safety ..Maintenance ........
- Page 4 Safety and Assembly Instructions ASSEMBLY INSTRUCTIONS - cont'd 6. Align the flex shaft connector cap (6) wfth the cutting tool motor housing (8) (see Fig. 3). NOTES: a) Carefully align the square end of the flex shaft center core so it will engage into the square hole in the collet.
- Page 5 WARNING--] Dress properly. Do not wear loose clothing or jewelry Contain long hair. Keep your hair, clothing and Before using your cutting tool, it is critical gloves away from moving parts. Loose clothing. that you read and understand these safety jewelry or long hair can be caught In moving parts.
- Page 6 SERVICE ANGLE GRINDER ATTACHMENT SAFETY L=' wAr.J.G I Tool service must be performed only by qualified personnel Service or maintenance performed by Always wear safety goggles with side shields or a unqualified personnel could result in risk of injury. face mask when using the angle grinder attachment. High speed grinding and sanding will throw hot When servicing a tool, use only identical sparks and dust particles that could cause serious...
- Page 7 IZolUl;pie;il_ F;ll I IP'_,I IIfe__ Make sure your extension cord is in good condition. This cutting tool is double insulated to protect you from el_l shock, When using an extension cord, be sure to use one heavy enough to carry the current the tool will draw. An WARNIN undersized cord will cause a drop in line voltage resulting in loss of power and overheating, The table below shows...
- Page 8 WARNING I ® This symbol designates that this Some of the following symbols may be used on tool is listed with U.S. your tool. Please study them and learn their requirements by Underwriters LISTED meaning. Proper interpretation of these symbols Laboratories.
- Page 9 AVAILABLE ACCESSORIES COMPONENTS CUTTING TOOL IA WARNING J DESCRIPTION I QI;Y Inside Carrying Case Use only accessories recommended for this cutting tool. Follow instructions that accompany Angle Grinder Attachment accessories. Use of improper accessortes may cause Metal cutting disc injury to the operator or damage to the Cutting Tool. Masonry cutting disc 36 grit (coarse} sanding disc Visit your Sears Hardware Department...
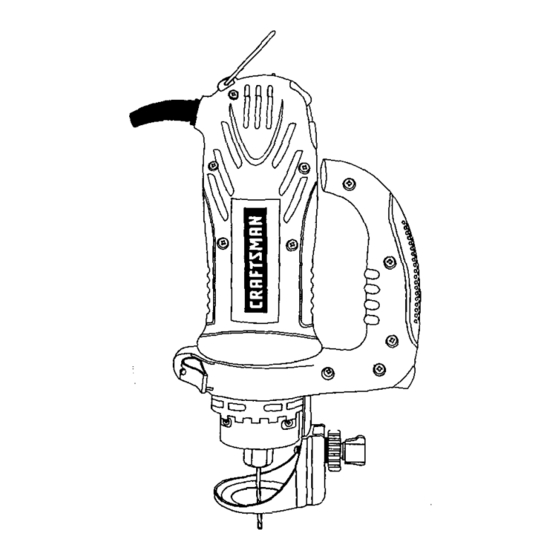
- Page 11 Loop precision Handle Motor Housir H_ng C:) < Quick Lod_ng Le_r Adjusting KnOb I_ver ,So4e Prate Motor Housir Motor Housing Depth StopRod DepUl SCale Height Mounting Knobs Quick Lever PSunge Knob Action Turret Sole Adjusting Pla_eLoc_ Mounting OLSC Knob Base Rip Fence Mount...
- Page 12 Grinding Handle Mounting Colla¢ Lockln Button Qulc_ Connect Cc41et Lever Connector...
- Page 13 INSTALLING CU'FrlNG BITS - Cont'd I_ WARNINGI insert new cutting bit (4) into the coliet. Remove the plug from the power source before assembly, changing accessories or cutters IA w a=aGI making adjustments. This safety action will help prevent accidental starting of the tool which could Insert the bit all the way into the coget and then...
- Page 14 CHANGING COLLET INSERT INSTALLING FREEHAND CU'I-rlNG GUIDE - cont'd The cuffing bits for this toot are locked into place with a Slide fi'eehand cutting guide mounting bracket (1) collet nut (t) and coflet (see Fig. 3). The l/a" collet (2) is onto the bottom of motor housing (2) until the slot in used for holding hobby tool accessory bits.
- Page 15 PRACTICE CUTS USING FREEHAND CU'I"TING GUIDE- contfd [,_ WARNtNG ) Set the speed control switch to the appropriate speed Have you read "POWER TOOL SAFETY", "CU'I_ING TOOL SAFETY", "ELECTRICAL Turn the switch ON. REQUIREMENTS & SAFETY" AND "CUTTING TOOL SYMBOLS" on pages 3, 4, 5 and 6 or'this manual? When the motor is up to full speed, slowly tip the tool if not, please do it now before you operate this...
- Page 16 CUTTING OUTLET OPENINGS IN DRYWALL cUTrlNG OUTLET OPENINGS IN DRYWALL- cont'd 6. Move the bit slowly to the dghtuntilyou feel end IA DANGER I hear the bit contactingthe insideof the box. Do not attempt to use this tool to make cut-outs Pull the bit out far enough to slip it over the edge of around any fixture or opening which has live the box.
- Page 17 ADUSTING FREEHAND CuI-rlNG GUIDE-Cont'd [4_lvJ [s%vl_,_ .=tnl:::li _, f .'l_II] _ INSTALLING REMOVABLE HANDLE The removable handle is designed for use when precision control over the tool movement is desired. The comfortable handle can be used with either the right or left hand.
- Page 18 _HI:._]m::l ' _o41JW|l_[_[eLWlle] CIRCLE CUTTING GUIDE OPERATION - cont'd CIRCLE CUTTING GUIDE OPERATFON Turn the switch ON. WARNING When the motor is up to full s peed, slowly tip the tool Unplug the tool from tt3epower source before changing accessories, changing bits and making and circle cutting guide assembly to an Upright adjustments.
- Page 19 SETTING ROUTER DEPTH FOR SINGLE DEPTH "Jllll+[_ :11:ts]lJl I1: =i :r_*!:j ONLY The router accessory Converts your Cutting Tool into a small hobby plunge router that is capable of handling Depth of cutting is controlled by sliding the muter base small _"...
- Page 20 SEI-FING PLUNGE DEPTH - cont'd SET'rING ROUTER BASE BEVEL Loosen both height adjusting knobs (6) by turning Bevel cutting with the cutting bit can be done with the them counter-clockwise. router base tilted to the desired angle. NOTE: Only loosen height adjusting knobs enough to release the tension on the guide rods (7).
- Page 21 ,] I[ I I _ [€l :il _._[aJlj I q _1 :]r:_,.'l FREEHAND CUTI'ING AND ROUTING CuI-rlNG STRAIGHT UNE WITH STRAIGHT EDGE When the router base accessory is installed on the To cut a straight line. you can use a straight edge Cutting Tool, it will function as a small router to be used template to guide the muter base.
- Page 22 _1 nn. Jl_[e_=8:_oll In II::l _..8 :__,_! CU'I-rlNG CURVED LINE WITH A TEMPLATE INSTALLING RIP FENCE TO ROUTER BASE To cut a curved line, you can use a curved template to Loosen all three cap screws (1) in the router base guide the router base.
- Page 23 Match up key (2} on motor housing and slot (3) in INSTALL FLEX SHAFT ADAPTER angle grinder attachment. There are also arrows on the motor housing and angle grinder attachment Remove collet nut (1) from the motor shaft (2) housing. Slide angle grinder attachment onto the and remove existing conet (see Fig 23).
- Page 24 INSTALLING GRINDING DISC - cont'd SAFETY EQUIPMENT FOR ANGLE GRINDER ATrACHMENT WARNING Your angle grinder attachment is a high speed tool that will throw hot sparks and metal dust when grinding. It will also throw particles and dust when sanding, it is critical that you use proper safety goggles, dust mask and hearing protection at all times while operating this tool.
- Page 25 Ig=F.'4J:lg; _._]" r :_;i Insert collet with square hole (5) into main shaft (3) and re-install the collet nut onto the main shaft (see Fig. 30). NOTE: Collet with square hole is packed in Polybag ALWAYS WEAR EYE PROTECTION. Any power tool Use Cuthng Tool wrench to tighten the collet nut eyes which could cause permanent firmly onto the main shaft while spindle lock is...
- Page 26 For your own safety, turn the switch OFF and remove the plug from the power source before maintaining your Cutting Tool. When servicing, use only identical parts. Use of any other part may create a hazard or cause product damage. EXTERNAL CLEANING __.
- Page 27 Main Unit...
- Page 28 IA WARNING I When servicing use only CRAFTSMAN® replacement parts. Use of any other parts may create a HAZARD or cause damage to your Spin Saw. Any attempt to repair or replace electrical parts on this Cutting Tool may create a hazard unless repair is performed by a qualified technician.
- Page 29 Freehand Cutting Guide Assembly Key # Part # Part Name 02.AF-000041-10 Fixing shaft 02AF-000076-00 Release lock pin 22t8-MA0001-00 Release lock pin 2218-MA0001-01 Release lock pin _rew 02._S-000287-00 2213-MA00t0-00 FreeoJt metal round guide 2213-PA0010-00 Lock 2213-PA0010-01 Lock Fixbase 2213-PA0011-00 2213-PA0011-01 Fixbase 2213-PA0012-00 Plastic guide base 2213-PA0013-00...
- Page 30 Handle Assembly _330 Part # Part Name Key # Key # Part # Part Name 02AF-000041-10 Fixing sha[t 2213-MA0013-00 S-round guide holder 02AF-000076-00 2213-PA0010-00 Lock Release lock pin 2213-PA3O10-01 Lock 2218-MA0001 `00 Release lock pin 2218-MA0001-01 2213-PA0012`00 Plastic guide base Release lock pin Compressive Adjustment Gear...
- Page 31 Circle Cutting Guide Assembly Part Name Key # part # Hexagonthinnut 02AN-000018-00 02AN_00018-10 Hexagonthin nut 02AN-000028-Q0 Fixingnut 02AS-000258-00 Machinescrew 02AS-000258-10 Machinescrew 02.AS-0O03 t 9_0 Screw 02AW-000022-B0 Springwasher 2206-MA0001-00 Circulararm (metric) 2206-MA0005--00 Ck'culerarm (inch) 2206-MA0002-00 Washer 2206.-MA0003-00 Handlebush 2206.-PA0003-00 Lockingbase 2206-PA0004-00 Roundguidemount 2206-PA0005-00 Screwknob...
- Page 32 Router Assembly t 39...
- Page 33 Router Assembly Key # Part # Part Name Key # Part # Part Name 02AF-000041-10 FixinQ shaft 02AS-000292-00 Screw Base release 02AS-000292-10 Screw 02AF-000077-00 lock pin 02AF-000078-00 Height rod 02AS-000308-00 Screw 02AG-000145-00 I Guide bush 02AW-000068-00 Wave washer 02AW`000070-00 External retaining ring s 02AJ-000017-00 Router tiJe base...
- Page 34 Flex Shaft Assembly...
- Page 35 Flex Shaft Assembly Part # Part Name Key # Part Name Key # Part # 2213÷MA00t 9-00 Electrode 01AT-000034-00 Bushing tube -'lexible hose 2213÷MA0020-00 Rotor shaft 01AT-000038-00 2213-MA0O21-0O Pen front 01AT-000039_0 Spdng+hose 9710-MA0003-00 02AE_00045-30 Bearing 3/32" collet (on toolI 9710-MA0008-02 1/8"...
- Page 36 Angle Grinder Assembly Angle Grinder Handle Assembly...
- Page 37 Angle Grinder Assembly Key # Part # Part Name Key # Part # Part Name Flex shaft 02AE-000037-OO Scaring 02AH-000127-00 Flex shaft 02AE-000049-00 Bearing 2221-MA0006-00 02AE-000067-00 Scaring 2221-MAO009-00 Flex shaft adapter Lock 02AF-000041-10 Fixing shaft 2213-PA0005-01 Bottom cab 02AF-000025-10 Anvil lock pin 2221-PA0001-00 Top cab 02AF-000083-00...
Need help?
Do you have a question about the 183.172540 and is the answer not in the manual?
Questions and answers