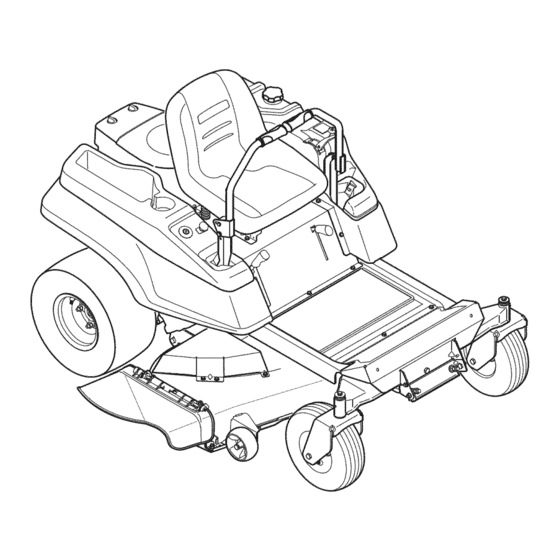
Cub Cadet RZT54 Operator's Manual
Rzt series
Hide thumbs
Also See for RZT54:
- Operator's manual (85 pages) ,
- Specifications (2 pages) ,
- Operator's manual (112 pages)
Table of Contents
Advertisement
Available languages
Available languages
Advertisement
Table of Contents

Related Manuals for Cub Cadet RZT54


Summary of Contents for Cub Cadet RZT54
- Page 1 SafeOperationPractices • Set-Up• Operation• Maintenance • Service• Troubleshooting• Warranty ATOR S ANUAL RZT Series Tractor m Moclel RZT54 CUB CADET LLC, P.O. BOX 361131 CLEVELAND, OHiO 44136-0019 PrintedIn USA FormNo.769-04292 (November 1 8,2008)
-
Page 2: Customer Support
This information will be necessary, should you seek technical support via our web site or with your local Cub Cadet dealer. Pivot the seat assembly SERIAL NUMBER forward to locate the model plate on the underside... -
Page 3: Important Safe Operation Practices
ImportantSafeOperation Practices WARNING! This symbol points out important safety instructions which, if not followed, could endanger the personal safety and/or property of yourself and others. Read and follow all instructions in this manual before attempting to operate this machine. Failure to comply with these instructions may result in personal injury. - Page 4 29. Ifsituations occur which a re notcovered inthis manual, use 12. Amissing ordamaged discharge cover can cause blade contact orthrown o bject injuries. care and good judgment. Contact your c ustomer service representative forassistance. 13. Stop t heblade(s) when crossing gravel drives, walks, or roads a nd while notcutting g rass.
- Page 5 Children When practical, remove gas-powered equipment from the truck or trailer and refuel it on the ground. Tragic accidents ca n occur if the operator is not alert to the If this is not possible, then refuel such equipment presence of children. Children are often attracted to the...
-
Page 6: Spark Arrestor
Check the blade(s) and engine mounting bolts at frequent Donot modifyengine intervals for proper tightness. Also, visually inspect blade(s) To avoid serious injury or death, do not modify engine in any for damage (e.g., excessive wear, bent, cracked). Replace the blade(s) with the original equipment manufacturer's way. -
Page 7: Safety Symbols
Safety Symbols This page depicts and describes safety symbols that may appear on this product. Read, understand, and follow all instructions on the machine before attempting to assemble and operate. READ THE OPERATOR'S MANUAL(S) Read, understand, and follow all instructions in the manual(s) before attempting assemble and operate... - Page 8 or a corner of a building... 15 ° Usethis page as a guide to determine slopeswhere you may not operate safely. WARNING! Do not operate your lawn mower on such slopes. Do not mow on inclines with a slope in excess of 15 degrees (a rise of approximately 2-1/2 feet every 10 feet).
-
Page 9: Contents Of Crate
Assembly & Set-Up Contents of Crate One Lawn Tractor One Oil Drain Tube One Deck Wash Hose Coupler One RZT Tractor Operator's One Kawasaki Engine Operator's Manual Manual Remove the two shoulder bolts and lock nuts in the seat TractorPreparation pan as shown in Fig. -
Page 10: Connecting The Battery Cables
Position DriveControllevers Connecting the Battery Cables The drive control levers of the tractor are lowered for shipping CALIFORNIA PROPOSiTiON 65 WARNING! purposes. The flange lock nuts, hex screws, and flat washers that Battery posts, terminals, and related accessories normally secure the control levers in their operating position contain... - Page 11 Lower DeckDischarge ChuteDeflector the chute deflector installed and in the down ARNING! Never operate the mower deck without position. Check the mower deck for a shipping brace (with tag) that may be holding the chute deflector upward for shipment. Ifa brace is present, it must be removed before operating the tractor.
-
Page 12: Controls And Features
Controls a nd Features Deck Height Deck Lift Handle index Parking Brake Throttle Control Switch LH Drive RH Drive nition Switch Hour Meter/ Control Lever Control Lever indicator Cup Holder Seat Adjustment Lever Fuel Tank Ca Tray Figure 4-1 RHand LHDriveControl Levers NOTE: References to LEFT, RIGHT, FRONT, and REAR indicate that position... - Page 13 Do not attempt to remove the cap from the tractor. ignition Switch Push the cap downward on the fuel tank fill neck and turn The ignition switch is located on the RH console approximately 1/4turn clockwise to tighten Always re-install to the right of the operator's seat.
-
Page 14: Throttle Control
Pull the lever up out of the "J" slot and to the right; then operation, check the battery and charging system for possible lower completely to disengage the parking brake. causes and/or contact your Cub Cadet dealer. NOTE: If the LH and RHdrive control levers are not fully Oil Pressure Indicator opened out in the neutral position when engaging the This warning lamp indicates low engine oil pressure. -
Page 15: Operation
Contact your authorized Avoid operation on traction surfaces that are unstable; Cub Cadet Dealer. extreme caution if the surface is slippery. The safety interlock system prevents the engine from Slow down before turning... -
Page 16: Starting The Engine
The safety interlock system will shut offthe engine if the Turn the ignition key clockwise to the "START" position operator leaves the seat with the PTO engaged, regardless and release it as soon as the engine starts; however, do not of whether the parking brake is engaged. -
Page 17: Stopping The Engine
Move the RH and LH drive control levers inward in the Stopping the Engine neutral position. Refer to Figure 5-2. Place the PTO switch in the "OFF" position. Move the RH and LH drive control levers fully outward the neutral position. - Page 18 To turn to the left, move the left drive control lever Drivingthe TractorForward rearward of the right lever. See Fig. 5-4. WARNING! Keep all movement of the drive control levers slow and smooth. Abrupt movement of the control levers can affect the stability of the tractor and could cause the tractor to flip over, which result in serious injury or death to the operator.
- Page 19 Driving the Tractor in Reverse Turning While DrivingRearward To turn the tractor while driving rearward, move the control WARNING! Always look behind and down on both levers as necessary so that one lever is forward of the other. The tractor will turn in the direction of the forward control lever.
-
Page 20: Stopping The Tractor
Executinga Zer0Turn Stopping the Tractor Move both drive control levers to the neutral position WARNING! When executing a zero turn, the tractor stop the motion of the tractor. MUST BE STOPPED. Executing a zero turn while the tractor is moving can significantly reduce your Push the PTO switch downward... - Page 21 ARNING! Make certain the area to be mowed contact you Cub Cadet dealer to have the tractor inspected. that can be thrown by the rotating blades. NOT operate the tractor if any safety circuit is not functioning properly.
-
Page 22: Maintenance And Adjustments
Maintenance & Adjustments MaintenanceSchedule Prior Every Every Before Every Every toStoring Eachuse lOHours 25 Hours 50 Hours I00 Hours Check Engine intakeScreen/Cover CleanHood/Dash Louvers Check Engine Oil Leve[ Check Air Filterfor Dirty,Looseor Damaged Parts CleanandRe-oH Air Filter'sFoamPredeaner V/" Replace Air Filter Element Change Engine Oiland Replace Oil Filter Clean Battery Terminals LubeFrontPivot AxleandCaster A xles... - Page 23 3. Ifyour e ngine has the oildrain valve s etup s hown i fFig. 6-1, Turn the oil drain valve 1A-turn, then pull outward see theOil D rain V alve s ection below. begin draining oil. After the oil has finished draining, push the end of the oil drain valve back in and turn V4-turn to secure it back in place.
- Page 24 If checking wheel axles and the front pivot axle with Cub Cadet 251H reservoir oil level, proceed as follows: EP grease after every 10 hours of service.
-
Page 25: Tractor Storage
Using the DeckWashSystem bypass rod engaged. Serious transmission damage WARNING! Do not tow the tractor, even with the will result from doing so. never engage the deck from any position other than ARNING! When using the deck wash system, the operator's seat of the tractor. -
Page 26: Removing Thetractor Fromstorage
If storing the tractor for 30 days or more: Adjustments To prevent gum deposits from forming inside the engine's carburetor and causing possible ignition key and engage the parking brake before malfunction of the engine, the fuel system must be ARNING! Shut the engine off, remove the making... -
Page 27: Leveling The Mower Deck
To adjust the drive control levers forward or rearward, proceed Level the deck by using a wrench to turn the adjustment follows: gear (found immediately behind the hex cap screw just loosened) clockwise to raise the left side of the deck, or If not already loose, loosen the flange lock nut and rotate counterclockwise... -
Page 28: Adjusting The Seat
Remove the cotter 3in from the left end of the roller shaft. When the correct pitch of the deck is acquired, secure the inner hex nuts with a wrench and tighten the outer hex See Fig. 6-10. nuts against the inner hex nuts to lock them in the adjusted position. -
Page 29: Battery Removal
This tractor's electrical system checked by your Cub Cadet Service will prevent sparking or possible injury from an Dealer electrical short caused by contacting the tractor body with tools being used to connect... -
Page 30: Relaysand Switches
PTO pulley on the bottom Cub Cadet Service Dealer. the engine. Sitting behind the tractor facing forward, reach beneath DeckRemoval the tractor to grasp the belt at the front of the PTO pulley. -
Page 31: Deck Installation
DeckInstallation Lower the deck to the ground using the deck lift handle. Locate the LH and RH deck support pins on each side of the To install the mower deck, proceed as follows: deck. Pull the deck support pins outward and lock in the While holding the deck front hanger rod upward,... - Page 32 Mower ilade (are Rolling the Belt intothe PT0Pulley. Using the deck lift handle, raise the deck to the position that provides the most horizontal run of the belt between place the PTO switch in the "OFF" position, engage the deck idler pulleys and the PTO pulley on the bottom WARNING! Before performing any maintenance,...
-
Page 33: Transmission Drive Belt
When reinstalling the blades, be sure they are installed TractorCreeping that the wind wings are pointing upward toward the top of the deck. Creeping is the slight forward or backward movement of the tractor when the engine is running at high idle and the drive Tighten the blade nuts to 70-90 ft. - Page 34 TractorHighSpeedTracking If the tractor tracks to one side with both drive control levers fully forward, adjust the control levers as follows: Check for proper and balanced air pressure in both front and rear tires. Refill tires if necessary. Perform the first three steps in the previous section, Tractor Creeping, to verify that the tractor...
-
Page 36: Troubleshooting
Troubleshooting Problem Cause Remedy Engine fails to start 1, PTOiBlade Engage knob engaged. 1. Place knob in disengaged (OFF) position. 2. Parking brake notengaged. 2. Engage parking brake. 3. Drive control levers not fully outward 3. Move drive control levers fully outward neutral position. - Page 37 Problem Cause Remedy Engine overheats 1. Engine oil level low. Fill crankcase with proper amount weight of oil. 2. Air flow restricted. Clean grass clippings and debris from around the engine's cooling fins and blower housing. Engine hesitates at high Spark plug(s) gap too close.
-
Page 38: Replacement Parts
Replacement P arts Component Part Number and Description 954-04138A Drive Belt (Mowing Deck) 954-04043A Drive Belt (Transmissions) 942-0677B Deck Blade 918-0671B Deck Spindle 734-04155 Deck Wheel 731-05825 Deck Roller (Rear) 925-1707D Battery 751-10703 Fuel Tank Cap 751-10447 Fuel Tank Cap Phone (800) 965-4CUB to order replacement parts or a complete Parts Manual (have your full model number... - Page 39 Component Part Number and Description 746-04214 Choke Control/Cable 746-04066 Throttle Control Cable 925-1745 Ignition 631-04070A Discharge Chute Assembly 634-04321A Caster Wheel Assembly Phone (800) 965-4CUB to order replacement parts or a complete Parts Manual (have your full model number and serial number ready).
-
Page 40: Attachments & Accessories
Attachments & Accessories The following attachments and accessories are compatible with your Cub Cadet RZT tractor. See your Cub Cadet dealer or the retailer from which you purchased your tractor for information regarding price and availability. Part Number Part 19A70008100... -
Page 42: California Emission Control Warranty Statement
CALIFORNIA EMISSION CONTROL WARRANTY STATEMENT YOUR WARRANTY RIGHTS AND OBLIGATIONS The CaliforniaAir ResourcesBoardandMTDConsumerGroupInc are pleasedto explainthe evaporativeemissioncontrolsystemwarrantyon your2008 lawn mower.In California,new lawnmowersmust be designed,built and equippedto meetthe State'sstringentanti-smogstandards.MTDConsumerGroupInc must warrantthe EECSon yourlawn mowerfor the periodof time listed below providedthere has beenno abuse, neglector impropermaintenanceof yourlawn mower. Your EECSmay includeparts such asthe carburetor,fuel-injectionsystem,the ignitionsystem,catalyticconverter,fuel tanks,fuel lines,fuel caps, valves, canisters,filters,vapor hoses,clamps,connectors,andother associatedemission-relatedcomponents. - Page 43 WARRANTED PARTS: The repairor replacementof any warrantedpart otherwiseeligiblefor warrantycoveragemay be excludedfrom such warrantycoverageif MTDConsumerGroup Inc demonstratesthatthe lawn mowerhas been abused,neglected,or improperlymaintained,andthat such abuse,neglect, or impropermaintenancewasthe directcauseof the needfor repairor replacementof the part. That notwithstanding, a ny adjustmentof a componentthat has a factory installed,and properly operating,adjustmentlimitingdevice is still eligiblefor warrantycoverage.
- Page 44 Without limiting the foregoing, this limited warranty does not provide The limited warranty set forth below is given by Cub Cadet LLC with coverage in the following cases: respect to new merchandise purchased or leased and used in the a.
- Page 45 Medidas importantes de seguridad • Configuraci6n • Funcionamiento • Mantenirniento • Servicio • Solu EL OPE ANUAL Tractor Serie RZT m Moclelo RZT54 CUB CADET LLC, P.O. BOX 361131 CLEVELAND, OHiO 44136-0019 FormularioNo.769-04292 Impresoen Estados UnidosdeAmerica (Noviembre 18,2008)
- Page 46 Elija entre las opciones que se presentan a continuaci6n: Visite nuestro sitio web en www.cubcadet.com Llame a un representante de Asistencia al Cliente al (877) 282-8684 Escribanos a Cub Cadet LLC • P.O.Box 361131 • Cleveland, OH • 44136-0019...
-
Page 47: Medidas Importantes De Seguridad
Medidasimportantes de seguridad ADVERTENCIA" La presencia de este s[mbolo indica que se trata de instrucciones importantes de seguridad que se deben respetar para evitar poner en peligro su seguridad personal y/o material y la de otras personas. Lea y siga todas las instrucciones de este manual antes de poner en funcionamiento esta m_quina. - Page 48 10. Est@ a tento a lacortadora yaladirecci6n deladescarga Desenganche todos los embragues de los accesorios, los aditamentos ynoapunte a nadie. Nunca h aga f uncionar coloque el freno de mano en posici6n 'on'y mueva las lacortadora dec@sped sinque est@n colocados lacubierta palancas de control de transmisi6n...
- Page 49 Haga que todos los movimientos en las pendientes sean No permita nunca que los niffos menores de 14 afros lentos y graduales. No cambie repentinamente la velocidad utilicen esta m_iquina. Los niffos de 14 afros en adelante ni la direcci6n. La aceleraci6n o la reducci6n repentina...
- Page 50 Llene el tanque no m_s de 1/2pulgada por debajo Nunca modifique el sistema de bloqueo de seguridad de la base del cuello del tap6n de carga, para dejar otros mecanismos de seguridad. Controle peri6dicamente espacio para la expansi6n del combustible. que funcionen correctamente.
- Page 51 Si se utiliza un amortiguador de chispas el operador Io debe AmortiguMor de chispas mantener en condiciones de uso adecuadas. En el Estado ADVERTENCIA: Esta m_iquina est,1 equipada con un de California las medidas anteriormente mencionadas motor de combusti6n interno y no debe ser utilizada exigidas pot ley (Articulo 4442 del C6digo de Recursos POblicos en o cerca de un terreno agreste cubierto...
- Page 52 15 ° Vseesta p,_ginacomo guia para determinar en qudpendientes no puede operarel tractor de manera segura. ADVERTENCIA: No opere la cortadora de c_sped en dichas pendientes. No corte en inclinaciones mayores de 15 grados (elevaci6n aproximada de 2 1/2 pies por cada 10 pies). El tractor cortac_sped podrfa voltearse...
- Page 53 M0ntajey C0nfiguraci6n Contenido dei caj6n Un tractor corta c6sped Un acoplador de manguera para Un tubo de drenaje de aceite lavado de plataforma Un Manual del operador del tractor Un Manual del operador del motor RZT Manual Kawasaki Quite los dos pernos y tuercas de fijaci6n de hombro en la Preparaci6n dei tractor...
- Page 54 Instalad6n del cablede la baterias Coloque laspalancasde controlde la transmki6n en posici6n. Las palancas de control de la transmisi6n del tractor se bajan PROPUESTA 65 DE CALIFORNIA para el embarque. Las tuercas de seguridad con brida, los ADVERTENCIA! Los postes de la bateria, tornillos hexagonales y las arandelas planas que normalmente...
- Page 55 Baje el deflector del canalde descargade la plataforma cortadora sin el deflector de descarga instalado ADVERTENCIA! Nunca opere la plataforma de la posici6n baja. Inspeccione la plataforma de la cortadora para ver si hay una traba de seguridad (con etiqueta) que puede estar sujetando el deflector del canal hacia arriba para el envio.
- Page 56 Controles y Caractedsticas Posicionamiento Manija de la altura de la elevaci6n plataforma la plataforma Freno de mano Control del regulador Interruptor de _otencia de arranque Control del cebador Palanca de Palanca de Interruptor control de control de Medidor horario de encendido transmisi6n transmisi6n Panel indicador...
- Page 57 Interruptorde encendido Tap6ndei tanque de combustible El interruptor de encendido est_ ubicado El tap6n del dep6sito de combustible est_ ubicado cerca de en la consola del lado derecho, a la derecha la parte media de la consola del lado izquierdo. Gire el tap6n del asiento del operador.
- Page 58 Caractedstkas del panelindkad0r Palancade enganche dei freno de rnano Indicador de bateria La palanca de enganche del freno de mano est_ Se ilumina y muestra brevemente el voltaje de la bateria ubicada hacia adelante/a la izquierda del marco del cuando el interruptor de encendido se coloca en posici6n "ON"...
-
Page 59: Seguridad General
Sujete bien las palancas de control. funciona mal, no se debe hacer funcionar el tractor. P6ngase en contacto con su Cub Cadet distribuidor autorizado. Sea cuidadoso al operar cerca de rutas. Detenga movimiento del tractor y espere a que pasen los vehiculos... - Page 60 Haga controlar mal. Controle peri6dicamente las funciones del tractor per el distribuidor Cub Cadet. sistema de bloqueo para verificar que funcionen adecuadamente. Arranque del motor en dima fdo AI arrancar el motor a temperaturas cercanas o inferiores...
- Page 61 Detenci6ndel motor Coloque las palancas de control de transmisidn del lado derecho y del lado izquierdo hacia adentro, en posici6n Coloque el interruptor de la potencia de arranque (PTO) en neutral. Vea la Figura 5-2. posici6n "OFF" (apagado). Coloque las palancas de control de transmisi6n del lado derecho...
- Page 62 Conducd6n del tractor hada adelante Para girar a la izquierda, mueva la palanca de control lado izquierdo hacia atr_s respecto de la palanca derecha. Vea la Fig. 5-4. palancas de control deben set lentos y suaves. El ADVERTENCIA! Todos los movimientos de las movimiento abrupto de las palancas de control puede afectar la estabilidad del tractor y podria GIRO HACIA...
- Page 63 Conducd6n cleltractor en marchaatr_s Realizar un gir0 mientrasse conducemarcha atr_s Para que el tractor gire mientras se desplaza hacia atr_s, mueva las palancas de control segun sea necesario para que una abajo a ambos lados del tractor antes de desplazarse iADVERTENCiA! Siempre mire hacia atr_s y hacia palanca quede...
- Page 64 Giro de radio cero Detend6n del tractor Mueva las dos palancas de control a la posici6n neutral iADVERTENCIA! Para realizar un giro de radio cero, el tractor SE DEBE DETENER. La realizaci6n para detener el movimiento del tractor. un giro de radio cero con el tractor en movimiento Presione el interruptor de la potencia...
- Page 65 Usode la plataformade la cortadora Controlde 10sdrcuit0s de bl0que0de seguridad Controle peri6dicamente los circuitos de bloqueo de seguridad para estar seguro de que funcionan adecuadamente. Si algun va a cortar est_ libre de desechos, ramitas, piedras, i_ll IADVERTENCIA! Aseg0rese que el _rea donde se circuito de seguridad no funciona...
-
Page 66: Mantenimiento
Mantenirniento y Ajustes Calendafio de mantenimiento Antes de Cada Cada Cada Cada Antes de Cada uso 10 horas 25 horas 50 horas 100 horas aimacenar Inspecdone [apantalla/cubierta de entrada de[ motor Inspecdone e [ nive[ de aceitede[ motor Controleelflitro deaffe paravet si haypiezassudas,suekaso daffadas Limpiey vuelva a [ubricarel depuradorde espumade[ fiitrode aire Reemplace el eiementode[flltro deaire Cambiee[ aceitede[ motory reempiace e[ flitrode aceite... - Page 67 Si su motor tiene la v_lvula de drenaje de aceite de El motor puede estar equipado con un giroy tirar fuga de configuracidn se muestra si la Fig. 6-1, v_ase la v_lvula de puerto o un puerto de drenaje con pesta_as. Si su motor drenaje de aceite seccidn siguiente.
- Page 68 La bateria debe guardarse con carga completa. Una bateria Bujia de encendido descargada se puede congelar m_s pronto que una bateria Las bujias se deben limipiar y la separaci6n reajustar cargada. Una bateria con carga completa se guarda pot vez por temporada. Consulte el tipo de bujia correcta y las...
- Page 69 Mantenimiento de losneum_ticos Abra el suministro de agua. Desde el asiento del operador del tractor, encienda Controle la presi6n de aire de los neum_ticos cada 50 horas de motor y enganche la potencia de arranque (PTO). Deje operaci6n o una vez por semana. Mantenga los neum_ticos funcionar segun sea necesario.
- Page 70 Despu_s de mover el tractor, desenganche las dos varillas Limpie perfectamente el motor y toda la unidad. de derivaci6n. Levante la varilla y guie la brida de la varilla Cargue totalmente la bateria, luego desconecte el cable hacia atr_s a trav_s de la abertura circular m_s grande del negativo...
- Page 71 Inserte el tornillo hexagonal con arandela a trav_s de la Ajustedel asiento del operador ranura de la palanca de control y el soporte de pivote. Para ajustar la posici6n del asiento, tirelo hacia arriba y sostenga Enrosque la tuerca de seguridad con brida en el tornillo, la palanca de ajuste del asiento.
- Page 72 Afloje, pero no extraiga, el tornillo de cabeza hexagonal Ubicado delante del tractor, afloje las tuercas exteriores ubicado en la m_nsula de suspensi6n derecha de la hexagonales de la varilla de suspensi6n delantera de la plataforma. Consulte la Fig. 6-8. plataforma y girelas separ_indolas de las tuercas interiores.
- Page 73 Uso de manejar el ascensor, conjunto de la cubierta en el ajuste La posicidn en la parte trasera cubierta de los rodillos es en de la altura deseada y, a continuaci6n, comprobar la rueda de general no ha cambiado. En la baja posici6n de los rodillos se medir la distancia desde el suelo a continuaci6n.
- Page 74 Servkio Retirode ia bateria Cargade ia bateria Si el tractor ha estado guardado durante un tiempo, pruebe IADVERTENCIA! Los postes, bornes y accesorios bateria y, si es necesario, recMguela. de la bateria contienen plomo y compuestos plomo. L_vese las manos despu_s de estar en Un voltimetro o medidor de carga deberia...
- Page 75 Rel_se interrupt0res Haciendorodarla correapara sacarlade la polea dela potenciade arranque (PT0). Hay varios interruptores de seguridad en el sistema el_ctrico. Si una funci6n del sistema de bloqueo de seguridad descripto Usando la manija de elevaci6n de la plataforma, levante antes no funciona adecuadamente, haga que el distribuidor la plataforma...
- Page 76 Baje la plataforma al suelo usando la manija de elevaci6n Instalaci6nde ia plataforrna de la plataforma. Para instalar la plataforma de la cortadora de c6sped, proceda de Ubique los pasadores de soporte de la plataforma la siguiente manera: lado izquierdo y del lado derecho que se encuentran Mientras...
- Page 77 Hadendorodar la correaparaque ingreseen la poleade la Cuidadode iascuchiilas de ia cortadora de c sped potenciade arranque(PTO). Usando la manija de elevaci6n de la plataforma, levante de mantenimiento, coloque el interruptor de la la plataforma a la posici6n que le ofrece mayor recorrido IADVERTENCIA! Antes de realizar cualquier tarea...
- Page 78 Dirija la correa pot encima del soporte de polea Ioca y de distribuidor autorizado del servicio del Cub Cadet. vuelta a la polea de transmisi6n del motor. Levante la correa Si la rotaci6n para, ajuste la barra de control...
- Page 79 Desviodei tractor a alta velocidad Si el tractor se desvia hacia un lado cuando ambas palancas de control de transmisi6n est_in totalmente hacia adelante, ajuste las palancas de control de la siguiente forma: Controle que la presi6n de aire est_ balanceada y que sea adecuada en las ruedas delanteras...
-
Page 80: Soluci6N De Problemas
Soluci6nde Problemas Problema Solud6n Causa El motor no arranca 1. Perilla de potencia de arranque (PTO)/ 1. Co[oque la perilla en la posici6n de desconexi6n (OFF). enganche de cuchilla conectada. 2. No est_ colocado el freno de mano. 2. Coloque el freno de mano. 3, Las palancas de control de transmisl6n 3. - Page 81 Problerna Soluci6n Causa El motor recalienta El nive[ de aceite del motor est,1 bajo. 1. Llene el c_irter con la cantidad y el peso de aceite adecuados. 2. Flujo de aire restringido. 2. Elimine los recortes de c_sped y los desechos de alrededor de las aletas de enfriamiento del motor y de la carcasa de[ soplador.
- Page 82 DECLARACION DE GARANTJA DEL CONTROL DE LAS EMISIONES DE CALIFORNIA DERECHOS Y OBLIGACIONES DE SU GARANTJA El Departamento de los Recursos de Aire de California y MTD Consumer Group Inc, se complacen en explicar la garanfia del sistema de control de emisiones por evaporaci6n de su cortadora de cesped 2008.
- Page 83 PIEZAS GARANTIZADAS: quedeotromodo estar c ubierta perla podr_, setexcluida detalcobertura de reparaci6n o el reemplazo de cualquier pieza garantizada pudiese garanfia garanfia siMTD Consumer Incdemuestra quela cortadora de negligencia o mantenimiento yquetal Group cesped es objeto uso incorrecto, inadecuado, uso incorrecto, mantenimiento inadecuado fuecausa directa delanecesidad de dedicha...
- Page 84 El dang resultante de la instalaci6n o ei uso de piezas, accesorios En ning_n caso se obtendr_, una compensaci6n mayor al monto o compiementos no aprobados por Cub Cadet para su uso con ei o dei precio de compra dei producto vendido. La modificaci6n de Ins los productos incluido(s) en este manual anular_,la garantia en Io caracteristioas de seguridad del productoanular_ esta garantia.