Table of Contents
Advertisement
.
S
FACSIMILE
O
M
INSTALLATION .a..-..e-. - -.-*-.--.-..e-..-*
INITIAL SETTINGS ---.--.--..-----..---e-.
FAX OPERATIONS ----.----*-------.m-----
USINGTHE ANSWERINGMACHINE--
.
MAKINGCOPIES --.-..-.---... -.--.---..-. s
MAKINGTELEPHONECALLS ------------ 6-1
SPECIAL FUNCTIONS --------------------
OPTIONAL SETTINGS .----.-.------------
PRINTINGOUT REPORTSAND LISTS
MAINTENANCE -q------m . a-.---e -..-e----. s .
.
TROUBLESHOOTING ---------------------
SPECIFICATIONS
QUICK REFERENCEGUIDE
INDEX
7-1
8-1
9-1
10-1
11-1
1
2-1
3"1
4-1
5-1
Advertisement
Table of Contents

Related Manuals for Sharp FO-455


Summary of Contents for Sharp FO-455
- Page 1 FACSIMILE INSTALLATION .a..-..e-. - -.-*-.--.-..e-..-* INITIAL SETTINGS ---.--.--..-----..---e-. FAX OPERATIONS ----.----*-------.m----- 3“1 USINGTHE ANSWERINGMACHINE-- MAKINGCOPIES --.-..-.---... -.--.---..-. s MAKINGTELEPHONECALLS ------------ 6-1 SPECIAL FUNCTIONS -------------------- OPTIONAL SETTINGS .----.-.------------ PRINTINGOUT REPORTSAND LISTS MAINTENANCE -q------m . a-.---e -..-e----. s . 10-1 TROUBLESHOOTING --------------------- 11-1 SPECIFICATIONS QUICK REFERENCEGUIDE...
- Page 2 — A — R — I — C — C Please case of loss or theft. These numbers are located on the rear side of the unit. Space is also provided for other relevant information. Model Number Number Date of Purchase Place of Purchase...
- Page 3 Internal parts may become exposed, the equipment should be immediately disconnected from the phone line and then the power line and returned to a SHARP authorised Service Centre for Inspection, repair, or disposal.
- Page 4 Never install telephone wiring during a Ilghtning storm. Never install telephone jacks in wet locations unless the jack is specifically designed for wet locations. Never touch uninsulated telephone wires or terminals unless the telephone line has been disconnected at the network interface. Installing or modifying telephone lines should only be under taken by a Iiscenced techician.
-
Page 5: Table Of Contents
Unpacking Check List ....Connections ......, 1-2 Attachments . - Page 6 TABLE Problems and Solutions ....11-1 Messages and Signals . . . , 11-4 Clearing Paper Jams ....11-6...
- Page 7 After unpacking your fax, make sure you have all the items shown below. If any are missing, contact your dealer or retailer. Warranty card Received document support labels carrier + In addition to the above items, you should have an F080TP adaptor (fax Ilne cord).
- Page 8 Connect the handset lead to the handset “ and the fax as shown. ~> > . The ends of the handset lead are iden- ttcal. so they will go into either socket. ‘;/&b ,/’ <l Place the handset on the handset rest. Use the handset to make ordinary phone calls, or to transmit and receive documents manually.
- Page 9 If desired. you can connect an extension phone to your fax. + You can connect an extension phone to the fax to make and receive calls like any other extension phone on your line. For details on receiving faxes from an extension phone, see “Receiving Documents”...
- Page 10 the extender so that it points straight Flip up the original document support. Rotate Attach the received document support The bend In the support must point ~ awa> from you. ‘:;$”’ ---- ,,+. \ . %, -c’- “< “’’---:-.::.<::- -—---- ,’...
- Page 11 Your fax prints by a process called thermal printing. The print head applies heat to special paper which ISchemically treated to change colour when heated to a cefialn level. and this creates the printed text or Image. Follow the steps below to load the sample roll of fax paper provided. Grasp the finger hold on the right side of the paper compartment cover, and pull up to open it.
- Page 12 To assure a long life for your fax and obtain the best reproduction quality, we recommend that you use the following Sharp fax (thermal) paper which ISavailable from your dealer:...
- Page 13 Before you can begin using your fax, there are some settings which must be made with the keys on the operation panel. Some of the settings are required for basic use of your fax, others may or may not be necessary depending on how you want to use the fax.
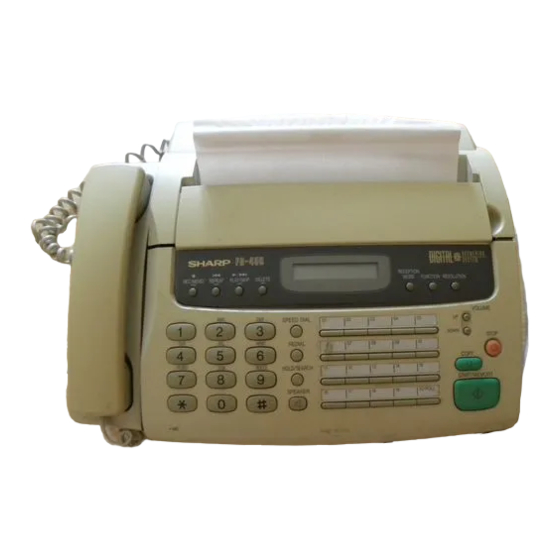
- Page 14 Before you make the settings, take a moment to familiarise yourself with the opera- tion panel. automatically redlal the last number dlalled. Press this key to play this key recorded messages. a 2-digit Speed Dial During playback, press it number. to skip forward to the next message.
- Page 15 A LOOK AT THE OPERATION PANEL Display This displays various messages during operation and programming. RECEPTION MODE key Press this key to select the mode of reception. FUNCTION key RESOLUTION key Press this key to select Press this key to aajust the various special functions, resolution and contras~ before sending or copvlng...
- Page 16 Enter your name by pressing the appro- pnate number keys as shown on the fol- lowing page. Press each key repeatedly until the desired letter appears In the dls- play. (Max. of 24 characters.) SPEAKER (Example: “SHARP”) Press the START key and then the STOP key.
- Page 17 Names are programmed by pressing the numeric keys. You WIIInotice that letters are indicated above each of the number keys “2” through “9”. To enter a letter (or number), press the appropriate key one or more times until the letter appears In the display (the number will appear first, followed by the letters In the order indicated above the key).
-
Page 18: Entering Letters For Names
ENTERING LETTERS FOR NAMES To enter a symbol from the list below, press the “#” key or the “*” key repeatedly until the desired symbol appears. I } -- A - ‘ { “ # 90 & ‘ ( ) * + , - : ; c = > ‘? @ [ ~ ] The followlng ISan example of entenng the name “ABC Co. - Page 19 The date and time appear In the display and reports, and are printed at the top of evety page you transmit. Set the date and time by pressing the keys on the operation panel as shown below. o T. correct a mistake. press the SPEED DIAL key to move the cursor back to the mistake, and then enter the correct number.
-
Page 20: S T R M
Your fax has three modes for receiving incoming calls and faxes: ANS mode: Select this mode when you are out and want the built-in answenng ma- chine to answer all calls. Voice messages will be recorded. and fax messages will be received automatically. -
Page 21: A M S
The FO-455’Sbuilt-in answenng machine allows you to receive both voice messages and fax transmissions while you are out. Up to 11 minutes of voice messages can be recorded when no documents are stored in memory (this may vary depending on the content of the messages). When the reception mode ISset to ANS, the answering machine WIIIautomatically answer incoming calls and play your outgoing message (this is your recorded greeting which informs callers that they can leave a message or send a fax). - Page 22 ANSWERING MACHINE SET-UP The following ISan example of a general outgoing message: “Hello, this ISthe Jones family. We are not at home right now, If you would like to leave a general message, please speak after the beep. If you would like to leave a private message, press “1”...
- Page 23 /4NSWERlNG MACHINE SET-UP Press the REC/MEMO key, and then speak facing the “MIC”mark on the lower left co-rnerof the machine at a dis- tance of about 30 cm. The general outgoing messagecan be up to 60 seconas long. ,A~ersonal out- going message can be up [o 30 sec- onds long, While recording, the display wlil snow...
- Page 24 ANSWERING MACHINE SET-UP A 3-digit passcode can be programmed for each of the boxes. If this is done, the passcode must be entered before messages in the box can be listened to or erased. Program a new passcode or clear a previously programmed passcode by pressing the panel keys as shown below.
- Page 25 ANSWERING MACHINE SET-UP Incoming messages (ICMS) are the messages which callers leave for you on the built-in answering machine. The answering machine is set at the factory to allow each caller a maximum of 4 minutes to leave a message. If desired, you can change this setting to 15, 30, or 60 seconds.
- Page 26 ANSWERING MACHINE SET-UP If the memory for recording Incoming messages becomes full while you are out, the answering machine will no longer be able to record messages, The ON A.M. FAILURE setting is used to choose the response of the machine to [ncomlng calls when this happens: Automatic fax reception OFF: The FO-455 will answer after 20 rings.
- Page 27 RINGING If you subscribe to a distinctive rlnglng services from your telephone com~any, you WIIIneed to reset OptIon Setting 12 to turn on Dlstlnctlve Rlng[ng function. When this ISdone, your fax machine WIIIsignal voice calls by the normal rlnglng pattern. and fax transmissions by a special ringing pattern.
- Page 28 Automatic dialling ISa quick and convenient way of dialling which ISperformed by either pressing a Rapid Key (Rapid Key Dialling). or pressing the DIAL key and entering a 2-digit number (Speed Dialling). It can be used for both fax transmis- sions and voice calls.
- Page 29 STORING NUMBERS FOR AUTOMATIC DIALING Enter a 2-digit number (from “01” to “50”) by pressing the number keys. This will be the Speed Dial number. (Example) Enter the fax or voice number by press- ing the number keys (max. of 32 digits :n- ‘~ eluding pauses).
- Page 30 STORING NUMBERS FOR AUTOMATIC DIALING FUNCTION Press the keys shown at left “~AX’TEL. # MODE’ WIIIappear In the d[sp[ay. Press “2” to select CLEAR, Enler the Speed Dial number tnai you want to clear by press[ng the numDer keys (~xample) Press the STMT Return to Step 3 to clear another num- STOP...
- Page 31 You can adjust the volume of the speaker and ringer tislng the UP and DOWN keys on the operation panel. volume settings: ddjust The speaker has 5 the volume of the speaker, first press the SPEAKER key, and then press the UP or DOWN key ?O change :he volume ;O the aeslred setting.
-
Page 32: Volume Adjustment
VOLUME ADJUSTMENT Notes 2-20 INITIAL SETTINGS... - Page 33 Your fax can transmit most standard office documents. Specific guidelines are as follows: The size and weight of documents which you can load in the document feeder depend on whether you load one sheet at a time or several sheets at once. sheet at a time: 52 glm2 ~ 128mm...
- Page 34 ‘Thedocument carrlel- gives you a means of sending ceflain documents v~hlch cannot otherwise be loaded Into the feeder. Use it for the followlng types of documents Documents wnlc~ are torn Documents smaller than the mlnlmum size Carbon-backed documents (Insert a sheet of white paper between the carbon back of the document and the document carrier).
- Page 35 Up to 20 pages can be placed in the feeder at one time. The pages WIIIbe automatically fed into the fax starting from the page on the bottom. + If you need to send or copy more than 20 pages, place the additional pages gently and carefully In the feeder just before the last page is scanned.
- Page 36 If you want, you can adjust the resolution and contrast before sending a document. Your fax has 4 resolution settings. If you do not make a setting. the fax will automatically send the document in STANDARD resolution. STANDARD: Use STANDARD for ordinary documents. This setting gives you the fastest and most economical transmission.
- Page 37 Once you have loaded the document and made any desired contras~resolution settings, you are ready to dial the number of the receiving fax machine and transmit the document. There are several ways of dialllng, and you can select the one which ~est suits your needs.
-
Page 38: Sending Documents
SENDING DOCUMENTS When you hear the reception tone, press the START key. Replace the handset if you used it. . When transmission IScompleted, the fax will beep. If you do not need to talk with the other party before sending the fax, you can Just dial: it isn’t necessary to pick up the handset or press the SPEAKER key. - Page 39 If the number you want to dial has been stored as a Rapid Key number (see “storing Numbers for Automatic Diailing” In Chapter 2), you can dial it by pressing the appropriate Rapid Key. Press the appropriate Rapid Key. The name of the recelvlng party WIIIap- pear in the display.
- Page 40 SENDING DOCUMENTS which you have If you don’t remember the Rapid Key or Speed Dial number In by followlng the stored a particular fax number, you can search for the number and transmit the steps below. Once you have found the number, you can dial it loaded document by simply pressing the START key.
- Page 41 Press the key. The document will be automatically transmitted once the connection ts made. If you use automatic dialling (including Direct Keypad Dialllng) and the line ISbusy. your fax will automatically redial the number. Up to 2 redialling attemp~swill be made at intewals of 5 minutes.
- Page 42 When the reception mode is set to FAX (press the F?ECEPTION MODE key until “FAX” appears in the display). your fax automatically answers all calls on 2 rings and receives the incoming documents. You can change the number of rings on which the fax answers Incoming calls by changing OptIon Setting 2 (see Chapter 8.
- Page 43 If the other party first talks to and then wants to send a document, press “5” “x” and “x” if you are on a tone dial phone. If you are on a pulse dial phone. set the handset down (do not hang up), walk over to the fax, pick up the handset, and press the START key.
- Page 44 R~cElvlNG This ISa special function In FAX recept[on mode which allows you to use one Ilne for both fax and voice communications without having to personally answer every call. When [t ISturned on. your fax will detect whether an Incomtng call ISa voice call or a fax message.
- Page 45 C)PEMWG Activate the answenng machine before you go out as follows: Press the RECEPTION MODE key one or two times to set the reception mode to “GENERAL OGM PLAY” is d\s- MODE CUNCTION RESOLUTION Rlaved. “00 J — — . Each outgoing message WIIIolay (you —...
- Page 46 If you want tOlisten to the messages in a personal box. enter the number of that box by pressing the appropriate number key. (Example) If the box (general or personal) has a passcode, enter the passcode by press- ing the appropriate number keys. (Example) The messages will play As each message plays, the date and...
-
Page 47: Operating The Answering Machine
OPERATING THE ANSWERING MACHINE Playback wlil a call, lift the handset, press the STOP kev. or open the paper compartment cover, It is important to erase received messages after you listen to them to ensure that the memory does not become full. This is done as follows: Erasing general messages: To erase all messages In the General Box, press and hold down the DELETE key... - Page 48 OPERATING THE ANSWERING MACHINE Recording phone conversations To record a phone conversation hoic down the REC/MEMO key during tne conversation you want to record When you are flnlshed. release the A beep WIIIsound at every 15 seconds interval to signify that 2 way recording IStaking place.
- Page 49 You can call the FO-455 from any tone dial telephone and play back your messages using remote commands. You can also use these commands to change the reception mode and other settings. When you call the FO-455. you must enter the passcode for the box you want to Ilsten to, or a remote code number if the box does not have a passcoue.
- Page 50 When you call the FO-455 to listen to your messages, it will answer after two rings if it has received at least one message in any of the boxes, or after four rings if it hasn’t received any messages. This allows you to save money on telephone charges, particularly if you are calling long distance.
- Page 51 Follow the steps below to listen to your messages from a remote Iocatlon. Note that you can only access one box per call: If you want to access more than one box. you must make a separate call for each box. You can also access the FO-455 for remote operation when the reception mode is set to FAX.
- Page 52 . If no messages have been received In the box, you wil! hear a snort beep You can either hang up, or perform any of the operations described in the followlng section “Other remote opera- tions”. While the messages are playing. you can do any of the followlng: Repeat: To Ilsten to a message a sec- “...
-
Page 53: Remote Operations
REMOTE OPERATIONS When you have finished listening to your messages, you can do any of the follow- ing: . Erase all messages: To erase all of the messages in the box, press “3”. “3”, and “#”. . Repeat playback: To listen to your messages aga]n, press ‘7”... - Page 54 REMOTE OPERATIONS After Iistenlng to your messages. you can do any of the operations described below by press!ng the appropriate keys on the telephone. The following commands cannot be entered wh//e messages are being played back. If you do not want to wait until playback ends to entera com- mand, first stop playback by pressing “O”and “#, and then enter the com- mand.
- Page 55 REMOTE OPERATIONS the following section, “Other functions”. ) (The Transfer function ISdescr[bed In To turn Transfer on: Press “9”. “ “f#”, followed by the number of the box (“O” for the General Box) and “~”. To turn Transfer off: Press “9”, “2”, and (Exampie~ “#”...
- Page 56 REMOTE OPERATIONS a “ You can leave a “memo” for yoursell or other users of the machine. It will be recorded in the General Box, ana played back wnen messages In that box are Ilstened to. Press “w” and “#” on the telephone. When you hear a short beep.
- Page 57 The Transfer function is used to make the FO-455 automatlcal[v call you at a specified number every time it receives an Incoming message in a selected box. This lets you hear your messages Immediately after they come In. even when you are at a remote location.
- Page 58 If needed. you can change the transfer number from a remote location. See “Other remote operations” In the previous section “Remote operations” The transfer message plays when you answer the telephone. and Informs you tnat the call is a transfer call. It can be up to 15 seconas long. To record a transfer message, follow the steps described In “Recording an outgoing message”...
-
Page 59: Other Functions
OTHER FUNCTIONS can turn the Transfer tuncf[on on or off from a remote /Oca- [ion, See ‘Other remote operations” ~nthe ,orevloussection. ‘Remote opera- tions” (To turn the transfer funcr[on on or off. the transfer ~umber must be programmed In the machine first). This funct]on allows selected callers using a tone dial telephone to overrlae the answering ,ma.chinesoutgoing message and make a special ringer on the FO-455 Th]s ISuseful when you are near the macnIne... - Page 60 OTHER FUNCTIONS The proceaure for overrldtng the answering machine ISas follows: Your caller calls the ~0-455 from a tone dial telephone. When the outgoing mes- sage begins. he or she should press the “#” key on the telephone. . The caller WIIIhear a short beep. and the outgoing message will stop.
- Page 61 Your fax can also be used to make coDles. In pafllcular. ~hlsrunctlon Canbe usea to make sample copies of documents to De transmitted to see :f the resolution or contrast needs adjustment. + The defauit resolution for ccpvlng ISFINE Load the aocument(s~face ~c~vn contrast ‘,vlth{he ~ESOLUTION <e!j Press the COPY <e!/ COPY...
- Page 62 Notes MAKING COPIES...
- Page 63 ‘{our fax can be used Ilke a regular Ielepnone to ma~e and receive voice cails, + To make or receive a phone call. the power must be on. Pick up the handset or press the SPEAKER key, Listen for the dial tone { /7 ‘r \’...
-
Page 64: M T C
The last number called can Deredialled by pressing tne REDIAL key (tl ISnot necessa~ to pick up the handset or press the SPEAKER Key i Whenthe other Party answers. nandsel. You can put the other part) on nold during a conversation ~~rpressing the HOLD/SEARCil key When this ISdone, the) cannot hear you. - Page 65 The Anti Junk Fax function lets you avoid wasting fax paper ~y preventing reception of faxes from specified parties. To use this function, first turn It on by setting Option Setting 1310 ‘YESas described !n Chapter 8. and then enter the fax numbers from wh!ch you do not want to receive faxes as shown below.
-
Page 66: Polling
POLLING Polling allows your faX you ICI request another fax machine to send a document fax ma- machine. In other words the recelvlng fax machine. not the transmitting be polled chine. activates the transmission. You can use your fax to both poll and by others. - Page 67 After polling a fax machine. you can send a document to it on the same connection. Simply place the document to be sent in the feeder and follow the steps described above in “Polling others”. When polling is finished, the document will be automat- ically transmitted.
- Page 68 Press the START/MEMORY key and then the STOP key. You can store up to 10 fax numbers In your fax”s I[st of permitted numbers. Press the keys shown at left. “ENTRY MODE” will appear In the display, key 4 times. “PASSCODE appear In the display.
- Page 69 The Timer function allows you to set a transmission and/or polling operation to be performed automatically at a time you specify. One transmission operation and one polling operation can be set at any one time, and the times they will be performed can be specified up to 24 hours in advance.
- Page 70 Enter the Speed Dial number of the re- ceiving fax machine. (Example) : ,: \ Press the key. If this is a transmission operation, you RESOLUTION can adjust the resolution and/or contrast (skip this step if you don’t want to). Press the key and ~-~~’...
-
Page 71: Memory
Your fax has a memory which can be used to temporarily store both incoming and outgoing documents. Approximately 20 pages of average content can be held in memory when no voice messages (including outgoing messages) have been recorded. Less can be held if To see in the feeder. - Page 72 Press the START/MEMORY key if you entered a Speed Dial number or a full number. . The document ISfirst scanned and stored In memory. The other machine is then dlalled (redlalllng will be per- formed automatically if necessary). When the connection is made, trans- mission begins.
- Page 73 A variety of optional settings are available which you can use to fine-tune your fax to better suit your needs. The settings are made by pressing the panel keys, and each setting is described in the list below. Press the keys shown at left. “OPTION FUNCTION SETTING”...
-
Page 74: Timer Operations
Setting 3: 4 RINGS MANUAL ANSWER Press “1” (YES) to have the machine answer a call after 4 rings when it ISin MANUAL reception mode. Press “2” (NO) to turn the function off. Factory setting: “2” Setting 4: TEL/FAX REMOTE NUMBER (TRANSFER CODE) This sets the 1-digit number for activating fax reception from an extension phone. - Page 75 Setting 8: AUTO FAX/PHONE CHANGEOVER Press “1” (YES) to have your fax detect whether incoming calls are voice calls or fax transmissions In automatic reception mode. Press “2” (NO) to turn the function off. . Factory setting: “2” Setting 9: PSEUDO RINGING DURATION , This sets the duration of pseudo ringing when Automatic Fax/Phone Changeover is turned on.
- Page 76 JUNK Press “1” to prevent reception from fax numbers entered In the Anti Junk Fax List. Press “2” to allow recepllon from all numbers. Factory setting: “2” POLLING Press “1” if you want to use Rapid Key 20 as a polllng key. Press “2” if you want to use it as a regular Rapid Key.
- Page 77 You can print out a variety of lists showing settings and Information entered In the fax. You can also have the fax automatically print out a repoti on transactions after they are made. Each list and the report ISdescribed below. Press the keys shown at left.
- Page 78 This list shows the fax and voice numbers which have been stored for automatic dialling. This list shows settings made for polllng security. your name and faxftelephone number as entered In the machine. and a sample of the header printed at the top of every page you transmit (HEADER PRINT).
- Page 79 This list shows the current status of the optional settings. The bottom part of the list shows the status of the settings made for answering machine connection. is not allowed. This list shows the fax numbers from which PRINTING OUT REPORTS AND...
- Page 80 This list shows the settings and codes programmed for the answenng machine. This Ilst shows information about the messages currently recorded In the answenng machine. Includlng the date and time of recording, the length. and the type (ICM or memo) PRINTING...
- Page 81 PRINTING OUT REPORTS AND This report is printed out automatically after an operation IScompleted to allow you to check the result. Your fax is set at the to print out the report only when an error occurs, or after a timer or memory operation. If desired, you can change the setting to have It printed out under a variety of other conditions.
- Page 82 E-O I Ableto recognise handshake signal.but It haserrors , E-1 ~ Cannotrecognise the handshake signalfromthe receiverside E-2 ‘ transmission E-6 ; ‘d ~ No response from E-2 , ~ E-3 , E-4 I ISreceived al recelve~ side “...
- Page 83 Clean the printing head frequently to ensure optimum printing performance. To clean the head, first disconnect the telephone line then unplug the power lead. open the paper compartment cover (grasp the finger hold on the right side of the cover and pull up), and remove the fax paper.
- Page 84 MAINTENANCE Clean the reading glass and rollers frequently to ensure the quality of transmitted Images and copies Open the operation panel by pulling the front edge up (gras~ It at the “PANEL REMASE” mark), and clean them as shown below 9~ass while t)ackp[ate and rollers with a soft cloth.
-
Page 85: Troubleshooting ---------------------
PROBLEMS AND SOLUTIONS Problem ~othlng aopears In the dls- Make sure the power cord is properly ~luggea Into a power outlet. play Connect another electrical appllance to the outlet ~ to confirm that It has power, If a beep sound ISnot made when you press the ~ The fax does not respond ‘... - Page 86 “TEL.SET” socket If the receiving machine ts In manual mode with no attendant. reception will not be possible. If the receiving machine ISnot a Sharp model. make sure it ISG3 compatible. Check the display for error messages. Pick up the handset and check for a dial tone.
-
Page 87: Loading The Fax Paper
Bell Tinkle detectors will give rise to bell tinkle or noise and (New Zealand) may cause false tripping of the ring detector Should such a problem occur,contact your Sharp authorised Setvlce Centre for information. TROUBLESHOOTING 11-3... - Page 88 “ FUNCTION pressSTOP transmission at this the extenslo~ SPEAKER ~ “ TROUBLESHOOTING...
- Page 90 If a document doesn’t feed properly during transmission or copying, or DOCUMENT JAMMED appears in the display, first try pressing the key. If the document doesn’t feed out, open the operation panei (grasp the front edge at the “ mark and pull up) and pull it out gently. Open the paper compartment cover (grasp the finger hold on the right side of the cover and pull up).
- Page 91 Public switched telephone network i PBX Applicable telephone line: ITU-T (CCITT) G3 mode Compatibility: Half-duplex, desktop transceiver Configuration: Modified Huffman and Sharp special mode Compression scheme: Flat-bed, solid-state CCD Scanning method: Horizontal: Resolution: 8 lines/mm Vertical: Standard — 3.85 lines/mm Fine /Halftone 7.7 lines/mm...
- Page 92 Document capacity in mem- memory). ory: As a part of our policy of continuous improvement, SHARP reserves the ngh? ] to make design and specification changes for product improvement without prior notice. The performance specification figures Indicated are nominal values of production units. There may be some deviations from these values...
- Page 93 . -— -- - -. Steps which are optional are enclosed in a dotted frame. ~~Oa~ ~-~~~,j~-~ ~ Lifthan~,set Dial ipress Normal Dialling numenc ke~s) ,document + SPEAKER press – - –d .-.,,~, - Walt f or Hangup receQtiontone . . - — . - - .= ,.
- Page 94 The following chart shows the layout of the functions and settings accessed by pressing the FUNCTION key. First press the FUNCTION key, the appropriate numeric key as shown. and then “#” or “M” until the desired setting appears. Instructions for making each setting appear in the display. If you have any difficulty refer to the detailed instructions on the page shown below the setting.
- Page 95 Entry Mode Optional Settings...
- Page 96 Fast Play key. 2-2, 4-2 A.M. Program List. 9-4 Fax paper, 1-5 -1-6 AMS reception mode, 2-8. 4-1 Fax reception mode, 2-8.3-10 Anti Junk Fax (Anti Junk Number). 7-I, Fax reception on TAD failure, 2-14 Fine Resolution Prlorlty. 8-1 Anti Junk Number List, g-3 Function key.
- Page 97 OGM key, 2-10 Senders name and number. anterlng, OptIon Setting List, 9-3 Outgoing message. 2-9-2-11 Slow Play key, 2-2, 4-2 Override ringing, 4-15-4-16 Speaker key, 2-2.3-5, 6-1 Speaker volume. 2-19 Speed Dial key, 2-2.3-7, 5-; Speed Dialing, 3-7, 6-1 Start/Memory key, 2-3 Stop key, 2-3 Storing numbers for automatic a[ailng, 2-16-2-18...
- Page 98 SHARP CORPORATION OF AUSTRALIA PTY.LTD. SHARP CORPORATION OF NEW ZEALAND LIMITED. & H...