
Subscribe to Our Youtube Channel
Related Manuals for Sharp ViewCam VL-AH151S


Summary of Contents for Sharp ViewCam VL-AH151S
- Page 1 CAMCORDER CON PANTALLA DE CRISTAL LÍQUIDO CAMCORDER COM VISOR DE CRISTAL LÍQUIDO LIQUID CRYSTAL DISPLAY CAMCORDER VL - AH151S MANUAL DE MANEJO MANUAL DE OPERAÇÃO OPERATION MANUAL...
- Page 2 This equipment complies with the requirements of Directives 89/336/EEC and 73/23/EEC as amended by 93/68/EEC. Dieses Gerät entspricht den Anforderungen der EG-Richtlinien 89/336/ EWG und 73/23/EWG mit Änderung 93/68/EWG. Ce matériel répond aux exigences contenues dans les directives 89/ 336/CEE et 73/23/CEE modifiées par la directive 93/68/CEE. Dit apparaat voldoet aan de eisen van de richtlijnen 89/336/EEG en 73/ 23/EEG, gewijzigd door 93/68/EEG.
- Page 3 Before using the VIEWCAM, please read this operation manual carefully, especially page i. OPERATION MANUAL ENGLISH WARNING CAUTION TO PREVENT SHOCK To prevent shock, do not open the cabinet. No user serviceable parts HAZARD, DO NOT EXPOSE inside. Refer servicing to qualified THIS APPLIANCE TO RAIN dealer or service centre.
- Page 4 Precautions • When the VIEWCAM is not in use, • Always respect prohibitions or restrictions remember to remove the cassette tape, on the use of electronic equipment on turn off the power, and disconnect the commercial flights or in other sensitive VIEWCAM from the power source.
- Page 5 About Your VIEWCAM Recording Format LCD Monitor Screen Hi8 is a high-performance extension of the The VIEWCAM is equipped with a large LCD ordinary 8 mm format. It uses advanced monitor screen that allows you to record technology to achieve even higher resolution scenes while comfortably holding the and picture quality.
-
Page 6: Supplied Accessories
Supplied Accessories Battery pack BT-H22 AC adapter Power cord Infrared remote control CR2025 type Audio/video cable lithium battery Shoulder strap Lens cap AA battery for Sun hood remote control... -
Page 7: Optional Accessories
Optional Accessories Standard type Extended type battery pack battery pack BT-H32 BT-H22... -
Page 8: Table Of Contents
Contents Operation Summary Part Names ............3 Quick Reference Index ........5 Warning Indicators ..........6 Preparation Inserting and Removing the Battery Pack ... 7 Charging the Battery Pack ........8 Powering the VIEWCAM from an AC Outlet ... 9 Inserting and Removing a Cassette .... - Page 9 Useful Features Operations of the On-screen Controls Using the Control Buttons ....... 25 Selecting the Mode/Menu Screens ....25 Adjusting the Menu Settings ......26 Recording the Date and Time ......27 Setting the Digital Zoom ........28 Digital Quick Zoom (Extend Zoom) ....29 Still Recording ............
-
Page 10: Operation Summary
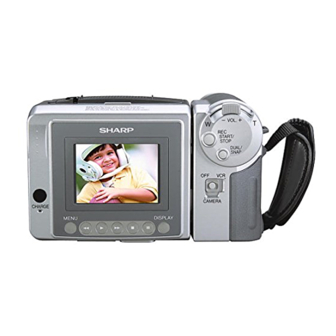
Operation Summary Part Names For details on the use of each part, refer to the page number indicated in the brackets. Front view Terminal cover Microphone Zoom lens VIDEO jack [pp. 23, 56] AUDIO jack [pp. 23, 56] DC IN jack [pp. 8, 9] Speaker When the cassette compartment door is open Cassette holder [p. - Page 11 Rear view RECord START/STOP button [p. 19] Power Zoom Wide angle/ LCD monitor screen Telephoto control [p. 20] VOLume control [p. 22] Shoulder strap loop [p. 17] Remote sensor [p. 44] DUAL/SNAP button CHARGE indicator [pp. 30, 53, 54] [p. 8] MENU button [p.
-
Page 12: Quick Reference Index
Operation Summary Quick Reference Index This index lists some example uses of the VIEWCAM’s features. • To record with a Hi8 tape in normal 8 mm format. —See page ii ( Recording Format) • To record powerful close-up images. —See page 28 (Setting the Digital Zoom) •... -
Page 13: Warning Indicators
Warning Indicators Displayed for the first Displayed after Description of warning 3 seconds 3 seconds The video cassette is defective and should be removed (see page 10). Dew has formed inside the VIEWCAM. Wait for a few hours until the dew disappears (see page 58). About 10 seconds after this warning appears, the VIEWCAM automatically turns off. -
Page 14: Preparation
• Do not expose the battery compartment door to strong force, as it may come off. • Use only SHARP model BT-H22 or BT-H32 battery packs with this VIEWCAM. Use of other batteries may present a risk of fire or explosion. -
Page 15: Charging The Battery Pack
• See page 59 for more information on using the battery pack. Terminal cover Caution: • Charge only SHARP model BT-H22 or BT-H32 battery packs. Other types of battery packs may burst, causing personal injury and damage. DC IN jack... -
Page 16: Powering The Viewcam From An Ac Outlet
Preparation Powering the VIEWCAM from Cautions: • BEFORE REMOVING THE DC PLUG, ALWAYS an AC Outlet STOP THE TAPE AND TURN THE POWER OFF. If you remove the DC plug during recording or playback, the tape will remain wound around the Caution: video head drum, potentially causing damage to •... -
Page 17: Inserting And Removing A Cassette
Inserting and Removing a Wait for the cassette holder to fully retract. Close the compartment door by Cassette pressing the centre until it clicks into place. Inserting a Cassette Supply power to the VIEWCAM, then slide the release and open the cassette compartment door. -
Page 18: Installing The Lithium Memory Battery
Preparation Installing the Lithium Close the cassette compartment door by pressing the centre until it clicks into Memory Battery place. The supplied lithium battery is used to store the memory of the date and time settings. Slide the cassette compartment door release and open the cassette compartment door. -
Page 19: Selecting The Language For The On-Screen Display
Selecting the Language for Changing the Language the On-screen Display In Recording Standby mode, press the MENU button until appears. This VIEWCAM allows you to choose from among English, German or French for the on- Press the PAGE (SEITE or PAGE) screen display language. -
Page 20: Camera Mode
Preparation English On-screen Displays The following on-screen displays appear when “ENGLISH” is selected as the on-screen display language (see page 12). Camera Mode MENU EXTEND DGT L Z OOM D I S DUAL / SNAP DUAL E X - P I C GAMA T END E F F... - Page 21 German On-screen Displays The following on-screen displays appear when “DEUTSCH” is selected as the on- screen display language (see page 12). Camera Mode Ü S- Z OOM DGT L Z OOM. A U S D I S A U S PAAR / SCHNAP PAAR B I LD...
- Page 22 Preparation French On-screen Displays The following on-screen displays appear when “FRANÇAIS” is selected as the on- screen display language (see page 12). Camera Mode MENU E T ENDU Z OOM NUM. D I S DOUBL E / I NS T DOUBL E E T - MENU...
-
Page 23: Setting The Date And Time
button (C or D) to Setting the Date and Time Press the select “2” (day), and press the SET button. Example: Setting the date to 2 June 2003 (2. 6. 2003) and the time to 10:30 am (10:30). 1 2 0 0 2 S E T T I NG 0 0 0 Note:... -
Page 24: Using The Hand Strap And The Lens Cap
Preparation Using the Hand Strap and the Notes: • Always replace the Lens Cap lens cap on the lens when the VIEWCAM is Open the hand strap flap (Q) and grip not in use. strap (W). • Attach the lens cap to the hand strap so it will not get in the way Hand strap flap... -
Page 25: Using The Sun Hood
Using the Sun Hood Closing the Sun Hood Fold in both side covers while holding the It is recommended that you use the supplied top cover open. sun hood when recording outdoors on a sunny day or at a brightly illuminated location. Attaching the Sun Hood Fit the bottom clip on the sun hood into the slot below the LCD screen (Q), and align the top... -
Page 26: Basic Operations
Basic Operations Camera Recording Easy Camera Recording with Note: • When recording at the beginning of a tape, advance Full Auto Mode the tape about 15 seconds before you begin recording. This will prevent the beginning of the recording being cut off when it is played back. Before you start recording, perform the operations described on pages 7 through 18 to prepare your To Pause Recording... -
Page 27: Zooming
Zooming Tips on Recording Positions Zooming allows you to move visually closer to The rotating LCD monitor screen lets you enjoy or farther from a subject without physically easy video recording in a more relaxed posture changing your position. without having to hold the VIEWCAM up to your eye. -
Page 28: Remaining Recording Time Display
Basic Operations Camera Recording Remaining Recording Time Remaining Battery Power Display Display When the VIEWCAM is recording in Camera When using the VIEWCAM with the battery mode, about 10 minutes before the tape pack as the power source, you can turn on and reaches the end, an on-screen indicator off the remaining battery power display by displays the approximate remaining recording... -
Page 29: Playback
Basic Operations Playback Playback To Stop Playback Press the STOP The LCD monitor screen makes it possible to button (A). REW P L AY ST OP ST I L L play back and see what you have just recorded. Nothing needs to be connected, allowing instant on-screen playback with the sound through the built-in speaker. -
Page 30: Watching The Playback On A Tv
Basic Operations Playback Watching the Playback on a Turn on the TV and set it to the “AV” or “VIDEO” channel. (See the operation manual of your TV.) • When connecting to a TV via a VCR, turn on You can also connect the VIEWCAM to a TV to the VCR and set it to the “AV”... -
Page 31: Video Search
Video Search Still The video search function makes it easy to The still function makes it possible to pause search for a desired scene on the tape. playback. During playback, press the STILL button ( ). Searching for a Scene Near the Current Tape Position During playback, press the Forward REW P L AY... -
Page 32: Useful Features
Useful Features Useful Features Operations of the On-screen Selecting the Mode/Menu Screens Controls You can use the mode screens to select Using the Control Buttons various functions and the menu screens to adjust various settings. Follow the procedure The following buttons on the VIEWCAM can be below to display the mode/menu screen with used to control the various functions, settings the indicator of the desired function/setting. -
Page 33: Adjusting The Menu Settings
Adjusting the Menu Settings Press the SET button (B) to select the desired setting. • Each time you press the SET button, the Follow the procedure below to adjust the setting changes. desired menu settings. Example Camera mode MENU Hold down the Lock button and slide the S E T F ADE NORMAL... -
Page 34: Recording The Date And Time
Useful Features Recording the Date and Time When “AUTO” is selected, the date/time is displayed and recorded for 10 seconds at the beginning of the first Follow the procedure shown below to record recording of each day. the date and time, or the date only, along with When “ON”... -
Page 35: Setting The Digital Zoom
Setting the Digital Zoom • A “D” appears in front of “ZOOM” when you push the Power Zoom control to the T (telephoto) side during the digital zoom. You can select among three different zoom ranges: 1–16 (optical zoom), 16–64 (digital zoom) or 64–400 (digital zoom). -
Page 36: Digital Quick Zoom (Extend Zoom)
Useful Features Digital Quick Zoom Setting the Digital Quick Zoom Ranges (Extend Zoom) In Recording Standby mode, press the The digital quick zoom function allows you to MENU button until (MENU 1) quickly zoom in on a subject. This is useful appears. -
Page 37: Still Recording
Still Recording Using Still Recording In Recording Standby mode, press the You can record still images of subjects with DUAL/SNAP button. normal sound by selecting one of three still • A still image of the subject is displayed. recording modes. DUAL/SNAP button Type of Still Recording Modes SNAP: A still picture (snapshot) is recorded for... -
Page 38: Fade In And Fade Out
Useful Features Fade In and Fade Out Selecting Fade Mode In Recording Standby mode, press the The fade function allows you to gradually bring MENU button until (MENU 1) the image and sound in or out at the beginning appears. or end of a scene to create a scene transition. -
Page 39: Quick Review
Quick Review Press the REC START/STOP button to begin recording. • The picture and sound fade in with the The quick review function lets you check the selected fade mode. last 5 seconds of tape just recorded without switching to VCR mode, to make sure that the recording has come out right. -
Page 40: Strobe Recording
Useful Features Strobe Recording Digital Image Stabilization (DIS) You can record strobe images (still pictures that capture continuous motion at 1/5 sec. The digital image stabilization (DIS) function intervals) of subjects with normal sound. You lets you stabilize the image by electronically will find it useful when you want to produce a compensating for relatively small image shakes special effect while recording moving subjects... -
Page 41: Quick Return
Quick Return Edit Search When you have been playing back what you The edit search function lets you search, have recorded, and wish to quickly return to without switching from Camera mode to VCR recording again from the end of the last mode, for the point on the tape where you wish recorded scene, use the quick return function. -
Page 42: Gamma Brightness Compensation
Useful Features Gamma Brightness To obtain a brighter picture Compensation Press the GAMA EFF. button (A) again. • The indicator appears. When the subject is backlit, the image will be GAMA darkened if it is recorded normally. The gamma GAMMA GAMMA E F F . -
Page 43: Gain-Up (Cat's Eye)
Gain-up (Cat’s Eye) To cancel the gain-up function Press the GAMA EFF. button until “GAMMA” When you are recording in a dark or poorly- disappears. illuminated location, “LIGHT” is displayed on the screen. Use the gain-up function to record Notes: a brighter picture. -
Page 44: Wide Screen (16:9)
Useful Features Wide Screen (16:9) Macro Shots The wide screen function lets you record This VIEWCAM lets you shoot close-up images scenes with the wide-screen feel of a movie of small objects such as flowers and insects, or shown in a theatre. The top and bottom of the make title frames for your videos. -
Page 45: Setting The Viewcam To Full Auto Mode
Setting the VIEWCAM to Full If “EXPOSURE” is displayed in yellow, press the EXPOSURE button ( ) to Auto Mode display the exposure setting screen, then press the AUTO button (B). This VIEWCAM is equipped with auto focus, • The exposure setting screen turns off auto white balance, and auto exposure and “EXPOSURE”... -
Page 46: Self Recording
Useful Features Self Recording Push the Power Zoom control to obtain the desired angle of view. The LCD monitor can be rotated 180° vertically so that the monitor screen faces the subject. This lets you record yourself while watching your image on the screen. Press the REC START button (B) to You can enjoy recording a portrait of yourself, begin recording. - Page 47 Self-recording Message When the remaining recording time reaches 5 seconds, “EXTEND” will begin flashing. In Self Recording mode, you can record a short • When you want to extend the recording video message for somebody. This feature is time, press the EXTEND button (A) convenient for editing video letters.
-
Page 48: Tape Counter Feature
Useful Features Tape Counter Feature Camera mode Press the MENU button until The tape counter shows elapsed playback or appears. recording time in hours, minutes and seconds. (The counter continues to count internally even Press the COUNTER button (B) to while it is not being displayed.) This feature can display the tape counter. - Page 49 Using the Counter Memory Press the REW button (C). • The tape will automatically stop when the counter reaches 0:00.00. Use the counter memory feature when you want to return to the beginning of a particular scene. The position where the counter was reset (0:00.00) is stored in memory to make it easier to return to that point on the tape.
-
Page 50: Program Search
Useful Features Program Search Press the REW (C) (or FF [B]) button. • The tape rewinds (or fast forwards) to the The program search function automatically beginning of a scene immediately before finds and plays back the beginning of a (or after) the current tape position;... -
Page 51: Using The Remote Control
Using the Remote Control Operating the Remote Control Aim the remote control at the remote sensor of Use the remote control to operate the VIEW- the VIEWCAM, and press the control buttons for CAM from a distance, such as when you want operation. -
Page 52: Advanced Features
Advanced Features Advanced Features Digital Picture Effects To cancel the digital picture effect Select “PIC. EFF.” in step 2 above. These digital picture effects let you record the subject with a more dramatic effect. Notes: • Digital picture effects cannot be selected Type of Digital Picture Effects when a still image is displayed. -
Page 53: Scene Menu (Program Ae)
To cancel the scene setting Scene Menu (Program AE) Select “SCENE MENU” in step 2 above. You can set the VIEWCAM to the shooting mode that will create the best results for a Notes: specific type of shooting situation. Just select •... -
Page 54: Superimposing A Title
Advanced Features Superimposing a Title Press the button (Q) to select the desired title, then press the SET button (B) (W) to superimpose it. Use the title feature to superimpose titles on your videos when recording. There are eight titles preset for your convenience which you T I T LE SUP E RST AR ! HAPPY B I RTHDAY ! can choose from. -
Page 55: Changing The Preset Titles
Changing the Preset Titles Press the © or ß button (Q) to select the desired character (or “ ” for space) and press the SELECT button You can make a new title of your own by ( ) (W). changing any of the eight preset titles. The •... -
Page 56: Auto/Manual Focus
Advanced Features Auto/Manual Focus In Recording Standby mode, press the MENU button until appears. Auto Focus The auto focus function is designed to focus on WH I T E E XPO most types of subjects. In Auto Focus mode, F OCUS BAL. -
Page 57: White Balance Lock
White Balance Lock Press the WHITE BAL. button (A). • “WHITE BAL.” changes from blue to yellow and begins flashing. The colour of the subject on the screen tends to look different depending on the lighting WH I T E BA L. -
Page 58: Manual Exposure
Advanced Features Manual Exposure Press the button to select the desired exposure level. • The bar indicates the selected exposure The VIEWCAM is preset to Auto Exposure level. mode, which automatically chooses the optimal aperture. When there is too much contrast in brightness between the subject and E X POSURE background, however, you may not be able to... -
Page 59: Picture/Backlight Adjustments
Picture/Backlight Press the button to adjust the picture or backlight to the desired Adjustments setting. If the monitor picture is difficult to see due to ambient lighting, etc., adjust the picture settings. This feature can be adjusted in both Camera and VCR modes. •... -
Page 60: Digital Dual Picture
Advanced Features Digital Dual Picture Push the Power Zoom control to frame the inset subject. This function allows you to record two images on one screen using one of two modes, Picture-in-Picture or Title Screen. Note: • The functions below cannot be used together with Digital Dual Picture: —STRETCH and SLIM EFF. - Page 61 Title Screen • To put the title screen at the top of the screen, press the SELECT ( ) button. To return the title screen to the bottom of the You can simultaneously record a normal image screen, press the SELECT ( ) button again. on half of the screen with a still image title bar on the other half.
-
Page 62: Gamma Playback
Advanced Features Gamma Playback Turning Off the LCD Monitor Backlight The gamma playback function improves the picture by increasing the brightness of the The LCD monitor uses a fluorescent lamp for subject while leaving the brighter portions of backlighting (see page 59). In order to reduce the image unaffected. -
Page 63: Editing
Editing Cutting Unwanted Sequences Play back the tape to be edited, and locate Video editing lets you refine your videos by the beginning and end of the sequence removing unwanted sequences from your tape, you wish to cut. Write down the tape or transposing one sequence with another. -
Page 64: References
References References Useful Information Lighting For clear, good-quality recording, 500 to Hints for Better Shooting 100,000 lux is needed. Recording is possible with less light, but the picture quality may • Position the subject in the centre of the suffer. Adequate lighting is also essential for screen. -
Page 65: Dew Formation
If the video heads become clogged, the the surroundings for about one hour. indicator appears on the screen. Contact the For example, when bringing the VIEWCAM nearest SHARP service centre or your dealer indoors after skiing, place it in a plastic bag. for further advice. Note: •... -
Page 66: Battery Pack
Contact the nearest SHARP service centre or CHARGE your dealer for further advice. Window... - Page 67 Cleaning Video Cassette Tapes Use only tapes with the mark • Many plastic parts are used in the VIEWCAM with this VIEWCAM. casing. Do not use thinner, benzene or other strong chemical cleaners. These may cause To protect recordings against erasure discolouration and damage to the casing.
-
Page 68: Demonstration Mode
References Demonstration Mode Cancelling Demo Mode During the demonstration, perform step You can watch a brief demonstration of the 3 above. special VIEWCAM features in Demo mode. If the demonstration appears on the screen Press button (Q) to select when you turn on the VIEWCAM for the first “DEMO MODE”, then press the SET time, cancel the Demo mode to use your button (B) (W) to select “OFF”. -
Page 69: Before Requesting Service
Before Requesting Service Before calling for service, please check the following troubleshooting table. Symptom Possible cause Suggested solution No power. Power source is not properly Connect power source properly connected. (pp. 7, 9). Battery pack is not charged. Charge battery pack sufficiently (p. - Page 70 References Symptom Possible cause Suggested solution Cannot play back, rewind Position at beginning or end of tape. Rewind or fast forward tape to or fast forward tape. desired point (p. 22). Video noise in image. Dirty video heads. Call for service. Old or worn tape.
-
Page 71: Specifications
Specifications VIEWCAM Signal System: PAL standard Recording System: 2 rotary heads, helical scanning system Cassette: 8 mm video tape, MP type or Hi8 MP, ME type Recording/Playback Time: 120 minutes (P5-120) Tape Speed: 20.051 mm/second Pickup Device: ⁄ (6.4 mm, effective size: 4.5 mm) CCD image sensor (with approx. - Page 72 Notes...
- Page 74 Notes...
- Page 75 SHARP CORPORATION Impreso en Malasia Impresso na Malásia Printed in Malaysia TINSL0317TAZZ 02P01-M-G...
Need help?
Do you have a question about the ViewCam VL-AH151S and is the answer not in the manual?
Questions and answers