Table of Contents
Advertisement
PAL
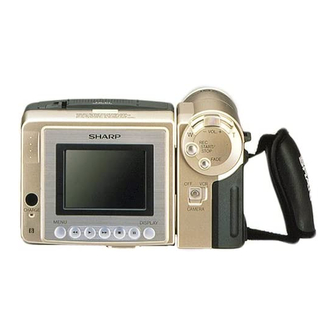
LIQUID CRYSTAL DISPLAY CAMCORDER
MODEL
VL - A10H
OPERATION MANUAL
Please read this operation manual
carefully before using the VIEWCAM.
If you require any advice or assistance
regarding your Sharp product, please
visit our web-site www.sharp.co.uk/
support. Customers without Internet
access may telephone 08705 274277
during office hours (or (01)676 0648
if telephoning from Ireland) .
Advertisement
Table of Contents

Related Manuals for Sharp VIEWCAM VL-A10H


Summary of Contents for Sharp VIEWCAM VL-A10H
- Page 1 OPERATION MANUAL Please read this operation manual carefully before using the VIEWCAM. If you require any advice or assistance regarding your Sharp product, please visit our web-site www.sharp.co.uk/ support. Customers without Internet access may telephone 08705 274277 during office hours (or (01)676 0648...
- Page 2 Power supply: WARNING: THIS AC ADAPTER IS NOT FOR USE WITH TOYS. THIS AC ADAPTER IS FOR USE WITH SHARP VIEWCAM MODEL VL-A10H ONLY. This unit can be operated by connecting it to either the AC adapter or battery pack.
- Page 3 SPECIAL NOTE FOR USERS IN THE U.K. The mains lead of this product is fitted with a non-rewireable (moulded) plug incorporating a 3A fuse. Should the fuse need to be replaced, a BSI or ASTA approved BS 1362 fuse marked and of the same rating as above, which is also indicated on the pin face of the plug, must be used.
- Page 4 Precautions • When the VIEWCAM is not in use, remember to remove the cassette tape, turn off the power, and disconnect the VIEWCAM from the power source. • Do not aim the lens at the sun. Do not allow direct sunlight to strike the VIEWCAM lens or LCD monitor screen, whether or not recording is in progress, as it may damage the CCD sensor or LCD screen...
-
Page 5: Lcd Monitor Screen
The VIEWCAM is equipped with a large LCD monitor screen that allows you to record scenes while comfortably holding the camcorder. The LCD monitor screen can be rotated for easy recording at high or low angles. It also functions as a handy playback monitor so you can enjoy what you have just recorded. -
Page 6: Supplied Accessories
Supplied Accessories Battery pack BT-H22 AC adapter Power cord Infrared remote control CR2025 type Audio/video cable lithium battery Shoulder strap Lens cap AA battery for Sun hood remote control... -
Page 7: Optional Accessories
Optional Accessories Standard type Extended type Accessory Tripod adapter battery pack battery pack shoe adapter for 180° recording BT-H32 VR-30AD BT-H22 VR-33FA Soft case... -
Page 8: Table Of Contents
Contents Operation Summary Preparation Basic Operations Part Names ... 3 On-screen Display Index ... 5 Quick Reference Index ... 6 Warning Indicators ... 7 Inserting and Removing the Battery Pack ... 8 Charging the Battery Pack ... 9 Powering the VIEWCAM from an AC Outlet ... 10 Inserting and Removing a Cassette ... - Page 9 Useful Features Advanced Features References Operations of the On-screen Controls Using the Control Buttons ... 22 Selecting the Mode/Menu Screens ... 22 Adjusting the Menu Settings ... 23 Recording the Date and Time ... 24 Fade In and Fade Out ... 25 Quick Review ...
-
Page 10: Operation Summary
Operation Summary Part Names For details on the use of each part, refer to the page number indicated in the brackets. Front view Zoom lens When the cassette compartment door is open Lens hood [p. 30] Cassette compartment door Microphone Speaker Cassette holder [p. - Page 11 Rear view RECord START/STOP button [p. 16] LCD monitor screen Remote sensor [p. 37] CHARGE indicator [p. 9] MENU button [p. 22] Operation buttons [p. 22] DISPLAY button [p. 22] Bottom view Battery compartment door [p. 8] Power Zoom Wide angle/ Telephoto control [p.
-
Page 12: On-Screen Display Index
Operation Summary On-screen Display Index For details on the use of each function, refer to the page number indicated. Camera Mode p. 38 P I C E F F COU- NTER p. 42 FOCU S p. 27 T I - RE - p. -
Page 13: Quick Reference Index
Quick Reference Index This index lists some example uses of the VIEWCAM’s features. • To quickly check what you have just recorded. —See page 26 (Quick Review) • To quickly return the tape to the end of the last recorded scene after playback. —See page 27 (Quick Return) •... -
Page 14: Warning Indicators
Operation Summary Warning Indicators Displayed for the first 3 seconds Note: indicates a flashing display. Displayed after 3 seconds The video cassette is defective and should be removed (see page 11). Dew has formed inside the VIEWCAM. Wait for a few hours until the dew disappears (see page 49). -
Page 15: Preparation Inserting And Removing The Battery Pack
• Do not expose the battery compartment door to strong force, as it may come off. • Use only SHARP model BT-H22 or BT-H32 battery packs with this VIEWCAM. Use of other batteries may present a risk of fire or explosion. -
Page 16: Charging The Battery Pack
• See page 50 for more information on using the battery pack. Terminal cover Caution: • Charge only SHARP model BT-H22 or BT-H32 battery packs. Other types of battery packs may burst, causing personal injury and damage. Max. Max. -
Page 17: Powering The Viewcam From An Ac Outlet
Powering the VIEWCAM from an AC Outlet Caution: • The supplied AC adapter is specially designed for use with this VIEWCAM, and should not be used as a power supply for other camcorders. Power switch Connect the power cord to the AC adapter, then insert the AC plug into a power outlet. -
Page 18: Inserting And Removing A Cassette
Preparation Inserting and Removing a Cassette Inserting a Cassette Supply power to the VIEWCAM, then slide the release and open the cassette compartment door. • The cassette holder extends and opens automatically. Cassette compartment door release Insert the cassette fully with the window facing outwards, and with the erasure protect tab facing upwards. -
Page 19: Installing The Lithium Memory Battery
Installing the Lithium Memory Battery The supplied lithium battery is used to store the memory of the date and time settings. Slide the cassette compartment door release and open the cassette compartment door. Cassette compartment door release Note: The cassette holder will extend and open when the VIEWCAM is connected to a power source. -
Page 20: Setting The Date And Time
Preparation Setting the Date and Time Example: Setting the date to 2 June 2001 (2. 6. 2001) and the time to 10:30 am (10:30). Note: • Check that the lithium memory battery has been installed before setting the date and time. Power switch MENU button DISPLAY button... -
Page 21: Using The Hand Strap And The Lens Cap
Using the Hand Strap and the Lens Cap Open the hand strap flap (Q) and grip strap (W), and pass the grip strap through the loop at the end of the lens cap cord (E). Hand strap flap Pass your hand through the hand strap and put your thumb close to the Power Zoom control. -
Page 22: Using The Sun Hood
Preparation Using the Sun Hood It is recommended that you use the supplied sun hood when recording outdoors on a sunny day or at a brightly illuminated location. Attaching the Sun Hood Fit the bottom clip on the sun hood into the slot below the LCD screen (Q), and align the top clip with the ridge above the LCD screen (W). -
Page 23: Basic Operations
Basic Operations Camera Recording Easy Camera Recording with Full Auto Mode Before you start recording, perform the operations described on pages 8 through 15 to prepare your VIEWCAM for recording. REC START/STOP button LCD monitor screen Power switch Remove the lens cap (see page 14). Hold down the Lock button and slide the Power switch to CAMERA. -
Page 24: Basic Operations Camera Recording
Basic Operations Camera Recording Zooming Zooming allows you to move visually closer to or farther from a subject without physically changing your position. Zooming in (when you want to centre attention on the subject) Wide angle Zooming out (when you want to show the surroundings) To Zoom In Push the Power Zoom control to the T... -
Page 25: Remaining Recording Time Display
Remaining Recording Time Display When the VIEWCAM is recording in Camera mode, about 10 minutes before the tape reaches the end, an on-screen indicator displays the approximate remaining recording time. DISPLAY button Approx. remaining On-screen recording time indicator 10 min.–8 min. T A P E 8 min.–6 min. -
Page 26: Playback Playback
Basic Operations Basic Operations Playback Playback Playback The LCD monitor screen makes it possible to play back and see what you have just recorded. Nothing needs to be connected, allowing instant on-screen playback with the sound through the built-in speaker. Power switch LCD monitor screen DISPLAY button... -
Page 27: Watching The Playback On A Tv
Watching the Playback on a You can also connect the VIEWCAM to a TV to allow a larger audience to enjoy video playback. Lift up the terminal cover on the VIEWCAM ( ) and rotate it to the right Terminal cover Connect the VIEWCAM to your TV (or VCR) with the supplied audio/video cable, as shown. -
Page 28: Basic Operations Playback
Basic Operations Playback Video Search The video search function makes it easy to search for a desired scene on the tape. Searching for a Scene Near the Current Tape Position During playback, press the Forward Search (B) (or Reverse Search [C]) button. -
Page 29: Useful Features
Useful Features Useful Features Operations of the On-screen Controls Using the Control Buttons The following buttons on the VIEWCAM can be used to control the various functions, settings and on-screen displays. MENU button DISPLAY button Operation buttons MENU button Each time you press the MENU button, the mode/menu screen changes from in Camera mode and from in VCR mode. -
Page 30: Adjusting The Menu Settings
Useful Features Adjusting the Menu Settings Follow the procedure below to adjust the desired menu settings. Camera mode Hold down the Lock button and slide the Power switch to CAMERA. Press the MENU button until appears. Press the PAGE button ( ) to display the desired menu screen. -
Page 31: Recording The Date And Time
Recording the Date and Time Follow the procedure shown below to record the date and time, or the date only, along with the subject. Note: • Before performing the procedure below, make sure that the date and time have been correctly set (see page 13). -
Page 32: Fade In And Fade Out
Useful Features Fade In and Fade Out The fade function allows you to gradually bring the image and sound in or out at the beginning or end of a scene to create a scene transition. This VIEWCAM features one normal and two animated fade modes. -
Page 33: Quick Review
Press the REC START/STOP button to begin recording. • The picture and sound fade in with the selected fade mode. HA PPY B I R THDAY ! HA PPY B I R THDAY ! P I C P I C E F F E F F Press the REC START/STOP button at... -
Page 34: Quick Return
Useful Features Quick Return When you have been playing back what you have recorded, and wish to quickly return to recording again from the end of the last recorded scene, use the quick return function. In Recording Standby mode, press the MENU button until T I - T L E... -
Page 35: Gamma Brightness Compensation
Gamma Brightness Compensation When the subject is backlit, the image will be darkened if it is recorded normally. The gamma brightness compensation function improves the picture by increasing the brightness of the subject while leaving the brighter portions of the image unaffected. Press the MENU button until appears (Camera mode). -
Page 36: Gain-Up (Cat's Eye)
Useful Features Gain-up (Cat’s Eye) When you are recording in a dark or poorly- illuminated location, “LIGHT” is displayed on the screen. Use the gain-up function to record a brighter picture. Press the MENU button until appears (Camera mode). Press the GAMA EFF. button (A) once. •... -
Page 37: Wide Screen (16:9)
Wide Screen (16:9) The wide screen function lets you record scenes with the wide-screen feel of a movie shown in a theatre. The top and bottom of the picture are masked with black bands to produce an effective screen aspect ratio of 16:9. -
Page 38: Self Recording
Useful Features Self Recording The LCD monitor can be rotated 180° vertically so that the monitor screen faces the subject. This lets you record yourself while watching your image on the screen. You can enjoy recording a portrait of yourself, or recording yourself and your friends together at a party, using the remote control. - Page 39 Self-recording Message In Self Recording mode, you can record a short video message for somebody. This feature is convenient for editing video letters. • Complete steps 1 to 3 of “Normal Self Recording” on page 31, then perform the procedure below. EXTEND button REC START/ MESSAGE button...
-
Page 40: Setting The Viewcam To Full Auto Mode
Useful Features Setting the VIEWCAM to Full Auto Mode This VIEWCAM is equipped with auto focus, auto white balance, and auto exposure functions. For easy, high-quality camera- recording, record subjects in Full Auto mode. If “AUTO” is not displayed even when the DISPLAY button is pressed, perform the procedure below to set the VIEWCAM to Full Auto mode. -
Page 41: Program Search
Program Search The program search function automatically finds and plays back the beginning of a number of previously recorded scenes. Up to 10 different scenes can be found on one tape. Note: • This function does not work if no recording has been made since the cassette was loaded, if the cassette has been removed after the recordings were made, or if the power source has been... -
Page 42: Tape Counter Feature
Useful Features Tape Counter Feature The tape counter shows elapsed playback or recording time in hours, minutes and seconds. (The counter continues to count internally even while it is not being displayed.) This feature can be set and used in both VCR and Camera modes. - Page 43 Using the Counter Memory Use the counter memory feature when you want to return to the beginning of a particular scene. The position where the counter was reset (0:00.00) is stored in memory to make it easier to return to that point on the tape. VCR mode During playback, press the MENU button until...
-
Page 44: Using The Remote Control
Useful Features Using the Remote Control Use the remote control to operate the VIEW- CAM from a distance, such as when you want to record yourself in a scene, or when the VIEWCAM is connected to a TV for use as a VCR. -
Page 45: Advanced Features
Advanced Features Digital Picture Effects These digital picture effects let you record the subject with a more dramatic effect. Type of Digital Picture Effects B/W EFF.: The picture is recorded in black- and-white. SEPA EFF.: The picture is recorded in sepia colour similar to that of an old photograph. -
Page 46: Scene Menu (Program Ae)
Advanced Features Scene Menu (Program AE) You can set the VIEWCAM to the shooting mode that will create the best results for a specific type of shooting situation. Just select one of the four scene settings shown below. The VIEWCAM will automatically set the exposure, white balance, and shutter speed to produce the optimum picture quality for the selected situation. -
Page 47: Superimposing A Title
Superimposing a Title Use the title feature to superimpose titles on your videos when recording. There are eight titles preset for your convenience which you can choose from. In Recording Standby mode, press the MENU button until appears. T I - RE - T L E TURN... -
Page 48: Changing The Preset Titles
Advanced Features Changing the Preset Titles You can make a new title of your own by changing any of the eight preset titles. The maximum number of title characters is fifteen. Example: Changing “WEDDING DAY” to “IN HAWAII”. Press the MENU button until appears, and then press the TITLE button (C) to display the title selection screen. -
Page 49: Auto/Manual Focus
Auto/Manual Focus Auto Focus The auto focus function is designed to focus on most types of subjects. In Auto Focus mode, the VIEWCAM automatically focuses on what- ever is in the centre of the scene. Always keep the subject in the centre of the screen. Notes: •... -
Page 50: White Balance Lock
Advanced Features White Balance Lock The colour of the subject on the screen tends to look different depending on the lighting condition. The VIEWCAM is preset to Auto White Balance mode, which automatically adjusts the hue of the picture for the current lighting condition. -
Page 51: Manual Exposure
Manual Exposure The VIEWCAM is preset to Auto Exposure mode, which automatically chooses the optimal aperture. When there is too much contrast in brightness between the subject and background, however, you may not be able to record a clear image. In this case, use the manual exposure function to correct the exposure level. -
Page 52: Picture/Backlight Adjustments
Advanced Features Picture/Backlight Adjustments If the monitor picture is difficult to see due to ambient lighting, etc., adjust the picture settings. This feature can be adjusted in both Camera and VCR modes. • The example screens for this feature are for Camera mode. -
Page 53: Gamma Playback
Gamma Playback The gamma playback function improves the picture by increasing the brightness of the subject while leaving the brighter portions of the image unaffected. During playback, press the MENU button until appears. GAMA COU- E F F . NT ER Press the GAMA EFF. -
Page 54: Editing
Advanced Features Editing Video editing lets you refine your videos by removing unwanted sequences from your tape, or transposing one sequence with another. This VIEWCAM lets you monitor the source pro- gram on the built-in LCD monitor without having to connect it to an external TV or video monitor. -
Page 55: References Useful Information
References Useful Information Hints for Better Shooting • Position the subject in the centre of the screen. When you are using auto focus, whatever is in the centre of the screen is kept in focus. Position the subject in Focus manually when the centre. -
Page 56: Dirty Video Heads
If the video heads become clogged, the indicator appears on the screen. Contact your SHARP dealer for further advice or refer to page 53 “Before Requesting Service”. Note: • Video head cleaning can be done by using a commercially-available cleaning tape. -
Page 57: Battery Pack
This VIEWCAM uses a fluorescent lamp to backlight the LCD monitor. If the monitor becomes dark or difficult to view, the fluorescent lamp may need to be replaced. Contact the nearest SHARP service centre or your dealer for further advice. Battery Pack Battery pack consumption •... -
Page 58: Video Cassette Tapes
References Video Cassette Tapes Use only tapes with the VIEWCAM. To protect recordings against erasure When a previously recorded cassette is used again for recording, the previously recorded material is erased. To protect a recording against accidental erasure, slide the tab on the cassette to cover the opening. -
Page 59: Demonstration Mode
Demonstration Mode You can watch a brief demonstration of the special VIEWCAM features in Demo mode. If the demonstration appears on the screen when you turn on the VIEWCAM for the first time, cancel the Demo mode to use your VIEWCAM. -
Page 60: Before Requesting Service
Where this is not possible, please visit our web-site www.sharp.co.uk/support. Customers without Internet access may telephone 08705 274277 during office hours (or (01)676 0648 if telephoning from Ireland). - Page 61 Symptom Tape stops during rewind or fast Counter is in memory mode. forward. No image appears on connected Video input channel on TV or TV channel is not TV screen. selected properly. Audio/video cable is not properly connected. Position at beginning or end of tape. Cannot play back, rewind or fast forward tape.
-
Page 62: Specifications
References Specifications VIEWCAM Signal System: PAL standard Recording System: 2 rotary heads, helical scanning system Recording/Playback Time: 120 minutes (P5-120) Tape Speed: 20.051 mm/second Pickup Device: Lens Filter Diameter: 46 mm Microphone: Electret monaural microphone Colour Temperature Compensation: Auto white balance with white balance lock Minimum Illumination: 0.8 lux* (with gain-up, F1.4) Video Output Level: 1.0 Vp-p 75-ohm unbalanced Audio Output Level:... - Page 63 SHARP CORPORATION SHARP ELECTRONICS (U.K.) LTD. Sharp House, Thorp Road, Newton Heath Manchester M40 5BE Printed in Malaysia TINSE0377TAZZ T2437-A 0P06-M-G...
Need help?
Do you have a question about the VIEWCAM VL-A10H and is the answer not in the manual?
Questions and answers