Table of Contents
Advertisement
Quick Links
t®
Grilling's Juicy Little Secret
TM
PRODUCT
GUIDE
MODEL
463622513
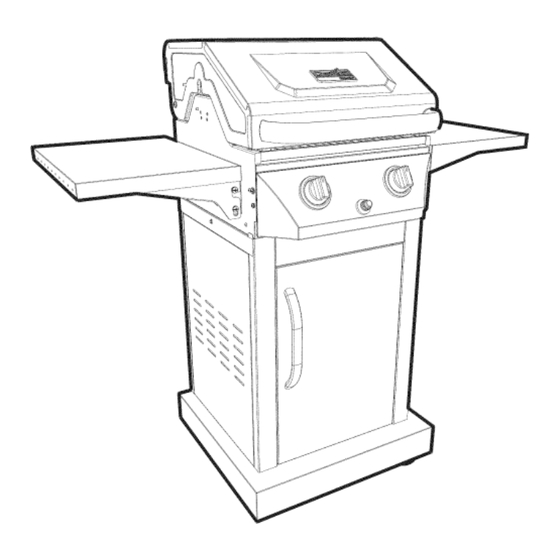
Char-Broil Classic C-22G1
iMPORTANT: Fi, out the product record information below.
Serial Number
See ratinglabel on grill for serialnumber.
Date Purchased
Forsupportandto registeryour
grill, pleasevisit us at
www.charbroil.com
If you havequestionsor need
assistanceduringassembly,
pleasecall 1-800-241-7548.
© 2013 Char-Broil,LLC Columbus,GA 31902
Printedin China
Assembly instructions© 2013
07/27/12 • G309-001-070801
Advertisement
Table of Contents

Related Manuals for Char-Broil 463622513


Summary of Contents for Char-Broil 463622513
- Page 1 Fi, out the product record information below. Serial Number See ratinglabel on grill for serialnumber. Date Purchased Forsupportandto registeryour grill, pleasevisit us at www.charbroil.com If you havequestionsor need assistanceduringassembly, pleasecall 1-800-241-7548. © 2013 Char-Broil,LLC Columbus,GA 31902 Printedin China Assembly instructions© 2013 07/27/12 • G309-001-070801...
- Page 2 iiiEi,, ForYourSafety........If you smell gas: GrillingGuide........1. Shut off gas to the appliance. Useand Care ........8-13 2. Extinguish any open flame. LimitedWarranty ........3. Open lid. PartsList.......... 4. If odor continues, keep away from the appliance and immediately call your gas PartsDiagram ........
-
Page 3: California Proposition
CAUTION CALIFORNIA P ROPOSITION 65 1.Combustible by-products produced whenusing this productcontainschemicals knownto theState of California to causecancer, b irthdefects,or otherreproductive harm. This product contains chemicals, including lead and lead compounds, known to the State of California to cause cancer, birth defects or other reproductive harm. - Page 4 Temperature - Convective Grills ONLY. The temperature gauge in the hood of your new grill measures air temperature. The air temperature inside your grill will never First Time Use be as hot as the temperature at the cooking surface. Read yourAssembly Manual and ensure the grill is put together properly.
-
Page 5: Food Safety
Rotisserie C ooking Rotisserie cooking is best for'round' meat, such aslarge roasts, whole poultry, andpork.Itgenerally requires anaccessory motor Outdoor grilling i sreally q uite simple. You'll succeed with and spitrodthatallows t hemeat tobeturned a taconstant burgers, dogs, o rsteaks u sually o nyour v ery first t ry.With speed. - Page 6 Wood Chips For extra smoke flavor when grilling, try adding wood chips. Cooking onyour n ew grill i sahands-on experience, anditis Soak the chips in water for approximately 30 minutes before recommended toremain o utside w ithyour g rill w hile cooking. adding to a smoke box or pan.
-
Page 7: Routine Care
Use non-abrasive scouring powder for stubborn stains. The Char-Broil® grill is equipped with Gear which Trax allow for the easy mounting of our unique line of Gear Trax Painted surfaces: Wash with mild detergent or non-abrasive accessories. - Page 8 LP Cylinder •The LP cylinder used with your grill must meet the following requirements: •Use LP cylinders only with these required measurements: 12" (30.5cm) (diameter) x 18" (45.7 cm) (tall) with 20 lb. (9 kg.) capacity maximum. • NEVER store a spare LP cylinder under or near •LP cylinders must be constructed and marked in accordance the appliance or in an enclosed...
- Page 9 LP Cylinder Exchange Connecting Regulator to the LP Cylinder •Many retailers that sell grills offer you the option of replacing I.LP cylinder must be properly secured onto grill. (Refer to your empty LP cylinder through an exchange service. Use only assembly section.) those reputable exchange companies that inspect, precision fill, 2.Turn all control knobs to the OFF position.
- Page 10 Leak Testing Valves, Hose and Regulator 1.Turn all grill control knobs to OFF. 2.Be sure regulator is tightly connected to LP cylinder. 3.Completelyopen LP cylinder valve by turning hand wheel counterclockwise. If you hear a rushing sound, turn gas off immediately.
- Page 11 Safety Tips A Before opening LP cylinder valve, check the coupling nut for tightness. A When grill is not in use, turn off all control knobs and LP For Safe Use of Your Grill and to Avoid Serious cylinder valve. Injury: A Never move grill while in operation or still hot.
- Page 12 Burner Flame Check • Remove cooking grates and flame tamers. Light burners, rotate knobs from HIGH to LOW. You should see a smaller flame in LOW position than seen on HIGH. Perform burner flame check Turn controls and gas source or tank OFF when not on sideburner, also.
-
Page 13: Spider Alert
Remove carryover tubes and burners. CAUTION Detach electrode from burner. NOTE: Removal/Detachment method will depend on the burner configuration. See different configurations in illustrations below. Carefully lift each burner up and away from valve openings. SPIDER ALERT! We suggest three ways to clean the burner tubes. Use the one easiest for you. - Page 14 This warranty only applies to units purchased from an authorized retailer. ManuPacturer warrants to the oxiginal consurner-purchaser only that this product shall be free from defects in workmanship and materials after correct assembly and under nolTnal and reasonable home use for the periods indicated below beginning on the date of purchase*.
- Page 15 FIREBOX MAGNET ASSEMBLY MAINBURNER SPRINGPIN,Fi DOOR ELECTRODE, Fi MAINBURNER FIXEDPIN,Fi DOOR CARRYOVERTUBE NOTPictured CONTROL PANEL,MAIN ELECTRONIC IGNITION MODULE CASTERPIN BUTTON, F /IGNITION MODULE PRODUCT MANUAL,ENGLISH HARDWARE PACK SHIELD,F/ELECTRONIC IGNITION MODULE HOSEVALVE REGULATOR ASSEMBLY BEZELF/CONTROLKNOB CONTROL KNOB RIGHT SIDESHELFWELDMENT LEFTSIDESHELFWELDMENT SIDESHELFBRACKET, L EFT SIDESHELFBRACKET, R IGHT TOP LID LOGOPLATEF/LID...
- Page 17 [] Place bottom shelf upside down. [] Insert Caster Pin into the caster mounting plate to lock it in place, shown A. Spin the caster clockwise into the threads on the bottom shelf until secure. Remove the Caster Pin and repeat for remaining casters. Make sure the two locking casters are secured at the rear and the non-locking casters are secured at the front.
- Page 18 [] Attach upper d oorbrace andbackrailtocartsideframes with#8x3/8" s heet m etal s crews. Upper D oorBrace #8x3/8" Sheet M etal S crew Qty. 8 Front Rear Attach handle to door with #10-24X3/8" machine screws, 5mm lock washers and 5mm flat washers. Insert hinge pin on bottom shelf into hole in door.
- Page 19 Secure with1/4-20X1/2" machine screws asshown. [] Carefully l ower thegillhead ontothecart.Makesurethe regulator hoseis hanging inside thecart. 1/4-20X1/2" Machine Screw Qty.4 [] Hang sideshelf a ssembly o ntothepre-installed screws andbushings o nsideshelfbrackets a sshown. [] Insert1/4-20X1/2" Machine S crews andbushings t hrough sideshelf a ssembly a ndsideshelfbrackets. Secure with1/4-20 flange nutsasshown.
- Page 20 on pins in back of firebox, Place heat tents over burners by inserting tabs into slots in front of firebox. Opposite ends of heat tents rest Place cooking grates onto grate rests. Unscrew ignitor cap and place AAA battery into ignitor slot with positive end (+) facing outward. Replace ignitor cap onto ignitor, Cooking Grate...
- Page 21 Insert ends of Warming Rack pivot wire into holes in sides of grill lid. Insert ends of Warming Rack leg wire into holes in sides of firebox. NOTE: Pivot and leg wires, running side-to-side, should be under wires running front-to-back. If pivot and leg wires are on top, Warming Rack is installed upside-down. Swing Away Hang grease cup clip from bottom of firebox and place grease cup into grease clip.
- Page 22 LPtank is soldseparately. Useonlywith an OPD(over-fillprotectiondevice)equippedLP tank. Filland leak-check before attachingto grill and regulator. See Use and Caresection to correctly LeakTestand perform the Burner FlameCheck. PlaceLP tank intohole in bottomshelfwith tank collaropeningfacingto front of grill as shown. Fingertightentank retainerscrew to hold LP tank securelyin place. LP Tank Always keep LP cylinders in upright position during use,...
-
Page 23: Troubleshooting
DANGER; if a gas leak cannot be stopped, or a fire occurs due to gas leakage, call the fire department, Gasleakingfrom • Damagedhose. •Turnoff gas at LP cylinderor at sourceon naturalgassystems.If cracked/cut/burned anythingbut burned,replacevalve/hose/regulator. If burned, hose. discontinueuseof productuntila plumberhas investigated cause and corrections are made. - Page 24 Troubleshooting (continued) ELECTRONIC IGNITION: Burner(s)will not light usingignitor. • Nospark,no ignitionnoise. • SeeSectionI of ElectronicIgnitionSystem. (See ElectronicIgnition Troubleshooting a lso) • Nospark,someignitionnoise. • SeeSectionII of ElectronicIgnitionSystem. • Sparks,but notat electrodeor at full • SeeSectionIII of ElectronicIgnitionSystem. strength. Burner(s)will not • See "GAS ISSUES:"on previouspage. matchlight.
-
Page 25: Troubleshooting - Electronic Ignition
Troubleshooting - Electronic ignition pmm ! SECTION I Nosparksappearat • Battery not installed • Checkbatteryorientation. • Installbattery(makesurethat "+"and "-" anyelectrodeswhen properly. connectorsare orientedcorrectly, w ith "+"end up ElectronicIgnitionButton and "-" enddown.) is pressed;no noise can be heardfromspark • Deadbattery. • Has batterybeen used •... - Page 27 Which product are you registering? _.Qu_ producto est_i registrando? Mail to: / Enviar a: / Envoyer Quel produit enregistrez-vous? []Gas Grill I Parrilla a gas I Gril au gaz Char-Broil Warranty Registration Electric Grill ] Parrilla el_ctrica I Gril _lectrique []Smoker I Ahumador I Fumoir P.O.
- Page 28 FO YOU URCHASE Grilling's Juicy Little Secret _° • Valuable product information • Inspiring grilling accessories • Reliable customer support • Delicious recipes and tips from chefs • Exciting events and promotions • And much more!
Need help?
Do you have a question about the 463622513 and is the answer not in the manual?
Questions and answers