
Related Manuals for TerraTec DMX 6Fire USB


Summary of Contents for TerraTec DMX 6Fire USB
- Page 1 Hardware and driver installation English Operation Manual Version 1.1, status: August 2008...
- Page 2 All registered trademarks, product designations or brand names used in this document are the registered property of their respective owners. ©TerraTec Electronic GmbH, 1994 - 2008. All rights reserved (22/08/2008). DMX 6Fire USB (English)
-
Page 3: Table Of Contents
Content: Welcome! .......................... 5 From opening the package to installation ................7 Scope of delivery ......................7 Driver and Control Panel installation—step by step ............8 Which operating system? ....................8 Power supply ......................... 8 Installing the DMX 6Fire USB driver in Windows XP ............8 Installing the DMX 6Fire USB driver in Windows Vista .......... - Page 4 WDM kernel streaming .....................31 The Control Panel ......................32 Mixer ..........................32 Volumes ........................32 Signals ........................33 Routing ........................33 Outputs & Settings .......................34 Volumes ........................34 Clock Settings......................35 Device settings ......................35 Scenes ........................36 Miscellaneous ......................36 About ...........................37 Appendix A – Short cable tutorial ..................38 1/4"...
-
Page 5: Welcome
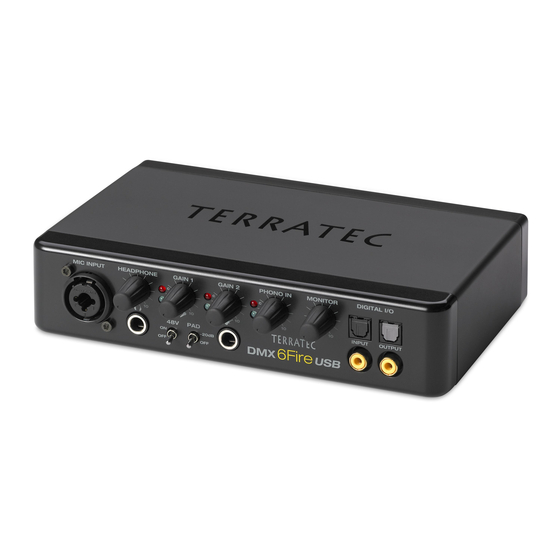
Welcome! We're pleased that you have chosen an audio interface from TerraTec for your musical activities and would like to congratulate you on this decision. With the DMX 6Fire USB, you have acquired a piece of advanced studio technology. We're convinced that in the years to come, the product we have developed will prove extremely useful to you—both in... - Page 6 Technology that will thrill you. DMX 6Fire USB—the perfect audio system from TerraTec for hi-fi fans, gamers and hobby musicians. The fantastic internal specifications include 24-bit/192 kHz, and the variety of connections feature four analogue inputs and outputs, gain-controlled connections for microphone (XLR, 1.4"/6.3 mm combo jack) and headphone, digital I/O (coaxial and optical), monitor level control, USB 2.0 connection and...
-
Page 7: From Opening The Package To Installation
■ 1 registration card with the serial number Please fill out and return the enclosed registration card to us at your earliest convenience or register online at http://www.terratec.net/register.htm. This is important for support and hotline services. DMX 6Fire USB (English) -
Page 8: Driver And Control Panel Installation-Step By Step
Driver and Control Panel installation—step by step Please follow the steps in the same exact order they appear here. Do not connect the DMX 6Fire USB to the computer until the point specified in the installation. Which operating system? • Windows o The DMX 6Fire USB can be used with Windows XP (Service Pack 2) and Windows Vista only. - Page 9 The installation wizard will now display its welcome message. 3. The default destination for the installation is specified in the following window. If you prefer another folder, select "Browse..." and choose the corresponding directory. Then, click "Install". 4. You can disregard the following safety warning without concern. Click "Continue Anyway"...
- Page 10 5. The driver is now installed in the system, and as soon as the message below appears, you can connect the DMX 6Fire USB to your computer's USB 2.0 port using the cable provided. Windows XP will automatically recognise the device as new hardware and open the driver installation dialogue.
- Page 11 6. The Windows "Found New Hardware Wizard" asks what driver to use for the new hardware component. You do not have to search for the driver online. The next win- dow asks about the driver for the DMX 6Fire USB hardware. Next, select "Install the software automatically [Recommended]"...
- Page 12 8. This concludes part 1 of the installation, so click "Finish". 9. This returns you to the installation wizard, as only the drivers for the USB controller have been installed; now, the drivers that make the controller a USB audio device are installed.
- Page 13 10. Again, you can safely ignore the message that the software did not pass the "Win- dows Logo test". 11. Click "Finish" to complete the installation of the drivers. DMX 6Fire USB (English)
- Page 14 12. Once the drivers have been installed, the DMX 6Fire USB should appear in the device manager with the following entries. You can find the "Device Manager" in the Control Panel under "System" > "Hardware". Click the "Device Manager" button. The DMX 6Fire USB as a system audio device (Windows XP) If you would like to use the DMX 6Fire USB not only for specific audio applications, but as your default Windows audio device, select the DMX 6Fire USB audio driver in the Control...
-
Page 15: Installing The Dmx 6Fire Usb Driver In Windows Vista
important only for Voice-over-IP or Internet telephony applications; otherwise, you should not use the Windows mixer to control those inputs, as otherwise the signal will be degraded due to digital attenuation. The volume control in the mixer of the DMX 6Fire USB affects the software monitoring path only;... - Page 16 3. The default destination for the installation is specified in the following window. If you prefer another folder, select "Browse..." and choose the corresponding directory. Then, click "Install". 4. The driver is now installed in the system, and as soon as the message below appears, you can connect the DMX 6Fire USB to your computer's USB 2.0 port using the cable provided.
-
Page 17: Multi Channel
The DMX 6Fire USB as a system audio device (Windows Vista) To get started with the 6Fire, you have to select it as the default device in your operating system. Because in Windows Vista, a sound card consists only of inputs and outputs, you have to select the output to be used before playing back a file. - Page 18 3. In the next menu item, you can select which speakers you want to use. Then, select the corresponding outputs by placing a tick mark. To continue, click "Next". 4. Now, select whether your speakers are full-spectrum speakers (usually 2 or 3-way speakers) or satellite speakers (treble and midrange) connected to a subwoofer.
-
Page 19: Multi Device
Multi Device: Open Start -> Control Panel -> Sound 1. Define "DMX 6Fire Waveplay 1/2" as the default device by selecting the device and confirming with "Set default". Then, click "Configure" and follow point 2. Note: The green tick mark shows the selected output. -
Page 20: Installing The Dmx 6Fire Usb Driver In Mac Os 10.4 Or Higher
1. Insert the CD provided and open it using the CD / DVD symbol on your desktop. 2. A window with 3 folders opens. Please open the Software (a) folder and the Terratec (b) folder, each with a double click. -
Page 21: Updating The Firmware
3. This contains the installation file *.dmg (a). Open the file and double-click on the *.mpgk (b) file to start the installation. Please follow the instructions given by the in- stallation wizard to complete the driver and software installation. 4. After the installation, the DMX 6Fire USB Control Panel is located in your applications folder. -
Page 22: The Connections Of The Dmx 6Fire Usb System
The connections of the DMX 6Fire USB System The DMX 6Fire USB audio interface offers you numerous connections for connecting professional studio peripherals and hi-fi devices. Following is a detailed overview of its technical and electrical characteristics: If you have any difficulties understanding the various connections, refer to our short cable tutorial in Appendix A, ... -
Page 23: Back
7. -20 dB pad switch. If the recording of the microphone is much too loud, set this switch to "on"—the signal is then trimmed by 20 dB. 8. Indicator LEDs for gain control 2 (instrument input). Here, too, blue means "signal is present"... -
Page 24: Analogue Outputs
1. Connector for the external power adapter 2. USB 2.0. Connect this port to your computer's USB 2.0 jack. 3. MIDI IN. You can connect equipment such as a controller keyboard or digital piano to this jack. Use a 5-pin DIN cable to your keyboard's MIDI OUT. 4. -
Page 25: Headphone Output (Front)
Headphone output (front) The front of the unit features the headphone output (1/4" or 6.3 mm phone jack), above which is a gain control that you can use to control the volume. This output always has the same signal as output 1/2, which can be set to any signal. Do yourself, and your hearing, a favour—before switching on the unit, check the position of the gain control or turn it all the way down at first. -
Page 26: Analogue Inputs
Analogue inputs MIC INPUT (Front) The front of the DMX 6Fire USB has a combo jack that can accept both phone plugs (1.4"/6.3 mm) and the XLR plugs commonly used for microphones. However, note that this input is intended solely for connecting a microphone, not for line-level signals. Condenser microphones usually require an additional 48 volts of phantom power for operation. -
Page 27: Drivers
PHONO is operated as an alternative to the analogue input "LINE IN 3/4"; you can toggle between them in the Control Panel. Simultaneous operation is not possible. Drivers The inputs are viewed as stereo pairs (1/2, 3/4). There, the drivers are called "DMX 6Fire Input 1/2"... -
Page 28: The Mme Wave Driver
The MME wave driver. Multi-channel mode In most Windows programs, you will encounter drivers with the designation "DMX 6Fire MC Out" for recording and playback. This is a multi-channel driver that signals all six analogue output drivers to the operating system as one multi-channel driver. This is the standard operating mode for WDM drivers, and is routed back to the physical outputs by corresponding software. - Page 29 Device configuration in Cubase 4 The inputs and outputs (generally called "buses" or "channels") available in the individual programs are called "DMX 6Fire In 1, DMX 6Fire In 2, etc. and DMX 6Fire Out 1, DMX 6Fire Out 2" etc. ASIO audio connections in Cubase 4 DMX 6Fire USB (English)
-
Page 30: The Midi Driver
Microsoft's WDM specification. For example, the drivers are able to play back audio data streams from multiple applications in parallel (multi-client, a "luxury" that faithful TerraTec customers have enjoyed since 1997). You can also run WDM and ASIO drivers in parallel. -
Page 31: Wdm Kernel Streaming
WDM kernel streaming WDM kernel streaming also represents a new technology for Microsoft. Like established models such as Steinberg's ASIO interface, kernel streaming is designed to provide extremely fast access to audio hardware, bypassing the mixer for direct hardware access. Thus the name "kernel streaming"—the kernel of the Microsoft Windows operating system permits the audio data to stream directly through. -
Page 32: The Control Panel
The Control Panel The Control Panel is—beside the drivers—by far the most important piece of software in the package. Here, depending on the requirements of each situation, you can have total control of the audio interface, reduce volumes, route inputs to any output, set the Master Clock values or toggle the analogue inputs 3/4 between PHONO and LINE. -
Page 33: Signals
Note: If you are working with common audio/MIDI sequencers, you should also use this software for volume control. The advan- tage: the settings are usually saved together with your project (song, arrangement etc.). Signals INPUT 1/2 – The controls for the analogue input pair 1/2 (MIC/INST IN on the front or LINE IN 1/2 on the back) of the DMX 6Fire USB. -
Page 34: Outputs & Settings
Outputs & Settings The control panel for Windows XP and Windows Vista. The control panel for MAC OS 10.4 or higher. The following do not apply to MAC systems: Multichannel / Multidevice ASIO Colours Volumes Here, you can control the volume of the analogue and digital outputs. As for the mixer, a separate fader is available for each mono channel. -
Page 35: Clock Settings
Clock Settings Clock Here we're dealing with the sample rate used by the DMX 6Fire USB. This is a very important point, as unlike PCI cards, the DMX 6Fire USB system cannot automatically synchronise to the required sample rate. Be sure to select the sample rate manually using the drop-down menu in the Control Panel to avoid a sample rate conversion and the associated loss of quality. -
Page 36: Scenes
signals, resulting in a full, well-rounded soundscape. Output 1/2 is activated exactly as usual, and the signal is also mirrored to output 5/6; output 3 has a combined mono signal for the centre speaker, and a frequency-corrected subwoofer signal is sent to output 4. Attention: In surround mode, the settings configured in the mixer are disabled. -
Page 37: About
increase the latency. Further options are generally available on the relevant panels of ASIO applications such as Cubase, Wavelab etc. About The About page of the DMX 6Fire USB Control Panel gives you all of the relevant facts on your Control Panel, audio drivers, firmware version and operating system. Note: you can select the contents with your mouse and copy it to the clipboard. -
Page 38: Appendix A - Short Cable Tutorial
Appendix A – Short cable tutorial XLR, cinch (RCA), stereo plug, miniplug, optical, coaxial—these terms are not immedi- ately understood by everyone, so the following is a short, illustrated cable tutorial. Before we begin, one thing is fundamental—never skimp on your investment in good cables and plugs. -
Page 39: Xlr
XLR stands for "Xternal Live Return". XLR connectors are used for microphones, AES/EBU and speaker cables (in professional applications). The three-pin plugs and jacks are most commonly used, but four-pin and five-pin versions also exist (e.g. for lighting control data or for transmitting timecodes). XLR plugs have many advantages. Most feature a locking mechanism that prevents them from being unplugged accidentally, and eliminates unpleasant pops when plugging them in (because the earth always makes contact first). -
Page 40: Cinch Or Rca
Cinch or RCA The name probably comes from the US-based company "Cinch Connectors", who initially were the main producers of this type of plug. Another explanation would be the word "cinch" itself, which means "a firm grip". These plugs have been in use in the USA since the 1940s and are usually found on coaxial cables (asymmetrical two-core lines for transmission of high-frequency signals), as commonly used on stereo systems or in video applications. -
Page 41: Midi Cables
MIDI cables Cables with five-pin DIN plugs are used for MIDI connections. Germans of a certain age may remember that these plugs were once used in that country to transmit audio signals (while in the USA, cinch/RCA plugs have long been used for this purpose). 5-pin DIN plug DMX 6Fire USB (English) -
Page 42: Appendix B - Technical Data
Appendix B – Technical data Specifications • External USB 2.0 audio system • 1 microphone input with gain control (combo XLR / 6.3 mm jack) • 48V phantom power • - 20 dB pad switch • 1 instrument input with gain control (6.3 mm jack) •... -
Page 43: System Requirements / Recommendations
System requirements / recommendations Requirements • Windows XP SP2, XP X64, Vista or Vista X64 • MAC OS 10.4 or higher • Intel-based Apple computer • 256 MB RAM • 1.4 GHz CPU or higher • 1 available USB 2.0 interface •...
Need help?
Do you have a question about the DMX 6Fire USB and is the answer not in the manual?
Questions and answers