Table of Contents
Advertisement
A0151IVZ.fm
BAS 316G DNB /
BAS 316G WNB
Betriebsanleitung . . . . . . . . . . . . . . . . . . . . .3
Operating Instruction . . . . . . . . . . . . . . . . .15
Instructions d'utilisation . . . . . . . . . . . . . . .27
Manuale d'istruzioni . . . . . . . . . . . . . . . . . .39
Manual de uso . . . . . . . . . . . . . . . . . . . . . .51
Advertisement
Table of Contents

Subscribe to Our Youtube Channel
Related Manuals for Elektra Beckum BAS 316G DNB


Summary of Contents for Elektra Beckum BAS 316G DNB
- Page 1 BAS 316G DNB / BAS 316G WNB Betriebsanleitung .....3 Operating Instruction ....15 Instructions d'utilisation .
- Page 2 BAS 316 G ** 98/37/EG, 89/336/EWG, 73/23/EWG, 93/68/EWG *** BM 2010949 **** TÜV-Rheinland, Am Grauen Stein, D-51105 Köln Ing. grad. Hans-Joachim Schaller Leitung Entwicklung und Konstruktion Metabowerke GmbH Business Unit Elektra Beckum Daimler Str. 1 D - 49716 Meppen 1001095/ 02...
-
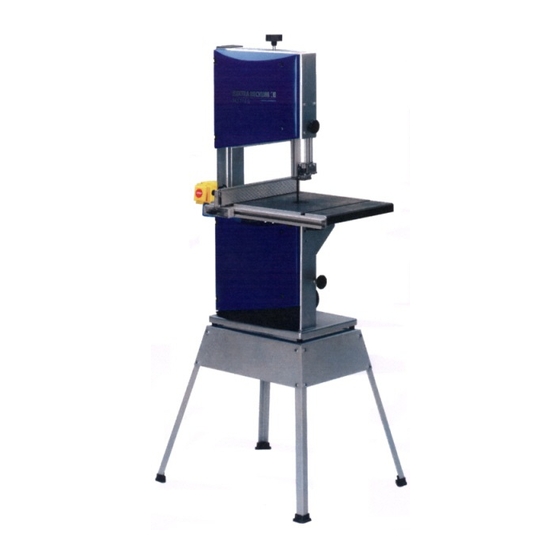
Page 3: Parts Identification (Standard Delivery)
1. Parts identification (standard delivery) Front Upper housing door Setting knob for band saw blade tension Upper band saw wheel Setting knob for blade guard Blade guard Band saw blade Saw table Fence guide extrusion, graduated Lower band saw wheel... -
Page 4: Table Of Contents
2. Please read first! These instructions have been written in a way which facilitates learning of how to safely operate your saw. Here is a guide on how you should read these instruc- tions: − Read these instructions before use. -
Page 5: Safety Devices
Use suitable feeding aids, if necessary. Keep suf- ficient distance to driven compo- nents when operating this tool. • Wait for the band saw blade to come to a complete stop before removing cutoffs, scrap, etc. from the work area. •... -
Page 6: Special Product Features
In this chapter the essential oper- ating elements of the machine are intro- duced. The proper use of the saw is detailed in chapter “Operation”. Read this chapter before using the saw for the first time. On/Off switch with emergency stop •... -
Page 7: Initial Operation
Attach the saw table with four each screws (35) and washers to the table trunnion. Saw table alignment The saw table needs to be aligned in two planes − laterally, in order for the blade to run dead centre through the table insert;... -
Page 8: Fence Guide Extrusion Installation
Danger! Too much tension can cause the band saw blade to break.Too little tension can cause the driven band saw wheel to slip and the band saw blade to stop. Raise upper blade guide fully (see “Operation”). Check tension by pushing with a fin-... -
Page 9: Operation
Do not pull on power supply cable to unplug. Changing the direction of rota tion (3-phase motor only): Depending on phase sequence the band saw blade may turn in the wrong direction. This can cause the work- piece being tossed... -
Page 10: Sawing
− stop saw, unplug and recheck settings. Band saw blade align- ment If the band saw blade does not run in the centre of the rubber tyres, the tracking needs to be corrected by adjusting the tilt of the upper band saw wheel: Loosen locking nut (57). -
Page 11: Lower Blade Guide Alignment
Loosen screws (76) with a hex. wrench. Press guide pins (77) together (against the band saw blade). 10. Turn the band saw wheel by hand in a clockwise direction several times to bring the guide pins in correct position – both guide pins should just touch the band saw blade. -
Page 12: Table Insert Replacement
12. Adjust thrust bearing position (78) so it just touches the band saw blade. 13. Tighten screw (79) again. 14. Reinstall the saw table on the upper table trunnion. 15. Reinstall the fence guide extrusion for the rip fence. Band saw tyre replace-... -
Page 13: Repairs
Before carrying out any fault service or maintenance work always: − switch machine OFF. − unplug power cable. − wait until the band saw blade has come to a complete stop. Check to see that all safety devices are operational after each fault serv- ice. -
Page 14: Technical Specifications
A-sound power level L 15.1 Available band saw blades Application Wood general cutting Wood contour cutting Wood standard cross cutting Non-ferrous metals BAS 316G DNB 400 (3~ 50 Hz) 0.74 0.55 10 (time-lag or K-Auto- mat) IP 44 1400 ±10% m/min 800 ±10%... - Page 15 090 900 4276 090 902 9260 090 903 0528 ° 091 000 8048 013 001 1004 090 902 9244 090 902 9279 090 903 0536 090 901 0900 431 306 2258 090 902 9252 090 901 8811 090 901 8366 091 003 1260 091 101 8691...
- Page 16 U4BA_EB3.fm www.elektra-beckum.de...
Need help?
Do you have a question about the BAS 316G DNB and is the answer not in the manual?
Questions and answers