Table of Contents
Advertisement
Quick Links
Advertisement
Table of Contents

Related Manuals for Kyocera TNT S2400


Summary of Contents for Kyocera TNT S2400
- Page 2 FCC RF exposure guidelines, if you wear a handset copyrighted software. Accordingly, any copyrighted on your body, use the Kyocera Wireless Corp. software contained in the KWC products may not (KWC) supplied and approved accessory designed be modified, reverse engineered, distributed or for this product.
- Page 3 These limits are part of comprehensive guidelines The FCC has granted an Equipment Authorization and establish permitted levels of RF energy for the for this model phone with all reported SAR levels general population. The guidelines are based on evaluated as in compliance with the FCC RF standards that were developed by independent emission guidelines.
- Page 4 The Health Industry Manufacturers Association and Blasting areas —Turn off your phone where the wireless technology research community blasting is in progress. Observe restrictions, and recommend that you follow these guidelines to follow any regulations or rules. minimize the potential for interference. Potentially explosive atmospheres —Turn off your •...
- Page 5 Use only Kyocera-approved accessories with cannot be guaranteed. Other factors, such as Kyocera phones. Use of any unauthorized type of hearing aid device or degree of hearing accessories may be dangerous and will invalidate loss, also can affect a phone’s performance for a the phone warranty if said accessories cause particular user.
- Page 6 The more immune your hearing aid is, the less likely you are to experience interference noise from mobile phones. Please visit www.virginmobileusa.com if you have any additional questions about hearing aid-compatibility. Kyocera Wireless Corp. www.kyocera-wireless.com To purchase accessories, visit www.kyocera-wireless.com/store or www.virginmobileusa.com.
-
Page 7: Table Of Contents
ABLE OF ONTENTS Getting Started..... . 1 Messaging ......17 Phone battery . - Page 8 12 Settings......36 Menu options ......36 Display .
-
Page 9: Getting Started
ETTING TARTED Phone battery Installing the battery Charging the battery To install the battery: You must have at least a partial charge in the battery to make or receive calls. 1. With the back of the To charge the battery: phone facing you, locate the notch near the 1. -
Page 10: Battery Care
Battery care • Replace the battery only with another qualified battery. Use of an unqualified battery may General safety guidelines present a risk of fire, explosion, leakage, or • Do not disassemble or open the battery. other hazard. If you are unsure about whether •... -
Page 11: Purchasing Accessories
Purchasing accessories Step 2: Programming your phone Once your account is activated, you’ll need to To purchase accessories for your new phone, program your Virgin Mobile phone number into such as a hands-free headset, carrying case, or your phone. When you are ready, follow these car power adapter, please visit steps to program your phone: www.virginmobileusa.com. -
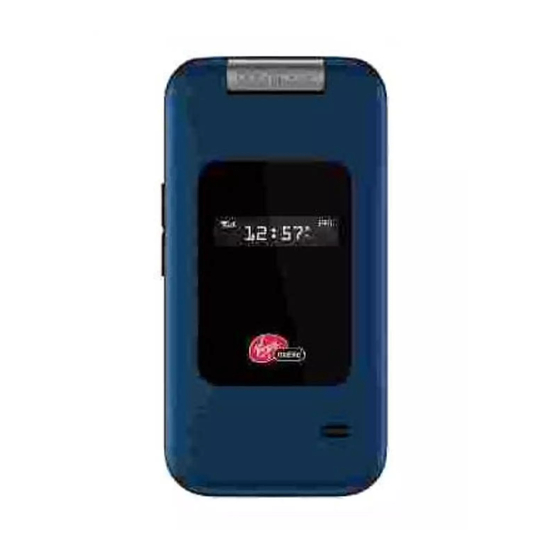
Page 12: Phone Overview
Phone overview Getting to know your phone The following illustration shows the phone in open position. 1. Earpiece speaker. 2. Main screen. key scrolls through lists and text entry fields Navigation and accesses shortcuts from the main screen. 4. Left option button selects items that appear on the lower left of the display, or accesses the at the main screen. -
Page 13: Common Keys
The following illustration shows the phone in closed position. With the phone closed, the keys are locked to prevent accidental key presses. 1. Jack for hands-free headset only (sold separately). key to raise or lower speaker volume. Volume 3. External screen displays time, caller ID, signal, and battery strength. -
Page 14: Screen Icons
Screen icons These icons may appear on your phone’s screen: New voice message. The phone is operating in IS95 digital mode. New voice and text message. The phone is operating in 1X digital mode. The phone is set to light up instead of ring. The phone is receiving a signal. -
Page 15: Main Menu
Main menu The contents of the main menu are as follows: My Stuff Settings VirginXL Tools Recent Calls My ringtones Display Accesses VirginXL Voice memo Missed calls My graphics Sounds Calendar Received calls Messaging My games Convenience Alarm clock Outgoing calls Send text msg My themes Call options... -
Page 16: Basic Navigation
Basic navigation Guide conventions Use these keys to access the basic functions on In this guide the following conventions are used your phone: when describing phone features. • : Select items that appear means to press the left or right option Left option button Select on the lower left of the display. -
Page 17: Basic Functions
ASIC UNCTIONS Call using contacts This section explains basic functionality of your phone. For more detailed explanations of your At the main screen: phone’s features, refer to the later chapters. 1. Select to open your Contacts list. Contacts Powering up 2. -
Page 18: Ending Phone Calls
Answer using earpiece Press the key or any key with Any Key Send Answer enabled. For more information, see “Any key answer” on page 43. Answer using speakerphone Press the key. Speakerphone Answer using flip You can set the phone to answer immediately when you open the flip. -
Page 19: Call Features
EATURES Speed dialing This chapter describes call features such as volume, holding calls, speed dialing, and other features. Use the Speed Dial feature to assign a one- or Volume control two-digit shortcut to a contact. Before you can use speed dialing, you must save a phone number as a You have several ways to control the volume of contact and assign a speed dial location to it. -
Page 20: Emergency Services
Emergency services Send a call to voicemail To immediately send a call to voicemail without Call emergency service answering it, select Ignore You can call an emergency code, even if your Note: Make certain that Open to answer is phone is locked or your account is restricted. Disabled, or else opening the flip will answer the When you call, your phone enters Emergency call. -
Page 21: Text Entry
NTRY You can enter letters, numbers, and symbols in Note: The mode you start in depends on the task contacts, text messages, and your banner. you are doing. For example, when entering a phone number, you are in numbers only mode. Text entry modes When entering a name for a contact, you are in normal alpha mode. - Page 22 2. If the word doesn’t match what you want, To change text entry modes, press and hold the press the key to check other key repeatedly until the icon for your 0 Next Shift * word matches. desired mode appears at the top of the screen. You can also select and a different mode.
-
Page 23: Text Entry Quick Reference
Text entry quick reference This table gives instructions for entering letters, numbers, and symbols. To.. Do this... Enter a letter Use normal alpha mode and press a key until you see the letter you want. For more options, see “Text entry modes” on page 13. Enter a number Use numbers only mode and press a key. -
Page 24: Recent Calls
ECENT ALLS Call lists – deletes the call from the call list. Erase – deletes all calls from the Erase all Details on the calls you made, received, or missed call list. are stored in the Recent Calls list and are Note: If the phone number is classified as identified by the following icons: “secret,”... -
Page 25: Messaging
ESSAGING This chapter describes how to send, receive, and 4. Select Send Include preset text and other extras erase messages from your phone. For information on voicemail messages, see “Voicemail” on During text entry, you can insert prewritten text page 11. (Auto text), symbols, or contacts. -
Page 26: Erase Messages
icon flashes if the message is urgent. Urgent – displays the sender information, Sender messages are also marked in the Inbox. allows you to save the Save Contact sender to your Contacts. Message notifications Note: If a graphic is too large or incorrectly If you see a message notification, select Inbox formatted and is not received with the message,... -
Page 27: Working With Messages
Working with messages Scroll through the list of messages. One of the following indicators may appear next to This section provides some tips about messaging each message: with your phone. The scheduled message was sent and Unable to send messages delivered as scheduled. -
Page 28: Message Settings
Message settings Edit autotext Your phone comes with prewritten messages Message settings help configure your phone’s text (Auto text), such as “Please call me,” which you message settings. can insert into the body of a text message. You can Text message alert edit these messages or create new ones. -
Page 29: Entry Mode
Auto-erase You can set your phone to erase message automatically when memory is needed for incoming messages. Select > > > Menu Messaging Msg settings and one of the following: Auto-erase • erases no messages. Disabled • erases old messages in your Inbox Msgs Inbox when memory is needed. -
Page 30: Contacts
ONTACTS Adding contacts Use your phone’s Contacts list to store information about a person or company. Each Add contact from main screen contact entry can have up to six phone numbers, two email addresses, two Web addresses, two To add a contact to your Contacts list: street addresses, and a space for notes. -
Page 31: Working With Contacts
Add code or extension 3. At the contact’s detail screen, scroll to the contact name. When you save the phone number of an automated 4. Select and one of the following: Options service, you may include a pause to stop dialing, –... - Page 32 – makes this number the – deletes Web address from Primary number Erase web primary number for the contact. the contact. – adds the number to the – makes the Web Add to group Secret Not secret business, personal, or custom group. address secret, hiding it from the screen until you enter the lock code.
-
Page 33: Contact Groups
– makes the note secret, 5. Select Secret Not secret General Work Home Mobile hiding it from the screen until you enter . The appropriate icon appears Pager the lock code. next to the number in your phone lists. 6. Select Save Assign ringtone Contact groups... -
Page 34: Searching Contacts
Customize groups Frequent list 1. Select > > With Frequent List enabled, you can see 15 of Menu Contacts Groups your most frequently called contacts. For more 2. At the Groups list, select a group. information, see “Frequent list” on page 40. 3. -
Page 35: Virginxl
IRGIN Accessing VirginXL Ending a VirginXL session With VirginXL, you can access music, Press the key from any page. VirginXL entertainment, and information services from your phone. Download ringtones, wallpapers, screen savers, and more. Check Virgin Mobile’s Web site at www.virginmobileusa.com for availability and pricing, or check directly from your phone through VirginXL. -
Page 36: My Account
CCOUNT Top-Up with a Top-Up Card You can manage your Virgin Mobile account directly from your phone. The basic tasks are 1. From the main screen, select > Menu summarized in this chapter. For more information My Account about your account, go to 2. -
Page 37: For More Information
4. Scroll down to select and press the Login key. 5. Scroll down and select Credit Card PayPal 6. Enter the amount you want to add and press key. You can Top-Up in amounts of $10, $20, $30, $50, or $90. 7. -
Page 38: My Stuff
10 M Y STUFF Note: If you don’t have enough money in your See “Add contact from main screen” on page 22. account, you need to Top-Up before downloading. My graphics My ringtones You can download wallpapers and screensavers to The My ringtones folder stores your preloaded your phone from the Virgin Mobile Web site at and downloaded ringtones. -
Page 39: Tools
11 T OOLS Your phone comes with tools and games. Some of deletes the memo. – Erase the games or tools described here may not be – prevents erasing the memo Lock available on your phone. If you receive an accidentally. -
Page 40: View By List
View by date – Scroll up or down to change hour, minute and AM/PM. 1. Select > > and one of Menu Tools Calendar Press the key to save the time and move the following: to the next field. – displays the current month. -
Page 41: Alarm Clock
– Select > to sort • assigns sound alerts for Options Sort by time Reminder sound events by time. new event reminders. – Select > to sort • sets the phone to silent mode for Options Sort by type Silent mode events by type. -
Page 42: Tip Calculator
Set the quick alarm 4. Enter the second number. Press the key to perform the operation. The result is shown. 1. Select > > Menu Tools Alarm clock 5. Select to return to menu or Exit Options 2. Highlight the quick alarm and select one of the following: 3. -
Page 43: Timer
Timer Memopad The Timer counts down for the specified time, Write memos on your phone. and beeps when that amount of time has elapsed. Write memos 1. Select > > > Menu Tools Timer To write a memo select > >... -
Page 44: Settings
12 S ETTINGS Menu options The contents of the Settings menu are as follows: Display Convenience Messaging Airplane mode TXT tone Graphics Fast find Reminder Menu style Frequent list Signature Themes Hold call Edit auto text Greeting banner 1-Touch Dialing Save to sent Language Auto-erase... -
Page 45: Display
Display Themes You can select a color theme for the display Graphics background of your phone. You can select a wallpaper for your phone’s main 1. Select > > > Menu Settings Display screen, a screensaver which appears after 10 Themes seconds of no keypresses, and caller IDs for your 2. -
Page 46: Sounds
Brightness Set backlight duration You can set the length of time that bright To change the brightness of the display: backlighting remains on. Select > Menu 1. Select > > > Menu Settings Display > > > Settings Display Backlight Duration Brightness one of the following:... -
Page 47: Convenience
Ringtones TXT Tone Choose your alerts for text messages. You can change the ringtone for your phone. You can also assign ringtones for different tasks. 1. Select > > > Menu Settings Sounds TXT tone Your phone has multiple ringtones you can 2. -
Page 48: Fast Find
Fast find Enable hold call feature 1. Select > > > Menu Settings Convenience With Fast Find enabled, you can press one or two > Hold Call Enabled keys to view close matches of the number you are looking for. If you have not recorded a hold message, you need to record one, such as “Please hold. -
Page 49: Call Options
Change the hold message Automatic add 1. Select > > > Menu Settings Convenience By default, your phone automatically enables > Hold call Re-record msg voice dialing for each new contact you add to your 2. Record the message twice, as prompted. Contacts list as long as the contact name contains 3. -
Page 50: Voice Training
Digit lengths answer?”. Say “Yes” to answer or “No” to silence the alert without answering. Use the digit lengths to determine whether to limit your dialed numbers to North American numbers Voice wake-up or any numbers. Select > > Menu Settings You can activate voice dialing by saying “wake up”... -
Page 51: Security
Open to answer 3. Select and one of the following: Lock phone – leaves the phone always unlocked. Never This feature enables you to answer a call by – locks the phone every time On power up opening the flip. Select >... -
Page 52: Messaging
Reset phone You can view these numbers only when entering them for the first time. This resets the phone to its factory default setting. All To make a call to an emergency number from a custom content (including contacts, downloaded locked phone, you must dial the number content, and personal settings) are erased. -
Page 53: Accessories
This feature works only when your phone is in Note: Power backlighting may not be digital mode. You do have the option of turning off available with the optional desktop charger the locator to emergency services. or other accessories. Select >... -
Page 54: Phone Information
Hearing aid Enable your phone to operate with a T-coil Hearing Aid device. Select > > Menu Settings > > > Accessories Hearing aid Enabled Note: Enable Hearing Aid only when using your phone with a T-coil Hearing Aid device. Phone information You can access information regarding your phone. -
Page 55: Voice Commands
13 V OICE OMMANDS You can call a contact, dial a phone number, 2. At the contact list, highlight a check marked access menus, or find contact information from contact and press the key. No check your voice dial list using voice commands. mark appears next to a name when voice Note: You cannot use voice recognition to end dialing is inactive. -
Page 56: Use Shortcuts
Use shortcuts 3. Say “Contact” and the name of the person you want to call. 1. From the main screen, press and hold the The phone prompts, “Please repeat” or “Say key. The phone prompts, “Say a Send a name” if it does not recognize the name. If command”. -
Page 57: Getting Help
Phone accessories www.virginmobileusa.com. For additional questions, you may contact the To shop for phone accessories, visit Kyocera Wireless Corp. Customer Care Center in . You may also www.kyocera-wireless.com/store any of the following ways: call us at 800-349-4188 (U.S.A. only) or •... -
Page 58: Consumer Limited Warranty
God or other acts which are not prepaid, to a KYOCERA authorized service center the fault of KYOCERA and which the Product is not specified to tolerate, including damage caused by within the one year warranty period, and (ii) is accompanied by a proof of purchase in the form mishandling, shipping and blown fuses;... - Page 59 SOLE AND EXCLUSIVE REMEDIES FOR BREACH (phone-help@kyocera-wireless.com) for the OF THE LIMITED WARRANTY, AND SUBJECT TO location of the Kyocera Wireless Corp. authorized THIS WARRANTY, THE PRODUCTS ARE service center nearest you and for procedures for APPROVED AND ACCEPTED BY YOU “AS IS”.
-
Page 60: Index
NDEX Numerics , 37 , 24 banner email addresses , 41 1-touch dialing battery , 23 erase caring , 22, 23, 44 erasing charging , 40 fast find accessories installing , 40 frequent list , 45 headsets recharging , 25 groups , 45 settings... - Page 61 display , 41 expert mode , 37 , 37 language backlighting left option button , 37 banner flip , 44 , 38 location information brightness , 43 answering calls , 43 lock code , 37 color themes folders locking , 37 language , 19 draft...
- Page 62 multimedia messages , 45 , 34 backlighting world clock , 20 auto retrieve , 39 security on and off sounds , 28 , 43 My Account , 23 emergency numbers prepend , 30 , 44 my graphics erasing contacts , 24 primary number , 30 , 43...
- Page 63 speed , 34 , 38 calculator volume , 11 dialing , 35 , 11 memopad adjusting , 35 stopwatch , 31 , 38 scheduler earpiece , 14 symbols , 35 , 38 stopwatch keypad , 35 , 38 timer ringers , 34 , 38 tip calculator...
- Page 64 Kyocera Wireless Corp. www.kyocera-wireless.com 82-K8214-1EN, Rev. 001...