Table of Contents
Advertisement
Quick Links
Advertisement
Table of Contents

Related Manuals for Kyocera Torino S2300


Summary of Contents for Kyocera Torino S2300
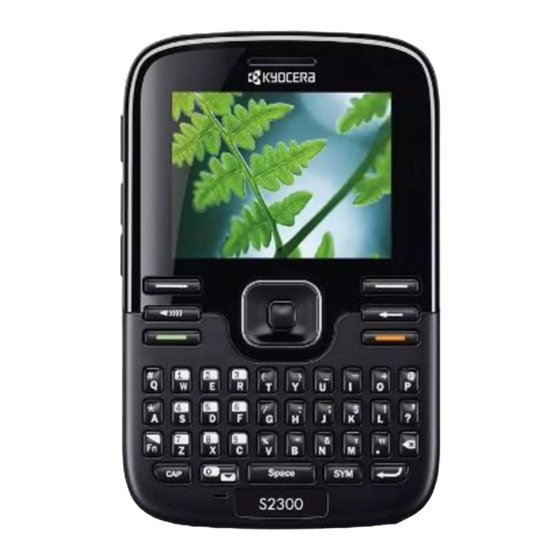
- Page 1 T o r i n o S 2 3 0 0 u s e r g u i d e User Guide...
- Page 2 Bluetooth SIG, Inc. and used by Kyocera Communications Inc. under license. This manual is based on the production version of the Kyocera All other trademarks are the property of their respective owners. S2300 phone. Software changes may have occurred after this printing.
- Page 3 Display Grant section www.fcc.gov/oet/ea after searching on exposure to radio frequency (RF) energy set by the Federal Communications Commission of the U.S. Government. These the FCC ID: OVF-K5302. limits are part of comprehensive guidelines and establish Additional information on SAR can be found on the Cellular permitted levels of RF energy for the general population.
- Page 4 Observe restrictions, and follow any regulations or Accessories rules. Use only Kyocera-approved accessories with Kyocera phones. Potentially explosive atmospheres—Turn off your phone Use of any unauthorized accessories may be dangerous and will when you are in any area with a potentially explosive void the phone warranty if said accessories cause damage or a atmosphere.
- Page 5 Phase II E911 Mandates issued by the FCC. www.fcc.gov/cgb/dro. Hearing Aid Compatibility (HAC) with Mobile Phones Kyocera Communications Inc. Some mobile phones and hearing devices (hearing aids and www.kyocera-wireless.com cochlear implants), when used together, result in buzzing, humming, or whining noises detected by the user.
-
Page 7: Table Of Contents
Table of Contents Get Started ......9 View Data Counter....31 Browser . - Page 8 Erase Events......55 Call a Contact ..... . 76 Change Scheduler Settings .
-
Page 9: Get Started
Get Started Phone Battery Charge the Battery 1. Open the microUSB jack Install the Battery cover on the top of the 1. With the back of the phone. Connect the AC phone facing you, press adapter to the microUSB on the back cover and jack. - Page 10 Battery Safety Guidelines • Replace the battery only with another qualified battery. Use of an unqualified • Do not disassemble or open the battery. battery may present a risk of fire, • Do not crush, bend, deform, puncture, or explosion, leakage, or other hazard. If you shred the battery.
-
Page 11: Phone Overview
Phone Overview Get to Know Your Phone The following shows the phone’s keypad. 1. Earpiece speaker. 2. Home screen. 3. Left softkey selects items that appear on the lower left of the display. At the home screen, you can select Menu. 4. - Page 12 The following shows the back of the phone. 1. Jack for a hands-free headset (sold separately). 2. Camera lens. 3. Accessory eyelet (for optional straps and lanyards). 4. Jack for AC adapter (included) and microUSB cable (sold separately). 5. External speaker. 6.
- Page 13 The phone is operating in IS95 digital The phone is receiving a signal. You can mode. make and receive calls. Fewer bars indicate a weaker signal. Content is DRM protected. The speaker phone is turned on. Position location is set to emergency services only.
-
Page 14: Main Menu
Main Menu From the home screen, press the OK key or select Menu to access the main menu. Idle State > Level 1 > Level 2 Menu Contacts Access these options: View All, Add New, Groups, Speed Dial List, Voice Dial List, Erase Contacts, and Contacts Count. -
Page 15: Guide Conventions
Guide Conventions In this guide, the following conventions are used when describing phone features. Select means to press the Left softkey, Right softkey or OK key to select an item seen on the display. For example, “Select Menu” tells you to physically press the left softkey to choose Menu from the display. -
Page 16: Call Features
Call Features Call Using Voice Commands This section describes the basic features related to calls. You can use voice commands to call a contact from your voice dial list or to dial a phone Power Phone Up number. For more information, see “Voice Commands”... -
Page 17: Activate Voice Dialing
Activate Voice Dialing Use Speed Dialing 1. Press and hold the Send key. Speed dialing allows you to assign a one- or two-digit shortcut to a contact. Before you can 2. Follow the prompts. use speed dialing you must save a phone For more information, see “Voice Commands”... - Page 18 Exit Emergency Services When you have completed the emergency call: 1. Select Exit. 2. Select Exit again to confirm your choice. Note: To determine who has access to your location, see “Set Location Information” on page 67. Emergency Services...
-
Page 19: Text Entry
Text Entry You can enter letters, numbers, and symbols in Press the Function key once to change the contacts, text messages, and your banner. mode for the next character only. Enter Letters with QWERTY Keypad Text Entry Modes From the text entry field, select Options > The text entry screen has the following Normal Alpha to enter letters. - Page 20 icon indicates you are in Rapid Entry mode. To change case mode, press the Shift key. Enter Symbols with QWERTY Keypad While entering text in Normal Alpha mode, press the Function key and then the key for the number or symbol. To access more symbols, do one of the following: •...
-
Page 21: Text Entry Quick Reference
Text Entry Quick Reference This table gives instructions for entering letters, numbers, and symbols. To.. Do this.. Enter a letter In Normal Alpha mode, press a key. Enter a number In Numbers Only mode, press a key. Enter a symbol Use Normal Alpha mode, press the Function key and then a key. -
Page 22: Contacts
Contacts Use Contacts to store information about a person or company. Contacts Menu Select Contacts from the main menu to access the following functions: Level 1 > Level 2 > Level 3 Contacts View All Access your existing contacts list. Add New Add a new entry to your contacts list. -
Page 23: Add Contacts
Use Frequent List up or down to move through the contact fields.) With Frequent List enabled, you can view 15 4. When done, select Save. of your most frequently called contacts. See “Enable Frequent List” on page 63. Add a Code or Extension Use Fast Find When saving the phone number of an automated service, you may include a pause... -
Page 24: Customize Contacts
Customize Contacts 2. At the contact details screen, highlight a number or email address. Edit Contact Details 3. Select Options > Send Text Msg. 1. From View All, select a contact. 4. Complete your text message and select Send. 2. At the contact details screen, select Edit. 3. -
Page 25: Erase Contacts
Change Primary Numbers 2. At the contact details screen, highlight the contact name. When a contact has more than one number, the 3. Select Options > Msg Tone > Assign Msg first number becomes the primary number by Tone and a ringer from the list. (Scroll to default. -
Page 26: Contact Groups
2. At the contact details screen, highlight a 2. Highlight a group and do one of the number, address or note. following: – Press the OK key to view the group 3. Select your desired erase option and then details. select Yes. -
Page 27: Speed Dial List
Send a Group vCard 3. If you are modifying a group you created, select Next. Otherwise, go to the next step. 1. At the Groups list, highlight a group. 4. Select contacts from the list provided. A 2. Select Options > Send > Via Bluetooth. checkmark appears next to each contact in 3. -
Page 28: Voice Dial List
Voice Dial List Enable Voice Dial Tags Your phone creates a voice dial tag for each contact that has a name field which is not blank or a name that is more than five syllables. You can enable or disable the voice dial tags associated with your contacts. -
Page 29: Recent Calls
Recent Calls Recent Calls Menu Select Recent Calls from the main menu to access the following functions: Level 1 > Level 2 > Level 3 Recent Calls See a list of all voice calls. Incoming See a list of all voice calls you have received. Outgoing See a list of all voice calls you have made. -
Page 30: Erase Call List Records
Return a Missed Call Send Text Message from Call List 1. From Missed, highlight a number. 1. At a call list, highlight a contact. 2. Press the Send key to call the number or 2. Select Options > Send Text Msg. select Options to access more features. -
Page 31: Work With Call Timers
Work with Call Timers This timer tracks all roaming calls made and received since you last reset the timer. To reset View All Calls Timer this timer to zero, select Reset > Yes. Select Life Timer to view the number of calls Your phone can alert you with a short beep ten and the total call time. -
Page 32: Browser
Browser You can use your phone to browse the Internet • To choose a site, scroll to the link and press if you have obtained phone Internet services the OK key. from your service provider and if over-the-air • An underline and an arrow indicate that Internet access is available in your area. -
Page 33: Alarm Clock
Alarm Clock You can set up to four alerts with your phone’s 2. Choose a time. (A notification shows the three alarm clocks and one quick alarm. quick alarm is on.) Note: The alert occurs only if the phone is on. When the quick alarm rings, select Off to turn off the alarm, or Reset to set the quick alarm Set an Alarm... -
Page 34: Media Gallery
Media Gallery Use Media Gallery to retrieve and playback media files and other downloads. Media Gallery Menu Select Media Gallery from the main menu to access the following functions: Level 1 > Level 2 > Level 3 Media Gallery Images Access these options: Camera Pictures, Saved Images, Wallpapers, Wallpaper Shuffle, Screensavers, and Caller IDs. -
Page 35: Sounds
Change the Default Wallpaper Assign a Ringer 1. From Wallpapers, select a wallpaper. 1. From Ringers, highlight a ringer. 2. Select Set Default. 2. Select Assign and choose how you want to assign the ringer. Edit the Wallpaper Shuffle 3. Complete the appropriate task. 1. - Page 36 Send a File Play a File 1. From a media file list, highlight a file. 1. From a media file list, highlight a file. 2. Select Options > Send > Via EMS (to 2. Select Options > Play. attach to an enhanced message), Via MMS Use the Navigation key to control the (to attach to a multimedia message), Via playback tools displayed.
-
Page 37: Erase Media Files
View a Slideshow Erase All Image Files 1. From Camera Pictures, select Options > From Delete All, select Images Only > Yes to Slideshow to play the slideshow of the files erase all files in the Images folder. contained in the current folder. Note: You can only erase unlocked files. -
Page 38: Messaging
Messaging Use Messaging to send, receive, and erase messages from your phone. Messaging Menu Select Messaging from the main menu to access the following functions: Level 1 > Level 2 > Level 3 Messaging New Text Msg Compose a text message. New Pic Msg Compose a multimedia message. -
Page 39: Send Messages
Send Messages recently used addresses. Scroll down to move to the next field when done.) Create a Text Message You can message up to ten recipients at You can only send text messages to phone once. Use comma or spaces to separate numbers capable of receiving them or to email addresses. - Page 40 Add Recipients from Contacts Save Recipients as Contacts 1. At the compose message screen, select 1. At the compose message screen, select Options > Contacts when entering a phone Options > Save Address when entering a number or email address. phone number or email address.
- Page 41 Complete Messages in Drafts Add Memos to Messages 1. From Drafts, highlight your desired 1. At the compose message screen, select message. Options > Insert Note when entering the text. 2. Select Edit or Options > Edit. 2. Select a memo. 3.
- Page 42 or voice memos. A multimedia message may Record Sounds for Messages have up to ten slides. 1. At the compose message screen, select 1. At the compose message screen, select Options > Record Sound when adding a Options > Add New Slide when entering sound.
- Page 43 Request a Message Receipt – Scroll up or down to change the month, day, and year. 1. When entering a message, select Options > 6. Select Done. Msg Settings > Msg Receipt > Request to request a message delivery notice. 7.
-
Page 44: Manage Received Messages
Set CC and BCC Fields Note: If receiving a message during a call, the phone downloads the message after the call. 1. When entering the message, select Options 1. At a message notification, select View (to > Msg Settings > CC & BCC to enable or view the message) or Later (to check it disable the CC and BCC address fields. - Page 45 2. Enter a number or address. add to an existing contact, or create a new contact depending on the sender. 3. Complete your message and select Send. Lock Messages Reply to all Recipients When viewing a received message, select 1. When viewing a received message, select Options >...
-
Page 46: Manage Voicemail
View Messages with Multiple Slides automatically transferred to voicemail, even if your phone is in use or turned off. When viewing a received message containing 1. Press and hold the 1 key. multiple slides, use the following options to navigate through the slides. 2. -
Page 47: Manage Browser Alerts
Warning: Your service provider may charge The message was sent. You cannot you for each message segment. cancel delivery of the message. When you start a message, the maximum The message has been received. character limit appears once you are in the The message has been sent to more than message entry field. - Page 48 Set Page Alerts Set Message List View 1. From Alerts, select Page Alert. From Msg List View, select one of the following to set your message list display: 2. Select an alert for pages. • Sender & Preview displays the sender and If you select an &...
- Page 49 Enable Auto-Erase 3. Select Save. Note: You can also save messages you have Use Auto-Erase to set your phone to erase written or received as preset messages. messages automatically when it needs memory for incoming messages. Enable Auto Retrieve From Auto-Erase, select one of the following: From Auto Retrieve, select one of the •...
-
Page 50: Erase Messages
Set your Voicemail Number Erase Messages from a Folder Often your service provider automatically From Erase Msgs, select a folder to erase programs your voicemail number (the number messages from. For example, to erase received your phone calls to retrieve voicemail). To messages, select Inbox >... -
Page 51: 10 Camera
10 Camera Camera Tips a multimedia message), Via Bluetooth (to send to a Bluetooth-enabled device), or To Your phone has a camera. Before using your Printer (to print on a Bluetooth-enabled phone’s camera, here are some tips: device). • You cannot activate the camera while on an Select Erase to delete the picture from your active call or while browsing files in the phone. - Page 52 Enable Date/Time Stamp Set Color Tone From camera mode, select Options > Settings 1. From camera mode, select Options > > Date/Time > On to place a date/time stamp Settings > Color Tone. on each picture taken. 2. Scroll left or right to select a color tone. icon indicates when the date/time Look at the viewfinder to see how each stamp is on.
-
Page 53: 11 Scheduler
11 Scheduler Use Scheduler to schedule events and set – Scroll up or down to change hour and reminder alerts. minute. Press the OK key to save and move to the Create an Event next field. 6. Press the OK key to select a priority from 1. -
Page 54: Modify Events
Sort Events by Priority – Scroll to a time and select Add New to create a new event. From View All Events, select Options > Sort – Select Options to access more features. by Priority to sort events by their assigned priority. -
Page 55: Erase Events
Erase Events – Scroll up or down to change hour, minute, and AM/PM. Erase an Event 2. Select Save when done. 1. From View Day, select an event. Erase Events Automatically 2. At the event details screen, select Options From Auto Erase, select an option from the >... -
Page 56: 12 Settings
12 Settings Settings Menu Select Settings from the main menu to access the following functions: Level 1 > Level 2 > Level 3 Settings Bluetooth Access these options: On/Off, My Devices, and Settings. Browser Access these options: Multimedia, Look & Feel, Security, and Edit Search URL. -
Page 57: Bluetooth
Bluetooth Set Scroll Step From Scroll Step, set how far up or down you Use Bluetooth to configure your devices. See go when you scroll through Web page. “Bluetooth” on page 74 for more information. Set Connection Timeout Browser From Connection Timeout, set the amount of Use these settings to configure your browser. -
Page 58: Sounds
Enable Cookies – Edit Ringer Shuffle 1. From Ringer Shuffle, select Edit. From Cookies, turn the cookies for the 2. Select Add (to include the file in the browser on or off. shuffle) or Remove (to remove the file Allow Link Referral from the shuffle). -
Page 59: Display
Set Power On/Off Sounds You can also press and hold the # Q key to toggle between Vibrate Only mode and 1. From Pwr On/Off Sound, select Power Normal Sounds mode. On Sound or Power Off Sound. Note: The phone rings when attached to an 2. - Page 60 Wallpaper Shuffle To turn off screensaver, select None. 2. Select a file. You may need to resize or Enable Wallpaper Shuffle crop the file. From Wallpaper Shuffle, select Enable to 3. Select Done. turn on wallpaper shuffle. Set Theme Edit Wallpaper Shuffle From Themes, select a color theme for the 1.
-
Page 61: Convenience
Backlighting Set Time and Date Format From Date/Time Format, select a time and Set Display Duration date format. From Backlighting, select Display Duration Convenience and one of the following: • Always Dim forces the backlight to remain Use these settings to make your phone more dim before turning off. - Page 62 control. In airplane mode, however, your numbers to be consistent with the U.S. dialing phone does not emit RF signals. You cannot plan (or the North American Numbering Plan). make or receive calls, send text messages, use From Auto-Hyphen, select Enabled to turn on the Browser or Bluetooth, but you can play auto-hyphenation.
- Page 63 – Exit to exit. 2. From the home screen, press the keys corresponding to the letters of the name The next time a call comes in, you can place it you want to find. A matching contact or on hold. speed dial entry appears.
-
Page 64: Voice Features
Customize Keys Set Expert Mode You can modify the Navigation key and Left Use Expert Mode to speak a command after softkey settings to set up your desired shortcut. you hear a tone instead of following the initial voice prompts. 1. -
Page 65: Accessories
Voice Answer 2. Follow the prompts for each number until training is complete. Enable Voice Answer Note: You must read the numbers digit by digit You can set your phone to answer a call with for voice training to work. your voice when using a hands-free accessory. -
Page 66: Network
Enable Roaming Service Alert 2. From TTY Device, select OK to clear the notification. Use this setting if you want the phone to alert 3. Select one of the following: you when you roam outside of your home – TTY Off disables TTY. service area. -
Page 67: Security
Set Web Alerts established, a second phone number becomes available in the menu for selection. You can set an alert to confirm the start or end From Set Phone Line, read the note and select of a browser session. OK and one of the phone lines. From Web Alert, select one of the following: When using one line, you cannot receive calls •... -
Page 68: Phone Info
Lock Phone Change Lock Code Change your lock code from the default. Set Lock Phone 1. From Security, enter your four-digit lock With your phone locked, you can call only code. emergency numbers or your service provider’s 2. Select New Lock Code > Yes. customer service number. -
Page 69: 13 Downloads
13 Downloads How does BREW Work? Download an Application Your Kyocera phone has the added ability to 1. From Downloads, select Mobileshop > Catalog. When a connection is made, a list download and manage applications through of application types appears. -
Page 70: 14 Tools & Games
14 Tools & Games Tools & Games Menu Select Tools & Games from the main menu to access the following functions: Level 1 > Level 2 > Level 3 Tools & Games Brick Attack Play Brick Attack. Voice Memo Access these options: Record New and Recorded Memos. Scheduler Schedule an appointment. -
Page 71: Voice Memo
Voice Memo 2. Scroll down to select the percentage you want to tip. Use Voice Memo to record and play back The total bill with tip is displayed. If you audio memos. are finished, select Done. Otherwise, go on Record Voice Memos to the next step. -
Page 72: Use Timer
Memopad – MR displays value currently stored in memory on the screen. Write a Memo – MC clears value currently stored in memory. 1. From New Memo, enter the memo. 2. Select Save. Use Timer View a Memo The timer counts down for the specified time. From View Memos, select View to open a It beeps when that amount of time has elapsed. -
Page 73: World Clock
2. Select Options > Lock Memo. To unlock a memo, select Unlock Memo. Erase a Memo 1. From View Memos, highlight a memo. 2. Select Options > Erase > Yes. Erase All Memos From View Memos, select Options > Erase All >... -
Page 74: 15 Bluetooth
15 Bluetooth The Bluetooth® wireless technology (not 2. From My Devices, select Find New. Your available on all phones) enables wireless phone then searches and detects any connectivity with accessories such as portable available Bluetooth devices in the vicinity. or installed hands-free car kits, phones, You must enable the Bluetooth feature on handsets, computers, and so on. -
Page 75: Change Bluetooth Settings
Rename a Device Limit Visibility 1. From My Devices, highlight a device. By default your phone is always visible, if set to visible mode. You can limit the time your 2. Select Options > Rename. phone is visible to other Bluetooth devices. 3. -
Page 76: 16 Voice Commands
16 Voice Commands Call a Number You can execute certain commands through voice recognition. To control the settings 1. From the home screen, press and hold the associated with voice commands, see “Voice Send key. The phone prompts, “Say a Features”... -
Page 77: Find A Contact
Find a Contact 1. From the home screen, press and hold the Send key. The phone prompts, “Say a command”. 2. Say “Find Contact”. The phone prompts, “Say a name”. The phone prompts, “Please repeat” or “Say a name” if it does not recognize the name. If the name you spoke matches a contact in the voice dial list, the phone prompts: “Name, correct?”... -
Page 78: 17 Get Help
For additional questions, you may contact the Kyocera Communications Inc. Customer Care Phone Accessories Center in any of the following ways: • Web site: www.kyocera-wireless.com. To shop for phone accessories, visit •... -
Page 79: Index
Index Numerics installing, 1-touch dialing, recharging, safety guidelines, Bluetooth, accessories, activating, headsets, adding devices, T-coil hearing aid, changing phone name, TTY device, connecting, airplane mode, connecting devices, set date and time, deleting devices, alarm clock, OBEX authentication, snooze reminder, pairing, alerts renaming devices, browser,... - Page 80 secure prompt, missed, select images, placing on hold, timeout, redialing, silencing, timing, calculator, voice answer, calendar, see scheduler voice commands, call history, see call lists camera, call lists brightness, all, color tone, erasing, date stamp, incoming, multishot, missed, picture quality, outgoing calls, resolution, saving numbers,...
- Page 81 web addresses, headset sounds, contacts list, headsets conventions, using this guide, auto answer, countdown timer, voice answer, customer support, help, getting, hold calls data counter, activating, display, changing message, brightness, language, icons, time and date, images downloads, erasing, help, sending, drafts folder, inbox, incoming calls,...
- Page 82 modifying, attaching sounds, online locations, callback number, playing, calling numbers, renaming, checking status, sending, completing drafts, zoom, creating, media gallery, delivery receipts, memopad, erasing, calling numbers, forwarding, creating memos, incoming calls, editing memos, list view, erasing memos, locking, locking memos, online locations, sending memos, playing attachments,...
- Page 83 writing language, user guide, missed calls, picture messages, see multimedia messages multimedia, pictures multimedia messages, erasing, auto retrieve, frames, CC/BCC fields, sending, prompt, slideshow, taking, viewing, navigation shortcuts, power on sounds, notifications preset text, messages, primary number, voicemail, product evaluation, number prefixes, number types, quick alarm,...
- Page 84 event reminders, stopwatch, finding dates, support, customer, finding events, month view, T-coil hearing aid, sending events, teletype device, silent mode, text entry, snooze duration, modes, sorting events, numbers, work hours, text messages, screensavers, themes, security, timer, sent messages folder, tip calculator, settings tools, accessories,...
- Page 85 digit lengths, editing, voice dialing, voice memos, playing, recording, voicemail alerts, changing number, checking, configuring, volume adjusting, earpiece, keypad, ringers, speakerphone, wallpaper shuffle activating, editing, time interval, viewing, wallpapers, web browser, world clock, User Guide...
- Page 87 User Guide...
- Page 88 Kyocera Communications Inc. www.kyocera-wireless.com 82-A6074-1EN, Rev. 001...