Hauppauge WinTV Installation And Reference Manual
Hide thumbs
Also See for WinTV:
- Installation and reference manual (56 pages) ,
- Quick installation manual (2 pages) ,
- Installation and reference manual (157 pages)
Table of Contents
Advertisement
Installation and Reference
Copyright (c) Hauppauge Computer Works, Inc. 2000-2003
Hauppauge Computer Works, Inc.
91 Cabot Court
Hauppauge, NY 11788
Hauppauge Computer Works, GmbH
Krefelder Straße 673e
41061 Mönchengladbach, Germany
Hauppauge Computer Works, Ltd
6 Bank Chambers
Borough High Street
London, U.K. SE1 9QQ
Internet addresses:
Sales: sales@hauppauge.com
Technical Support: techsupport@hauppauge.com
http://www.hauppauge.com
WinTV
Manual
Technical Support: 02161-6948840
Technical Support: 0207-378-0202
Web site:
Telephone: 631-434-1600
Fax: 631-434-3198
Tech Support: 631-434-3197
Telephone: 02161-694880
Fax: 02161-6948815
BBS: 02161-177353
Phone: 0207-378-1997
Fax: 0207-357-9171
BBS: 0207-357-6587
Advertisement
Table of Contents

Related Manuals for Hauppauge WinTV


Summary of Contents for Hauppauge WinTV
- Page 1 WinTV Installation and Reference Manual Copyright (c) Hauppauge Computer Works, Inc. 2000-2003 Hauppauge Computer Works, Inc. Telephone: 631-434-1600 91 Cabot Court Fax: 631-434-3198 Hauppauge, NY 11788 Tech Support: 631-434-3197 Hauppauge Computer Works, GmbH Telephone: 02161-694880 Krefelder Straße 673e Fax: 02161-6948815 41061 Mönchengladbach, Germany...
-
Page 2: Fcc Statement
WinTV Installation and Reference Manual FCC Statement Radio Interference Statement: The WinTV boards have been tested and found to comply with the limits for a Class B digital device, pursuant to part 15 of the FCC Rules. These limits are designed to provide reasonable protection against harmful interference in a residential installation. -
Page 3: Table Of Contents
Table of Contents WinTV Installation and Reference Manual Revision 5.0 FCC Statement ..................CE Statement ..................... Installing the WinTV boards Installation overview................1-1 Board connections................1-1 WinTV board diagram .................1-2 Installing the WinTV board in your PC..........1-2 Installing the WinTV board under WindowsXP........1-3 Primary Surface ..................1-4... - Page 4 Using DirectX to install an updated DirectDraw driver ......C-1 Trademarks: WinTV and the Hauppauge logo are registered trademarks of Hauppauge Computer Works, Inc. Intercast and the Intercast logo are trademarks of Intel Corp. Microsoft is a registered trademark and Windows and the Microsoft logo are trademarks of Microsoft Corporation.
- Page 5 Introduction This manual is covers all of the WinTV models based on the “PCI Push” technology for displaying TV on your PC’s VGA screen. It covers, but is not limited to, the following models: WinTV-Go WinTV-Express WinTV-dbx WinTV-radio WinTV-pci WinTV-primio WinTV-Theater References to the WinTV apply to all models.
- Page 7 WinTV Installation and Reference Manual...
-
Page 8: Installing The Wintv Boards
Installing the WinTV boards The WinTV boards are Plug-and-Play devices designed for WindowsXP . Plug-and-Play simplifies the installation and hardware setup of WinTV by having hardware settings assigned by Windows, instead of needing to set jumpers. This chapter describes how to install these boards and how the automated Plug-and-Play installation proce- dure works . -
Page 9: Installing The Wintv Board In Your Pc
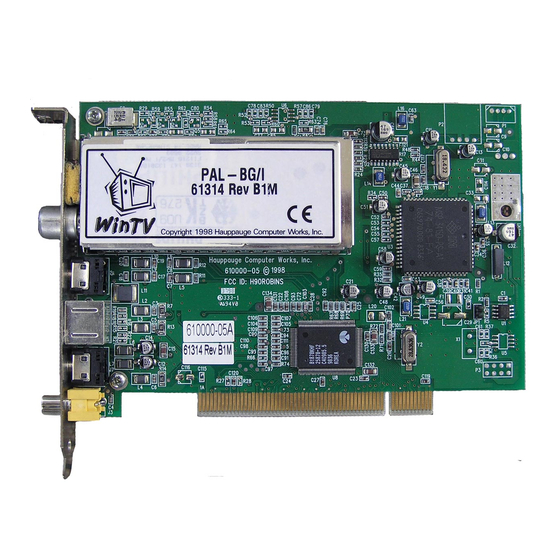
WinTV Installation and Reference Manual Audio LineOut Video In Audio LineIn Remote *Note: not available on all models. Note: this outline may not reflect the current revision of your WinTV board. For the most up to date information, see the WinTV QuickInstall Guide provided with your WinTV board. Installing the WinTV board in your PC Before installing the WinTV board, turn off the power to your PC and remove the cover. - Page 10 WinTV Installation and Reference Manual plugs into the LineIn jack of your sound card. Most sound cards have three round jacks on the out- side of the PC. They are: Microphone Input, Audio Output and Line Input. The Audio Output would go to your speakers, while the Microphone input might go to a microphone (if you are using one).
-
Page 11: Primary Surface
WinTV Installation and Reference Manual Finish Click After the video driver is installed, the Found New Hardware Wizard will detect the WinTV audio driver. Next Continue anyway Click , then Finish and then to complete the audio driver installation. Primary Surface It is sometimes useful to force WinTV to use a mode of operation of your VGA card known as . - Page 12 WinTV Installation and Reference Manual Primary then close the program by clicking on the X. The Primary program simply makes a setting in the Windows Registry that tells the WinTV application to always use the Primary mode of oper- ation. This can be changed at any time to "Allow Overlay" by re-running Primary and clicking Allow Overlay .
-
Page 13: Connecting The Wintv Board To A Sound Card
WinTV Installation and Reference Manual Connecting the WinTV board to a Sound Card The WinTV board's audio output should be connected to a sound card using the supplied Audio Cable : plug one end of the Audio Cable into the jack marked LineOut (Audio Line Out jack) on the back panel bracket of the WinTV board plug the other end of the Audio Cable into your soundcard’s... - Page 14 WinTV Installation and Reference Manual If LineIn is muted, unmute it to hear audio from the WinTV. You should see Line-In balance as one of the selections. If not, then click on Options/Properties and under Show the following vol- ume controls check Line-In. Then click OK. You should now see a selection for Line-In.
- Page 15 WinTV Installation and Reference Manual...
-
Page 16: Checking The Wintv Plug-And-Play Setup
Start/Settings/ControlPanel. Control Panel Now open up the setup by double clicking on its System properties icon, then click on the Device Manager folder: Then select Sound, video and game controllers, then click on Hauppauge WinTV and then Properties:... - Page 17 WinTV Installation and Reference Manual Click on Resources to see which resources Windows has assigned to the WinTV. Remember: the Interrupt setting cannot be changed (since it is assigned by Windows Plug-and-Play) but the Memory Address can. To see which versions of drivers are being used, click on Drivers:...
- Page 18 WinTV Installation and Reference Manual Click the Details tab to see the configuration of the WinTV driver This window will show the type of TV tuner, the serial number and revi- sion of your WinTV board.
- Page 19 WinTV Installation and Reference Manual...
-
Page 20: The Wintv2000 Application
The WinTV2000 Application To run the WinTV2000 application for watching TV and for recording videos, double click the WinTV2000 icon. Full screen TV Always-on-top Channel up Video source select Remove toolbars "no toolbar" mode Pref Preferences Channel down menu Close Minimize WinTV Channel surf... - Page 21 WinTV Installation and Reference Manual Start Then click to start the channel scan. Setting up the channels After you have scanned for channels, you can add channel names and fine tune Menu for better reception. To do this, click the button on WinTV2000, then click Suite Manager click and hold your right mouse button...
- Page 22 WinTV Installation and Reference Manual Suite Manager: configure the TV tuner (scanning, naming, fine tuning, etc.), setting up 'favorite channel lists' and set an external A/V source to a TV channel. Configuration: duplicate configuration menus for color, audio, MPEG set- tings, etc.
- Page 23 WinTV Installation and Reference Manual Note: a Pentium III 800MHz minimum system is recommended for best SoftPVR operation. OTR (One Touch Record) To start recording, either click the or the red Record button on WinTV2000. You can also start a recording by using WinTV Scheduler.
- Page 24 WinTV Installation and Reference Manual Clicking the File button opens the File menu. The File Button: last file recorded is listed in the File name box. In the File menu you can: Rename your recorded video file, Play a video file previ- ously recorded, Delete recorded video files.
- Page 25 Skip Skip “Quick ahead back Skip” buttons New style Hauppauge Old style Hauppauge remote control remote control indicating that the Remote application is running and then the WinTV applica- tion will be run. WinTV remote control for SoftPVR™ Remote control buttons when watching live TV 0 - 9 buttons: channel numbers.
- Page 26 WinTV Installation and Reference Manual Remote control buttons when playing video recordings Skip ahead button: skips ahead in the video 30 seconds per click. Holding the skip ahead button will autorepeat, and advances the video about 5 minutes per 10 seconds the button is depressed. Skip back button: skips back 30 seconds per click.
- Page 27 WinTV Installation and Reference Manual...
-
Page 28: Teletext Data Reception Using Vtplus
Teletext page they are being transmitted on. Teletext data must be inserted into the VBI by your TV broadcaster, and can only be received on the Win/TV boards if the Hauppauge Teletext decoder is installed. An example of a Teletext page follows. Each Teletext page has a page... -
Page 29: Installation Of The Vtplus Software
WinTV Installation and Reference Manual the VTPlus Teletext application is running. Installation of the VTPlus software If the VTPlus application is provided on CD-ROM, then it will automati- cally be installed from the WinTV Installation CD-ROM. If it is provided on diskette, click on the Start button, then Run and then type: A:\VTSETUP .EXE The program will install in the default direc- tory c:\VTPLUS. - Page 30 WinTV Installation and Reference Manual VTPlus toolbar Select TV channel TOP text select Center Teletext page Set Time/Date Current Teletext service Current page number Reveal invisible text Next Subpage Previous Subpage Script Reception indicator 1. Reception indicator: when this symbol is red, your requested page is being received.
- Page 31 WinTV Installation and Reference Manual 6. Arrange in Center: shortcut for Window/ArrangeInCenter. When you click on this button, the actual page will be positioned full size in the center of the Window. The centralized page will return to its original position as something else is activated. 7.
- Page 32 WinTV Installation and Reference Manual tions required and click use in VTPlus box for each station desired. Up to three letters can be used as the channel ID, to allow you to identi- fy which channel you are viewing. Quickselect Teletext pages By using the Ctrl+N key a Create and Receive page pops up request- ing a page number.
- Page 33 WinTV Installation and Reference Manual page of interest. For example, if the current Teletext page has financial data, highlight with the mouse the financial item of interest by click on the beginning of the field on the Teletext page, holding your mouse but- ton down, and releasing the mouse button at the end of the field.
-
Page 34: Running The Wintv-Radio Application
Using the WinTV-radio Application (on boards equipped with FM radio) If you have purchased the WinTV-radio board, in addition to watching TV you can also tune in radio stations on the FM band. The WinTV-radio board has two aerial inputs, one for TV and one for FM radio. -
Page 35: Using The Wintv-Radio Buttons
WinTV Installation and Reference Manual Using the WinTV-radio Buttons Volume: The audio volume is adjusted by setting the LineIn level in the Volume Control applet. Tune: Fine tune the current radio channel. Seek: Search for the next active FM radio channel. Mem: Sets a FM radio channel preset. - Page 36 WinTV Installation and Reference Manual 1. Scan Mode: Presets - When Presets is chosen and the Scan button is clicked, WinTV-radio tunes in only the stations which are assigned to the Preset buttons. 2. Scan Mode: All - When All is chosen and the Scan button is clicked, WinTV-radio tunes in all radio stations.
- Page 37 WinTV Installation and Reference Manual...
-
Page 38: How Wintv Works
How WinTV Works How WinTV displays Video-in-a-Window To display live video on your PC monitor, the WinTV boards use a tech- nique called PCI Push. With this technique, the live video is digitized by the WinTV board and then moved over the PCI bus into the memory of your VGA display adapter. -
Page 39: Primary Surface Mode Of Operation
WinTV Installation and Reference Manual ously overlay the VGA screen with the video image. Using Video Overlay, the VGA controller treats the live TV image just like any other window, which results in a 24-bit video image on your VGA screen. You will also be able to display full screen TV at all VGA resolutions. -
Page 40: Troubleshooting
In this case you might find the WinTV listed in? Other Devices. To delete this driver, highlight PCI Multimedia Video device and then click on Remove. Then browse the Hauppauge WinTV installation CD-Rom, open the folder Win98, and run VFW95/98.exe file. - Page 41 WinTV Installation and Reference Manual Problem: Poor TV picture quality A poor TV image could be caused if your VGA display adapter does not have enough video RAM to hold the TV image. In this case, WinTV resorts to Primary Surface mode, which lowers image quality. A memory upgrade on your VGA display adapter might fix this problem.
-
Page 42: Updating The Wintv Driver
From time to time, there might be a new WinTV driver which is an improvement over the existing driver. Driver updates can be down- loaded from the Hauppauge Internet Web site (see the front page of this manual for the URL). - Page 43 WinTV Installation and Reference Manual Click Next. The WinTV Update program now uninstalls the existing WinTV dri- ver, then copies a number of files to your hard disk: After the WinTV Driver installation program has copied all of the files over to your disk drive, you will be asked to reboot: Click OK to reboot your PC.
-
Page 44: Removing The Wintv Driver With Hcwclear
WinTV Installation and Reference Manual After rebooting Windows, an automatic installation of the new WinTV driver takes place. You will see the New hardware Found message, followed by the WinTV Inspection program and the WinTV Direct Draw Check program. After installing a new WinTV driver, it is advisable to install the latest WinTV applications, including the WinTV32, the WinTV-radio and IR remote control applications (if your WinTV board has these features). - Page 45 WinTV Installation and Reference Manual Click OK. You will then see the following message: Click Yes. If there are any errors which come up during the running of HCW- CLEAR, then it means that there is an application running which is using the WinTV drivers.
-
Page 46: Checking The Plug-And-Play Setup
Start/Settings/ControlPanel. Control Panel Now open up the setup by double clicking on its System properties icon, then click on the Device Manager folder. Then click on Sound, video and game controllers: then click on Hauppauge WinTV and then Properties:... - Page 47 WinTV Installation and Reference Manual Click on Resources to see which resources Windows has assigned to the WinTV. Remember: the Interrupt setting cannot be changed (since it is assigned by Windows Plug-and-Play) but the Memory Address can be changed if there is a memory conflict between the WinTV and another board.
- Page 48 WinTV Installation and Reference Manual To see which versions of drivers are being used, click on Drivers: You can also see the hardware configuration of the WinTV by clicking on the Details tab:...
- Page 49 WinTV Installation and Reference Manual This window will show the type of TV tuner, the serial number and revi- sion of your WinTV board and other information which can be used to help diagnose hardware problems.
-
Page 50: Technical Support A
Hauppauge be liable for consequential damages, including any lost savings, lost profits, or any other damages, caused by the use of the WinTV board or inability to use it, even if the dealer or Hauppauge has been advised of such liability or other claims. - Page 51 WinTV Installation and Reference Manual...
- Page 53 WinTV Installation and Reference Manual...
-
Page 54: To Install Updated Directdraw Vga Driver
Using DirectX setup to install an updated Direct Draw VGA Driver To install an updated DirectDraw driver An updated version of DirectX is installed automatically for Windows users. If you would like to re-install DirectX for your VGA card, or if you did not get a “Good News”... - Page 55 WinTV Installation and Reference Manual The DirectX setup will spend several minutes looking for drivers in your system which can be updated. As it finds drivers, you will see messages such as: Click on OK. After DirectX has updated all drivers, it will ask you to restart your After rebooting, you can check to see if your VGA card driver has been updated by running the DDCHECK program.
Need help?
Do you have a question about the WinTV and is the answer not in the manual?
Questions and answers