Advertisement
Quick Links
WinTV-NOVA-T-500
Quick Installation Guide for Windows XP &
Windows XP Media Center Edition
© 2007 Hauppauge Computer Works · QI-NOVAT500-RETAIL-V1.0-D-ENG · 2007/08/02
Hauppauge Computer Works, Ltd.
Tech Support: (+44) 0207 378 0202
10 Borough High Street
Telephone: (+44) 0207 378 1997
Bank Chambers
Fax: (+44) 0207 357 9171
London, UK, SE1 9QQ
www.hauppauge.co.uk
Hauppauge Computer Works, Inc.
Tech Support: (+1) 631 434 3197
91 Cabot Court
Telephone: (+1) 631 434 1600
Fax: (+1) 434 3198
Hauppauge, NY 11788
www.hauppauge.com
Hauppauge Digital Asia, Pte. Ltd.
Tech Support: (+65) 276 4412
Telephone: (+65) 276 9163
Blk 1093, Lower Delta Road #04-05
Tiong Bahru Industrial Estate
Fax: (+65) 276 9167
Singapore 169204
www.hauppauge.com.sg
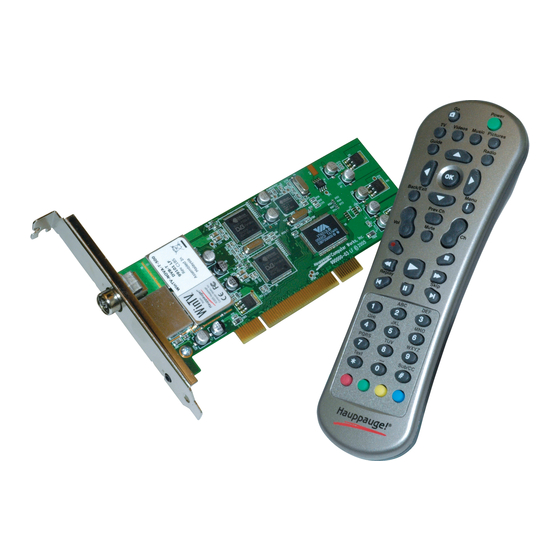
Included with the WinTV-NOVA-T-500
●
WinTV-NOVA-T-500 pci card
●
IR remote control and 2 x AAA
Batteries
●
WinTV for Windows
Installations CD-ROM with:
· WinTV2000 Application
· Remote control-Software
· WinTV Utilities
●
WingSE CD-ROM
●
WingSE Quick Install Guide
Installing the WinTV-NOVA-T-500 pci card
To install, switch off the computer and remove the computer cover.
The manufacturer of your PC supplies the instructions on removing
the PC cover.
N
ote: Your PC could be damaged by electrostatic discharge.
Avoid this by contacting the earthed chassis of your PC,
before you open it or touch the pci card.
On some PC's the WinTV-NOVA-T-500 wil need to be plugged into the
first or second PCI slot.
Locate a free PCI slot (a short white slot). Unscrew and remove the
metalcover plate which covers the back of the empty slot.
Plug theWinTV-NOVA-T-500 board into the PCI slot, and screw the
WinTV-NOVA-T-500 metal cover plate to the PC.
Replace the computer cover.
Connect the IR cable onto the back of the board.
Plug your TV antenna in to the TV connector socket on the back of the
WinTV-NOVA-T-500.
WinTV-NOVA-T-500 Antenna Signal
You will need to ensure that you are located in a area that has Digital
Terrestrial coverage.
Please visit www.dtg.org.uk/retailer/coverage.html
Page 1
3. Install the WinTV Drivers and Applications
N
ote: If you have any anti-virus software enabled, please dis-
able it during the installation of the software.
When you attach the WinTV-
NOVA, the Found New Hardware
Wizard will appear.
Click on Cancel.
Insert your WinTV Installation
CD-ROM and browse to the files
on the disc. Double click on the
file called HcwDriverInstall.
You will then be presented with a
blue screen which will begin
installing and updating the drivers
for your product.
When complete, click on the bar
to exit the driver installation.
To start the WinTV software installation, click Start / Run then type your
CD-ROM drive letter (for example: D:\) and then Setup.exe.
Select your language for the instal-
lation English is default and
Click Next.
It is recommended to leave the
default components ticked and
select Install and follow the on
screen instructions.
During the installation you will be
prompted to setup the EPG service.
A list of the options is described
below; to install with the default
options click OK.
Configure the EPG Service:
●
Start with system boot - Starts
the EPG Service automatically
each time you start your com-
puter.
●
Start minimize - Starts the EPG
Service minimized in the system
tray.
●
Record program ahead/longer -
Specifies the recording overlap
before and after a scheduled
recording.
●
Server Port No: Specifies which
port the EPG Service should run
on (Default is port 80 however if
you are hosting your own web-
page you will need to alter this).
●
Account for remote login - Enter
a username/password to access
the EPG service from any other
internet enabled computer.
Page 2
●
System Account for recording - Enter the username/password for the
user account you are currently using (the EPG service will use this
account to be able to start up the WinTV application).
Click on OK to complete the installation and refer to section 6 for more
information using the EPG.
4. WinTV
®
application v6
To start the WinTV application, double click on the WinTV icon.
When you run WinTV for the first
time, a message will appear ask-
ing you to scan for tuner chan-
nels now; please ensure that the
TV antenna is connected, click
YES.
Select your country location, for instance, select United Kingdom and
then, select Scan.
The scanning process for DVB-T will then scan for channels. When
DVB-T channels are found they then will appear in the channel listing
box.
N
ote: If you have attached an antenna and do not receive any
digital TV channels, either use a stronger antenna (a roof top
antenna is recommended for best reception) or try to add a TV
channel manually (see trouble shooting section).
Click Close when finished.
Watch TV
Full screen
Minimise
Channel up
Remove toolbars
Volume
Channel down
no title mode
Channel surf
Always on Top
Last channel
Mute
Click your right mouse button
in the TV window to remove
Freeze picture
toolbars. Click again to
Setup Menu
restore toolbars.
CFG
Configure Snapshot
Current TV channel
Click your right mouse
Snapshot viewer
button here to see the
Snapshot Still
window:
channel selector
capture
Double click on each
thumbnail to see
image full size.Click
and hold your right
mouse button to see
image options.
Pause
Record
TV-Mode
Changing channels
You can change channels by using the Channel Up or Channel
Down buttons on the WinTV. You can type a channel number (for
example: 27) and WinTV will tune to that channel. If the entered chan-
nel does not exist, you will see a black window.
You can also right click in the Current TV channel box, where you
will see a list of channels. Or type letters (for example: BBC) to access
to the list of the channels including these letters.
TV Mode
When you click the Full screen TV button, TV will appear full
screen on your PC monitor. When finished watching TV full screen,
click your right mouse button in the TV window. If you see video
with a black box around it, click the Pref button then click TV mode
tab. Check the box which says "Allow resolution change".
Page 3
"Always on top" Mode
The WinTV application will remain in view over any other applica-
tions even if it is not selected. To turn on, click the Always on top
button. It will turn green. To turn off, click this button again.
A convenient way to use Always-on-top is to make the TV window in
the no-title mode small, and to make the TV window in the title mode
larger. Then you can switch from a small window to a larger one by
clicking the right mouse button.
Pref button
Click the Pref button to open the preferences menu:
View: These are the settings for the On Screen Display of the TV
channel and Audio Volume, where you can enable Close Captions (if
supported in your system configuration), plus controls for the Toolbar
mode (Title mode), NoToolbar mode (No Title) and Full Screen (TV
mode).
Movies: Here is where you configure some video and audio settings.
You can set the movie record directory (DVCR Record File Path).
Snapshot: Set the size of your captured images, plus single or two
field captures for capturing motion or still image video.
Audio: Your audio settings are configured here.
Menu Button
Click the Menu button to open the TV setup menu. Here is the main
control bar for TV channels, and duplicate controls for other functions:
Suite Manager: Configure the TV tuner (scanning, naming, channel
pre set, etc..) and setting up favourite channel lists.
Configuration: Duplicate configuration menus for colour, audio, etc.
View: For settings an exact TV window size: 320x240, 640x480 etc.
Pause and Record
There are three buttons to control the watching, recording and pausing
of TV. Clicking on the Pause button will cause the Pause menu to roll
down from the WinTV application, while clicking on the Record but-
ton will cause the Record menu to roll down.
TV Mode
One Touch Pause One Touch Record
The Pause button prepares the WinTV pausing live video.
The Record button will start a record session. If you click Record
button more than once, a record timer will be set and the recording
will be done for 15 minutes for each time the Record button is
clicked. For example, if you click the button 3 times, the WinTV will
record for 30 minutes.
Pause mode
The pause mode allow you to pause the Live TV picture and allows
Close
you to use the TimeShift function to rewind and fast forward the TV.
Clicking the Pause button on the WinTV application starts the Pause
mode. The Pause Menu will drop down.
TV-Mode
Time counter
Video-position
Fast rewind
Pause
Slow motion
Pause Buffer
The Pause buffer is space on your hard disk where video is stored dur-
Playback
ing the Pause mode. The maximum amount of time which your TV
program can be delayed is dependent upon how much storage space
you have set for the Pause buffer.
Clicking the Pause button will start recording into WinTV's Replay Buffer.
It takes about 10 seconds for the Replay Buffer to be initialized and for
Pause to become effective.
Unclicking the Pause button will cause the audio/video program to start
playing from the point where the button was originally pushed.
Most WinTV functions are active while in the Pause or Pause Live
mode. For example, you can change volume, resize the TV window, go
into "no-title mode", etc.
While in Pause mode, the Video Position bar shows the amount of the
Replay Buffer which is filled with video. For example, if the Video
Position indicator shows halfway, it means that half of the Replay
Buffer is filled. If you find you cannot Pause as many minutes as you
would like, increase the size of the Replay Buffer.
Page 4
Record and Playback
Pause
Record
Skip forward 10 sec
Fast forward
Play
Fast forward
Advertisement

Related Manuals for Hauppauge WINTV-NOVA-T(D) 500 QI


Summary of Contents for Hauppauge WINTV-NOVA-T(D) 500 QI
- Page 1 ● System Account for recording - Enter the username/password for the "Always on top" Mode 3. Install the WinTV Drivers and Applications user account you are currently using (the EPG service will use this The WinTV application will remain in view over any other applica- account to be able to start up the WinTV application).
- Page 2 ● While in Pause mode, the A/V stream is always saved in the Replay Slow Motion Date to Begin Program: todays date is the default. Change this if you WinTV Command Line Commands Buffer. To stop saving the A/V stream in the Replay Buffer, you must want to schedule on another date.
Need help?
Do you have a question about the WINTV-NOVA-T(D) 500 QI and is the answer not in the manual?
Questions and answers