Table of Contents
Advertisement
Quick Links
Advertisement
Table of Contents

Related Manuals for Alinco DJ-C7T


Summary of Contents for Alinco DJ-C7T
-
Page 1: Instruction Manual
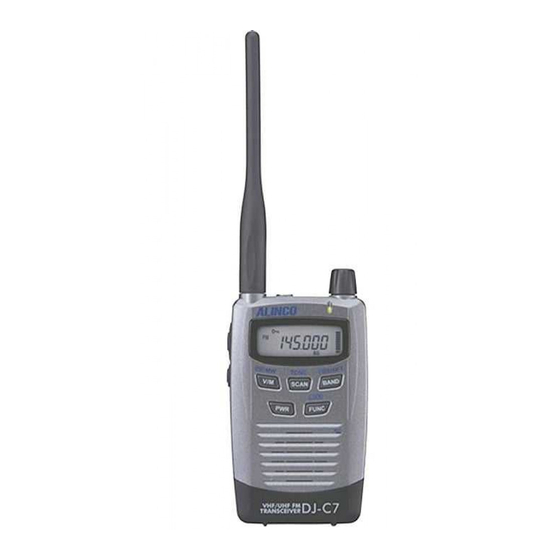
VHF/UHF FM TRANSCEIVER DJ-C7 T/E Instruction Manual Thank you for purchasing this ALINCO transceiver. This instruction manual contains important safety and operation instructions. Please read it carefully before using the transceiver and be sure to keep it for future reference. - Page 2 Information in this document is subject to change without notice or obligation. All brand names and trademarks are the property of their respective owners. Alinco cannot be liable for pictorial or typographical inaccuracies. Some parts, options and/or accessories are unavailable in certain areas. Changes or modifications not expressly approved by the party responsible for compliance could void the user's authority to operate the equipment.
-
Page 3: Table Of Contents
Contents Before Operating the Transceiver........5 4.6 Memory Mode ..............16 ITypes of Memory ............16 Attention ...................5 IProgramming a Memory Channel ......16 Points to Note Before Transmitting...........5 ISelecting a Memory Channel ........16 Points to Note When Using an External Power Supply ....5 IClearing a Memory Channel........17 IContents of Memory Channel ........17 1. - Page 4 7. Cloning ...............27 7.1 Cloning ................27 IConnecting the Transceiver ........27 IReceiving the Master Data ........27 ITransmitting Data from the Master Transceiver ..27 8. Maintenance and Reference ........29 8.1 Troubleshooting..............29 8.2 Resetting ................30 8.3 Options ................30 8.4 Transmission System............31 9. Specifications ............32...
-
Page 5: Before Operating The Transceiver
• In airports Ensure that the transceiver is safe, then bring it to the nearest • In shipping ports Alinco Service Center. • Within or near the operating area of business wireless stations or their relay stations. Before using in any of the above places, obtain any necessary permissions from the proper authorities, and be mindful of local laws that govern amateur radio operation. -
Page 6: Functions And Features
1. Functions and Features • 39 CTCSS tone squelch settings 1.1 Standard Accessories • Tone burst function (1000,1450,1750 and 2100Hz) • Split function • Li-ion Battery Pack EBP-58N (3.7V 600mAh) • Cloning • AC battery charger (EDC-126 or 128: 6.0V 0.5A) •... -
Page 7: Iattaching And Detaching The Battery Pack
IAttaching and Detaching the Battery Pack Caution • The battery pack is not charged when shipped. GAttaching It must be charged before using. • The battery pack can be charged by mounting it on the 1.Align the projections on the Projections DJ-C7 and connecting AC battery charger to the DC battery pack with the pits on... -
Page 8: Ipreventing Short Circuiting The Battery Pack
IPreventing Short Circuiting the Battery Pack IAC Battery Charger (EDC-126/128) GRecharging Be extra cautious when carrying 1.Mount the battery pack on AC adaptor plug battery pack; short- the transceiver. circuiting will produce surge 2.Connect AC adaptor plug to current possibly resulting in fire. the external power supply jack on the transceiver. -
Page 9: Control Functions
3. Control Functions 3.1 Name and Operation of Transceiver Controls ITop and Front Views Item Description For connection of the optional external SP/MIC speaker (8Ω) and microphone (2kΩ) with 2.5ø Connector stereo plug. Rotate this dial to select transmitting / receiving frequency, memory channel, and other functions. -
Page 10: Iside View
ISide View Item Description For connection of the included helical antenna. SMA Antenna If you use another antenna, choose one Connector with a low SWR (Standing Wave Ratio) designed for VHF and UHF frequencies. Press this key to transmit. When the key PTT Key is released, the transceiver returns to the receiving mode. -
Page 11: Keypad
3.2 Keypad Press FUNC While is ON Dial Operation While Holding Key Independent Operation Press Key for 1 Sec Switches between the VFO and Programs to memory Starts the Priority monitoring channels. (See on P.16) function. (See on P.21) Memory mode. (See on P.14) Sets the Tone Squelch setting. -
Page 12: Display
3.3 Display 14 13 Appears when the key is pressed. Appears when the charge level is low. Appears when keys are locked. Appears when the battery save function is on. Indicates the shift (+/-) direction or split Appears when the auto power off function is operation. -
Page 13: Basic Operations
4. Basic Operations 4.1 Turning the Power ON 4.2 Adjusting the Audio Volume • There are 31 volume levels. (00-30) • Default is set to 10. Hold the key down for a second. 1. Press the dial once. " " will be displayed on the LCD indicating the present To turn the power OFF, hold the key down until the display volume level. -
Page 14: Adjusting The Squelch
4.3 Adjusting the Squelch 4.4 Operating Modes The squelch is a function for eliminating noise when no signals The DJ-C7 has two operating modes; VFO mode and Memory are present. (MR) mode. "To open the squelch" means that the DJ-C7 monitors any ISwitching Between Modes signals stronger than the squelch level you set. -
Page 15: Vfo Mode
IEntry Completion Digit for Different Tuning Steps 4.5 VFO Mode The tuning step can be changed. You may choose one of the This is the mode which is set as the factory-shipped selections as follows: configuration. Auto, 5, 6.25, 8.33, 10, 12.5, 15, 20, 25, 30, 50, 100, 125, 200 kHz. Radio frequencies and various settings can be changed by rotating the dial in this mode. -
Page 16: Memory Mode
4.6 Memory Mode 3. Press the key to display a memory channel number on the LCD, and select a channel you wish to This mode allows you to program frequencies into the DJ-C7 write to by rotating the dial. memory. A programmed frequency is called a channel. The blank channels will blink and programmed channels will The DJ-C7 has four types of memory functions;... -
Page 17: Iclearing A Memory Channel
IClearing a Memory Channel IContents of Memory Channel The following settings can be stored in each memory channel: • Frequency 1. Set the Memory Write Protect function to OFF, if necessary. • Shift frequency For more information on this function, please refer to "Memory •... -
Page 18: Receiving
4.7 Receiving 4.8 Transmitting 1. Adjust the volume level. (See on P.13) 1. Select a frequency on which you wish to transmit signals. 2. Adjust the squelch level. (See on P.14) 2. Press the PTT key. 3. Select the frequency on which you wish to receive When the red TX/RX indicator lights, you are transmitting. -
Page 19: Advanced Operations
5. Advanced Operations 5.1 Scanning 3. Release the key. Scanning will be performed with the selected tuning step in the This function automatically searches for active frequencies to direction of the last dial operation. (up or down) help you locate a signal that you wish to receive. There are two types of scanning;... -
Page 20: Imemory Scan
4. Rotate the dial in the clockwise direction to scan in the UP direction. With the DJ-C7 the "Memory Skip" function, which Conversely, rotate the dial in the counter-clockwise excludes specified channels during a scan, or the "Memory direction to scan in the DOWN direction. Bank"... -
Page 21: Priority
5.4 Priority 5.5 Tone Squelch and Related Functions This function monitors two frequencies alternately to increase The Tone Squelch (The and the icons appear on the efficiency for receiving signals. LCD when it is active) is a function to unmute (open) squelch Every 5 seconds, the DJ-C7 momentarily switches from the only when one of the tone (encoder) frequency you set matches specified frequency to the frequency which is programmed as... -
Page 22: Tone Scan
6. To deactivate the Tone Squelch function, repeat steps 3. Release the key. 1 to 4, and press the key during step 4. The Tone Scan function will be activated. Tone frequencies are displayed on the LCD constantly. After the icon* is displayed, press the key again to Once the DJ-C7 finds a tone, a beep sounds and the Tone... -
Page 23: Parameter Setting Mode
6. Parameter Setting Mode The DJ-C7's Setting mode is used to set the various operating 6.2 Selecting the Setting Mode functions. 1. Press the key, and press the dial once while the 6.1 Mode Setting Items icon appears on the LCD. It switches to the Setting mode, and the item name will be (1) Audio Volume Level displayed on the LCD. -
Page 24: Selecting The Parameters
1. " " is displayed on the LCD. 6.3 Selecting the Parameters The following 11 functions can be set in the DJ-C7's Setting 2. Rotate the dial to select an antenna between Earphone mode. and External (SMA) as follows: "SmA" ->... -
Page 25: Tone Burst Frequency
(4) Tone Burst Frequency (6) Battery Save function This function prevents wasting battery power by switching the 1. "1750" is displayed on the LCD. reception circuit power supply OFF. With this function ON, the transceiver will be in a hibernation 2. -
Page 26: Bell
(8) BELL (10) Scan Type It functions like a beeper. The DJ-C7 tells you with a bell sound You can select the scan-resume condition between Busy scan that another station is calling. and Timer scan. 1. " " is displayed on the LCD. 1. -
Page 27: Cloning
7. Cloning 2. Wait for a while until the master data is transferred 7.1 Cloning completely. With the Cloning function, it is possible to connect two For more information on sending the master data, please refer transceivers by a cable, and copy all settings from one unit to the next section. - Page 28 2. Press the dial. " " is displayed on the LCD, and the Master starts to transfer data. " " is displayed on the LCD when transfer is completed successfully. 3. Turn the power OFF on the Master side to release the Clone mode.
-
Page 29: Maintenance And Reference
8. Maintenance and Reference 8.1 Troubleshooting Please check the list below before concluding that the transceiver is faulty. If a problem persists, reset the transceiver. This may correct erroneous operations. Symptom Possible Cause Action Poor Li-ion battery pack connection Check if the battery pack terminals are clean. Nothing appears on the display when Dead battery. -
Page 30: Resetting
8.2 Resetting 8.3 Options When you reset the transceiver, all settings are returned to the EME-24 Earphone microphone initial (default) factory setting. You can reset programmed EMS-60 Speaker microphone channel memory when the write protect is off. EDH-32 Cigarette lighter cable ESC-38 Soft case 1. -
Page 31: Transmission System
8.4 Transmission System DJ-C7T: 144.000-147.995 MHz 420.000-449.995 MHz DJ-C7T: 144.000-147.995 MHz DJ-C7E: 144.000-145.995 MHz DJ-C7E: 144.000-145.995 MHz 430.000-439.995 MHz Audio frequency Buffer Excitation Power amplification limiter VHF-VCO amplifier amplifier amplifier low pass filter 2SC5066FT µPC2771TB 2SC5066FT 2SK3078A BA4510FV Buffer amplifier MB15A01 2SC5066FT 12.6... -
Page 32: Specifications
9. Specifications GGeneral GTransmitter Power Output DC6.0V Approx. 0.5W 144.000 ~ 147.995MHz (T version) EBP-58N equipped Approx. 0.3W 144.000 ~ 145.995MHz (E version) Frequency Modulation Variable Reactance 420.000 ~ 449.995MHz (T version) Range Maximum Deviation +/- 5kHz 430.000 ~ 439.995MHz (E version) Spurious Emission -60dB or less 88.100 ~ 107.995MHz (T version) - Page 33 VHF/UHF FM HANDHELD TRANSCEIVER 144.000 - 145.995MHz / 430.000 - 439.995MHz CE0336 This device is authorized for use in all EFTA member states (CH, ICE, LI, NOR). An operator's license is required for this device.
- Page 34 ALINCO, INC. Head Office: Shin-Dai Building 9th Floor 2-6-1 Dojimahama, Kita-ku, Osaka 530-0004, Japan Phone: +81-6-4797-2136 Fax: +81-6-4797-2157 E-mail: export@alinco.co.jp PS0464...
Need help?
Do you have a question about the DJ-C7T and is the answer not in the manual?
Questions and answers