HP Z600 - Workstation - 6 GB RAM User Manual
Hp z workstation series user guide
Hide thumbs
Also See for Z600 - Workstation - 6 GB RAM:
- Installation manual (12 pages) ,
- Installation (2 pages) ,
- Declaration of conformity (1 page)
Table of Contents
Advertisement
Advertisement
Table of Contents

Related Manuals for HP Z600 - Workstation - 6 GB RAM


Summary of Contents for HP Z600 - Workstation - 6 GB RAM
- Page 1 HP Z Workstation series User Guide...
- Page 2 Copyright Information Warranty Trademark Credits Fifth Edition: December 2009 Hewlett-Packard Company shall not be liable The HP Invent logo is a trademark of Hewlett- for technical or editorial errors or omissions Packard Company in the U.S. and other Part number: 504629-005 contained herein or for incidental or countries.
-
Page 3: About This Guide
About this guide This guide provides setup and troubleshooting information for the HP Z Workstation series. It includes these topics: Guide topics Locating HP resources on page 1 Workstation components on page 7 Setting up the workstation on page 19 Setting up the operating system on page 28 Restoring the operating system on page 34 Preparing for component installation on page 40... - Page 4 About this guide ENWW...
-
Page 5: Table Of Contents
Table of contents 1 Locating HP resources ........................... 1 Product information ..........................2 Product support ............................ 3 Product documentation ........................4 Product diagnostics ..........................5 Product updates ........................... 6 2 Workstation components ..........................7 HP Z400 Workstation components ....................... 7 HP Z400 Workstation chassis components ................. - Page 6 4 Setting up the operating system ......................... 28 Setting up the Microsoft operating system ..................29 Installing or upgrading device drivers ................29 Transferring files and settings to your Windows workstation ..........29 Setting up Red Hat Enterprise Linux ....................30 Installing with the HP driver CD ..................
- Page 7 Installing an expansion card ....................... 50 9 Installing hard disk drives ..........................52 HDD configuration ..........................52 Installing a hard disk drive ........................53 Installing an HDD in an HP Z400 Workstation ..............53 Installing an HDD in an HP Z600 or Z800 Workstation ............. 56 10 Installing optical disk drives ........................
- Page 8 viii ENWW...
-
Page 9: Locating Hp Resources
Locating HP resources This section provides information on the following HP resources for your workstation: Topics Product information on page 2 ● HP Cool Tools ● Regulatory information ● Accessories ● System board ● Serial number and Certificate of Authenticity labels ●... -
Page 10: Product Information
Product information Table 1-1 Product information Topic Location HP Cool Tools Most HP Microsoft Windows workstations are preloaded with additional software that is not automatically installed during first boot. Additionally, a number of valuable tools on your workstation are preinstalled that may enhance system performance. -
Page 11: Product Support
Product support Table 1-2 Product support Topic Location Additional information For online access to technical support information and tools, see 5. Support resources include Web-based troubleshooting tools, technical knowledge databases, driver and patch downloads, online communities, and proactive notification services. The following communication and diagnostic tools are also available: ●... -
Page 12: Product Documentation
Product documentation Table 1-3 Product documentation Topic Location HP user documentation, white For the latest online documentation, see papers, and third-party http://www.hp.com/support/workstation_manuals. These documentation include this User Guide and the Maintenance and Service Guide. Product notifications Subscriber's Choice is an HP program that allows you to sign up to receive driver and software alerts, proactive change notifications (PCNs), the HP newsletter, customer advisories, and more. -
Page 13: Product Diagnostics
Product diagnostics Table 1-4 Product diagnostics Topic Location Diagnostics tools The HP Vision Field Diagnostics utility can be downloaded from the HP Web site. To use this utility, refer to the appropriate section of the workstation Maintenance and Service Guide. Audible beep and LED code Refer to the appropriate section of the workstation definitions... -
Page 14: Product Updates
Product updates Table 1-5 Product updates Topic Location Software, BIOS, and driver http://www.hp.com/go/workstationsupport to verify that updates you have the latest drivers for the workstation. To locate the current workstation BIOS on your Microsoft Windows workstation, select Start>Help and Support>Pick a Task>Use Tools to view...>Tools>My Computer Information>View general system information.. -
Page 15: Workstation Components
Workstation components This chapter describes workstation components and includes these topics: Topics HP Z400 Workstation components on page 7 HP Z600 Workstation components on page 11 HP Z800 Workstation components on page 15 HP Z400 Workstation components This section describes HP Z400 Workstation components, including front and rear panel connectors. For complete and current information on supported accessories and components for the workstation, see http://partsurfer.hp.com. -
Page 16: Hp Z400 Workstation Chassis Components
HP Z400 Workstation chassis components The following figure shows the chassis components of a typical HP Z400 Workstation. Drive configurations can vary. Figure 2-1 HP Z400 Workstation chassis components Table 2-1 HP Z400 Workstation chassis components description Item Description Item Description Power supply Memory module (DIMM) -
Page 17: Hp Z400 Workstation Front Panel Components
HP Z400 Workstation front panel components The following figure shows the front panel of a typical HP Z400 Workstation. Drive configurations can vary. Figure 2-2 HP Z400 Workstation front panel components Table 2-2 HP Z400 Workstation front panel components description Item Symbol Description... -
Page 18: Hp Z400 Workstation Rear Panel Components
HP Z400 Workstation rear panel components The following figure shows the rear panel of a typical HP Z400 Workstation. Figure 2-3 HP Z400 Workstation rear panel components NOTE: The rear panel connectors are labeled with industry-standard icons and colors to assist in connecting peripheral devices. -
Page 19: Hp Z600 Workstation Components
HP Z600 Workstation components This section describes HP Z600 Workstation components, including front and rear panel components. For complete and current information on supported accessories and components for the workstation, see http://partsurfer.hp.com. ENWW HP Z600 Workstation components... -
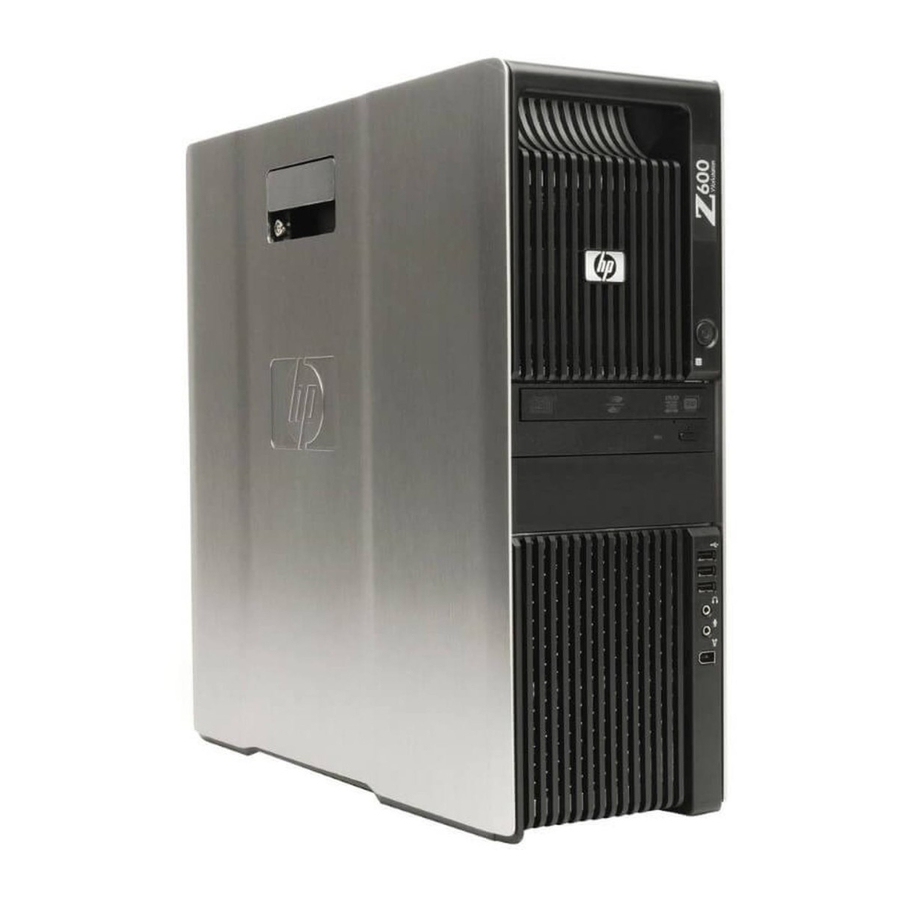
Page 20: Hp Z600 Workstation Chassis Components
HP Z600 Workstation chassis components The following image shows a typical HP Z600 Workstation. Drive configurations can vary. Figure 2-4 HP Z600 Workstation components Table 2-4 HP Z600 Workstation component descriptions Item Description Item Description Side access panel System board Side access panel key lock PCIe card Memory duct/fan housing... -
Page 21: Hp Z600 Workstation Front Panel Components
HP Z600 Workstation front panel components The following figure shows the front panel of a typical HP Z600 Workstation. Figure 2-5 HP Z600 Workstation front panel Table 2-5 HP Z600 Workstation front panel connectors Item Symbol Description Item Symbol Description Power button Headphone connector Hard drive activity light... -
Page 22: Hp Z600 Workstation Rear Panel Components
HP Z600 Workstation rear panel components The following figure shows the rear panel of a typical HP Z600 Workstation. Figure 2-6 HP Z600 Workstation rear panel NOTE: The rear panel connectors are labeled with industry-standard icons and colors to assist in connecting peripheral devices. -
Page 23: Hp Z800 Workstation Components
HP Z800 Workstation components This section describes HP Z800 Workstation components, including front and rear panel components. For complete and current information on supported accessories and components, see http://partsurfer.hp.com. ENWW HP Z800 Workstation components... -
Page 24: Hp Z800 Workstation Chassis Components
HP Z800 Workstation chassis components The following image shows a typical HP Z800 Workstation. Drive configurations can vary. Figure 2-7 HP Z800 Workstation components Table 2-7 HP Z800 Workstation component descriptions Item Description Item Description Airflow guide Memory module (DIMM) Side access panel Processor (CPU) Side access panel key lock... -
Page 25: Hp Z800 Workstation Front Panel Components
HP Z800 Workstation front panel components The following illustration shows the front panel components of a typical HP Z800 Workstation. Drive configurations can vary. Figure 2-8 HP Z800 Workstation front panel Table 2-8 HP Z800 Workstation front panel connectors Item Symbol Description Item... -
Page 26: Hp Z800 Workstation Rear Panel Components
HP Z800 Workstation rear panel components The following illustration shows the rear panel of a typical HP Z800 Workstation. Drive configurations can vary. Figure 2-9 HP Z800 Workstation rear panel NOTE: The rear panel connectors are labeled with industry-standard icons and colors to assist in connecting peripheral devices. -
Page 27: Setting Up The Workstation
Setting up the workstation This chapter describes how to set up the workstation, and includes these topics: Topics Ensuring proper ventilation on page 19 Setup procedures on page 20 Converting to desktop configuration on page 22 Adding monitors on page 24 Accessibility on page 27 Security on page 27 Product recycling on page 27... -
Page 28: Setup Procedures
NOTE: The ambient upper limit of 35 C is only good up to 1524 M (5000 FT) elevation. There is a 1 C per 304.8 M (1000 FT) derating above 1524 M (5000 FT). So, at 3,048 M (10,000 FT), the upper ambient air temperature limit is 30 C. - Page 29 Connect the power cord: Figure 3-3 Connecting the power cord WARNING! To reduce the risk of electric shock or damage to your equipment, observe these practices: • Plug the power cord into an AC outlet that is easily accessible. • Disconnect power from the computer by unplugging the power cord from the AC outlet (not by unplugging the power cord from the computer).
-
Page 30: Converting To Desktop Configuration
Converting to desktop configuration This workstation can be operated in the mini-tower or the desktop configuration. Follow these steps to convert to desktop configuration operation: NOTE: See the workstation Maintenance and Service Guide for installation details for the following steps. Prepare the workstation for component installation (see Preparing the workstation for component installation on page... - Page 31 On the back of the front bezel, squeeze the HP logo mounting tabs (1) and press the logo outward (2) as shown in the following figure. Figure 3-6 Rotating the HP logo Rotate the HP logo 90 degrees counterclockwise, and then release the logo and press it back into place in the front bezel.
-
Page 32: Adding Monitors
Adding monitors This section describes how to connect monitors to the workstation. Identifying monitor connection requirements The following are various scenarios for connecting monitors (see the table in Graphics card types on page 25 for more information about the different graphic cards): ●... -
Page 33: Graphics Card Types
Graphics card types The following table describes monitor configuration scenarios. Performance High Monitor connector Graphics card interface connector ISPLAY PORT VGA ( No adapter ON LEFT DVI to VGA adapter No adapter DMS-59 DMS-59 to VGA DMS-59 to DVI (sold separately) Display port to VGA Display port to DVI adapter No adapter... -
Page 34: Connecting The Monitors
Connecting the monitors NOTE: Your graphics card may support two or four monitors. Refer to the graphics card documentation for details. Connect the monitor cable adapters (1) to the workstation, then connect the appropriate monitor cables to the adapters (2) (if required) as shown in the following figure. Figure 3-8 Connecting the cables to the workstation Connect the other ends of the graphics cables to the monitors as shown below. -
Page 35: Using A Third-Party Graphics Configuration Utility
Using a third-party graphics configuration utility Third-party graphics cards may include a monitor configuration utility. Upon installation, this utility is integrated into Windows. You can select the utility and use it to configure multiple monitors with your workstation. Refer to your graphics card documentation for instructions on using the monitor configuration utility. NOTE: Monitor configuration utilities are also often available on the HP support Web site. -
Page 36: Setting Up The Operating System
Setting up the operating system This chapter provides setup and update information for the workstation operating system. It includes these topics: Topics Setting up the Microsoft operating system on page 29 Setting up Red Hat Enterprise Linux on page 30 Setting up Novell SLED on page 31 Updating the workstation on page 31 This chapter also includes information on how to determine that you have the latest BIOS, drivers, and... -
Page 37: Setting Up The Microsoft Operating System
Setting up the Microsoft operating system NOTE: If you ordered a downgrade from Windows 7 or Windows Vista to Windows XP Professional operating system, your system will be preinstalled with Windows XP Professional operating system. With this configuration, you will receive recovery media for the Windows 7 or Windows Vista operating system only. -
Page 38: Setting Up Red Hat Enterprise Linux
Setting up Red Hat Enterprise Linux HP offers an HP Installer Kit for Linux (HPIKL) to supplement Red Hat box sets and help HP Linux customers customize their system image. The HPIKL contains the HP driver CD and device drivers to successfully setup up the Red Hat Enterprise Linux (RHEL) operating system, The HP Installer Kit for Linux CDs are currently available for download at http://www.hp.com/support/workstation_swdrivers. -
Page 39: Installing And Customizing Red Hat-Enabled Workstations
Installing and customizing Red Hat-enabled workstations Linux-enabled workstations require the HP Installer Kit and the purchase of a Red Hat Enterprise Linux box set. The Installer kit includes the HP CDs necessary to complete the installation of all versions of the Red Hat Enterprise Linux box set that have been qualified to work on an HP workstation. -
Page 40: Determining Current Bios
Determining current BIOS To determine the current BIOS of the workstation during system power up: Wait for F10=setup to appear on the lower right corner of the screen. Press to enter the F10 Setup utility. The F10 Setup utility displays the workstation BIOS version under File > System Information. Note the workstation BIOS version so that you can compare it with the BIOS versions that appear on the HP website. -
Page 41: Upgrading Bios
Upgrading BIOS To find and download the latest available BIOS, which includes the latest enhancements: Go to http://www.hp.com/go/workstationsupport. Select Download Drivers and Software from the left menu column under Tasks. Follow the instructions to locate the latest BIOS available for the workstation. If the BIOS on the Web site is the same as the version on your system, no further action is required. -
Page 42: Restoring The Operating System
Restoring the operating system This chapter describes how to restore the Windows or Linux operating system. It includes these topics: Topics Restore methods on page 34 Ordering backup software on page 35 Restoring Windows 7 or Windows Vista on page 35 Restoring Windows XP Professional on page 36 Restoring Novell SLED on page 38 Restore methods... -
Page 43: Ordering Backup Software
Ordering backup software If you cannot create system recovery CDs or DVDs, you can order a recovery disk set from the HP support center. To obtain the support center telephone number for your region see http://www.hp.com/ support/contactHP. Restoring Windows 7 or Windows Vista This section describes how to restore Windows 7 or Windows Vista. -
Page 44: Restoring Windows Xp Professional
Restoring Windows XP Professional This section describes how to restore the Windows XP Professional operating system. NOTE: The workstation must have a CD or DVD writer installed to create the media set. Creating RestorePlus! media The RestorePlus! kit can be created using the files contained on the hard drive. To create the restore media: Boot the workstation. -
Page 45: Creating Hp Backup And Recovery (Hpbr) Media
Creating HP Backup and Recovery (HPBR) media NOTE: HPBR is only supported on Windows XP systems. For details, refer to the documentation on the Supplemental Software - HP Backup and Recovery CD included with the workstation. The documentation can be accessed during installation. The Initial Recovery Point can be burned to optical media and used to recover a system. -
Page 46: Restoring The Operating System
Restoring the operating system CAUTION: Before you restore the operating system, back up your data. When you run RestorePlus! from media, the process deletes all information on the primary hard drive, including all partitions. If you run RestorePlus! from the recovery partition, only the root (C:) partition is affected. - Page 47 NOTE: Make copies of the ISO recovery images on CD as backup files in case your workstation experiences a hard drive failure. ENWW Restoring Novell SLED...
-
Page 48: Preparing For Component Installation
Preparing for component installation To facilitate the installation of components, several steps can be taken to prepare the workstation. This section describes how to prepare your workstation for component installation. Disassembly and installation preparation Use the following table to determine the order of workstation disassembly required before installing components. - Page 49 Z400 Z600 Z800 Pull up on the handle (1), slide the Lift the side access panel handle (1), Lift the side access panel handle (1), cover 1/2-inch toward the rear of the and remove the side access panel (2). and remove the side access panel (2). system (2), then rotate the cover off the chassis (3).
- Page 50 Z400 (optional) Z600 Z800 Press the airflow guide release latches Disconnect the fan cable from the Remove the Z800 air flow guide as as shown in the following figure, and system board (1), press the release shown in the following illustration, if guide the airflow guide out of the tab at the green touch point (2), and applicable.
- Page 51 Remove the HP Z400 Workstation front bezel as shown in the following illustration, if applicable. Lift the release tabs (1), and then rotate the front bezel off the chassis (2). ENWW Preparing the workstation for component installation...
-
Page 52: Installing Memory
Installing memory This section describes how to add memory to your workstation. Supported memory configurations The following table describes the memory configurations supported by the HP Z Workstation series. Z400 Z600 Z800 Installation guidelines ● Z400 and Z600: install only HP-approved, unbuffered, DDR3 DIMMs. ●... -
Page 53: Preparing For Component Installation On
Z400 Z600 Z800 4–DIMM supported configurations Supported configurations Supported configurations ● Four DIMM slots ● Six DIMM slots ● Twelve DIMM slots ● Memory configuration from 1 GB to ● Memory configuration from 1 GB to ● Memory configuration from 1 GB to 16 GB 24 GB 192 GB... - Page 54 Push gently outward on the DIMM socket levers as shown in the following illustration. (The example shows a HP Z600 Workstation.) Figure 7-1 Opening DIMM socket levers Align the DIMM connector key with the DIMM socket key, and then seat the DIMM firmly in the socket (1) as shown in the following illustration.
-
Page 55: Installing The Airflow Guide (Z400 Only)
Installing the airflow guide (Z400 only) Follow the procedures described in Preparing for component installation on page 40 to prepare the workstation for component installation. Press the power cables, including P1, down toward the system board between the DIMM slots and the internal bay, as shown in the following figure. - Page 56 Route the CPU power cable (P3) through the opening next to the power supply as shown in the following figure. Figure 7-5 Routing the CPU power cable Secure the airflow guide in the chassis. Insert the tab on the airflow guide into the slot next to the yellow ODD release lever (1), and then press down as shown in the following figure.
- Page 57 Ensure that the latch on the top of the airflow guide snaps under the edge of the chassis frame as shown in the following figure. Figure 7-7 Securing the airflow guide latch Replace all components that were removed in preparation for component installation. ENWW Installing the airflow guide (Z400 only)
-
Page 58: Installing Pci/Pcie Devices
Installing PCI/PCIe devices This section describes how to install a PCI or PCIe card in the workstation. To increase the performance and functionality of your system, PCI/PCIe devices such as graphics cards or audio cards can be installed in the expansion card slots on the workstation. Expansion card slot identification The following table describes the expansion card slots in the HP Z Workstation series. - Page 59 To install a PCI or PCIe expansion card: Follow the procedures described in Preparing for component installation on page 40 to prepare the workstation for component installation. Align the card keyway with the slot key, and then firmly seat the card in the slot as shown in the following illustration (1).
-
Page 60: Installing Hard Disk Drives
Installing hard disk drives This section describes how to install a hard disk drive (HDD) in the workstation. HDD configuration The following table contains hard disk drive installation configuration information. Z400 Z600 Z800 HDD bays are designed to permit easy installation. Data cables are pre-connected in the workstation based on the factory configuration delivered. -
Page 61: Installing A Hard Disk Drive
Z400 Z600 Z800 Drive and cable configuration Drive and cable configuration Drive and cable configuration The HDD bays are not labeled on the The HDD bays are labeled 0 (top bay) The HDD bays are labeled 0 (top bay), chassis. and 1. - Page 62 Locate the four isolation grommet screws on the chassis. Figure 9-1 Location of the isolation grommet screws Install the four isolation grommet screws as shown in the following figure. Figure 9-2 Installing the grommet screws Chapter 9 Installing hard disk drives ENWW...
- Page 63 If installing a SAS drive, attach a SAS-to-SATA cable adapter to the connector on the SAS hard drive as shown in the following figure. NOTE: SAS Drives require a separate SAS Controller plug-in card. Figure 9-3 Attaching the cable adapter Push the hard disk drive into the selected bay until it snaps into place (1) as shown in the following figure.
-
Page 64: Installing An Hdd In An Hp Z600 Or Z800 Workstation
Replace all components that were removed in preparation for component installation. Installing an HDD in an HP Z600 or Z800 Workstation To install an HDD: Follow the procedures described in Preparing for component installation on page 40 to prepare the workstation for component installation. - Page 65 Rotate the hard disk drive handle down into its fully open position. Carefully push the drive into its slot until comes to a hard stop (1) as shown in the following illustration. (An HP Z600 Workstation is shown for example.) When the hard disk drive is installed, rotate the drive handle up until it snaps into place, fully securing the drive (2).
-
Page 66: 10 Installing Optical Disk Drives
10 Installing optical disk drives This section describes how to install an optical disk drive (ODD) in the workstation. Installing an ODD in an HP Z400 Workstation This section describes how to install an optical disk drive in the HP Z400 Workstation in the mini-tower and desktop configurations. -
Page 67: Installing An Optical Drive (Desktop Configuration)
Installing an optical drive (desktop configuration) Follow the procedures described in Preparing for component installation on page 40 to prepare the workstation for component installation. If necessary, remove the blank filler and the EMI filler from the optical bay. Install the four black metric M3 guide screws into the drive (1). Figure 10-2 Installing the optical drive Align the screws with the grooves in the drive bay and gently slide the drive into the casing until it... - Page 68 Lift and hold the green optical drive bay release latch (1) while sliding the drive into the bay (2). When the front of the optical drive is near its final position, let go of the latch, but continue to slide the drive inward until the latch closes and engages the drive as shown below.
-
Page 69: Notice For Blu-Ray Optical Drives
Connect the optical disk drive data cable to the appropriate and available SATA port on the system board as shown in the following figure (example shows HP Z600 Workstation). NOTE: All HP Z800 Workstation optical disk drives should be connected to either SATA or SAS system board connectors. - Page 70 For the best HDCP performance, HP recommends that you install the latest updates: Blu-ray player firmware Playback application patches Graphics firmware and drivers Updates are located on the support web site for your specific product at http://www.hp.com/support/ workstations. Chapter 10 Installing optical disk drives ENWW...
-
Page 71: Index
Index Product updates 1 RestorePlus! 35 Air flow guide Web links 1 Restoring the operating system Removing 22 Restore methods 34 Windows Vista 34 Installing Windows XP 34 BIOS Expansion cards iii Determining version 32 Hard drive iii Updating 33 hardware 40 Side access panel Memory 45... - Page 72 HP Z600 Workstation front panel 13 HP Z600 Workstation rear panel 14 HP Z800 Workstation 7 HP Z800 Workstation chassis 16 HP Z800 Workstation front panel 17 HP Z800 Workstation rear panel 18 Workstation setup Accessibility 19 Connecting monitors 19 Customizing the display 27 Ensuring proper ventilation 19 Security 19...
Need help?
Do you have a question about the Z600 - Workstation - 6 GB RAM and is the answer not in the manual?
Questions and answers