Advertisement
Quick Links
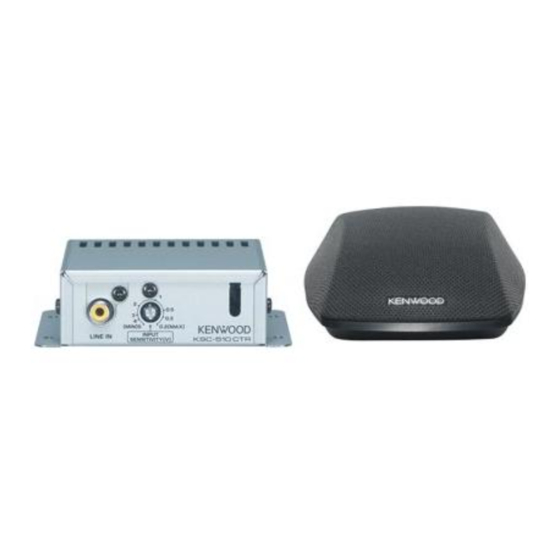
KSC-510CTR
ACTIVE CENTER SPEAKER
INSTRUCTION MANUAL
ENCEINTE CENTRALE ACTIVE
MODE D'EMPLOI
AKTIVER MITTELLAUTSPRECHER
BEDIENUNGSANLEITUNG
ACTIEVE MIDDENLUIDSPREKER
GEBRUIKSAANWIJZING
ALTOPARLANTE CENTRALE ATTIVO
ISTRUZIONI PER L'USO
ALTAVOZ CENTRAL ACTIVO
MANUAL DE INSTRUCCIONES
This Product is not installed by the manufacturer of a vehicle on the production line, nor
by the professional importer of a vehicle into an EU Member State.
Dieses Produkt wird weder vom Hersteller eines Fahrzeugs während der Produktion
noch von einem professionellen Importeur eines Fahrzeugs in einen EU-Mitgliedsstaat
eingebaut.
Ce produit n'est pas installé par le constructeur d'un véhicule sur le site de production,
ni par l'importateur professionnel d'un véhicule dans un Etat membre de l'UE.
Questo prodotto non è installato dal produttore di un veicolo della linea di produzione,
nemmeno dall'importatore professionale di un veicolo negli stati membro della UE.
Dit product wordt niet geïnstalleerd door de fabrikant van een voertuig op de productielijn,
noch door de professionele invoerder van een voertuig in EU-lidstaten.
Este producto no ha sido instalado en la línea de producción por el fabricante de un
vehículo, ni tampoco por el importador profesional de un vehículo dentro del estado
miembro de la UE.
KENWOOD CORPORATION
© PRINTED IN CHINA B61-1234-00 (FPI)
Advertisement

Related Manuals for Kenwood KSC-510CTR


Summary of Contents for Kenwood KSC-510CTR
-
Page 1: Manual De Instrucciones
Este producto no ha sido instalado en la línea de producción por el fabricante de un vehículo, ni tampoco por el importador profesional de un vehículo dentro del estado miembro de la UE. KENWOOD CORPORATION © PRINTED IN CHINA B61-1234-00 (FPI) - Page 2 Record the serial number, located on the back of the amplifier in the spaces designated on the warranty card, and in the space provided below. Refer to this model’s name and serial number whenever you call upon your KENWOOD dealer for information or service on this amplifier. Model KSC-510CTR Serial number...
- Page 3 Se référer à ce nom de modè et à celui de série dans le cas où vous consultez votre concessionnaire KENWOOD pour des informations ou des réparations de cet amplificateur. Modèle KSC-510CTR Numéro de série ________ Précautions pour la sécurité...
- Page 4 Parts check / Vérification des pièces Part Name Outside Shape Quantity Part Name Outside Shape Quantity Désignation des pièces Forme extérieure Quantité Désignation des pièces Forme extérieure Quantité Speaker Speed nut Haut-parleur Ecrou rapides Bracket (Double faced tape Ampli. attached) Support (fixé...
- Page 5 Mounting the speaker / Montage du haut-parleur [Step 1] [Etape 1] Cut off the template from the carton box. Set the tem- Découpez le modèle dans la boîte en carton. Posez plate so that the arrow points towards the passen- le modèle de sorte que la flèche soit orientée vers le ger, and mark the holes with a pen.
- Page 6 [Step 3] The front holes of the speaker Orifices avant du haut-parleur [Etape 3] Speaker Cord Câble de haut-parleur Slot Notch Fente Entaille Bottom View (Detail A) The back holes of the speaker Notch Vue du bas (Détail A) Orifices arrière du haut-parleur Entaille 1.
- Page 7 Amp mounting example / Exemple de montage de l’amplificateur 3 Tap screw 3 Vis auto taraudeuse 5 Amp 5 Ampli. Plywood or other panel Contreplaqué ou autre type de panneau Air vent Event Vehicle carpet Moquette du véhicule 1. Prepare a thick plywood or other panel and place it 1.
- Page 8 Connection / Connexions If there is no power control terminal in the center This connection example is for taking the center speaker output from a 5.1ch unit, connect the blue/white wire to the accessory separate surrond prosseor. When taking the output directly from the center line (ignition key switch ACC position line).
- Page 9 Operation / Fonctionnement Désignation de chaque pièce Name of each part Input sensitivity Bouton de réglage de la adjustment knob sensibilité d’entrée Input terminal Power control Borne d’entrée Commande électrique (RCA pin jack) Speaker output cord (Jack RCA) Cordon de sortie du haut-parleur Basic operation Fonctionnement de base Turn the input sensitivity knob with a flathead screw –...
- Page 10 You think it’s out of order but... (Troubleshooting) / Même si vous estimez qu’il ne marche plus….(Résolution des problèmes) It’s not operating right and you think it’s faulty, but before requesting service, check one more time according to the problem. Problem Cause Remedy...
- Page 11 Rating / Caractéristiques CAUTION ATTENTION The following ratings and design are subject to La conception et les caractéristiques suivantes change without notice. peuvent être modifiées sans préavis. Format Active Center Speaker Format Enceinte centrale active [Amp unit] [Unité d’amplification] Maximum output Puissance maximum 20 W 20 W...
- Page 12 WICHTIGE SICHERHEITSHINWEISE / BELANGRIJKE VOORZORGSMAATREGELEN Achtung: Diese Seite sorgfältig durchlesen. Let op: Lees voor uw veiligheid deze bladzijde zorgvuldig door. WARNUNG WAARSCHUWING Beim Verlängern der Zündschalter-, Batterie- oder Massekabel Wanneer u bedrading van de ontsteking, de accu on aarding unbedingt ein für Fahrzeuge vorgesehene Kabel oder Leitungen verlengt, moet u er op letten dat u draad gebruikt dat geschikt is gleichwertiger Qualität verwende, die einen Mindestquerschnitt von voor gebruik in auto’s met een kern van minsters 0,75 mm...
- Page 13 Sie die Installation und die Anschlüsse des Lautsprechers en tevens hieronder. Geef het model- en serienurnmer aan de durchführen, um einwandfreie Ergebnisse zu erhalten. KENWOOD handelaar door wanneer u informatie of onderhoud voor Für Ihre Unterlagen deze versterker nodig heeft.
- Page 14 Überprüfung der Teile / Controle van de onderdelen Bezeichnung der Teile Außenform Menge Bezeichnung der Teile Außenform Menge Naam van onderdeel Buitenprofiel Aantal Naam van onderdeel Buitenprofiel Aantal Lautsprecher Schnellshraubmuttern Luidspreker Clipmoer Rahmen Verstärker (mit doppelseitigem Versterker Klebeband) Beugel (met dubbelzijdige kleefband) Blechschraube RCA-Kabel (2,5 m)
- Page 15 Lautsprecher-Installation / Montage van de luidspreker [Schritt 1] [Stap 1] Die Schablone im Karton abschneiden. Die Knip of snijd het sjabloon uit de kartonnen doos. Schablone so ansetzen, dass der Pfeil zum Insassen Plaats het sjabloon zo dat de pijl naar de passagier hin weist, und die Löcher mit einem Stift markieren.
- Page 16 [Schritt 3] Frontlöcher am Lautsprecher Voorste gaten van de luidspreker [Stap 3] Lautsprecherkabel Luidsprekerkabel Schlitz Kerbe Sleuf Sicht von unten (Detail A) Rückseitenlöcher am Lautsprecher Kerbe Onderaanzicht (Detail A) Achterste gaten van de luidspreker 1. Beim Herausführen des Lautsprecherkabels aus der 1.
- Page 17 Beispiel für die Montage des Verstärkers / Voorbeeld van montage van versterker 3 Blechschraube 3 Tapschroef 5 Verstärker 5 Versterker Sperrholz oder andere Platte Plaat uit triplex of ander materiaal Lüftungsschlitz Ventilatie-opening Fahrzeugteppich Tapijt 1. Bereiten Sie ein Sperrholz oder eine andere Platte 1.
- Page 18 Anschluss / Aansluiting W e n n d a s H a u p t g e r ä t n i c h t m i t e i n e r Dieses Anschlussbeispiel zeigt die Ableitung des Centerlautsprecher-Ausgangs Leistungsregelungsbuchse ausgestattet ist, von einem separaten 5.1ch-Surroundprozessor.
- Page 19 Bedienung / Bediening Bezeichnung der einzelnen Teile Naam van elk onderdeel Eingangsempfindlichkeits- Ingangsgevoeligheid- Regler instelknop Eingangsbuchse Betriebsstromsteuerung Ingangsaansluiting Stroomvoorziening (RCA-Stiftbuchse) Lautsprecher-Ausgangskabel (RCA-penaansluiting) Luidsprekersnoer Grundfunktionen Basisbediening Drehen Sie den Eingangsempfindlichkeits-Regler mit Draai de ingangsgevoeligheidsknop met een platte einem Flachkopf-Schraubenzieher und stellen Sie den schroevendraaier om het geluid naar wens af te stellen.
- Page 20 Sie denken Ihr Gerät ist defekt, aber... (Fehlersuche) / Alvorens aan te nemen dat het toestel defect is… (Verhelpen van problemen) Ihr Gerät funktioniert nicht ordnungsgemäß und Sie gehen von einem Defekt aus. Bevor Sie jedoch einen Kundendienst kontaktieren, sollten Sie noch einmal die mit der Störung in Zusammenhang stehenden Punkte überprüfen.
- Page 21 Betriebsdaten / Technische gegevens VORSICHT OPGELET Änderung der nachfolgend aufgeführten Betriebsdaten De hieronder vermelde technische gegevens en het sowie des Designs ohne Ankündigung vorbehalten. ontwerp zijn vatbaar voor wijzigingen zonder kennisgeving met het oog op verbetering. Format Aktiver Mittellautsprecher Formaat Actieve middenluidspreker [Verstärker] [Versterker]...
- Page 22 PRECAUZIONI IMPORTANI / AVISOS IMPORTANTES Attenzione: Per vostra sicurezza, legg ete Precaución: Para su seguridad, lea con atención attentamente questa pagina. esta página. AVVERTIMENTO ADVERTENCIA Nel posare I cavi di accensione, della batteria e di messa a terra, Cuando extienda los cables de encendido, batería o masa, usare cavi per automobil o di altro tipo da 0,75 mmq di sezione asegúrese de utilizar cables para uso en automóviles u otros cables (AWG 18) o più...
- Page 23 Ogni volta che consultate il vostro rivenditore KENWOOD, riferitegli en el espacio suministrado a continuación. Mencione el nombre y ei il numero di modello e di serie dell’amplificatore.
- Page 24 Controllo delle parti / Comprobación de pieza Nome della parte Forma esterna Quantità Nome della parte Forma esterna Quantità Nombre de pieza Forma externa Cantidad Nombre de pieza Forma externa Cantidad Altoparlante Dadi Altavoz Tuerca de velocidad Staffa Amplificatore (Nastro biadesivo Amplificador fissato) Abrazadera...
- Page 25 Installazione dell’altoparlante / Montaje del altavoz [Fase 1] [Paso 1] Tagliare la maschera dalla scatola in cartone. Metterla Corte la plantilla de la caja de cartón. Coloque la in posizione in modo che la freccia punti verso il plantilla de modo que la flecha señale hacia el passeggero e segnale i punti da forare con una pasajero, y parque los orificios con un bolígrafo.
- Page 26 [Fase 3] Fori anteriori dell'altoparlante Los orificios frontales del altavoz [Paso 3] Cavo dell’altoparlante Cable de altavoz Fessura Tacca Ranura Muesca Visione dal basso (dettaglio A) Fori posteriori dell'altoparlante Tacca Vista inferior (Detalle A) Los orificios traseros del altavoz Muesca 1.
- Page 27 Esempio di installazione dell’amplificatore / Ejemplo de montaje del amplificador 3 Vite filettante 3 Tornillo de cubierta 5 Amplificatore 5 Amplificador Legno compensato o altro pannello di legno Panel de contrachapado u otro tipo de panel Valvola dell’aria Conducto de ventilación Tappetino del veicolo Alfombrilla del vehículo 1.
- Page 28 Collegamento / Conexión Se non c’è nessun terminale di controllo Questo esempio è per il collegamento dell'uscita per il diffusore centrale da dell’alimentazione nell’unità centrale, collegate i fili un processore Surround separato a 5.1 canali. Se si riceve il segnale blu e bianco alla linea accessoria (linea di posizione direttamente da un'unità...
- Page 29 Funzionamento / Manejo Nomenclatura Nombre de las partes Manopola di regolazione della sensibilità Mando de ajuste de dell’ingresso sensibilidad de entrada Terminale di ingresso Terminal de entrada Control de potencia Cavo di controllo (presa pin RCA) (Toma de contactos RCA) Cable de salida de altavoz Cavo di alimentazione Funzionamento principale...
- Page 30 Se credete che l’unità sia guasta … (Localizzazione dei guasti) / Usted cree que no funciona... (Solución de problemas) L’unità non funziona correttamente e voi credete che sia guasta, ma prima di richiedere dei lavori di assistenza tecnica, controllate la seguente lista a seconda del problema in questione. Problema Causa Rimedio...
- Page 31 Valori nominali / Valor nominal ATTENZIONE PRECAUCIÓN I seguenti valori nominali ed il design sono soggetti Los valores nominales y el diseño siguientes están a modifiche senza preavviso. sujetos a cambios sin previo aviso. Formato Altoparlante centrale attivo Formato Altavoz central activo [Unità...