Corinex HOMENET AV200 User Manual
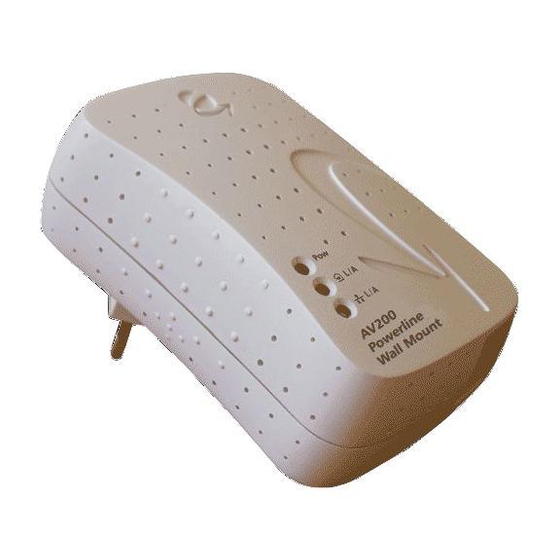
Powerline ethernet wall mount
Hide thumbs
Also See for HOMENET AV200:
- Manual (47 pages) ,
- Introduction manual (18 pages) ,
- Quick start manual (9 pages)

Related Manuals for Corinex HOMENET AV200


Summary of Contents for Corinex HOMENET AV200
- Page 1 Manual...
- Page 2 Corinex AV200 Powerline Ethernet Wall Mount Corinex Communications Corp. # 601 - 905 West Pender Street Vancouver, BC V6C 1L6, Canada EN 61000-3-2 EN 61000-3-3 Vancouver / April 14. 2008...
-
Page 3: Copyright
This document, as well as the software described in it, is furnished under license and may be used or copied only in accordance with the terms of the license. The content of this document is furnished for informational use only, it is subject to change without notice, and it does not represent a commitment on the part of Corinex Communications Corp. -
Page 4: End User License Agreement
CORINEX COMMUNICATIONS CORPORATION This End User License Agreement (“EULA”) is a legal agreement between you and CORINEX COMMUNICATIONS CORPORATION (“CORINEX”) with regard to the copyrighted Software provided with this EULA. Use of any software and related documentation (“Software”) provided with a CORINEX hardware product, or made available to you by CORINEX via download or otherwise, in whatever form or media, will constitute your acceptance of these terms, unless separate terms are provided by the software supplier, in which case certain additional or different terms may apply. - Page 5 7. Export Laws. This EULA involves products and/or technical data that may be controlled under any applicable export control laws, and regulation, and may be subject to any approval required under such laws and regulations. 8. Precedence. Except as set out above, where separate terms are provided by the software supplier, then, subject to this EULA, those terms also apply and prevail, to the extent of any inconsistency with this EULA.
-
Page 6: Table Of Contents
Contents Copyright ... 1 End User License Agreement ... 2 Introduction ... 5 1.1 Overview ... 5 1.2 About this manual ... 5 Installation ... 6 2.1 Package Contents ... 6 2.2 System Requirements ... 6 2.3 Physical Description ... 6 2.4 Functional Description ... -
Page 7: Introduction
Introduction 1.1 Overview The Corinex AV200 Powerline Ethernet Wall Mount Adapter is a network adapter, connecting your computers and devices to each other, and to your Internet connection, over the electrical circuits already in your home or office. Just plug the wall mount adapters into the wall, connect them to your computers, and you have an instant computer network, running at industry-leading speeds of up to 200 Mbps! -
Page 8: Installation
Installation 2.1 Package Contents When you receive your Corinex AV200 Powerline Ethernet Wall Mount, check to be sure that your package contains: • Corinex AV200 Powerline Ethernet Wall Mount(2x for Dual Pack) • Standard Ethernet cable (2x for Dual Pack) •... -
Page 9: Functional Description
Installation LED Definitions (Buttons from top to bottom) 1. PWR (Upper LED) Shows the status of the adapter: the LED is on, if the adapter is connected to power. 2. VPI (Middle LED) Displays the quality of the powerline link, when the adapter is synchronized with another adapter on the same network. - Page 10 2.4.2 SYNC/ RST Buttton 2.4.2.1 OBUS By default, Corinex AV200 Ethernet Wall Mount powerline adapters come without a network identifier and encryption key. As a result, when they are plugged into the mains a new PLC network will be created (called public network). It will operate smoothly, but without security configuration.
- Page 11 1. Identify which is the AP adapter in an existing PLC network. The AP adapter always shows its AP indicator ON in green. The other adapters are EPs and their AP indicators will be OFF; 2. Next, press “SYNC/RST” button for around two seconds on the AP adapter until its AP indicator starts blinking.
- Page 12 2.4.3 LED Definitions 2.4.3.1 VPI LED Colour Adapter Status Low Red Orange Green Blinking The low and high throughput thresholds are default to be 6 Mbps and 12 Mbps respectively, and can be redefined by users through the web interface. 2.4.3.2 AP LED When the adapter is configured as Fixed AP , the LED will be on.
-
Page 13: Technical Specifications
Technical Specifications Standards Compliance Speed AC Plug Type LED Status Lights Schnittstellen BenutzterFrequenzbereich Eingangsleistung Abmessungen Übertragene Stromspektrumdichte -56 dBm/Hz Stromverbrauch Sicherheit & EMI Connecting the Wall Mount Adapter To connect the Corinex AV200 Powerline Ethernet Wall Mount to your computer, follow the steps listed below. -
Page 14: Adapter Configuration
Adapter Configuration In order to access the web-based configuration pages, it is necessary to know the adapter’s IP address and for your computer to be connected to the wall mount adapter (as described in section 2.6). Corinex adapters come with a default IP address 10.10.1.69. -
Page 15: Main Page
Note: If password protection is disabled, you will be taken straight to the Main page, rather than the Authentication page. 3.2 Main Page This is the first page after login. It shows basic status information about the adapter, a list of available Powerline connections, MAC and IP addresses, MAC type, etc. “Additional Information,”... -
Page 16: Additional Information Page
3.3 Additional Information Page This page shows more detailed information about the adapter. System Information Uptime Firmware Version MAC Status MAC Address MAC Type Node Type Network Identifier Encryption Key Network Status IP Configuration IP Address Subnet Mask Default Gateway IP Address Shows how long the adapter has been running since the last startup. - Page 17 PHY Status Notches Power Control Multicast Status IGMP Aware Multicast Syndication Multicast Bindings VLAN Status VLAN Configuration VLAN Tag VLAN Priority Corinex AV200 Powerline Ethernet Wall Mount Adapter Configuration Indicates whether or not frequency notches are enabled. notches should always be enabled, in order to eliminate interference with Radio Amateur bands specified by the local authorities.
- Page 18 Priority Status Default Priority Criterion 1 & 2 Security Status Status You can leave the configuration page anytime by clicking on fhe “Log out” button in the upper right corner of the screen. Shows the default priority for traffic transmission. Shows which criteria are used to classify traffic.
-
Page 19: Change Configuration Page
3.4 Change Configuration Page 3.4.1 Overview The configuration pages allow you to change the settings on the wall mount adapter. Any parameters changed here will be stored in the wall mount adapter‘s permanent memory, and at the next startup, will be activated automatically. Any changes will take effect immediately after startup, with the exception of the Network Configuration settings (these require a restart of the wall mount adapter). - Page 20 • If the wall mount adapter is to be accessed through a router (e.g., in a large office network), the gateway IP needs to be configured. Otherwise, it can be ignored. WARNING: CHANGING AN ADAPTER‘S IP TAKES EFFECT ONLY AFTER A RESTART. YOU MAY WANT TO PLACE A LABEL ON EACH ADAPTER WITH ITS IP ADDRESS, SO YOU DON’T ACCIDENTALLY LOSE THE ABILITY TO ACCESS IT.
-
Page 21: Advanced Configuration
If you want to enable 3DES encryption in your network, please select one of the input methods and enter the password. Input methods: ASCII The Corinex AV200 Wall Mount Adapter supports also the stronger AES encryption. In order to enable it, please select AES from the menu and enter the password. Note: If you decide to use the AES encryption, please make sure all powerline adapters in your network are capable of using this type of encryption and it is enabled on all devices. - Page 22 If you want to configure the wall mount adapter to function as an automatic EP/AP , please select “EP” from the list. If you want the adapter to behave as a Master, select “Fixed AP” from the list. After selecting one, click “OK” to confirm your choice.
- Page 23 The following picture shows an example of two AV200 networks with different Network Identifiers: Communication between adapters (called modems in this picture) is encrypted with a Triple-DES algorithm. The Encryption Key can be set to any string of letters and numbers (Encryption Key field, ASCII or HEX).
-
Page 24: Network Configuration
3.4.3.2 Network Configuration Your Corinex AV200 Powerline Wall Mount can be configured to use either DHCP (automatic IP address assignment), or a fixed IP . The following parameters are used by the fixed IP configuration. In order for the wall mount adapter to correctly communicate with other devices on the network, it is necessary to define a valid IP address, as well as a proper subnet mask and gateway address. -
Page 25: Multicast Configuration
Adapter Configuration Note: It is strongly advised to turn on the notching function. Power Control is an automatic transmission power control which prevents different networks from overpowering each other. Power Control is turned on only when other networks are detected in the channel. If the transmission strength reaches the isolation point between networks, the transmission power is limited from overpowering the other network. -
Page 26: Vlan Configuration
3.4.6 VLAN Configuration When AV200 Powerline Wall Mount adapters are used for ADSL extension, it is important for the operator to be able to distinguish the type of traffic that each adapter is generating. This is usually done by means of VLAN tagging. The AV200 technology includes the ability to tag all traffic that enters the Powerline network through each adapter’s Ethernet port. - Page 27 Adapter Configuration After setting both values, please click OK to save the values to NVRAM. The changes will be applied immediately and the LED behavior may change. Several options are available in this form. The first, and easiest to understand and use, is the Default Priority value.
-
Page 28: Security Configuration
When several traffic flows are sharing the same network, it is sometimes necessary to establish several levels of priority in order to guarantee that bandwidth-sensitive applications like video and telephony function smoothly under network congestion. The traffic classifier is a packet inspector that is able to recognize several patterns in an Ethernet frame, and assign a different priority to each of them. - Page 29 3.4.9 Tools Clicking on hardware reset button will restart your adapter. The configuration will remain the same, and any changes made in the Network Configuration section will be applied. This means that if you’ve changed the IP address, the adapter will restart with the new IP address.
- Page 30 Adapter Configuration 3.4.10 Flash Upgrade The firmware, the loader and the factory settings (default factory configuration) are stored in Flash memory. To upgrade them, first select the Flash section to update (Firmware, Loader or Factory Settings) and the protocol (FTP or TFTP). Type the IP address of the FTP or TFTP server (Server IP Address field).
- Page 31 2. Save the firmware file in the folder specified in “Current Directory” or click “Browse” and find where the file is saved. 3. Open the Web browser and enter the IP of the adapter to be upgraded. 4. When the page comes up, click on Change configuration. 5.
-
Page 32: Firmware Update Page
The adapter connected to the ADSL adapter is the access point. Data and video are delivered through ADSL. The access point must prioritize the video higher than other data, to avoid a jittery image whenever there is a heavy data download. First of all, the Criterion field must be set to Custom, in order to create custom rules for traffic classification. -
Page 33: Video Network Setups
Video Network Setups 4.1 Introduction An In-Home AV network is made up of an access point (AP) adapter and several end points (EPs). In-Home AV networks can have only one AP . However, several In- Home AV networks can be created in the same space, each of them with its own AP , because each network is isolated by a unique network identifier. - Page 34 • Public Network - This is the default configuration of an In-Home network. If you do not want to change the settings on your network, the network configuration protocol will configure all the adapters automatically. By default, all adapters are EPs and have a public (empty) network ID. If the protocol does not detect an AP in the channel, it will change an EP to act as an AP .
- Page 35 4.2.1.2 Extending the Internet Connection to an AV200 Powerline Network The next picture shows a more advanced Powerline network with three Corinex AV200 Powerline Ethernet Wall Mount Adapters. This is a common network configuration, where Internet access and digital video are delivered through the same ADSL line.
- Page 36 In multi-network scenarios, such as the one depicted in the picture above, there is a new entity, called the QoS controller. The QoS controller’s role is to assign channel access to the different networks. The QoS controller acts at the same time as the AP of one of the networks.
-
Page 37: Network Configuration
Network Configuration 5.1 Setting an IP Address on your Computer This section explains how to set a static IP on your computer, in order to connect to the Corinex AV200 Powerline Ethernet Wall Mountand configure it. 5.1.1 Setting Up a Static IP in Windows Vista 1. - Page 38 4 Select Internet Protocol Version 4 (TCP/IPv4) and click the Properties button. 5. Select Use the following IP address. Set the IP address manually in the format 10.10.1.X (for example 10.10.1.200) and mask 255.255.0.0 of local TCP/IPv4 settings. The Default gateway box can be empty. 6.
- Page 39 5.1.2 Setting Up a Static IP in Windows XP 1. Click the Start button, open the Control Panel. From there, click the Network Connections icon and then the Network Connections window appears. 2. Select the Local Area Connection icon for the applicable adapter (Ethernet adapter or Powerline - usually the first adapter listed).
- Page 40 4. Select Internet Protocol (TCP/IP) and click the Properties button. 5. Select Use the following IP address. Set the IP address manually in the format 10.10.1.X (for example 10.10.1.200) and mask 255.255.0.0 of local TCP/IP settings. The Default gateway box can be left blank. Corinex AV200 Powerline Ethernet Wall Mount Network Configuration...
- Page 41 6. Click OK in the TCP/IP Properties window to complete the PC configuration, and click Close or the OK button to close the Network window. 5.1.3 Setting up a static IP in Windows 2000 1. Go to the network screen by clicking the Start button. Click Settings and then Control Panel.
- Page 42 3. Click the Properties button to get to the Local Area Connection Properties. 4. Select Internet Protocol (TCP/IP) and click the Properties button. 5. Select Use the following IP address. Set the IP address manually in the format 10.10.1.X (for example 10.10.1.200) and mask 255.255.0.0 of local TCP/IP settings.
- Page 43 6. Click the OK button in the TCP/IP Properties window to complete the PC configuration, and click Close or OK to close the Network window. 5.1.4 Setting Up a Static IP in Windows 98 1. Go to the network screen by clicking the Start button. Click Settings and then Control Panel.
- Page 44 Network Configuration 5.1.6 Setting up a static IP in Mac OS 1. Open the Network Control Panel in System Preferences. Corinex AV200 Powerline Ethernet Wall Mount...
- Page 45 Network Configuration 2. Select Built-in Ethernet from the pop-up menu. 3. Set the IP address manually in the format 10.10.1.X (e.g. 10.10.1.200) and Subnet Mask 255.255.0.0. Corinex AV200 Powerline Ethernet Wall Mount...
-
Page 46: Improving Network Performance
Network Configuration 4. Click on Apply Now and close the Network panel, saving your settings. 5.2 Improving Network Performance The latency (delay) of a Powerline network is higher than that of an Ethernet network. Most operating systems have a default setting of the network latency based on Ethernet figures. -
Page 47: Checking Network Performance
Network Configuration With a Linux PC running kernel 2.4 or higher, open the console and execute the command ./tcpwin.sh 512 logged in as root. tcpwin.sh for use with Linux operating systems After applying the script, please restart the system. This applies to both Windows and Linux. - Page 48 When to use this filter: • When you want to isolate a Powerline test network from the rest of the electrical grid, either because you don’t want the Powerline signal from the test network to go out and disrupt other adapters, or because you want to isolate this network from the noise, or other traffic, in the rest of the electrical grid.
-
Page 49: Troubleshooting Guide
Troubleshooting Guide The Corinex AV200 Powerline Ethernet Wall Mount has been designed to be a reliable and easy-to-use network connection device. Please refer to the list below to aid in troubleshooting or visit www.corinex.com/retail for information on your product. There you will find news, manuals and software updates, as well as frequently asked questions (FAQ). - Page 50 1. Ping the IP address of the computer to which the wall mount adapter is connected. If this fails, there is a problem with the Ethernet network card or with the TCP/IP protocol. 2. Repeat the same process with the other computers on your AV200 Powerline network.
Need help?
Do you have a question about the HOMENET AV200 and is the answer not in the manual?
Questions and answers