Advertisement
Table of Contents
- 1 A Consumer Guide to Product Safety
- 2 Important Safety Instructions
- 3 Installation and Maintenance
- 4 Controls and Buttons
- 5 LCD Display with Indicators
- 6 Daylight-Saving Time and Leap Years
- 7 Setting the Clock and Calendar
- 8 Adjusting the Display Backlight
- 9 Operating the Alarms
- 10 Limited 90-Day Warranty Information
- Download this manual
For additional information, online registration,
and exclusive special offers visit our website:
www.timexaudio.com
For questions or comments regarding this or other products,
please call our toll-free number 1-800-888-4491.
Para instruccionese en Espanol, llame al 1-800-888-4491.
MP3/CD Line-In
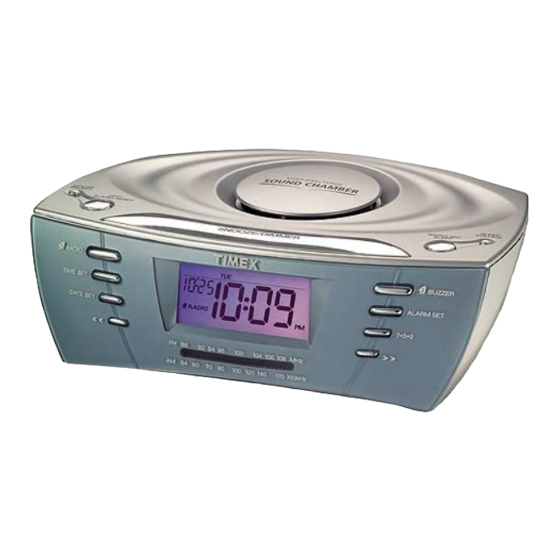
dual alarm clock radio
Model T439
Advertisement
Table of Contents

Related Manuals for Timex T439S


Summary of Contents for Timex T439S
- Page 1 Model T439 MP3/CD Line-In dual alarm clock radio For additional information, online registration, and exclusive special offers visit our website: www.timexaudio.com For questions or comments regarding this or other products, please call our toll-free number 1-800-888-4491. Para instruccionese en Espanol, llame al 1-800-888-4491.
- Page 2 CAUTION RISK OF ELECTRIC SHOCK DO NOT OPEN CAUTION: TO REDUCE THE RISK OF ELECTRIC SHOCK, DO NOT REMOVE COVER (OR BACK). NO USER-SERVICEABLE PARTS INSIDE. REFER SERVICING TO QUALIFIED SERVICE PERSONNEL. WARNING: TO REDUCE THE RISK OF FIRE OR ELECTRIC SHOCK, DO NOT EXPOSE THIS APPLIANCE TO RAIN OR MOISTURE.
-
Page 3: A Consumer Guide To Product Safety
A Consumer Guide to Product Safety IMPORTANT SAFETY INSTRUCTIONS This unit has been designed and manufactured to assure your personal safety. Improper use can result in potential electrical shock or fire hazards. Please read all the safety and operating instructions carefully before installation and use. Keep these instructions handy for future reference. Take special note, adhere to all warning, and always follow the instructions on the unit and in the instruction and service manuals. -
Page 4: Installation And Maintenance
Installation and Maintenance Installation 1. Remove the unit and all packing materials from the carton. You should save packing materials in case unit needs to be returned for service. If you do not wish to save the materials, please dispose of them properly. 2. -
Page 5: Controls And Buttons
Controls and Buttons Power On/Sleep Button Snooze/Dimmer Bar Off/Alarm Reset Button Sleep Volume Button Color Select Button Radio Alarm Button Buzzer Alarm Button Time Set Button Alarm Set Button Date Set Button 7-5-2 (Year) Button Reverse << (Date) Button Forward >> (Month) Button CD/MP3/AUX Radio Tuning Thumbwheel Radio/Aux Band Switch... -
Page 6: Lcd Display With Indicators
LCD Display With Indicators Radio Alarm Indicator Buzzer Alarm Indicator Radio Power Indicator Battery Low Indicator Daylight Savings Time Indicator POWER RADIO BUZZER PM Indicator Sleep Volume SLEEP Clock Indicator Calendar/ Sleep Timer Calendar Day/ 7-5-2 Alarm Settings... -
Page 7: Daylight-Saving Time And Leap Years
Setting the Clock and Calendar Setting the clock 1. Press and hold the 3 Time Set Button until the time display begins flashing. 2. Press the 1 << or M >> Button to adjust to correct time. Holding a button for a few seconds will advance or reverse the time rapidly. - Page 8 Listening and Sleeping to the Radio Listening to the Radio 1. Press the 8 Radio On/Sleep Button once to turn the radio on. The Radio Power Indicator will appear at the top of the display. Note: If the 8 Radio On/Sleep Button is pressed more than once, the unit will enter the sleep mode. See the Sleeping to the Radio with Timer section for more information about this feature.
-
Page 9: Operating The Alarms
Operating the Alarms Setting the Radio Alarm 1. Press the K Alarm Set Button once to set the radio alarm. The display will flash and show the radio alarm setting. 2. Press the 1 << or M >> Button to set the radio alarm time. Hold either button for a few seconds so as to advance or reverse the alarm time rapidly. -
Page 10: Limited 90-Day Warranty Information
Limited 90-Day Warranty Information Timex Audio Products, a division of SDI Technologies Inc. (hereafter referred to as SDI Technologies), warrants this product to be free from defects in workmanship and materials, under normal use and conditions, for a period of 90 days from the date of original purchase.
Need help?
Do you have a question about the T439S and is the answer not in the manual?
Questions and answers
Battery indicator won't shut off and I changed the batteries
The battery low indicator on the Timex T439S may not turn off after changing the batteries if the new batteries are not properly installed, have incorrect polarity, or are not providing sufficient power. Ensure that the batteries are fresh, correctly oriented as indicated in the battery compartment, and securely in place. If the issue persists, try replacing them with new alkaline batteries.
This answer is automatically generated