Advertisement
Packing list

Technical Specification
| Printing | |
| System | ANYCUBIC Photon |
| Operation | 2.8-inch Color TFT Screen |
| Software | ANYCUBIC Photon Slicer |
| Connectivity | USB memory |
| Specifications | |
| Technique | LCD Shadow Masking |
| Light source | UV-LED ( wave-length 405nm ) |
| XY Resolution | 0.047mm ( 2560*1440 ) |
| Z axis Accuracy | 0.00125mm |
| Suggested Layer Thickness | 0.01 ~ 0.2mm |
| Suggested Print Speed | 20mm/h |
| Rated power | 40W |
| Physical Dimensions | |
| Dimension | 220mm (L) *200mm (W) *400mm (H) |
| Build volume | 115mm (L) *65mm (W) *155mm (H) |
| Materials | 405nm UV-resin |
| Net weight | ~6.6kg |
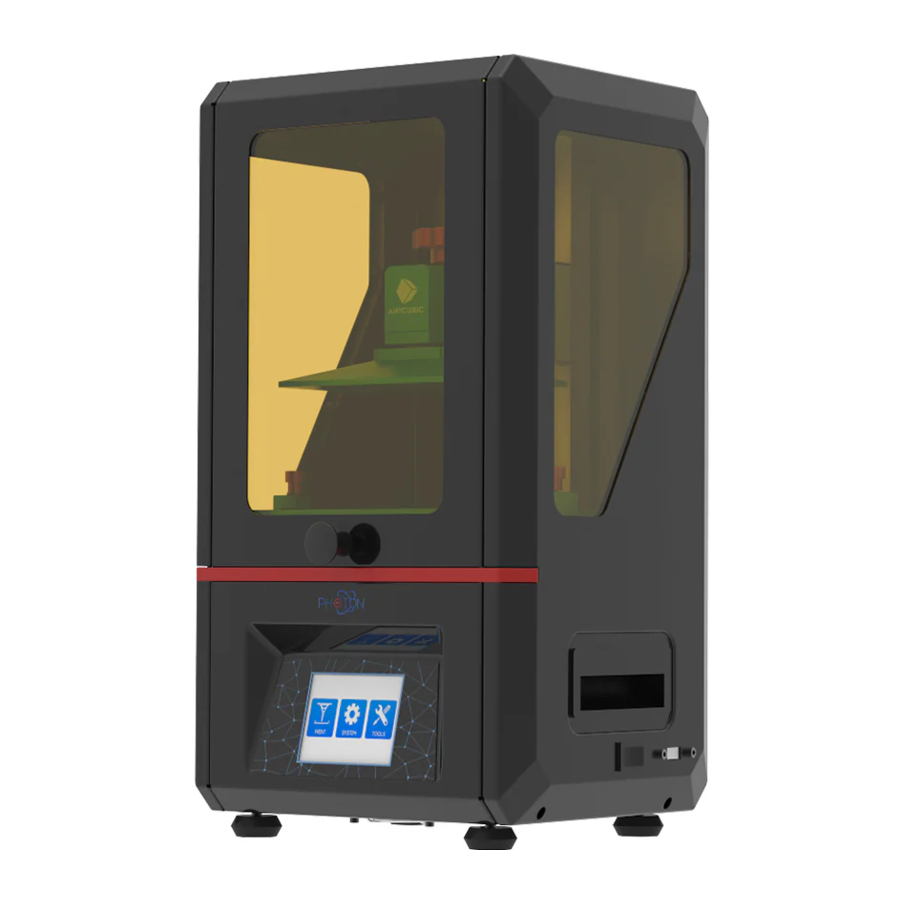
Product Overview

Menu Directory


Assembly and Leveling instructions
- Unpack the machine and then tear off the protective film outside.
- Install the handle on the top cover, as shown in Fig.(1).

- Open the top cover, check and ensure the 2K LCD screen and platform are clean and free of dust, as shown in Fig.(2). (Do not install the platform and resin vat until Step 7).

- Plug in the power and turn on the power switch.


Please strictly follow the following steps for leveling.
- As shown in Fig.(3), click the "TOOLS" → "MOVE Z" → "HOME" on the color screen. Wait for the Z axis to descent and then it will stop automatically.

- Loosen the screw on the platform, as shown in Fig. (4).

- As shown in Fig.(5) and (6), put an A4 paper on the 2K LCD screen and then install the platform onto the platform bracket (If it can not be install due to limited distance, then please click and rise the Z axis by "0.1mm" or "1mm" on the touch screen until the platform can be installed). Lastly tighten the red platform fixed knob on the top.

- After the platform is settled, if it is far from the 2K LCD screen, then click and lower the Z axis by "0.1mm" or "1mm" on the touch screen until feel the drag resistance when pulling the A4 paper back and forth, as shown in Fig.(7). Ensure click only once every time, do not press continuously to avoid the impact risk onto the LCD screen

- Now, gently press on the top of the platform, and let the platform fit evenly on the 2K LCD screen, and then use Allen wrench to fix the platform screw as tight as possible, as shown in Fig.(8).
Note that the platform should not be tilted at any direction or angle, otherwise it will affect the prints.
Please try best to keep those edges (indicated by red lines in Fig.8) parallel to each other, and then use the short handle of the wrench to well tighten the platform.

Fig. (8) - Double check: click on the touch screen and let the Z-axis up and down, until feel the resistance when pulling the paper at a particular Z axis height. The purpose is to adjust the distance between the 2K LCD screen and platform to about a piece of paper thin.
- Lastly, set the current Z height as the position where the first layer will be started: click "TOOLS" → "Z=0" on the touch screen, and then click "OK" on the pop-up window as shown in Fig.(9). Till now, the leveling process is finished.
Note: (1) it is not necessary to level the platform very time, (2) the Z=0 position is different from the default Z Home position, shown in Fig.(10).

- Function test of UV-LCD: gradually rise the platform about 120mm, then click "TOOLS" → "DETECTION" → "NEXT" on the screen as shown in Fig.(11), 2K LCD screen should display a complete rectangular as shown in Fig.(12). Otherwise, the UV light is malfunction and please contact the tech support.

- Make sure the resin vat is nice and clean, then install the resin vat till it aligns with the two limit-screws on the panel, as shown in Fig. (13). Finally tighten the red adjustable nut on both sides to secure the vat.


Software installation
Slicing software installation
Slicing software is located in SD card: "SD card" → "File_English_Photon" → "Photon slicing software". Double click "ANYCUBIC Photon SlicerInstall 1.1.9.exe", and then follow the installation guide as shown below:

Manipulate 3D model in Photon Slicer
When the software is installed, it will run automatically. On the menu bar, click "File" → "Open file" to import your own three-dimensional format model, i.e. STL file. Or you may input the Test (PHOTON.photon) file in the SD card. Using the mouse, left click on the model, then the model could be manipulated by "View", "Rotate", "Scale", and "Move".

Other operations:
- Position change: left click and hold on the model, then you may change the model position by dragging it around.
- Zoom in/out: scroll the mouse wheel.
- Change viewing angle: right click the platform, hold on and move the mouse.
Photon Slicer Settings
At the top right corner, there are "parameters", "support" and "print size" settings, please refer to the following instructions for those settings.
Parameters
Layer thickness: It is suggested to set it to 0.05mm (range: 0.01 0.2mm). The thicker the layer thickness, the longer the exposure time per layer needed.
Normal exposure time: Setting range: 6~15s, the exposure time is set according to the thickness of each layer and the details complexity of the model.
Off time: The UV light interval between each layers is ranged 3~6s.
Bottom Exposure Time: Setting range: 30~80s, the longer the bottom exposure time, the more easier for the bottom layer of the model to stick onto the build platform.
Bottom layers: setting range: 3~6.


Support
The type of support can be divided into Light, Medium and Heavy. Each choice has a corresponding parameter setting.
Light: Contact area between the support and model is small, easy to remove the support;
Heavy: Support contact with the model area is large, solid.
It is recommended to try the "Medium" first, and using the default settings.
Raft: Add the raft will make the bottom stick better to the build platform (but using more materials), the parameters can be changed according to you own requirements.
Print size
These parameter does not need modification usually. But if the printed model has big size errors along a particular axis (X,Y or Z), you can modify the corresponding values for that axis proportionally.

Slicing and Save the Photon files

When the settings are correct, click the "Slice" icon at the top left (red square). Save it in the USB memory (or SD card with card reader) and then start slicing, click "OK" to complete the slice; Or click "Show preview" to check the printing layers and other parameters as well.
First print instructions
Before printing, to minimize the first time frustration, please ensure
- Z axis is working fine;
- the platform is well leveled and fit with 2K LCD screen;
- the UV light is functional properly.
Insert the USB memory (or the SD card with card reader) into the USB port. Then wear masks and gloves, slowly pour the resin into the vat until it reaches 1/3 volume of the vat. After that, close the door.

Take off the gloves, select the "PHOTON.photon" test files or your own files (as shown in Fig.(14)  ), and start printing. During printing, avoid direct sun light and keep the printer flat without shaking.

If you think the resin is insufficient to finish an ongoing print (or you wish to change the resin color), you can click "Pause" (Fig.(16)), the platform will rise, and you can slowly pure (or change) the resin into the vat. After that, press "Start" to resume, as shown in Fig.(16).
Handling models and residues
After printing, waiting until the resin stop dropping from the platform and then unscrew and remove the platform. As shown in Figure (17), the model can be removed by scrapper carefully. The removed model should be washed with ethanol 95vol% concentration. The printed model may need post curing to achieve better hardness by direct sunlight or UV- curing box.


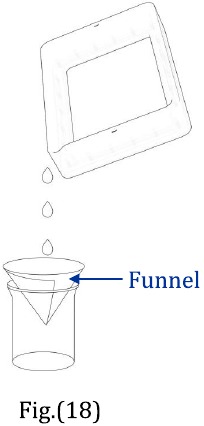
Inevitably, in case of incomplete curing or failed prints, there might be some resin residues left in the vat. Then, please filter the resin by a funnel (shown in Fig.18) and store the resin in a sealed container. For the residues left in the vat or on the platform, please use paper towel or plastic scrapper to carefully get rid of that.
Before each prints, please ensure there is no solid residues in the vat or on the platform, otherwise the 2K LCD screen may be impacted and broken during printing or leveling.
FAQ
-
Model not sticking to platform
- Bottom exposure time is insufficient, increase the exposure time.
- Contact area between the model and platform is small, please add raft.
- Bad leveling
-
Layer separation or splitting
- The machine is not stable during printing
- FEP film in the vat is not tight enough or it need a change for new one
- The printing platform or vat is not tightened
Machine maintenance
- If Z axis make noisy sound, please apply lubricant to Z lead screw.
![]()
- Do not use sharp objects to scrape off the residues on the FEP film.

- Be careful when remove the platform, do not let it fall onto the 2K LCD screen.
![]()
- Do not left the resin in the vat for over two days if not using it. Please filter and store the resin properly.

- After printing, please clean up the platform (wipe clean with paper towels or wash with alcohol), and ensure no residue left before next print (filter the residue with funnel).
- If the outside of printer is stained with resin, use alcohol to wipe clean.
- To switch the resin colors, please clean the original resin vat first.


Precautions
Please contact our customer service first if you have any issue after receiving the products.
Keep the ANYCUBIC PHOTON 3D printer and its accessories out of the reach of children.
Use the machine at room temperature, avoiding direct sunlight or dusty environment.

ANYCUBIC PHOTON 3D printer must not be exposed to water or rain.

Wear gloves when handling the resin and avoid direct skin contact.

Be cautious when using the scraper. Never direct the scraper towards your hand.
Few accessories in ANYCUBIC 3D printer are consumables and the warranty coverage may vary.
Do not disassemble ANYCUBIC PHOTON 3D printer, please contact technical support if you have any question.
In case of emergency, please immediately cut off the power of ANYCUBIC 3D printer and contact the technical support.
If you have any questions please contact customer service support@anycubic3d.com or check out ANYCUBIC official website http://www.anycubic3d.com/en/, we are likely to answer or solve any questions for you!
Please visit http://www.anycubic3d.com/en/ for firmware and slicing software updates.
Email us on support@anycubic3d.com or james@anycubic3d.com for any suggestion or question.

ANYCUBIC Website

Facebook page

YouTube channel
Documents / ResourcesDownload manual
Here you can download full pdf version of manual, it may contain additional safety instructions, warranty information, FCC rules, etc.
Advertisement


Need help?
Do you have a question about the Photon Mono X and is the answer not in the manual?
Questions and answers