Table of Contents
Advertisement
DIGITAL CAMERA
SP-560UZ
Instruction
Manual
Thank you for purchasing an Olympus digital camera. Before you start to use your new camera, please
read these instructions carefully to enjoy optimum performance and a longer service life. Keep this manual
in a safe place for future reference.
We recommend that you take test shots to get accustomed to your camera before taking important photographs.
In the interest of continually improving products, Olympus reserves the right to update or modify information
contained in this manual.
The screen and camera illustrations shown in this manual were produced during the development
stages and may differ from the actual product.
Quick Start Guide
This manual will help you
get started using your
camera right away.
Button operations
Menu operations
Printing pictures
Using OLYMPUS Master
Getting to know your
camera better
Appendix
Advertisement
Chapters
Table of Contents

Related Manuals for Olympus SP-560


Summary of Contents for Olympus SP-560
-
Page 1: Digital Camera
Appendix Thank you for purchasing an Olympus digital camera. Before you start to use your new camera, please read these instructions carefully to enjoy optimum performance and a longer service life. Keep this manual in a safe place for future reference. -
Page 2: Table Of Contents
Printing pictures P.48 Learn how to print pictures you have taken. Using OLYMPUS Master P.55 Learn how to transfer pictures to a computer and save them. Getting to know your camera better P.62 Find out more about your camera and learn what to do when you have a question regarding operations. - Page 3 Strap/Strap rings String AA Batteries (four) USB cable AV Cable OLYMPUS Master 2 CD-ROM Items not shown: Instruction Manual (this manual), warranty card. Contents may vary depending on purchase location. Attach the strap and the lens cap Be sure to use the strap and strap rings provided.
- Page 4 • Attach the strap to the other eyelet in the same manner. Pull the strap tight so that it does not come loose. Preparing the camera a. Load batteries into the camera...
- Page 5 b. Insert the xD-Picture Card (optional) into the camera Card cover Notch • Insert the card straight in. • Insert the card until it clicks into place. Contact area • To remove the card, push it all the way in, release it slowly and remove. This camera allows you to take pictures without using an optional xD- Picture Card™...
- Page 6 Turn the camera on This explains how to turn on the camera in shooting mode. a. Set the mode dial to h. Shooting Mode When shooting movies (shooting mode) Still picture shooting modes The camera determines the optimum settings for the shooting conditions automatically.
- Page 7 Set date and time Tips The directions of the arrow pad are indicated with 124 3 in this manual. About the date and time setting screen Y-M-D (Year-Month-Day) Hour D T I M E D T I M E Minute Date formats (Y/M/D, M/D/Y, D/M/Y) ----.--.-- --:-- ----.--.-- --:--...
- Page 8 c. Press the 1 F button and the 2Y button to select [M]. D T I M E D T I M E 2007 2007.12 12.-- --:-- .-- --:-- Y / M / D Y / M / D d. Press the 3# button. CANCEL MENU e.
- Page 9 Take a picture a. Hold the camera Horizontal grip Vertical grip b. Focus Place this mark over The green lamp your subject. indicates the focus and exposure are locked. Shutter button (Pressed Halfway) The number of remaining still pictures is displayed. c.
- Page 10 View pictures a. Set the mode dial to q. Mode Dial Arrow pad Next Picture Prev. Picture Erase pictures a. Press the 4& button and the 3# button to display the picture you want to erase. b. Press the S button. 4&...
-
Page 11: Button Operations
Button operations Shooting Mode Playback mode Shooting Mode Flash mode Self-timer Macro mode/ Super macro mode 1 o button Turning the camera on and off Power on: Shooting Mode • Monitor turns on • Lens extends • Before turning the camera on in shooting mode, remove the lens cap. Playback mode •... -
Page 12: Changing The Aperture Value For Shooting Pictures
A Changing the aperture value for shooting pictures Press 12 after pressing 1 F. The camera automatically sets the shutter speed. 1/1000 1/1000 F4.0 F4.0 Aperture value : Increases the aperture value. : Decreases the aperture value. When the correct exposure cannot be obtained, the aperture value is displayed in red. -
Page 13: S Shoot Pictures By Selecting A Scene According To The Situation
rSetting your own original mode for shooting pictures This mode allows you to set functions and save up to 4 shooting modes manually, and use them as your original shooting mode. g “MY MODE SETUP Setting and saving shooting-related functions” (P.47) Use the function menu to switch the registered My Mode. - Page 14 This icon lights red during movie recording. The remaining recording time is displayed. When the remaining recording time reaches 0, recording stops. • When [IMAGE STABILIZER] is set to [ON], continuous movie recording for a long period will cause the camera’s internal temperature to rise and the camera may stop operation automatically.
-
Page 15: Recording Movies
Recording movies Set the mode dial to n, and press the shutter button halfway to lock the focus, and then press the shutter button completely to start recording. Press the shutter button again to stop recording. 4 Zoom Lever Zooming while shooting/close-up playback Shooting mode: Zooming in on your subject Optical zoom: 18×... - Page 16 5 h /mbutton g back Shooting with digital image stabilization/Using this button as custom button/Playing back continuously shot pictures in index display Shooting mode: Shooting with digital image stabilization Press h in shooting mode to select [hON]. Press o to set. g “IMAGE STABILIZER Shooting pictures using digital image stabilization”...
- Page 17 Playback mode: Playing back continuously shot pictures in index display Only the first frame will be displayed for pictures that have been shot continuously. Press m in the playback mode to display pictures in index view. g “Displaying pictures that have been shot continuously in index view (Sequential Playback) / Auto playing back of pictures that have been shot continuously (Sequential Pictures Auto Playback)”...
- Page 18 Displaying the menu guide With menu items selected, hold down DISP./E to display the E S P / METERING menu guide. Release DISP./E to close the menu guide. Sets picture brightness for taking pictures. Checking the time While the camera is off, press DISP./E to display the set alarm time (when [ALARM CLOCK] is set) and the current time for 3 seconds.
- Page 19 c 4& button Shooting pictures close to the subject (Macro) Press 4& in shooting mode to select the macro mode. Press o to set. Macro mode is deactivated. & (Macro mode) Allows you to shoot from as close as 10 cm/3.94 in. (when the zoom is set for the zoom-out angle) to your subject.
- Page 20 f 2Y button Self-timer shooting Press 2Y in shooting mode to select on and off of the self-timer. Press o to set. YOFF Cancel the self-timer. Y12 SEC After the setting, press the shutter button completely. The self- timer lamp lights for approximately 10 seconds, then starts blinking.
-
Page 21: Menu Operations
Menu operations Mode Dial o button m button Arrow pad About the menus Pressing m displays the top menu on the monitor or viewfinder. • The items displayed on the top menu differ according to the mode. Top menu (When Mode Dial is set to P) IMAGE IMAGE IMAGE... - Page 22 RESET MENU MENU MENU AF MODE CONTRAST SILENT SILENT SILENT FOCUS MODE SATURATION MODE MODE MODE FULLTIME AF NOISE REDUCT. EXIT MENU AF PREDICT TIMELAPSE 1 (conversion lens) AF ILLUMINAT. IMAGE STABILIZER R (movies) An OLYMPUS xD-Picture Card is required.
-
Page 23: Image Quality
• Some menu items are not available depending on the position of the mode dial. g “Functions available in shooting modes and scene modes” (P.73) g “SETUP menus” (P.41) • The factory default settings are displayed in gray ( 1 IMAGE QUALITY Changing the image quality Still picture image quality and their applications Image quality... - Page 24 2 RESET tings Change the shooting functions back to default settings / YES It restores shooting functions back to default settings. Functions restored to the factory default settings Factory Factory Function default Ref. Page Function default Ref. Page setting setting AF ILLUMINAT.
-
Page 25: Camera Menu
[eSHOOT & SELECT1] [fSHOOT & SELECT2] • Press and hold the shutter button to shoot sequential pictures. After shooting pictures, select the ones you want to erase, put R to them, and press S to erase them. Selected picture. Press 4 3 to scroll through the pictures. BACK MENU Pictures with R are erased. -
Page 26: Iso
When [PRESET] is selected Press 12 to select a white balance setting, then press o. PRESET WB BACK MENU When [V] is selected • With the [ONE TOUCH WB] screen displayed, point the camera at a sheet of white paper. Position the paper so that it fills the screen, making sure there are no shadows. -
Page 27: Drive
DRIVE .................... Continuous shooting Shoots 1 frame at a time when the shutter button is pressed. Focus and exposure are locked at the first frame. The sequential shooting speed varies depending on the setting of image quality. Pictures can be taken at a faster speed than normal sequential shooting. -
Page 28: Digital Zoom
DIGITAL ZOOM ..............Zooming in on your subject OFF /ON The digital zoom can be used to take close-up pictures with stronger magnification than the optical zoom. Optical zoom Digital zoom Maximum magnification: Zoom bar Still picture shooting modes White area: The optical zoom area Optical zoom ×... -
Page 29: Focus Mode
FOCUS MODE ..............Changing the focus method Press the shutter button halfway. The camera automatically focuses. Adjust the focus manually. When set to [MF] • Press 12 to set the focus. During operation, the focus area is enlarged. • Hold down o to fix the focus. The focus is locked at the distance you have set, and MF is displayed in red on the monitor. -
Page 30: Syncro
w ............Adjusting the amount of light emitted by the flash Depending on situations such as shooting small subjects or distant backgrounds, it may be advisable to adjust the amount of light emitted by the flash. In addition, this function is useful when increased contrast is desired. - Page 31 PANORAMA ............... Creating a panoramic picture Panorama shooting lets you create a panoramic picture, using the OLYMPUS Master software from the provided CD-ROM. An Olympus xD-Picture Card is required for panorama shooting. Connects pictures from left to Connects pictures from...
-
Page 32: Noise Reduct
SHARPNESS ............Adjusting the sharpness of the image 1 (Toward +) : The image contours are emphasized, CAMERA MENU CAMERA MENU making the image appear sharper and more vivid. Use this setting when you PANORAMA want to print pictures. If you adjust the >... - Page 33 Shooting pictures with conversion lens OFF /ON Set this function when shooting with the camera using a conversion lens (option) specified by Olympus. • Using the built-in flash with the conversion lens attached can cause vignetting. Use an external flash if required.
- Page 34 Playback mode menu When the still picture is selected 5EDIT 7PLAYBACK MENU *1*2 RAW DATA EDIT PRINT PRINT PRINT SLIDE- SLIDE- SLIDE- INDEX PLAY SHOW SHOW SHOW EDIT EDIT EDIT ORDER ORDER ORDER COLOR EDIT PERFECT PERFECT PERFECT PLAYBACK PLAYBACK PLAYBACK FRAME SETUP...
- Page 35 2 MOVIE PLAY Playing back movies Select [MOVIE PLAY] from the top menu, and press o to play [ IN IN ] back the movie. • Another option is to select a picture with the movie icon (A) in the playback mode, and press o to play back the movie. '07.12.26 '07.12.26 12:30...
- Page 36 3 PERFECT FIX Continuous shooting This function allows you to correct the taken picture and save it as a new picture. • Select the item to be corrected with 12 and press o. • Select the picture with 4 3 and press o. PERFECT FIX LIGHTING FIX REDEYE FIX...
-
Page 37: Color Edit
Q ..................Changing the size of pictures 640x480 / 320x240 This changes the image size of a picture and saves it as a new file. P ..................Cropping a part of pictures Designates and crops part of a still picture and saves it as a new file. •... - Page 38 CALENDAR ............Create a calendar print with your picture This function lets you select a calendar format, integrate the calendar with a picture, and save it as a new file. • Select the picture with 4 3 and press o. C A LE N D A R •...
-
Page 39: Playback Menu
EDIT ................... Extracting a part of the movie Allows you to specify a part of the movie and overwrite it, or save it as a new movie. • Select [NEW FILE] or [OVERWRITE], and press o. • Use the arrow pad to select the first frame of the part you want to 00:00 00:00 / 00:36 00:36... -
Page 40: Index Play
[ I N ] [ I N ] [ I N ] EXIT EXIT EXIT +90° 0° –90° Select the picture with 4 3, and rotate it by selecting [+90°], [0°] or [–90°] with 12. You can rotate several frames in succession. INDEX PLAY ........... - Page 41 • Make sure there is no card inserted in the camera when formatting the internal memory. • Be sure that the card is inserted in the camera when formatting the card. • Before using non-Olympus cards or cards which have been formatted on a computer, you must format them with this camera.
-
Page 42: Pw On Setup
PW ON SETUP ............Setting the startup screen and sound SCREEN 1 / 2 OFF (No picture is displayed.) SOUND OFF (No sound) You can select the types of the sound and the picture displayed when the camera is turned on. •... - Page 43 Select [ON] to set whether to display the image on the monitor or viewfinder during recording. LCD ONLY : Pictures that are being recorded will always be displayed on the menu on the monitor. CURRENT : Pictures that are being recorded will be displayed on the viewfinder when the viewfinder is used and on the monitor when the monitor is used.
- Page 44 s ................. Adjusting the monitor brightness Brightens the monitor. Darkens the monitor. Press o after setting is complete. BACK MENU X .................... Setting the date and time The date and time is saved with each image, and is used in the file name. Y-M-D (Year-Month-Day) Hour Minute...
- Page 45 ALARM CLOCK ..................Setting alarms No alarm is set or alarm is canceled. ONE TIME Alarm is activated once. After the alarm goes off, the setting is canceled. DAILY Alarm is activated daily at the set time. • When [X] has not been set, [ALARM CLOCK] is not available. •...
-
Page 46: Video Out
VIDEO OUT ................ Playing back pictures on a TV NTSC / PAL The factory default settings differ according to the region where the camera is sold. To play back camera images on a TV, set the video output according to your TV’s video signal type. •... -
Page 47: My Mode Setup
MY MODE SETUP ........Setting and saving shooting-related functions Types of my mode settings CURRENT Saves the current camera settings. S E T U P • Select [SET], and press o. ALARM CLOCK MY MODE SETUP VIDEO OUT SET CURRENT SETTING SET CURRENT SETTING CURRENT FRAME ASSIST... -
Page 48: Printing Pictures
Printing pictures Direct printing (PictBridge) Using the direct printing function By connecting the camera to a PictBridge-compatible printer, you can print pictures directly - no computer necessary. Select the pictures you want to print and the number of prints using the camera’s print menus. - Page 49 Press P . • Printing starts. EASY PRINT START PC / CUSTOM PRINT • When printing is finished, the picture selection screen is displayed. To print another picture, press 4 3 to select a picture, and press P . • When you are finished, disconnect the USB cable from the camera with the picture selection screen displayed.
- Page 50 Other print modes and print settings (CUSTOM PRINT) Display the screen being indicated on the right according to the procedure 1 and 2 in P.48, and press o. Select [CUSTOM PRINT] and press o. U S B [ I N ] EASY PRINT CUSTOM PRINT EXIT...
-
Page 51: Selecting The Picture To Print
Selecting the picture to print PRINT Prints one copy of the selected picture. When [ IN IN ] [SINGLE PRINT] or [MORE] has been selected, a single copy or more copies are printed. SINGLE PRINT Makes a print reservation for the displayed 1 0 0 - 0 0 0 4 1 0 0 - 0 0 0 4 picture. -
Page 52: How To Make Print Reservations
Disconnect the USB cable from the camera. Disconnect the USB cable from the printer. Print settings (DPOF) How to make print reservations Print reservation allows you to save printing data (the number of prints and the date and time information) with the pictures stored on the card. With print reservation, you can print out pictures easily either at home using a personal DPOF- compatible printer or at a photo store that supports DPOF. -
Page 53: Number Of Prints
Single-frame reservation Follow the operation guide to make a print reservation for a selected picture. Press m in the playback mode and display the top menu. Select [PRINT ORDER] [<], and press o. PRINT ORDER < Operation guide BACK MENU Press 4 3 to select the frames for print [ xD xD ]... -
Page 54: Resetting Print Reservation Data
All-frame reservation Reserves all the pictures stored on the card. The number of prints is set at one print per picture. Press m in the playback mode and display the top menu. Select [PRINT ORDER] [U], and press o. Select the date and time setting, and press o. The pictures are printed without the date and time. -
Page 55: Using Olympus Master
(P.56) Using OLYMPUS Master What is OLYMPUS Master? OLYMPUS Master is a software application for managing your digital images on your computer. Installing it on your computer lets you do the following: ( Download images from the camera or... -
Page 56: Install The Olympus Master Software
Before installing the OLYMPUS Master software, please confirm that your computer is compatible with the following system requirements. For newer operating systems, please refer to the Olympus web site as shown on the back cover of this manual. Operating environment... - Page 57 • To select the components to install, select “Custom”. • The installation begins. The screen confirming that setup is completed is displayed. Click “Close”. • Next, the screen confirming whether to install OLYMPUS muvee theaterPack Trial Version is displayed. To install this software, click “Install”. Macintosh Insert the CD-ROM into the CD-ROM drive.
- Page 58 • Connecting the camera to a computer via a USB hub may cause unstable operation. In this case, do not use a hub, but connect the camera directly to the computer. • Images cannot be transferred to your computer with OLYMPUS Master if [PC] is selected in Step 3, 3 is pressed and [MTP] is selected.
-
Page 59: Downloading And Saving Images
To exit OLYMPUS Master Click “Exit” on any window. • OLYMPUS Master is exited. Displaying camera images on a computer Downloading and saving images Click “Transfer Images” on the browse window, and then click “From Camera” • The window for selecting the pictures you want to transfer from the camera is displayed. -
Page 60: Browse Window
Double-click the movie thumbnail that you want to see in the browse window. • OLYMPUS Master switches to the edit window and the first frame of the movie is displayed. To play back the movie, click “Play” the bottom of the screen. - Page 61 Note • If your computer is running Windows Vista, you can select [PC] in Step 3 on page 58, press 3, and select [MTP] to use Windows Photo Gallery. • Data transfer is not guaranteed in the following environments, even if your computer is equipped with a USB port.
-
Page 62: Getting To Know Your Camera Better
Getting to know your camera better Shooting tips and information Tips before you start taking pictures The camera does not turn on even when the batteries are loaded The direction of the batteries is incorrect. • Insert the batteries in the correct direction. The battery power is exhausted •... -
Page 63: Shooting Tips
The viewfinder does not turn on The monitor is turned on • Press u to switch to the viewfinder. The monitor does not turn on The viewfinder is turned on • Press u to switch to the monitor. The viewfinder or monitor is hard to see There is condensation* inside the camera •... -
Page 64: Subjects That Are Difficult To Focus On
Subjects that are difficult to focus on • Under certain types of conditions, it is difficult to focus using auto focus. The green lamp on the monitor lights, allowing you to check if the focus is locked. The green lamp blinks. -
Page 65: Taking Pictures With The Correct Color
Taking pictures with the correct color • The reason why there are differences between the colors in a picture and the actual colors taken and the actual color is the light source illuminating the subject. [WB] is the function that allows the camera to determine the correct colors. Normally, the [AUTO] setting provides the optimal white balance, but depending on the subject, it may be better to experiment with changing the [WB] setting. - Page 66 Using a card (optional) • Pictures are recorded to the card when inserted in the camera. When the card is full, download the pictures to a computer, and then either erase the pictures from the card or use a new card. •...
-
Page 67: Using A New Card
Using a new card • If you use a non-Olympus card or a card used for another application, such as for a computer, use [FORMAT] function to format the card. g “MEMORY FORMAT (FORMAT) Formatting the internal memory or card” (P.41) Lamp indicators This camera uses several lamps to indicate the camera status. -
Page 68: Restoring Default Settings
Selecting the appropriate image quality Image quality is a combination of desired image size and compression level. Use the following examples to help determine the optimal record mode when shooting. To edit and process images on a computer • [RAW] To make high quality prints on full-size paper such as A3 (16.5 ×... -
Page 69: Playback Help And Troubleshooting Tips
There are several ways you can view the entire picture on the computer screen. View the picture using image browsing software • Install the OLYMPUS Master 2 software from the provided CD-ROM. Change the monitor setting • The icons on the computer desktop may be rearranged. For details of changing the... - Page 70 When you get an error message on the camera Monitor indication Possible cause Corrective action There is a problem with the This card cannot be used. Insert a new card. card. CARD ERROR Writing to the card is The recorded image has been protected prohibited.
- Page 71 Monitor indication Possible cause Corrective action There is an error in the Select [MEMORY FORMAT] [YES] and M EMORY SE TUP [ I N ] press o. All data in the internal memory is internal memory. erased. POWER OFF MEMORY FORMAT The camera is not Disconnect the camera and connect it connected to the computer...
- Page 72 Functions that can be assigned to My Mode/custom button Function MY MODE SETUP CUSTOM BUTTON Ref. Page P/A/S/M/f — — P.19 FNo. — P.12 SHUTTER — P.12 FLASH MODE — P.19 & — P.19 — P.20 — P.18 MONITOR (u) —...
-
Page 73: Modes And Shooting Functions
Functions available in shooting modes and scene modes Some functions cannot be set in certain shooting modes. For more details, refer to the table below. In r mode, available functions vary depending on the modes set in the [MY MODE SETUP] menu. In s mode, in order to produce specialized effects, some scenes limit control of certain functions. - Page 74 Shooting mode Ref. Function Page METERING — P.28 AF MODE — — P.28 FOCUS MODE — — P.29 FULLTIME AF — P.29 AF PREDICT — — P.29 AF ILLUMINAT. — — P.29 — — P.30 #SYNCRO — — P.30 QFLASH —...
- Page 75 Scene Ref. Page Function FINE ZOOM — — P.27 DIGITAL ZOOM — — P.28 AF MODE — — P.28 FOCUS MODE — P.29 FULLTIME AF — P.29 AF PREDICT — P.29 AF ILLUMINAT. — — P.29 — — — — P.30 #SYNCRO —...
- Page 76 Scene Ref. Page Function *11*12 IMAGE QUALITY — P.23 — — — — — — P.26 DRIVE — — — P.27 FINE ZOOM — — — P.27 DIGITAL ZOOM — — — P.28 AF MODE — P.28 FOCUS MODE — —...
-
Page 77: Appendix
Appendix Camera care Cleaning the camera Exterior: • Wipe gently with a soft cloth. If the camera is very dirty, soak the cloth in mild soapy water and wring well. Wipe the camera with the damp cloth and then dry it with a dry cloth. If you have used the camera at the beach, use a cloth soaked in clean water and wrung well. -
Page 78: The Card
The number of pictures that you can take may vary considerably depending on the battery manufacturer and shooting conditions. AA NiMH batteries (rechargeable batteries) Olympus NiMH batteries are rechargeable and economical. For details, refer to the instruction manual for your charger. ( Lithium battery pack (CR-V3) and manganese (zinc-carbon) batteries cannot be used. - Page 79 Using the internal memory or card You can confirm on the monitor whether the internal memory or card is being used during shooting and playback operations. Shooting Mode Playback mode Memory indicator [IN] : When internal memory is used. [xD] : When the card is used.
-
Page 80: General Precautions
CAUTION: TO REDUCE THE RISK OF ELECTRICAL SHOCK, DO NOT REMOVE COVER (OR BACK). NO USER-SERVICEABLE PARTS INSIDE. REFER SERVICING TO QUALIFIED OLYMPUS SERVICE PERSONNEL. An exclamation mark enclosed in a triangle alerts you to important operating and maintenance instructions in the documentation provided with the product. -
Page 81: Battery Handling Precautions
DANGER • Use only the Olympus brand NiMH batteries and proper fitting charger. • Never heat or incinerate batteries. • Take precautions when carrying or storing batteries to prevent them from coming into contact with any metal objects such as jewelry, pins, fasteners, etc. -
Page 82: Caution For Usage Environment
• Always observe the operating environment restrictions described in the camera’s manual. Battery Handling Precautions • Olympus NiMH batteries (included in some areas) are intended for use only with Olympus digital cameras. Never use these batteries with any other device. -
Page 83: Lcd Monitor
This is not a malfunction. Legal and Other Notices • Olympus makes no representations or warranties regarding any damages, or benefit expected by using this unit lawfully, or any request from a third person, which are caused by the inappropriate use of this product. -
Page 84: Copyright Notice
Olympus. No liability is assumed with respect to the use of the information contained in these written materials or software, or for damages resulting from the use of the information contained therein. - Page 85 Trademarks • IBM is a registered trademark of International Business Machines Corporation. • Microsoft and Windows are registered trademarks of Microsoft Corporation. • Macintosh is a trademark of Apple Inc. • xD-Picture Card™ is a trademark. • All other company and product names are registered trademarks and/or trademarks of their respective owners.
- Page 86 Humidity : 30 % to 90 % (operation)/10 % to 90 % (storage) Power supply : AA alkaline / NiMH battery (four) or Olympus AC adapter Dimensions : 116.0 mm (W) × 78.5 mm (H) × 78.0 mm (D) (4.57 × 3.09 × 3.07 in.)
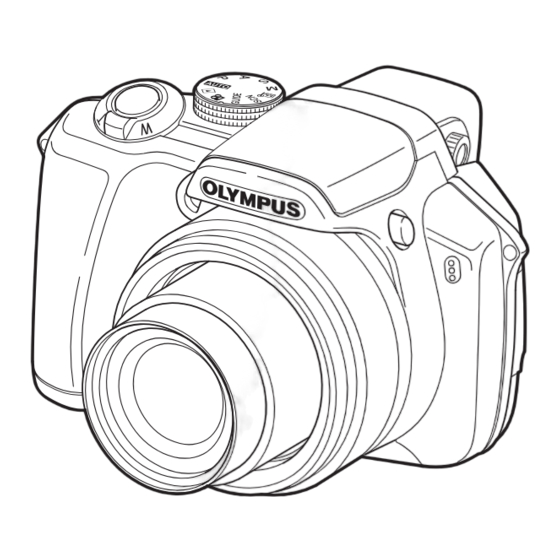
- Page 87 CAMERA DIAGRAM Camera Flash (P.17) # button (Flash Popup) (P.17) Shutter button (P.9, P.14) Strap Eyelet (P.3) Strap Eyelet DC-IN jack (P.79) Lens Microphone Connector Cover Card Cover (P.5) (P.46, P.48, P.58) Card Slot (P.5) Self-Timer Lamp/AF Illuminator Multi-connector (P.20, P.29, P.67) (P.46, P.48, P.58) Zoom Lever (P.15) h/m button...
-
Page 88: R (Still Pictures)
Monitor Symbols & Icons ( Shooting Mode Still pictures Movie Item Indications Ref. Page 1 Battery check e= full power, f= low power P.70 2 Green lamp O= Auto Focus Lock P.9, P.14, P.67 # (Lit) 3 Flash standby P.62 # (Blinks) Camera movement warning/Flash charge... -
Page 89: 31 Conversion Lens
Item Indications Ref. Page 22 Shadow Adjustment Technology P.18 k, h 23 Self-timer P.20 24 Shutter speed 15", 1/2, 1/60, 1/2000, BULB etc. P.12 25 Noise reduction P.32 26 Aperture value F2.8 to F8.0 P.12 27 Exposure compensation -2.0 - +2.0 P.19 28 Record mode RAW, SHQ, HQ, SQ1, SQ2, 16 : 9... -
Page 90: Playback Mode
( Playback mode Still pictures Movie Item Indications Ref. Page 1 Battery check e= full power, f= low power P.70 2 Current memory [IN] : Playing back the picture in the internal P.79 memory [xD]: Playing back the picture in the card <x10 3 Print reservation/Number of prints P.53... - Page 91 Index AUTO (white balance) WB AUTO . 25 s (Scene) ... . 6, 13, 24 Auto bracketing BKT ... 27 hm button.
- Page 92 Flash mode # ....19 CURRENT (MY MODE SETUP) . . . 47 Flash off $ ....19 CUSTOM (MY MODE SETUP) .
- Page 93 JPEG ......23 OLYMPUS Master ....55 LABEL .
- Page 94 SMILE SHOTl ... . 24, 25 RAW ....23, 66, 68 SNOW a ..... 24 RAW DATA EDIT .
- Page 95 Zoom lever ....15...
- Page 96 Memo...
- Page 97 Memo...
- Page 98 Memo...
- Page 99 Memo...
- Page 100 Manual for Shooting with the Olympus Wireless RC Flash System Wireless flash shooting is possible with the Olympus wireless RC flash system. With this wireless flash system, you can take pictures using multiple wireless flashes. The built-in flash is used to communicate between the camera and the external flashes.
- Page 101 Printed in Japan VS264801 1AG6P1P3694--...
Need help?
Do you have a question about the SP-560 and is the answer not in the manual?
Questions and answers