Canon imagePROGRAF W6400 User Manual
Canon imageprograf w6400: users guide
Hide thumbs
Also See for imagePROGRAF W6400:
- Manual (84 pages) ,
- Brochure & specs (8 pages) ,
- User manual (34 pages)
Table of Contents
Advertisement
Quick Links
User's Guide
Quick Menu
Loading Roll Media
Unexpected Printing Results
Handling Jams
Responding to Error Messages
When Ink Runs Out
List of Operation Panel Settings
Printer Driver
How to Use This Guide
i
Chapter 1 Basic Procedures
Chapter 2 Using a Variety of Media
Chapter 3 Printing Methods for Different
Objectives
Chapter 4 Maintaining the Printer
Chapter 5 Using the Printer in a Net-
work Environment
Chapter 6 Troubleshooting
Chapter 7 Operation of the Function
Menus
imagePROGRAF Print Plug-In for Photoshop Guide
Macintosh
Windows
imagePROGRAF HDI Driver Guide
Windows
Media Configuration Tool Guide
Macintosh
Windows
TOP
Chapter 1
Basic Procedures
Chapter 2
Using a Variety of
Media
Chapter 3
Printing Methods for
Different Objectives
Chapter 4
Maintaining the
Printer
Chapter 5
Using the Printer in a
Network Environ-
ment
Chapter 6
Troubleshooting
Chapter 7
Operation of the
Function Menus
Contents
Index
Advertisement
Chapters
Table of Contents

Related Manuals for Canon imagePROGRAF W6400


Summary of Contents for Canon imagePROGRAF W6400
-
Page 1: Chapter 4 Maintaining The Printer
Objectives Chapter 4 Chapter 4 Maintaining the Printer Maintaining the Printer Chapter 5 Quick Menu Chapter 5 Using the Printer in a Net- Using the Printer in a Network Environ- work Environment Loading Roll Media ment Unexpected Printing Results Chapter 6... -
Page 2: How To Use This Guide
How to Use This Guide Chapter 1 Basic Procedures How to Use the Top Page • Move to top page, chapter contents pages, contents pages, and indexed pages. Chapter 2 • Move to the previous/next page. Using a Variety of Media •... - Page 3 Set as Default Printer. We recommend that you specify the Click on blue text to move to the refer- printer you want to print on in Set as Default Printer and print on enced pages. A4 size plain paper.
-
Page 4: Table Of Contents
Chapter 1 Basic Procedures Chapter 1 Basic Procedures Click on the checkbox to print the section contents. Printer Part Names ..................1-2 Printer Main Unit ....................1-2 Chapter 2 Using a Variety of Switching the Printer On and Off ..............1-7 Media Switching the Printer On .................. -
Page 5: Printer Part Names
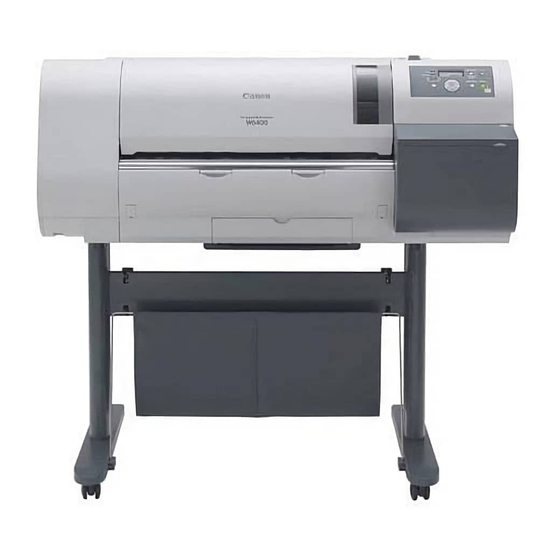
Chapter 6 a Upper cover Troubleshooting are attached to the legs to make it easy to move. Remove this cover to install the printhead, to load media, i Output stacker (provided with optional stand) or to remove sheets of paper jammed in the printer. -
Page 6: Back View
Maintaining the b USB port Printer you need to shift the paper manually, or when you must This is the communication port for USB 2.0 Hi-Speed. clean inside the printer. Connect the USB cable here to connect the printer to the... - Page 7 Borderless print ink groove Receives ink that drains from the edges of the media Contents during borderless printing. e Media guideline Media is set so it is parallel to this guideline when roll media is loaded. (→ P.2-26) Index 1- 4...
- Page 8 Printer Part Names Carriage (Inside Upper Cover) f Printhead height adjustment lever Use to adjust the height of the printhead. You will need to Chapter 1 adjust the height of the printhead for high quality printing, Basic Procedures or depending on the media you use. (→ P.2-40)
- Page 9 Chapter 7 Operation of the l Bk/MBk Ink Tanks Function Menus These are the ink tanks. The ink tanks are not installed in the printer when you unpack it; you must install them when you set up the printer. Contents...
-
Page 10: Switching The Printer On And Off
Chapter 6 Menu Troubleshooting If the Message lamp is flashing, read the message Switch on the printer before you execute a print job from the on the printer operation display and take the computer. appropriate action. “Responding to Error Messages”... -
Page 11: Switching The Printer Off
Chapter 7 print job has completed. Operation of the If a print job is in progress, wait for the print job to Function Menus complete before switching off the printer. Contents... -
Page 12: Online And Offline
The printer awakens from the sleep cedures. Maintaining the mode as soon as it receives a print job or if you press Printer The printer also goes offline automatically any time the any button on the operation panel. The printer requires printer cannot start processing a print job, such as about 5 seconds to recover from the sleep mode. - Page 13 Operation of the Online lamp lights. Function Menus If no media is loaded, or if a message is displayed on the operation panel, the printer will not enter the online mode even when you press the Online button. Every time you remove the cause of a printer error, the Contents printer will automatically enter the online mode.
-
Page 14: Print Job Processing
Chapter 6 Displays each item for selection on the menu. Troubleshooting A right arrow at the right end of the line indicates that Online there are more items. A down arrow at the right end of the line indicates that... -
Page 15: Using The Operation Panel Buttons
“How to Perform Function Menu Settings” Press to switch the printer on. Printer (→ P.1-17) Printer on: Press for at least 1 second to display Shut Down.. and Message Display Chapter 5 switch the printer off. Using the Printer in a... - Page 16 Paper Source button Printer offline: Online, Offline, Menu Display Status: Chapter 3 Press and hold for 1 second to move the carriage to Press and hold for 1 second or more to switch Printing Methods for the center of the platen.
-
Page 17: Reading Operation Panel Lamps
Cut sheet is selected as the paper source. Basic Procedures states. e Online lamp Information Power Chapter 2 The printer is online or the printer is processing a print Data Using a Variety of job or sleeping. Message Media Cleaning Off: (3 sec.) -
Page 18: Function Menus
Function Menus Function Menus Chapter 1 Basic Procedures You can use the operation panel to access and use all the functions built into the printer. You can use the menus to perform system settings, set up options, clean the Chapter 2 printhead, perform test prints and other functions. - Page 19 Displayed only during printing. *8 Displayed only when Manual is selected as the IP Mode. *4 Displayed only when Band Joint is selected as the Feed Priority. *5 Displayed only when Print Length is selected as the Feed Priority. Sub Menus (Information Button)
- Page 20 Online OK buttons to operate the menus. Using a Variety of Media Making Settings Here we will show you how set the sleep timer as an Press the [ ] or [ ] button to select Chapter 3 example of how to use the operation panel buttons.
- Page 21 (3 sec.) Printer Stop/Eject (1 sec.) Online Offline Chapter 5 Menu Using the Printer in a The Online lamp lights and the printer is ready to Network Environ- print. ment Chapter 6 Troubleshooting Chapter 7 Operation of the Function Menus...
-
Page 22: Menu Settings Summary Tables
Function Menus Menu Settings Summary Tables Chapter 1 Each menu has the functions described below. A setting value marked with an asterisk (*) is the initial setting for that menu Basic Procedures item. MAIN MENU Chapter 2 Using a Variety of... - Page 23 Scan Wait Time Off, 1 sec., 3 sec., 5 sec., 7 sec., 9 The printhead can be set to pause after one Using the Printer in a pass (a scan) and wait for the ink to dry (this Network Environ- sec. ment allows for the absorption properties of different media).
- Page 24 Sets the amount of white space to ensure Chapter 1 the quality of printing at the trailing edge. Basic Procedures Important If set to 5 mm, the print quality at the Chapter 2 Using a Variety of leading edge, or the accuracy of feeding, Media may deteriorate, or the surface of the print may be scratched.
- Page 25 Using a Variety of straight. Media Important Chapter 3 If media is set at a skewed angle while Off, Printing Methods for this could cause jams or fouling the platen. Different Objectives Width Detection On*, Off, Media Size?
- Page 26 (+) side, or adjust Contents it to the minus (-) side to set a shorter feed for a media that shrinks easily. This menu is displayed only when Print Length is selected for Feed Priority.
- Page 27 1, 2*, 3 to 3 (the standard factory default setting is Color Adj. C 1, 2*, 3 2). Set to 1 for a light adjustment or set to 3 Chapter 3 1, 2*, 3 Color Adj. K for a dark adjustment.
- Page 28 Sets the network interface for NetWare Chapter 1 protocol. After setting each TCP/IP item, Basic Procedures select Store Setting to save the settings and enable them. This menu is displayed only when the network interface is installed. Chapter 2 (→ P.5-35)
- Page 29 Media maintenance cartridge capacity warning is displayed. (→ P.4-23) Move Printer No, Yes Sets the printer to the mode that enables you Chapter 3 to carry out the procedures required before Printing Methods for Different Objectives transporting the printer to another location.
- Page 30 Troubleshooting media remaining on each roll. When Off, the bar code is not printed when the roll is removed. If this is set to Off, the edge will be cut off regardless of the roll Chapter 7 Operation of the paper loading position.
- Page 31 (→ P.1-9) Length Unit meter*, feet/inch Sets the units used to display the length of Contents the roll sheet on the display. The units for the roll length display and the roll supply remains display are separate. Index 1- 28...
- Page 32 Prints the printer information and setting values. Contents Menu Map Prints a list of all the items on the MAIN MENU. Print Job Log Prints a list of information about printed jobs, including media size and type, amount of ink consumed, etc.
- Page 33 Displays the time that the print jobs ended. Print Time Displays the time elapsed for the print job. Chapter 7 Print Size Displays the size of the media used in the Operation of the print job. Function Menus Media Type Displays name of the media type used in the print job.
-
Page 34: Sub Menus
(2dot) (1dot) Chapter 5 Width: X X: Media Width The width of the media is shown on the top Using the Printer in a Y: Media Type line, and the type of media is shown on the Network Environ- ment bottom line. -
Page 35: Printer Driver
Printer Driver Printer Driver Chapter 1 Basic Procedures The computer uses the printer driver to send the print job to the printer. This section describes the functions of the printer driver. Chapter 2 Using a Variety of Media Printer Driver Features... - Page 36 Chapter 2 Printing Using a Variety of Preview Display You can reduce the size of the image and Media print multiple copies on one sheet. Use this feature to save paper when you need Displays a graphic representation of what Chapter 3 to only confirm the content.
- Page 37 You can easily Using a Variety of perform print jobs that meet the purpose Media of the job. Also, you can register the content of the settings under a name that you give it. (→ P.3-2, P.3-59) Chapter 3...
-
Page 38: Main Sheet
Printer reproduction of color photos captured with a scanner. Long Format (Banner): Chapter 5 Using the Printer in a Best for long print jobs with mixed text Network Environ- and illustrations in hanging vertical or ment horizontal banners. CAD: Chapter 6... - Page 39 Printer Driver High: Color: This print mode places priority on Uses all the inks to print the job in color. Chapter 1 quality. Monochrome (Photo): Basic Procedures Standard: Provides stable monochrome photo Prints the printout with normal quality. printing with minimal tone change and...
-
Page 40: Page Setup Sheet
Fit Roll reduction proportionally to match the Media Paper Width size selected for the Roll Paper Width. Allows you to scale the size of the image Scaling Chapter 3 manually in the range 5% to 600%. Printing Methods for Allows you to specify the actual size of... -
Page 41: Layout Sheet
Printer Driver When the image to be printed is smaller Layout Sheet No Spaces at than the media, you can set the printer it Top or Bottom Chapter 1 does not feed and there is no margin at The Print Layout sheet provides the following settings. - Page 42 The Status Print item is on the Chapter 7 Information tab of the Status Monitor. Operation of the Use this setting to set the type of black Function Menus Update Ink ink. Click the Acquire Status button to Information set the printer to operate with the black ink tank mounted in the printer.
-
Page 43: Printing From Windows
In the software application, select Print from Chapter 2 Printing From Windows Using a Variety of the File menu. Media To print a job from a Windows software application, use the Print command in the File menu. Chapter 3 Printing Methods for Different Objectives Important... - Page 44 “Not Enough Ink” alert on the operation panel. In this case, replace the ink tank where the ink supply is low and Contents print again. However, if you reinstall and use an ink tank that is nearly empty this could cause print quality to deteriorate.
-
Page 45: Printing From A Macintosh
Chapter 6 Troubleshooting printer with the Chooser. This printer will not be dis- played in the list if it is not switched on, or if the printer cable is disconnected. Start the print job after you con- Chapter 7 firm that the printer is in working order. - Page 46 Basic Procedures Active is selected for AppleTalk. not be displayed in the list if it is not switched on, or if the The network interface card used with this printer is not printer cable is disconnected. Start the print job after you set before shipping for use with AppleTalk.
- Page 47 This printer can be connected and operated with the name of the printer from the list, then Zeroconf of Mac OS X. If you are using Mac OS X Ver. Chapter 4 click the Add button.
-
Page 48: Operating The Printer
The Print window appears. Maintaining the of the ink tanks. To confirm the ink supply level of the Printer ink tanks, on the Main panel click the Printer Check the Printer box and make sure that information button to display the levels. -
Page 49: Canceling A Print Job
Chapter 6 Troubleshooting Note You can also cancel a print job in progress, or a job waiting to be printed, by selecting and canceling each If the print in progress display on the printer Chapter 7 job on the on the Job sheet. -
Page 50: Canceling A Print Job From Macintosh
Canceling a Print Job from Macintosh Printing Paused button. Chapter 1 The procedure to cancel a print job is different, depending Basic Procedures on whether the job is printing in the background or the foreground. Chapter 2 Using a Variety of Note Media On Mac OS X all jobs print in the background. - Page 51 Chapter 7 All of the print data currently processing in the printer Operation of the is lost after the printer is switched off. Any print job Function Menus required must be restarted. Contents The printer re-enters print mode and is ready for operation.
- Page 52 Function Menus The print job in progress is canceled. Important Contents A print job that has already been sent to the printer cannot be canceled. If you want to cancel other remaining jobs, cancel them with the GARO Printmonitor. Index...
- Page 53 Select the name of the printer in the Printer Setup Utility (Print Center), select the name of the printer, If you are printing in the foreground with Mac OS 8.6/9.x, Chapter 1 click the Set icon, then open GARO Printmonitor for a...
- Page 54 Chapter 3 Printing Methods for Offline Menu Different Objectives All of the print data currently processing in the printer is lost after the printer is switched off. Any print job Chapter 4 required must be restarted. Maintaining the Printer Chapter 5...
-
Page 55: Network Interface Board
The following options are provided for this printer. This set contains the roll holder and stoppers. To make Stand proper use of rolls of different media types and widths, it Chapter 2 (Provided with the printer in the U.S.A.) Using a Variety of... -
Page 56: Print Media
Chapter 7 Operation of the Synthetic Paper Cut Sheets Function Menus Adhesive Synthetic Paper Signs: Size Photo: 203.2 x 254.0 mm to ARCH D 609.6 x 914.4 Backlit Film Flame-Registrant cloth Contents CAD Plain Paper CAD: CAD Tracing Paper CAD Translucent Matte Film... -
Page 57: Maintenance Cartridge
(→ P.4-16) Replaceable Printhead Chapter 5 Yellow Ink BCI-1451Y Using the Printer in a Magenta Ink BCI-1431M The product number of the printhead that can be used on Network Environ- Photo Magenta Ink BCI-1431PM the printer is: ment Cyan Ink BCI-1431C... -
Page 58: Cutter Blade
Consumables Cutter Blade The product number of the cutter blade that can be used Chapter 1 Basic Procedures on the printer is: Cutter Blade CT-02 Chapter 2 Using a Variety of Media Chapter 3 Note Printing Methods for For more details about how to replace the cutter blade, Different Objectives Chapter 4 “Replacing the Cutter Blade”... -
Page 59: Specifications
Interface Printing Methods for USB Interface Different Objectives (If the computer port, operating system, or USB cable does not support USB 2.0 High Speed (USB 2.0 Standard) Mode, you will not be able to use High Speed Mode.) Chapter 4... - Page 60 , Fine Art Photo, Fine Art Heavyweight Photo, Fine Art Textured, Canvas SemiGlos, Japanese ment Paper Washi, Colored Coated Paper, CAD Tracing Paper, CAD Translucent Matte Film, Special 1 to 5 Chapter 6 Normal Size: Printable Area Roll Paper: Top 5 mm, Bottom 5 mm, Left/Right: 5 mm...
- Page 61 *5. Cannot use the Borderless Size or Oversize items to print on some media types and sizes. Operation of the *6. With Oversize selected, load roll media larger than the selected Media Size: roll media 10 mm wider and 10 mm taller, Function Menus a cut sheet 10 mm wider and 20 mm taller.
-
Page 62: Basic Environmental Performance
Different Objectives Power Source Efficiency Printer Weight Approximately 40.0kg Dimensions (w x d x h) 1,200mm x 569mm x 484mm (47.3 in x 22.4 in x 19.1 in) Chapter 4 Maintaining the Recycling Exterior covers are technically certified as fully recyclable. - Page 63 Chapter 2 Using a Variety of Media Chapter 1 Basic Procedures Click on the checkbox to print the section contents. Media You Can Use ...................2-2 The Suitable Black Ink for Media ................2-2 Chapter 2 Using a Variety of Paper Type ......................2-4 Media Media Size ......................
-
Page 64: Media You Can Use
A variety of media types and sizes can be used with this printer. The following media can be used with this printer. Caution If you print with the black ink that is not suited to the Chapter 2 Using a Variety of... - Page 65 Maintaining the Recycled Coated Paper Printer Generic Coated Paper Heavyweight Coated Paper Extra Heavyweight Coated Paper Chapter 5 Using the Printer in a Colored Coated Paper Network Environ- Premium Matte Paper ment Fine Art Photo Fine Art Heavyweight Photo Chapter 6...
-
Page 66: Paper Type
Media You Can Use Describes the Media Type Paper Type Media Type setting in the printer driver. Chapter 1 This section describes the types of media that you can use Roll Paper Width commercially available Basic Procedures Width media with this printer. To obtain the most recent information about... -
Page 67: Plain Paper
Chapter 2 Characteristics presentation, or monochrome prints for Characteristics Superior yet economical ink-jet paper. Using a Variety of ceremonies, rallies, etc. It is low cost, so Media you can use it for test prints. Chapter 3 Printing Methods for Print... - Page 68 Media You Can Use Plain Paper (High Quality) Recycled Coated Paper Chapter 1 Basic Procedures High white content makes this plain paper Thin coated paper Ideal for line drawings, Chapter 2 Characteristics Characteristics comparatively thick. maps, presentation materials. Using a Variety of...
-
Page 69: Coated Paper
Media You Can Use Coated Paper Heavyweight Coated Paper Chapter 1 Basic Procedures Coated paper with a thick paper base. Use to print full-color images mainly consist of Thin coated paper Ideal for line drawings, Chapter 2 Characteristics Characteristics graphic images. Ideal for store POP, maps, presentation materials. - Page 70 This paper offers Chapter 2 Characteristics Characteristics paper, making it ideal for handling as art a soft texture free of reflective glare for a Using a Variety of material and a variety of textures. tranquil feel. Suitable for wide-ranging Media applications from Photo/Fine Art to Materials for Display such as High-Quality Poster/POP.
-
Page 71: Glossy Photo Paper
Chapter 1 Basic Procedures A glossy photo paper, like that used to Subdues light reflected from its white develop silver-halide photos. Ideal when surface to create a softer effect in its finish. you want high-quality finish for Chapter 2 Characteristics Characteristics The surface reflects little bright light, photographs. - Page 72 Basic Procedures Subdues light reflected from its white A glossy photo paper, like that used to surface to create a softer effect in its finish. develop silver-halide photos. Processed The surface reflects little bright light, with resin coat processing to prevent...
- Page 73 Printhead Printhead Optimum Optimum Height Height Contents After cutting trimming paper, pre-cut paper, After cutting trimming paper, pre-cut paper, Comments or other such media, remove the sheet Comments or other such media, remove the sheet manually. manually. Index 2- 11...
- Page 74 Backlit Film Flame-Resistant Cloth Chapter 1 Basic Procedures Printing is performed on the glossy, semi- transparent surface of this film, then a This is indoor cloth that has superior projector light mounted behind the film durability and is flame resistant. Suitable...
- Page 75 Chapter 2 Characteristics color tones close to those of the final print. Characteristics available in a wide variety of colors. Three Using a Variety of Ideal for printers who need color output for...
- Page 76 Function Menus Printhead Printhead Optimum Optimum Height Height The standard cutter cannot be used to The standard cutter cannot be used to Contents perform automatic cutting. After printing, perform automatic cutting. After printing, Comments cut the media manually. (→ P.2-34) Comments cut the media manually.
- Page 77 For landscapes, watercolors, etc. this media creates a bold, unique feeling. Chapter 2 Characteristics media reproduces exceedingly high, Characteristics Ideal for output of artworks such as digital Using a Variety of composed quality. paintings, copies of oil paintings, etc. Media Chapter 3...
- Page 78 Basic Procedures Ink jet printing and texture of traditional Japanese washi paper combine well. Ideal for price POPs at drugstores and This media is ideal for any type of artwork Chapter 2 Characteristics Characteristics other retail outlets. Covered on both sides...
- Page 79 Media You Can Use CAD Tracing Paper CAD Translucent Matte Film Chapter 1 Basic Procedures Tracing paper that can be used for color A translucent film for CAD designs (line Chapter 2 Characteristics printing, and ideal for CAD plans and Characteristics drawings).
-
Page 80: Media Size
The table below lists the media sizes and feeding methods that can be used with this printer. Basic Procedures Roll Media This table lists roll media with maximum diameters of 150 mm (5.1 in.), media core inside diameter of 2 or 3 inches. Chapter 2 Using a Variety of... - Page 81 Media You Can Use Cut Sheet Size (Width) Dimensions Cut sheets up to 606.9 mm wide (listed below) can be Chapter 1 ARCH B 304.8 x 457.2 mm (12 x 18 in.) Basic Procedures used. ARCH A 228.6 x 304.8 mm (9 x 12 in.)
- Page 82 Same size as the Media Size or wide roll paper. Normal Size: Chapter 4 Achieves a printout that is the same size as the media. Maintaining the Printer This can be used with all media sizes and media types. Media Size...
- Page 83 Chapter 2 Using a Variety of scratching the surface of the media, raise the Printing possible inside the area 5 mm in from the top, left and Media printhead to a higher position. (→ P.2-40) right area margins, and 23 mm in from the bottom margin.
-
Page 84: Borderless Printing
Paper Size is limited to roll media, and there are limitations on the width. roll width and type of media that can be used. Also, the Heavy Coated Paper, Extra Heavyweight Chapter 2 range of images that can be printed is different for some... - Page 85 Media You Can Use Oversize Data created the same size as Media Size. With Oversize you can print over the entire surface of the Chapter 1 Basic Procedures media. This is possible with all media types. When you Scale to fit...
- Page 86 The end edge of the roll media can disrupt a print job Chapter 7 as it comes off the roll. Try to avoid printing in the area Operation of the near the end edge of a roll. Function Menus...
-
Page 87: Handling Paper And Other Print Media
Print Results Chapter 3 Printing Methods for Different Objectives Important You cannot use ARCH D and other sizes wider than Chapter 4 599.6 mm to print for Oversize. Maintaining the Printer Handling Paper and Other Print Media... -
Page 88: Selecting The Paper Source
Printing Methods for lamp. (→ P.2-26) Different Objectives Load the roll media in the roll holder slot. (→ P.2-27) Pressing the Paper Source button alternates the selection between Roll Media and Cut Sheet. Chapter 4 Load the roll media on the platen. (→ P.2-30) -
Page 89: Loading The Roll Media
Follow this procedure to set a roll in the roll holder. First, Chapter 1 rotate the roll holder toward the rear to take Basic Procedures if there is a cut sheet or an ejected printed sheet on the platen, remove it. up the remaining paper, then remove the roll. Chapter 2... - Page 90 Important Important If the leading edge of the roll media is not straight, or if If the edge of the roll paper is not straight, take up the Chapter 6 it is marked by dirt or tape, this could cause poor Troubleshooting roll paper until the edge is straight then set it.
- Page 91 Important Do not touch any areas other than those indicated. As soon as you insert the edge as far as the top of Your hands could get dirty or this could damage the the platen, you will hear the printer start the vacuum printer.
- Page 92 (f), then pull the release lever to the HW Coated front to close it. Chapter 2 The (=) mark to the left of a setting indicates that roll Using a Variety of media type is currently selected, then the Media preparation for the select media begins.
- Page 93 Printing with Rolls In order to align the leading edge correctly when the Media Name Media Type Setting roll media is replaced with a new one, the media is fed Proofing Paper Proofing Paper 2 Chapter 1 and then cut the correct amount for the type of media.
-
Page 94: Selecting The Media Type
In order to achieve the best printing results with this Basic Procedures must use the printer operation panel to select the type of printer, the amount of feed is fine adjusted for each media loaded. If the type of print media is not suitable, type of media. -
Page 95: Removing A Roll
Removing a Roll operation is set to Enable: Chapter 1 Follow the procedure below to remove a loaded roll or when Basic Procedures 1. If the paper remains function is switched on for the media cannot be cut automatically. Or, if you are... - Page 96 Important Printing Methods for see Feed Limit.. on the display. The roll media If the ink drying time has been set, you will not be able Different Objectives reverse feeds 300 mm and stops automatically. to perform cutting with the Stop/Eject button until the prescribed drying time has elapsed.
-
Page 97: Loading Cut Sheets
To print on the cut sheet, follow the procedure below. select cut sheet as the media source. Using a Variety of Media If there is a cut sheet in the printer, remove it. Press and hold the Paper Source button for (→ P.2-33, P.2-39) Chapter 3... - Page 98 Follow this procedure to set a cut sheet on the platen. Chapter 1 Basic Procedures First, if there is a cut sheet on the platen, remove it. Important Chapter 2 When loading cut sheets that are longer than 914 mm Using a Variety of (36”), the trailing edge of the sheet will touch the floor...
- Page 99 If you are concerned about the noise, shift the position Chapter 2 of the paper about 1mm to the left or right (but not Using a Variety of Media more than 1 mm). Pull the release lever forward to close, raise...
- Page 100 If the cut sheet is skewed, this will cause a skew error. Plain Paper Plain Paper Using the Printer in a If a skew error occurs, start at Step 1 and set the cut Network Environ- CAD Plain Paper CAD Plain Paper ment sheet again.
-
Page 101: Removing A Cut Sheet
Important Printing Methods for The output assists guides should always be extended Different Objectives for printing. If they are not extended, this could lead to poor print quality. Chapter 4 Pull the release lever forward to close it. Maintaining the... -
Page 102: Adjusting Printhead Height
Adjusting the Height of the Printhead Adjusting the Height of the Printhead Chapter 1 Basic Procedures It is possible to achieve the higher print quality by adjusting Adjusting Printhead Height the height of the printhead. Follow the procedure below to operate. - Page 103 Chapter 2 SemiGlos set the lever to the high position (c), and Using a Variety of for all other media set the lever to the middle (b) Media (standard). If the printhead is scratching the surface of media that ripples or wrinkles easily, rather than...
-
Page 104: Aligning The Printhead
Printing Methods for After the print job is finished, especially before starting the Different Objectives next print with another type of media, you must do the procedure to reset the printhead height adjustment lever to Chapter 4 the optimum position for the next media. - Page 105 Enlarging and Reducing the Original ..............3-6 Media Printing Photos and Illustrations without Borders (Borderless Printing) ....3-13 Rotating the Page 90 Degrees for Printing (Conserve Paper) ......3-22 Printing Several Pages on One Sheet (Page Layout) ......... 3-24 Chapter 3 Printing Methods for Printing Posters (Page Layout) ................
-
Page 106: Before You Begin
In this chapter we will introduce of Printing) these functions. Chapter 2 To achieve the best printing, you must adjust the color and Using a Variety of other settings for the objective of the document. This printer Media... - Page 107 Chapter 3 Printing Methods for *1. Photo Black Ink (BK) is the black ink tank type mounted in the printer. Different Objectives *2. Matte Black Ink (MBK) is the black ink tank type mounted in the printer.
- Page 108 The Preview reflects changes in the settings described below. Note Chapter 1 The item in the list marked by the red ball contains the Basic Procedures Setting Preview Description settings that the printer is already set up to execute. You can use the Add and Edit buttons to add and edit The following settings are shown in the Preview the printing types.
- Page 109 Print Preview. If you set the Print Preview to display in the printer driver before the print job, the Pre- view will display at the start of every print job for you to Chapter 2 check and prevent failed print jobs.
- Page 110 Preview. After select- Chapter 1 ing the document name with PageComposer and con- The original can be printed at a larger or smaller size. Basic Procedures firming its appearance, start the print job from the File There are three methods for enlargement and reduction.
- Page 111 Size of the Media Chapter 1 software application. Basic Procedures By setting the size of the media actually loaded for print- ing, you can automatically enlarge or reduce the print automatically to match the size of the loaded media. Chapter 2...
- Page 112 Check the Preview and confirm that the media size selection has changed, then click Note Chapter 1 the OK button. If you do not see the checkbox for Enlarged/Reduced Basic Procedures Printing, then cancel the Borderless Printing selection. The Enlarged/Reduced Printing checkbox will appear.
- Page 113 Enlarge/Reduce to Fit Roll Paper Width For Page Size on the Page Setup sheet select the size of the original created in the You can enlarge or reduce the entire size of the original Chapter 1 software application. so it fits the width of the roll.
- Page 114 Printer Note Before you start the print job, confirm that the width of the roll selected in the printer driver is the same as the Chapter 5 Using the Printer in a width of the roll loaded in the printer. If the printer...
- Page 115 Printing Chapter 1 software application. Basic Procedures You can enter the rate of magnification directly if you need to scale the enlargement or reduction for a desired effect. Chapter 2 Using a Variety of...
- Page 116 The rate can be changed in increments of 1%. The size can be scaled in the range limited by the size of the Contents Scaling entry column displayed on the right.
- Page 117 Refer to the table below when you ing on this printer. create the original image and set the page for a size Here is a list of the types of roll media and their widths that can be used for borderless printing. Chapter 4 that can be used for borderless printing.
- Page 118 Make sure the image created for borderless printing covers the entire original page. Basic Procedures If you are using Microsoft Word or any other software application that allows margin settings, set all the margins to “0”. For more details about how to perform these settings, please refer to the software application instructions.
- Page 119 Specify a setting in the Roll Paper Width list, then click the OK button so you can continue with the borderless print (in this case the width of the original will be enlarged or reduced to fit the width of the roll media). The print cannot be performed with the same width as the original.
- Page 120 Paper)”. (→ P.3-38) Network Environ- the page to a margin of 3 mm. The result is the printer ment fills the entire page up to the edges with borderless printing. The top, bottom, left and right margins of the...
- Page 121 Media This features enlarges or reduces the size of the origi- Note nal so it fits the width of the roll. You can print a page For more details about how to open the printer driver Chapter 3 dialog box, please refer to “Printing”...
- Page 122 Print Preview before printing. Printer Chapter 5 Display the Page Setup sheet and perform the settings for borderless printing. Using the Printer in a Network Environ- 1. For Page Size select the size of the original created in ment the software application.
- Page 123 Width. Media that each margin, that is, the top, bottom, left, and right margin, is 3 mm each. The result is the printer fills the Chapter 3 entire page up to the edges with borderless printing. Printing Methods for...
- Page 124 Basic Procedures This takes an image that would otherwise overlap the margins and sizes it to 3 mm margins and then prints it Note with borderless printing on a media size that is the Chapter 2...
- Page 125 Print Job Starts, you can confirm the appearance of Maintaining the the print image in the Print Preview before printing. Printer Chapter 5 Display the Page Setup sheet and perform the settings for borderless printing. Using the Printer in a Network Environ- ment Chapter 6 Troubleshooting 1.
- Page 126 Begin”. image, then the page is rotated automatically for the print (→ P.3-5) Chapter 3 job. The image will not be rotated if it would not fit after Printing Methods for Different Objectives rotation. Click the Print button in the Print dialog box.
- Page 127 Select Rotate Page 90 degrees (Conserve Paper). Print dialog box of the application. Chapter 1 Basic Procedures Note For more details about how to open the printer driver Chapter 2 dialog box, please refer to “Printing” Chapter 1 Using a Variety of “Basic...
-
Page 128: Printing Several Pages On One Sheet
Chapter 1 (Page Layout) Basic Procedures You can print from 2 to 16 pages with reduced sizes on one sheet. For example, if you have a document with a large Chapter 2 number of pages you can print two pages per sheet and the Using a Variety of number of pages will be one-half. - Page 129 Page Layout Printing dialog box. Troubleshooting Note Chapter 7 If you select a border line to print, the image is sized Operation of the down by 5% to allow for the border line. Function Menus As soon as you select a border line, you will see this reflected in the Preview.
- Page 130 Chapter 1 After the image is enlarged and divided into several Basic Procedures sections, you can print the print the sections and paste Note them together to assemble one large poster. To achieve the best print results, you should confirm...
- Page 131 Select Page Layout. Using the Printer in a Network Environ- ment If you do not want to print any panel (a section of the divided image), click the Set button in the Chapter 6 lower right corner of the Page Layout section Troubleshooting to open the Pages to Print dialog box.
-
Page 132: Using Watermarks
Click and select either the panel or the Using Watermarks appropriate checkbox to deselect the panel Chapter 1 for printing. You can print watermarks on printouts to mark them for Basic Procedures special handling. Several standard watermarks (CONFIDENTIAL, DO NOT COPY, etc.) have been prepared. - Page 133 Select the Layout sheet. From the Watermark list, select the watermark that you want to print. Chapter 1 Basic Procedures The watermark that you selected will appear in the Preview on the left. Chapter 2 Using a Variety of Media...
- Page 134 Here we will describe as an example how to take a 3.94 in. x 19.67 in. original and enlarge to fit a 24” roll (approx- Chapter 3 Click the Print button in the Print dialog box.
- Page 135 Print dialog box. Confirm that the printer name Canon Chapter 2 Using a Variety of W6400PG is displayed. Media The sample of the Print dialog box below is from Microsoft Word. Chapter 3 Printing Methods for Different Objectives Chapter 4...
-
Page 136: Printing From Windows
Printer Note After you register a size in the Media Size Options dialog box, then the name and dimensions that you set for new size Chapter 5 will appear in the Media Size List. For more details about the Media Size Options dialog box, please refer to “About... - Page 137 <If you are using Microsoft Word...> A custom size sets a temporary user-defined page size between the software application and the printer driver. a Select the Paper Size sheet, then for the size select Chapter 1 For this reason, when the software application is...
- Page 138 Printing from Windows <If you are using Microsoft Excel...> c Click the OK button to close the Page Setup dialog box. a Select the Page sheet, then for the Paper Size Chapter 1 Basic Procedures select the size you defined and registered in the Note Medial Size Options dialog box.
- Page 139 Scale to fit Paper in the Print dialog box the Microsoft Word. Select Insert > Picture > WordArt, Chapter 2 Using a Variety of driver will size the page to fit the media loaded in the select the appropriate style, then enter the text. Media printer.
- Page 140 Different Objectives Chapter 4 Maintaining the Printer Chapter 5 Select the Page Setup sheet and perform the settings for a long print. Using the Printer in a Network Environ- ment 1. For Page Size select the media name registered in...
- Page 141 If the print job does not execute properly on you Chapter 2 operating system (Windows Server 2003, Windows width of the roll loaded in the printer, and then click Using a Variety of XP, Windows 2000, Windows Me, Windows 98), click...
- Page 142 Chapter 1 gins (Conserve Paper) Basic Procedures Note The white space in the top and bottom margins can be For more details about how to open the printer driver eliminated for printing to save paper. The printer does not Chapter 2 dialog box, please refer to “Printing”...
- Page 143 Custom Settings dialog Media box according to the requirements of your requirements. For example, if you need to set up printing text mixed Chapter 3 with photos or graphics, or some other such job, you can...
- Page 144 Printing Methods for Different Objectives Chapter 4 Maintaining the Printer Chapter 5 A Settings button appears in the lower right corner Using the Printer in a Network Environ- of the Print Quality group. ment Click the Settings button in the Print...
- Page 145 Printing from Windows From the Print Quality list, select the quality If one of the types of media below is selected, Draft cannot be selected under Print Quality. settings. Chapter 1 Premium Matte Paper, Glossy Photo, SemiGlos Photo Basic Procedures...
-
Page 146: Fine Adjusting Color For Printing
Basically the color settings of the software application Premium Matte Paper, Backlit Film, Fine Art Photo, have priority, but if the results of a print job are not what Chapter 2 you want you can also adjust color in the printer driver. -
Page 147: Line
Important Chapter 6 Monochrome (Photo) can be selected for Color Mode Troubleshooting only if one of the following types of paper is selected: Glossy Photo Paper/Semi-Glossy Photo Paper/ Heavyweight Glossy Photo Paper/Heavyweight Chapter 7 SemiGlos Photo Paper/Fine Art Photo/Fine Art... -
Page 148: Printing
Printing from Windows Select Manual Color Settings then click the The Color Settings dialog box opens. Color Settings button. Chapter 1 Basic Procedures Chapter 2 Using a Variety of Media Chapter 3 Printing Methods for Different Objectives Chapter 4 Maintaining the... - Page 149 Printing from Windows Confirm that the Color Adjustment sheet is Drag the slide bar to the left or right for the displayed, then click the Object Adjustment item that you want to adjust. You can also Chapter 1 button. enter the value direction or use the arrows of...
-
Page 150: Color Matching
Note Chapter 1 Color Adjustment presents the following items for Basic Procedures Color Matching selection. When you print an image captured with a scanner or a Color Adjustment Content digital camera, sometimes the appearance of the printout Chapter 2 Cyan does not match what you see on the screen. -
Page 151: Line
Network Environ- Important ment Monochrome (Photo) can be selected for Color Mode Chapter 6 only if one of the following types of paper is selected: Troubleshooting Glossy Photo Paper/Semi-Glossy Photo Paper/ Heavyweight Glossy Photo Paper/Heavyweight SemiGlos Photo Paper/Fine Art Photo/Fine Art... - Page 152 Chapter 3 Printing Methods for Different Objectives Chapter 4 Maintaining the Printer Chapter 5 In the Color Settings dialog box, select the Using the Printer in a Note Matching sheet. Network Environ- ment Manual Color Settings are enabled when Color,...
- Page 153 Here is a list of the available Matching Modes. The warning message below is displayed for Driver Chapter 6 ICM Mode, and Host ICM Mode. If you do not want to Troubleshooting Matching Mode Content disable the color adjustments, click the No button.
- Page 154 Note Troubleshooting If you want to perform different settings for Graphics Makes the best selections for the and Text, then you must cancel the selection of Use Image, Graphics, and Text items. Automatic the Same Profile for All Objects. *This item is available only when Chapter 7 Driver Matching Mode is selected.
- Page 155 Creating Custom Sizes Basic Procedures Correction) performed. On the Page Setup sheet of the printer driver click the This is the best mode for graphics. Size Options... button to open the Media Size Options Saturation Achieves the best results with priority Chapter 2 dialog box.
- Page 156 Printing from Windows Select the Page Setup sheet. Click the Size Options... button to open the Media Size Options dialog box. Chapter 1 Basic Procedures Chapter 2 Using a Variety of Media Chapter 3 Printing Methods for Different Objectives Chapter 4...
- Page 157 Chapter 4 Maintaining the Printer After you click the Add button, the user-defined media name registered in the Media Size List of the Media Size Options dialog box and the media size are displayed. Chapter 5 Using the Printer in a...
- Page 158 Printing from Windows Click the OK button to close the dialog box. Note Chapter 1 As soon as you select the name of a media size from Note Basic Procedures the Media Size List, the Width and Height settings of You can define up to 50 custom sizes for media.
- Page 159 Using a Variety of Size Options dialog box select the Display Series that Media you want to use. Also, if you want to cancel a size series selected for display, just click and cancel the Display Series selection. Chapter 3...
-
Page 160: When The Printout Quality Is Not Clean
Media Detailed Settings dialog box in the printer Basic Software for Printing Media driver. If the printouts are not clear, you may be able to imagePROGRAF Printer Driver 2005 correct the problem by adjusting the settings in this dia- Chapter 3 log box. -
Page 161: Using The Printer On A Network
PosterArtist Using the Printer in a printer and to set up and delete print jobs. This utility is Network Environ- The software provides a wizard that helps you create built into the network interface of this printer. -
Page 162: Select The Media Type
(paper, film, ment created in PhotoShop. This software is intended for etc.) that can be used with the printer as it becomes professionals and high-end users who want to obtain Chapter 6 available. The functions of this software are provided Troubleshooting the best finished color hues. -
Page 163: Proofing
POP ads, digital camera prints, CAD designs, and Maintaining the other prints. Just select from the list the type of document you need and perform the basic procedure for the print job. Printer The following applications are provided for the types of prints shown below. - Page 164 No Correction Chapter 5 *1. Photo Black Ink (BK) is the black ink tank type mounted in the printer. Using the Printer in a *2. Matte Black Ink (MBK) is the black ink tank type mounted in the printer.
- Page 165 Printing from Macintosh トップ To perform the settings for a print, first open the Main panel of the printer driver and then from Print Preferences select the type of printing that you want to perform. Chapter 1 Basic Procedures Chapter 2...
-
Page 166: Rotate
The preview illustrates the content of the current printer driver settings. If you change the page size and orientation, feed Chapter 1 method, etc., you can confirm their immediate effect easily by viewing the effect of the new settings in the Preview image. Basic Procedures You can confirm the following items in the Preview. - Page 167 Printing from Macintosh トップ When you select the Size tab, the details about the media size are displayed. Chapter 1 Basic Procedures Chapter 2 Using a Variety of Media Chapter 3 Printing Methods for Different Objectives Chapter 4 Maintaining the...
- Page 168 トップ Confirming the Print Image (Print Preview) There is one more function that can be displayed for the print image of the document in the Preview. This other image is Chapter 1 called the Print Preview. Open the Preview before you print, so you can avoid failed print jobs beforehand.
- Page 169 Enlarging or Reducing Printing to Fit the Size of the Media Different Objectives By setting the size of the media actually loaded for printing, you can automatically enlarge or reduce the print automati- cally to match the size of the loaded media.
- Page 170 Printer Chapter 5 Using the Printer in a Network Environ- ment Chapter 6 Confirm that the size of the original created in the software application is selected under Page Size. Troubleshooting Chapter 7 Operation of the Function Menus Contents Index...
- Page 171 Chapter 2 Using a Variety of Media Chapter 3 Printing Methods for Different Objectives Chapter 4 Maintaining the Printer Chapter 5 Using the Printer in a Network Environ- ment Chapter 6 Troubleshooting Chapter 7 Operation of the Function Menus Contents Index...
- Page 172 Operation of the Function Menus Important If the landscape or portrait orientation of the original page size and the print media are different, part of the image may not print on the media. Contents Confirm the content of the Preview, then click the Print button.
- Page 173 Printing from Macintosh トップ Enlarge/Reduce to Fit Roll Paper Width You can enlarge or reduce the entire size of the original so it fits the width of the roll. Chapter 1 Basic Procedures Chapter 2 Using a Variety of Media...
- Page 174 Printer Chapter 5 Using the Printer in a Network Environ- ment Chapter 6 Confirm that the size of the original created in the software application is selected under Page Size. Troubleshooting Chapter 7 Operation of the Function Menus Contents Index...
- Page 175 Under Enlarged/Reduced Printing select Fit Roll Paper Width (Fit Roll Width Size for OS 8/9). Troubleshooting Important Chapter 7 If Rotate Page 90 degrees (Conserve Paper) is selected on the Finishing panel, this function cannot be used. Operation of the Function Menus Contents...
- Page 176 Printing from Macintosh トップ Note Chapter 1 Under Enlarged/Reduced Printing select Fit Roll Paper Width (Fit Roll Width Size for OS 8/9) to change the width Basic Procedures setting for Media Size. Check the value displayed for Roll Paper Width. Chapter 2...
- Page 177 Printing from Macintosh トップ Selecting the Magnification Rate for Printing You can enter the rate of magnification directly if you need to scale the enlargement or reduction for a desired effect. Chapter 1 Basic Procedures Chapter 2 Using a Variety of...
- Page 178 Printer Chapter 5 Using the Printer in a Network Environ- ment Chapter 6 Confirm that the size of the original created in the software application is selected under Page Size. Troubleshooting Chapter 7 Operation of the Function Menus Contents Index...
- Page 179 Chapter 2 Using a Variety of Media Chapter 3 Printing Methods for Different Objectives Chapter 4 Maintaining the Printer Chapter 5 Using the Printer in a Network Environ- ment Chapter 6 Troubleshooting Chapter 7 Operation of the Function Menus Contents Index...
- Page 180 Operation of the Function Menus You can perform a setting that is larger than the size of the media loaded in the printer, but some portions will be cut off and not printed. To center an image in the upper left for printing, on the Finishing panel select Print Centered.
- Page 181 Media Source on the Finishing panel. Chapter 4 Here is a list of the types of roll media and their widths Maintaining the When Scaling is selected for Enlarged/Reduced that can be used for borderless printing.
- Page 182 Media Important The following page size settings can be used for borderless printing. Refer to the table below when you create the original image and set the page for a size that can be used for borderless printing. Chapter 3 Printing Methods for If the media size was pre-selected in the software application, the selected size must support Borderless Printing.
- Page 183 Printer Chapter 5 Using the Printer in a Network Environ- ment Chapter 6 Troubleshooting Open the Finishing panel (Page Setup for OS 8/9) and then select Enlarged/Reduced Printing and Borderless Printing. Chapter 7 Operation of the Function Menus Contents Index...
- Page 184 When Borderless Printing is selected under the Media Size in the software application, Step 4 Step 6 are not Basic Procedures required. If you select Enlarged/Reduced Printing with Borderless Printing, Fit Roll Paper Width is selected for Enlarged/ Reduced Printing. Chapter 2 Using a Variety of Media Chapter 3...
- Page 185 Using the Printer in a Network Environ- ment Chapter 6 Select the Media Size setting that you want. Troubleshooting Confirm the content of the preview, then click the Print button. Chapter 7 The print job starts. Operation of the Function Menus Contents...
- Page 186 Chapter 4 To perform a borderless print of an image with a top and bottom margin, on the Finishing panel you can select No Maintaining the Spaces at Top or Bottom (this is an easy way to perform a borderless print by setting these margins to zero). For...
- Page 187 Printing Methods for Different Objectives Create the original in the software application so it matches the size of the media used for printing. From the File menu of the software application select Print to display the Print dialog box. Chapter 4...
- Page 188 Chapter 5 Using the Printer in a Network Environ- ment Chapter 6 Troubleshooting Note If you select Enlarged/Reduced Printing with Borderless Printing, Fit Roll Paper Width is selected for Enlarged/ Chapter 7 Reduced Printing. Operation of the Function Menus Contents Index...
- Page 189 Note After the Fit Roll Paper Width (Fit Roll Width Size for OS 8/9) feature automatically sizes to original to fit the width of the roll, the printer driver automatically enlarges the image so that each margin, that is, the top, bottom, left, and right Contents margin, is 3 mm each.
-
Page 190: Rotating The Page 90 Degrees For Printing (Conserve Paper)
Rotating the Page 90 Degrees for Printing (Conserve Paper) Chapter 1 In cases where the length of the print job data is shorter than the width of the media, the printer driver will rotate the image Basic Procedures 90 degrees and the length of the image across the width of the media. By rotating the image you can maximize the use of the media and reduce waste. - Page 191 Printing from Macintosh トップ From the File menu of the software application select Print to display the Print dialog box. Chapter 1 Select the Finishing panel. Basic Procedures Chapter 2 Using a Variety of Media Chapter 3 Printing Methods for...
- Page 192 Operation of the Function Menus To achieve the best print results, you should confirm the appearance of the original in the Print Preview before printing. For more details about how to display the Preview, please refer to “Confirming the Print Image (Print Preview)”...
- Page 193 Printing Methods for Different Objectives From the File menu of the software application select Print to display the Print dialog box. Chapter 4 Maintaining the Select the Layout panel (Page Setup for OS 8/9).
- Page 194 Printing from Macintosh From the Pages per Sheet (Page Layout Set the Layout Direction to arrange the for OS 8/9) list, select the Page Layout that pages on the media. Chapter 1 you want to use for printing. Basic Procedures...
- Page 195 Basic Procedures The print job starts. Note Chapter 2 To achieve the best print results, you should confirm Using a Variety of the appearance of the original in the Print Preview Media before printing. For more details about how to display the Preview, please refer to “Confirming the Print...
- Page 196 Chapter 1 After the image is enlarged and divided into several dialog box. Basic Procedures sections, you can print the print the sections and paste them together to assemble one large poster. Select the Page Setup panel. Chapter 2 Using a Variety of...
- Page 197 Printing from Macintosh Click the Page Layout checkbox on and If you do not need to print one of the panels select Poster (2x2) from the list. of the divided image, click the Pages to Chapter 1 Print checkbox to remove the checkmark for...
-
Page 198: Vertical And Horizontal Banner Printing (Long Prints)
Media easy to print vertical and horizontal banners. before printing. For more details about how to display Here we will describe as an example how to take a 250 the Preview, please refer to “Confirming the Print mm x 600 mm original and enlarge to fit a 24” roll Chapter 3 Image (Print Preview)”... -
Page 199: Printing From Macintosh
Printing from Macintosh Start the software application. Set the Format for (OS 8/9 does not have this setting). Chapter 1 From the File menu select Page Setup to Basic Procedures open the Page Setup dialog box. Chapter 2 Using a Variety of... - Page 200 Printing from Macintosh Select Custom Paper Size (Media Design Click the New button then define the media for OS 8/9). name and size (for OS 8/9, define the media Chapter 1 name and size then click Add button). Basic Procedures...
- Page 201 Note Basic Procedures Once you have registered the size in the Custom Paper Size panel (Media Design for OS 8/9), the size settings are stored under the specified name and the Chapter 2 name is displayed in the list. For more details about...
- Page 202 Printing Methods for Different Objectives After the original is created, from the File menu select Print to open the Print dialog box. Chapter 4 When the Main panel displays, select Long Format (Banner) for the Print Preferences for the long Maintaining the print.
- Page 203 Note Function Menus To achieve the best print results, you should confirm the appearance of the original in the Print Preview before printing. For more details about how to display the Preview, please refer to “Confirming the Print Image (Print Preview)”...
- Page 204 Printing without Top and Bottom Margins (Conserve Paper) Chapter 1 The white space in the top and bottom margins can be eliminated for printing to save paper. The printer does not feed the Basic Procedures white space in the margins to save paper. This function can be used only when Roll Paper is selected as the media source.
- Page 205 Printing from Macintosh トップ From the File menu of the software application select Print to display the Print dialog box. Chapter 1 Select the Finishing panel. Basic Procedures Chapter 2 Using a Variety of Media Chapter 3 Printing Methods for...
- Page 206 Chapter 7 Note Operation of the To achieve the best print results, you should confirm the appearance of the original in the Print Preview before printing. Function Menus For more details about how to display the Preview, please refer to “Confirming the Print Image (Print Preview)”...
- Page 207 Basic Procedures When you need to frequently perform combined settings for print quality and print speed, you can select Custom Set- tings under Print Quality and then perform the print quality and resolution settings in the Custom Settings dialog box Chapter 2 according to the requirements of your requirements.
- Page 208 Chapter 5 Using the Printer in a Network Environ- ment Chapter 6 Troubleshooting Click the Set button in the Print Quality group to open the Custom Settings dialog box. Chapter 7 Operation of the Function Menus Contents Index 3- 104...
- Page 209 Chapter 6 Troubleshooting Important The items of that are available for selection the print Quality may differ depending on which print media are used. Here is a list of the media where Highest under Print Quality is available. Chapter 7...
- Page 210 Note Chapter 7 In OS 8/9 if you select Enhance Text With Photos in the Custom Settings dialog box then when you have text mixed Operation of the with photos or graphic data, the resolution of the text will be raised (this function is not available for OS X).
-
Page 211: Fine Adjusting Color For Printing
Chapter 1 Adjusting Color Basic Procedures Basically the color settings of the software application have priority, but if the results of a print job are not what you want you can also adjust color in the printer driver. Chapter 2... - Page 212 Monochrome Prints in monochrome. Contents Prints with only a limited number of colors. Use this setting when you need fine lines with light Solid Color colors in a sharp image. Black Only All colors other than white are printed black.
- Page 213 トップ Important Chapter 1 Monochrome (Photo) can be selected for Color Mode only if one of the following types of paper is selected: Basic Procedures Glossy Photo Paper/Semi-Glossy Photo Paper/Heavyweight Glossy Photo Paper/Heavyweight SemiGlos Photo Paper/Fine Art Photo/Fine Art Heavyweight Photo/Fine Art Textured/Japanese Paper Washi Chapter 2 Press the Set button.
- Page 214 Printing Methods for Different Objectives Chapter 4 Maintaining the Printer Chapter 5 Using the Printer in a Confirm that the Color Adjustment panel is displayed, then click the Object Adjustment button. Network Environ- ment Chapter 6 Troubleshooting Chapter 7 Operation of the Function Menus The Object Adjustment dialog box opens.
- Page 215 Maintaining the Printer Drag the slide bar to the left or right for the item that you want to adjust. You can also enter the value directly or use the arrows of the spinbox to raise or lower the value.
- Page 216 Network Environ- ment As you change each item on the panel, the image of the Preview on the left changes to reflect the adjustment. The Original shows the appearance of the initial settings, and the Preview reflects the current settings.
-
Page 217: Color Matching
Printing from Macintosh トップ Color Matching When you print an image captured with a scanner or a digital camera, sometimes the appearance of the printout does not Chapter 1 match what you see on the screen. Basic Procedures This is caused by differences between the display color and the printed color. In the Color Settings dialog box you can... - Page 218 Monochrome Prints in monochrome. Contents Prints with only a limited number of colors. Use this setting when you need fine lines with light Solid Color colors in a sharp image. Black Only All colors other than white are printed black.
- Page 219 トップ Important Chapter 1 Monochrome (Photo) can be selected for Color Mode only if one of the following types of paper is selected: Basic Procedures Glossy Photo Paper/Semi-Glossy Photo Paper/Heavyweight Glossy Photo Paper/Heavyweight SemiGlos Photo Paper/Fine Art Photo/Fine Art Heavyweight Photo/Fine Art Textured/Japanese Paper Washi Chapter 2 Press the Set button.
- Page 220 Printing from Macintosh トップ The Color Settings dialog box opens. Chapter 1 Basic Procedures Chapter 2 Using a Variety of Media Chapter 3 Printing Methods for Different Objectives Chapter 4 Maintaining the Printer Chapter 5 Using the Printer in a Select the Matching panel.
- Page 221 Driver Correction Calibrates color using the original color profile of the printer driver. Chapter 7 Calibrates the color in the printer driver using the standards of ICC color profiles. When this Operation of the ICC Correction mode is selected, this specifies the entry profile and printer profile.
- Page 222 For OS 8/9, If you select ICC Correction you can adjust Images, Graphics and Text for the Matching Method. Also, if you select Use Common Input Profile for All Objects, then the Images, Graphics, and Text all apply to one profile Chapter 2 (this function is not available for OS X).
- Page 223 Printing from Macintosh トップ Click the input profile Matching Method list and select a matching method. Chapter 1 Basic Procedures Chapter 2 Using a Variety of Media Chapter 3 Printing Methods for Different Objectives Chapter 4 Maintaining the Printer Chapter 5...
- Page 224 From the Printer Profile Settings list, select a printer profile. Chapter 1 Important Basic Procedures A print profile can be selected only when ICC Correction or ColorSync is selected under the Mode. Chapter 2 Using a Variety of Media Chapter 3...
- Page 225 In the software application you can define original media sizes and save them. Once a custom size has been Chapter 2 defined, it will be listed along with the standard sizes and Using a Variety of be available for selection.
- Page 226 Printing from Macintosh Set the Format for (OS 8/9 does not have Select Custom Paper Size (Media Design this setting). for OS 8/9). Chapter 1 Basic Procedures Chapter 2 Using a Variety of Media Chapter 3 Printing Methods for Different Objectives...
- Page 227 Network Environ- ment Note Chapter 6 If you are using OS 8/9 you are allowed to store up to a Troubleshooting maximum of 5 custom settings. The settings in the Custom Paper Size panel (Media Design for OS 8/9) box remain in effect even after the Chapter 7 software application is closed.
- Page 228 This function is not provided for OS X. To display a paper size series for selection for Media Chapter 3 Size in the Print dialog box, or for Page Size on the Printing Methods for Page Attribute panel, you must select Display Series Different Objectives with a check mark on the Media Design panel.
- Page 229 Basic Procedures You can use the printer operation panel to perform suitable settings for the ink drying time of each media and other fea- tures. These settings can also adjusted with the items in the Media Detailed Settings dialog box in the printer driver. If Chapter 2 the printouts are not clear, you may be able to correct the problem by adjusting the settings in this dialog box.
-
Page 230: For Mac Os 8.6/9.X
Chapter 3 Environment”) This is a software application that required for the Printing Methods for If you use a Remote UI, you must set the IP address in printer to print. This must be installed on every Different Objectives the printer. - Page 231 Basic Procedures Media Configuration Tool is the software used to register information about print media (paper, film, etc.) that can be used with the printer as it becomes Chapter 2 available. The functions of this software are provided Using a Variety of...
- Page 232 Using a Variety of Ink Tank Handling Precautions ................4-4 Media Replacing an Ink Tank ................... 4-5 Cautions About Using Refilled Ink Tanks for This Printer ......4-8 Chapter 3 Switching the Ink Level Detection Function Off ............. 4-8 Printing Methods for Executing a Print Job .....................
-
Page 233: Replacing Ink Tanks
How to Confirm Ink Levels appears on the operation panel display or on the printer driver screen to tell you that it is time to replace the ink tank. You can confirm the ink level at any time by checking the... -
Page 234: When To Replace An Ink Tank
Using a Variety of An ink tank cannot be replaced during printing Media You can check the ink level at any time (during a print job because the right cover is locked. or while an error is displayed) by pressing the Informa-... -
Page 235: Ink Tank Handling Precautions
Chapter 1 Obey the following precautions when you handle ink tanks. Basic Procedures When the ink in a tank runs out, the Rep. Ink Tank mes- sage displays and the printer stops printing. Replace the Caution ink tank as soon as this message appears. When you... -
Page 236: Replacing An Ink Tank
Always confirm that the replacement ink tank is the Media same type as the tank that is installed in the printer. If you mistakenly exchange a Photo Black ink tank and a The ink level is shown in the display; a flashing color Chapter 3 Matte Black ink tank, this could damage the printer. - Page 237 Always hold an ink tank by its left and right grips (b) ment while you are handling it. Chapter 6 Troubleshooting Place each ink tank in a vinyl or plastic bag and seal it. Chapter 7 Operation of the Never touch the ink supply port (a) or the electrical Function Menus Important terminal (c).
- Page 238 The ink tanks are shaped so the cover will not close If Function Menus you set the wrong ink tank in a holder. If the ink tank cover does not close, confirm that the color labels on the holder match the color of the ink tank and the direction of the ink tank.
-
Page 239: Cautions About Using Refilled Ink Tanks For This Printer
Chapter 2 printhead. Using a Variety of Media If you use a refilled ink tank, the ink level detection function Press the Online button to display MAIN will no longer function correctly, and the printer will halt MENU. when ink runs out. Before you can use tanks like this, you... -
Page 240: Executing A Print Job
After switching off the ink level detection function, every Basic Procedures time you execute a print job from the computer the Ink level? message appears on the printer operation panel display and the printer goes offline. To start the print job, Chapter 2 just press the Online button on the printer operation panel. -
Page 241: Cleaning The Printer
Media Caution When you clean the printer, always switch the printer Chapter 3 off and unplug its power cord from the power supply. If Printing Methods for the printer is accidentally switched on while you are Different Objectives cleaning it, moving parts inside the printer could cause Dampen a clean cloth, wring it out personal injury if you are touching them. -
Page 242: Cleaning Inside The Upper Cover
To maintain optimum use of the printer, you should clean Basic Procedures the interior surfaces of the upper cover when you see the print surfaces or back sides of printouts fouled with ink, after printing one complete roll, or at least once a month. - Page 243 Chapter 4 Maintaining the Printer Chapter 5 Note Using the Printer in a Wash the cleaner brush with water if it is dirty. Network Environ- ment Important Chapter 6 Never polish the areas under the upper cover with a Troubleshooting dry cloth during cleaning.
- Page 244 Cleaning the Printer While raising the flexible wire (h) with one Insert the plug of the power cord into the hand, wipe away the dirt on the flexible wire power source. Chapter 1 guide (i). Basic Procedures Chapter 2 Using a Variety of...
-
Page 245: Cleaning The Paper Restraint
Cleaning the Paper Restraint Cleaning the Paper Restraint Chapter 1 Basic Procedures To maintain the proper use of the printer, use a piece of Disconnect the power cord at the power plain paper to clean the back surface of the paper pressure supply. - Page 246 Cleaning the Paper Restraint Insert the plug of the power cord into the power source. Chapter 1 Basic Procedures Chapter 2 Using a Variety of Media Chapter 3 Printing Methods for Different Objectives Chapter 4 Maintaining the Printer Chapter 5...
-
Page 247: Replacing The Maintenance Cartridge
You can check on how much space remains in the mainte- Troubleshooting nance cartridge at any time (during a print job or error dis- play) by pressing the Information button. The icon at the right end of the bottom line shows you the amount of space Chapter 7 that remains in the maintenance cartridge. - Page 248 Cart. message appears. Replace the ink tank as soon as Chapter 2 display a message to tell you that it is time to replace the this message appears. Using a Variety of maintenance cartridge.
-
Page 249: Message Cleaning
Printing Methods for Look at the printer display and make sure Different Objectives full of ink, never drop it and always lay it flat (never at that the printer is not operating. an angle). Spilled ink can stain the work area. - Page 250 Always store a used maintenance cartridge in a safe Chapter 4 Important Maintaining the location out of the reach of children. If a child licks or Printer In accordance with its active and on-going policy to ingests ink accidentally, seek medical assistance protect the environment, Canon collects used immediately.
- Page 251 Chapter 1 Be sure to store the removed maintenance cartridge in Basic Procedures a packing box and store it on a flat surface. An ink leak can stain the work area. Before you place the vinyl bag into the packing box,...
- Page 252 Remove the cap from a new shaft cleaner and attach it to the used shaft cleaner, place the used shaft cleaner in its box, place it in the original box with the used Contents maintenance cartridge, and dispose of them together.
- Page 253 Replacing the Maintenance Cartridge Install the new shaft cleaner into the carriage. Chapter 1 Basic Procedures Push in the shaft cleaner until you hear it catch. Chapter 2 Using a Variety of Media Chapter 3 Printing Methods for Different Objectives...
-
Page 254: Replacing The Printhead
Note the nozzles to dry and lead to poor print quality. Network Environ- When the ink supply runs low in an ink tank, procure a ment If you need to store a printhead temporarily, set it with new ink tank for replacement as soon as possible. -
Page 255: How To Replace The Printhead
Before you adjust the position of the printhead after (1 sec.) Online Chapter 2 replacing it, make sure a roll or cut sheets A3 (L) size or Using a Variety of Media wider is loaded in the printer. Remove printed and other media from the platen. - Page 256 Replacing the Printhead Open the upper cover. If the printhead adjustment lever is in either the high or low position, return it to the center Chapter 1 (normal) position, then raise the carriage Basic Procedures cover completely. Chapter 2 Using a Variety of...
- Page 257 Printing Methods for Different Objectives Caution Chapter 4 Raise the printhead lock cover completely to If you are going to replace the printhead immediately Maintaining the after printing, wait a few minutes before performing the Printer open it. replacement. The metal components of the printhead...
- Page 258 Pull the printhead lever toward you and down The inside surface protective cap 2 (e) is covered with Network Environ- ink to protect the nozzles. Do not touch this area of the to lock the printhead in place. ment cap or drop it. Performing so could cause problems.
- Page 259 Chapter 7 The printhead adjustment cannot be performed if the Operation of the loaded roll paper or cut sheets are not at least A3 (L) Function Menus size or larger. Printhead adjustment continues as soon as the media is set.
-
Page 260: Cutter Blade Ct
The cutting position can then press [ be changed twice for one blade. Once the cutting position Chapter 2 adjustment dial is set to 3, replace the blade with a new MAIN MENU Using a Variety of System Setup ↓... -
Page 261: Chapter
Rotate the cutter position adjustment dial 1 notch in the direction shown. Chapter 4 Important If the dial is already at notch 3 replace the cutter Maintaining the blade with a new one. Printer Do not touch any areas other than those indicated. - Page 262 Reset Cut To remove the protective cap from a new cutter blade, Count message displays. Chapter 4 turn the cap in the direction of the arrow. Also, you Maintaining the must attach the removed cap to the used cutter blade Printer...
-
Page 263: Transporting The Printer
] to select Maintenance, execute Move Printer after the maintenance cartridge then press [ has been replaced. Never tilt the printer while you are moving it. This could Chapter 7 MAIN MENU Operation of the spill ink inside the printer and foul the work area. - Page 264 Chapter 3 Printing Methods for Different Objectives Chapter 4 Maintaining the Printer Place each ink tank in a vinyl or plastic bag and seal Remove Ink Tank is displayed on the operation Chapter 5 panel. Using the Printer in a Note...
- Page 265 Chapter 3 Printing Methods for Please Wait.. appears followed by Ink Draining Different Objectives while the ink is sucked from inside the tubes. This processing requires about 4 minutes to complete. Chapter 4 Open the upper cover. The printer switches off automatically once Maintaining the processing is completed.
- Page 266 Chapter 5 Important Using the Printer in a Raise the upper cover stopper to release the Follow the procedures in the Quick Start Guide to re- Network Environ- lock then close the upper cover. ment install the printer at the new location after moving the printer.
-
Page 267: Checking The Condition Of The Printer
Checking the Condition of the Printer Checking the Condition of the Printer Chapter 1 Basic Procedures When you see that the printouts are faded and uneven, or Press the Online button to display MAIN streaked with white lines, print a nozzle check pattern to MENU. - Page 268 Checking the Condition of the Printer If there are no breaks in the horizontal lines of each color, the nozzle check pattern is normal. Chapter 1 • Sample: Printhead Operation Normal Basic Procedures Chapter 2 Using a Variety of Media...
-
Page 269: Cleaning The Printhead
If the printer operation does not recover after Different Objectives performing Head Cleaning B, the printhead may be at the end of its service life. Call for service or contact the dealer Types of Printhead Cleaning Chapter 4 where you purchased the printer. - Page 270 Network Environ- Printhead cleaning starts. When printhead cleaning ment is finished, the printer returns Online. Chapter 6 Troubleshooting Print the nozzle check pattern to determine if printing has been recovered. ( P.4-36) → Chapter 7 Operation of the Function Menus...
-
Page 271: Aligning Printhead Procedure
Maintaining the position of the printhead. Before you adjust the position of Printer the printhead, make sure a roll or cut sheets A3 (L) size or Press the Online button to display MAIN wider are loaded in the printer. Chapter 5 MENU. - Page 272 ] to select Advanced Adj. or Standard Adj., then press [ Chapter 1 Basic Procedures Advanced Adj. adjusts the gaps between the even and odd numbered nozzles, the color boundaries, and print direction boundaries. Chapter 2 Standard Adj. adjusts only the print direction Using a Variety of boundaries.
-
Page 273: Adjusting Amount Of Media Feed
If the printer power is off, press the Power Different Objectives adjust the amount of line feed if you see white lines or dark button to switch the printer on. color lines in your printed images. As the band adjustment... -
Page 274: Adjusting Line Feed Manually
] or [ ] to select Adjust Band, Adjusting Line Feed Manually then press [ Chapter 1 The line feed can be fine adjusted manually to increase or Basic Procedures decrease the amount of feed. Follow the procedure below Adjust Printer ↓... - Page 275 3 cm immediately after the change. Adjust in the plus (+) direction if white stripes are Contents visible in the output image, or adjust in the minus (−) direction if dense color stripes are visible. Index 4- 44...
-
Page 276: Reducing The Amount Of Cutting Dust
If the printer power is off, press the Power cutting dust you can perform the setting to reduce the button to switch the printer on. amount of cutter waste that can cause a deterioration in the Chapter 2 quality of printing or damage the printhead. The cutter dust... - Page 277 ] to select a value for the Using a Variety of setting then press OK button. Media To switch the cutter dust reduction function on for the Chapter 3 selected media type, select On or to release the Printing Methods for function for the media type select Off.
- Page 278 Chapter 1 Basic Procedures This printer employs two types of black ink, either Photo Black Ink or Matte Black Ink, to best match the media type Important and the requirements of the print job. For more details When you execute ChangeBkInkType, the printer...
-
Page 279: Black Ink Tank Exchange Procedure
Stop/Eject (1 sec.) Online Network Environ- ment Chapter 6 Troubleshooting Press down on the lever of the black ink tank Press [ ] or [ ] to select and open the ink tank cover. ChangeBkInkType, then press [ Chapter 7... - Page 280 Hold the black ink tank by the grips and With the black ink tank that you are going to remove it. use still in is bag, slowly rotate it 7 or 8 times Chapter 1 then remove from the bag.
- Page 281 If the ink type display is incorrect press Stop, open Printer you set the wrong ink tank in a holder. If the ink tank the right cover, and replace the black ink tank. cover does not close, confirm that the color label on...
-
Page 282: Chapter 5 Using The Printer In A Network Environment
Chapter 7 Initializing the Settings ................5-47 Operation of the Function Menus List of Network Settings ................5-48 Software Applications that can be used for Network Settings ....5-51 Contents → Before clicking the Start Print button Start Print How to Use the Chapter... -
Page 283: Before Using The Printer
• Windows NT 4.0 Required Memory • Windows Me, Windows 98 Chapter 7 • 24 MB or more for Mac OS 8.6, 32 MB or more for • Mac OS 8.6 or later Operation of the Mac OS 9.x Function Menus •... -
Page 284: The Network Environment
Chapter 7 Operation of the them print. Also, if a print server is set up for Windows Function Menus Server 2003, Windows XP, Windows 2000, or Windows NT, each printer can send print jobs to the print server, the print server can manage these jobs, and then send them directly to the printer on the network. - Page 285 For a Macintosh computer, the AppleTalk (EtherTalk) or Chapter 1 The TCP/IP and AppleTalk protocols can be used TCP/IP, or Zeroconf (Mac OS X Ver. 10.2.5 or later) pro- Basic Procedures together even in a NetWare server network tocol is used. (→ P.5-20)
-
Page 286: Connecting The Lan Cable
There is no printer driver for UNIX. Chapter 3 Performing the TCP/IP Protocol → P.5-15 Here is a summary of the procedures required to set the Printing Methods for Settings Different Objectives printer for use on a TCP/IP network. - Page 287 8. Press [ ] or [ ] to select Ethernet Type then Using a Variety of lamp (a) to confirm that it lights and remains on. This Media press [ lamp lights green with a 100-Base-TX connection and 9. Press [...
-
Page 288: Setting The Printer Ip Address
AutoPlay. However, you can print without performing the printer network settings if you use the Zeroconf function (IP Chapter 7 Print (Auto)) with Max OS X Ver. 10.2.5 or later to con- Operation of the nect the printer. Function Menus... - Page 289 Chapter 5 Using the Printer in a Network Environ- ment Chapter 6 Select the name of the printer you want to Troubleshooting set from the list of printer names, then select Protocol Settings from the Printer menu. Chapter 7 Operation of the...
- Page 290 If the IP address is set automatically, select Automatic for the Setting IP Address, then click Chapter 2 the check boxes for DHCP, BOOTP, or RARP for the Using a Variety of features you want to use. To specify a fixed IP Media address, select Manual for the Setting IP Address.
- Page 291 To perform the setting with the ARP/PING command, Chapter 1 Basic Procedures you need the MAC address of the printer. The MAC address can be found printed on the status print or on MAIN MENU Head Cleaning Cleaning the seal attached to the expansion board, or on the (3 sec.)
- Page 292 TCP/IP Network Settings (Windows, Macintosh, UNIX) Setting the IP Address The MAC Address is printed in the Status Print at the location indicated in the sample below. Chapter 1 If you are using a Windows computer, start Basic Procedures from the MS-DOS prompt or the command prompt.
-
Page 293: Setting With The Printer Operation Panel
(For Solarius) then press [ Chapter 5 Note MAIN MENU Using the Printer in a The “l” of the “-l” entry is an alphabetic lower case “l” ↓ Set Interface Network Environ- (el). ment The subnet mask and gateway address are set to... - Page 294 The selected digit increments by 1 every time you Chapter 5 press [ ]. However, at 255 the number rolls up to 0. Using the Printer in a press [ ]. However, at 255 the number rolls up to 0.
- Page 295 ] to select the number to Maintaining the Important Printer change, then press OK button. If you need to change the IP address, subnet mask, or The selected digit increments by 1 every time you default gateway, you must perform Step 18 to register...
- Page 296 Remote UI, the software application built into the network environment and board have been set up correctly. interface of this printer, allows you to use a Web browser on Chapter 2 your computer to monitor the status of the printer and...
- Page 297 Chapter 6 Note Troubleshooting If a password has been set for the printer, enter the password and then click the Logon button. If no password has been set, then no password entry is Chapter 7 required. Operation of the Function Menus The Edit TCP/IP Protocol Settings page opens.
- Page 298 Primary DNS Server Address, Secondary DNS Troubleshooting Server Address, DNS Host Name, and DNS Domain Name. Enter the text or hyphen (-) for the name of the host in Chapter 7 Operation of the the DNS Host Name box (Limit: 63 characters).
-
Page 299: Setting The Printer For Sharing
Windows 2000, or Windows NT 4.0, greatly improves the efficiency of managing the network printer. After you set up the Chapter 2 print server, print jobs are managed by the print server. Also, if Using a Variety of Media you install alternate drivers for the print server beforehand, each computer can install the printer driver via the network. - Page 300 Basic Procedures of the printer for sharing. sure to select the printer set up for sharing by the print Click the Additional Drivers... button (click the server. Alternate Drivers button in Windows NT 4.0) Chapter 2 and select the printer driver to install.
-
Page 301: Macintosh Network Settings
P.5-5 port. If you are installing a expansion network interface Chapter 6 Troubleshooting board or a wireless LAN, be sure to select the name of Connect the LAN port to the HUB with the LAN cable. that port. → Setting a Macintosh P.5-21... -
Page 302: Setting A Macintosh
Macintosh Network Settings If you are using Mac OS Ver. 10.1 or later, you can use Setting a Macintosh the printer on a Canon IP (GARO) network. Canon IP Chapter 1 (GARO) uses the TCP/IP protocol. The printer can be... - Page 303 Printing Methods for Make AppleTalk Active is selected. Different Objectives Close AppleTalk to save the setting. If this item is not checked, select it and then click the Apply Now button. Chapter 4 This completes the AppleTalk network settings for a Maintaining the Macintosh.
- Page 304 Printer network settings, please contact your network system administrator. Set Using DHCP Server for Configur. If the computer is connected to the printer with IP Print Chapter 5 Close TCP/IP to save the setting. Using the Printer in a (Auto), then the computer and the printer must be Network Environ- connected to the same network as the router.
- Page 305 Preferences. Basic Procedures Important Chapter 2 If the computer is connected to the printer with Using a Variety of Zeroconf, then the computer and the printer must be Media connected to the same network as the router. The computer cannot be connected with the Zeroconf...
-
Page 306: Setting Appletalk Protocol
Setting the Protocol with Web Browser Setting AppleTalk Protocol (Remote UI) Chapter 1 The AppleTalk protocol of this printer is set to disable before Basic Procedures the printer is shipped. Enable the AppleTalk protocol to Important connect the printer via AppleTalk. The printer protocol... - Page 307 Start the Web Browser, enter the following URL for the Location or the Address, then Note Chapter 1 If a password has been set for the printer, enter the press the Enter key. Basic Procedures password and then click the Logon button. If no http://<Printer IP Address or name>/...
- Page 308 OS 8.6/9.x) or the name displayed in Setup Utility (Print Center) (Mac OS X). Chapter 7 Important Operation of the If more than one printer is in the same zone, be sure to Function Menus assign a unique name for each printer. Note Contents The initial (default) network interface name is Canon NB 15FB (xxxxxx).
- Page 309 When a zone is set on the network, enter the name of zone where the printer belongs. Chapter 2 Using a Variety of If no zone is set, then leave the asterisk (*) entry as Media it is. Chapter 3...
- Page 310 Network Environ- This completes the protocol settings for the printer. ment Chapter 6 Troubleshooting Enter the name of the printer on the network Chapter 7 into the Multicast DNS Service Name box. Operation of the Function Menus Enter the printer name displayed in Chooser (Mac OS 8.6/9.x) or the name displayed in Print Setup...
- Page 311 Macintosh Network Settings Setting with the Printer Operation Panel Press the OK button. You can use the printer operation panel to select Apple- If you want to cancel the setting, press Stop button Chapter 1 Basic Procedures Talk protocol. for at least 1 second.
-
Page 312: Install The Printer Driver
Chapter 2 Installing the Printer Driver Using a Variety of Media In order for the printer to operate, a printer driver compat- ible with the printer must be installed. Install the Printer Driver (→ Quick Start Guide) Chapter 3 Printing Methods for... - Page 313 From the connection destination menu, select AppleTalk, Canon IP (GARO), or Chapter 1 Zeroconf for the network connection, click Basic Procedures the name of the printer in the displayed list, then click the Add button. Chapter 2 Using a Variety of Media...
- Page 314 • NWADMIN or PCONSOLE (Novell software Network application provided with NetWare) Chapter 3 → Here is a summary of the procedures required to set the Setting NetWare Protocol P.5-40 Printing Methods for Different Objectives printer for use on a NetWare network.
-
Page 315: Setting The Printer Frame Type
Setup Utility > GARO Device Setup Utility. Chapter 3 Important Printing Methods for Different Objectives In order to use GARO Device Setup Utility, it must be installed on your computer. Install GARO Device Setup → Utility on your computer. ( P.5-34) - Page 316 Stop/Eject Network Environ- (1 sec.) Online ment Note The IP address setting is required here to allow the Chapter 6 printer protocol setting to be performed with the Web Troubleshooting Press [ ] or [ ] to select Interface Setup browser (Remote UI).
- Page 317 The available selections for Print Service are NetWare Chapter 3 BindaryPserver, RPrinter, NDSPserver, and Printing Methods for NPrinter. Different Objectives After the equals mark (=) appears on the left, the display returns to the NetWare menu. Print Service RPrinter Chapter 4 Maintaining the Press [...
-
Page 318: Types Of Print Services
Either NDS or Bindery is supported. Select the mode Chapter 1 that is best suited for your network environment. A print service for the print server, queue, and so on, must Basic Procedures Queue Server Mode and Remote Printer Mode be set up before you can use a NetWare network to print. - Page 319 Setting Up the Print Server With Note NWADMIN, PCONSOLE Chapter 1 You are going to need the name of the print server to Basic Procedures If You Are Using NDS Queue Server Mode or perform the printer protocol settings so be sure to note the printer name.
- Page 320 This completes the NetWare print service settings. Next, Note → perform the printer protocol settings. ( P.5-40) You are going to need the name of the print server to perform the printer protocol settings so be sure to note Contents the printer name. Index...
-
Page 321: Setting Netware Protocol
In the Web Browser perform the settings so JavaScript ment and cookies can be used. Chapter 6 If more than one remote UI is being used, then the most Troubleshooting recently used settings remain enabled. Starting and using only one Remote UI at a time is recommended. - Page 322 On for NCP Burst Mode. Chapter 6 Troubleshooting Note The burst mode is used in the queue server mode to Chapter 7 transfer data rapidly at very high speed during printing. Operation of the Normally, leave the setting on.
- Page 323 Bindery PServer Selected: Queue Server Mode Note (Using a Bindery Print Server) Here we will show only one service selected and Enter the file server name into File Server Chapter 2 enabled. More than one service cannot be enabled at Using a Variety of Name.
- Page 324 Manager, press the Reset button. Chapter 1 Basic Procedures Enter the Tree Name and Context Name for the tree and context name of the print server. Enter a context name of less than 255 Chapter 2 characters. Using a Variety of...
-
Page 325: Setting The Computer For Netware
Install NetWare client software on all the computers that Using a Variety of Media will be used to print, then log in to the NetWare server or tree. For more details about connection methods, refer to the NetWare or operating system instructions. -
Page 326: Printing With Unix
Basic Procedures If a filter is to be used, select the filter. Using LPD to Print If there is no filter for the printer, you can temporarily Chapter 2 This section describes printing with LPD. select any filter, shut down the Printer Configuration Using a Variety of Utility, and then change the postscript.cfg file in the... -
Page 327: Using Ftp To Print
Using FTP to Print Chapter 1 Basic Procedures Start at the MS-DOS prompt or command line. Chapter 2 If you are using UNIX, open the Console screen. Using a Variety of Media Execute the following commands. Chapter 3 ftp <Printer IP Address>... -
Page 328: Initializing The Settings
Basic Procedures Follow the procedure below to use the Web browser From the Device Manager menu on the left, (Remote UI) to restore all the network settings to the default select Network. values set before shipping the printer from the factory. -
Page 329: List Of Network Settings
List of Network Settings Chapter 1 Basic Procedures TCP/IP Settings If you are using a Web Browser (Remote UI), you can change the settings of the network interface. The settings that can be changed are listed in the tables below. Initial... -
Page 330: Netware Settings
Chapter 5 Item Content Value Using the Printer in a Bindery PServer Network Environ- The name of the phase type Name of the NetWare file ment Phase Type in use (determines whether Disabled File Server server of the NetWare print Blank AppleTalk is used.) - Page 331 Printer Number NetWare print server. (Range: 0 to 15) Chapter 3 NDS PServer Printing Methods for Different Objectives The name of the NDS tree of Tree Name the NetWare print server. Blank (Range: 0 to 32 chars.) Chapter 4 Maintaining the...
- Page 332 → P.5-40) Chapter 6 Troubleshooting *1. Only these settings are allowed: IP address, subnet mask, default gateway, DHCP, BOOTP, RAPP, frame type, phase settings. *2. Only phase settings are possible. *3. Only frame type are possible. Chapter 7 Operation of the...
- Page 333 Chapter 6 Troubleshooting Chapter 1 Basic Procedures Click on the checkbox to print the section contents. Responding to Error Messages ..............6-2 Operation Panel Message List ................6-3 Chapter 2 Using a Variety of Media Messages ....................6-4 Media Ink Messages ...................... 6-11 Other Messages ....................
-
Page 334: Responding To Error Messages
The printer status cannot be displayed with a USB connection to Mac OS X. Chapter 6 If the GARO Status Monitor is not installed on Windows, look at the message on the printer operation panel. Troubleshooting Chapter 7 Operation of the... -
Page 335: Operation Panel Message List
Responding to Error Messages Operation Panel Message List Chapter 1 Basic Procedures Media Messages Ink Messages Other Messages Close xxx Cover (xxx name of the Load Roll Media Check Ink Level cover) Chapter 2 Using a Variety of Remove Roll Media Rep. -
Page 336: Media Messages
( P.2-26) remove the roll. Using the Printer in a 1. Load a roll with media that is the same type 3. Pull the release lever toward you to close it. Network Environ- ment and size as the printer settings. - Page 337 3. Select length if the media remaining detection the printer. ( P.2-26) feature for roll media is on. 1. Load a new roll of the size and type to be Chapter 5 4. Press the OK button. used. Using the Printer in a 2.
- Page 338 Chapter 4 for the cut sheet. (→ P.2-35) 1. Open the upper cover. Maintaining the 1. Load a cut sheet that is the same type and Printer 2. Push the release lever to the rear and size as the printer settings.
- Page 339 Med.SizeNoMatch Contents Problem1: A roll of a width that cannot be used with borderless printing is loaded in the printer. Solution1: Load a roll media of a width that can be used → with borderless printing. ( P.2-26) Index 6- 7...
- Page 340 Operation of the printing cannot be used with borderless printing. Function Menus Solution1: Follow the procedure below to correct the setting so the printer can print on a media that can be → Solution1: Set the media correctly. ( P.2-26, P.2-35) used for borderless printing.
- Page 341 Printer check pattern. 2. Press the release lever to the rear to open. 3. Align the right edge of the roll media with the Solution1: Load A3 size media or larger for printing. Chapter 5 line aligned with the right edge of the roll,...
- Page 342 Chapter 4 Drying.. Maintaining the Printer Problem1: The printer is waiting for the ink to dry on the printout. Chapter 5 Using the Printer in a Solution1: Wait until the printed sheet ejects automatically. Network Environ- ment Feed Limit..
-
Page 343: Ink Messages
Chapter 3 Printing Methods for Different Objectives Chapter 4 Solution1: Obtain a new ink tank. If a long print job is in Maintaining the progress, or if you need to print a job of many Printer sheets, you should replace the ink tank with a Solution1: Install correctly the ink tank named in the new one. - Page 344 Problem1: The installed ink tank named in the display by Problem1: Ink in the tank is low and there is not enough ink Basic Procedures the color of its holder cannot be used. for Head Cleaning B, or any other job that requires a large amount of ink.
- Page 345 Printing Methods for media. Different Objectives Solution1: Install a new maintenance cartridge intended for → Solution1: Check the black ink setting in the printer driver use with this printer. ( P.4-16) and make sure that it is correct. Chapter 4...
-
Page 346: Other Messages
Chapter 1 Problem1: The current height of the printhead (displayed at Basic Procedures the left end of the bottom display line) is not the Close xxx Cover (xxx name of the cover) appropriate height (displayed at the right end of Problem1: The named cover is open. - Page 347 Turn Power Off!! Problem3: A problem occurred in the printer. Chapter 1 Solution1: Switch the printer off, wait for over 3 seconds, Problem1: The tape inside the upper cover or the belt Basic Procedures then switch the printer on again.
- Page 348 Solution3: If the message appears again after performing Chapter 3 the procedure above, read the content of the Solution2: If the carriage is in, close the upper cover, press Printing Methods for message and write down the first line, switch the Different Objectives the Online button, select Replace P.head then...
- Page 349 Error in the print data. Basic Procedures Solution1: Reload the media and then print the nozzle Solution1: If the job does not print correctly, check the check pattern to check the condition of the settings then restart the print job.
-
Page 350: When You Cannot Print
When You Cannot Print When You Cannot Print Chapter 1 Basic Procedures Check the following items when the printer does not operate and will not print. Printing Will Not Start Printing Halts During Print Job Cannot Print on Network Chapter 2... - Page 351 When You Cannot Print Solution2: If you are using Mac OS 8/9, make sure that the Solution1: Windows: 1. Select the icon for the printer in the Printer correct name of the printer is selected with the Chapter 1 folder.
- Page 352 Different Objectives → Solution1: Remove the jammed sheets. ( P.6-35) Problem3: With Mac OS 8/9, the printer is shared via USB. Chapter 4 Problem2: The printer went offline. Solution1: Connect the printer directly to the computer to be Maintaining the...
-
Page 353: Printing Halts During Print Job
No ink. Different Objectives Problem2: Roll media ran out during the print job and the Solution1: When the ink tank replacement message tape on the trailing edge of the media sheet is appears, replace the ink tank for the indicated preventing the rest of the sheet from feeding. - Page 354 Chapter 2 connected correctly. Using a Variety of Problem2: The leading edge of the roll media is cut to an Media Solution1: Confirm that the connection of the cable that even length. connects the printer to the network is secure,...
- Page 355 Troubleshooting istrator. 2. On the Device Manager menu, click Net- work. Problem5: The name of the file you are trying to print is too Chapter 7 3. Click the Edit button under AppleTalk. long. Operation of the 4. Under Phase Type select Phase 2, then...
- Page 356 Chapter 1 selected for connection to the correct port for Basic Procedures Solution1: If the number of routers are exceeded with the the destination. Zeroconf function, the computer cannot connect to the printer if it is on a different network.
- Page 357 1. Open Network for System Preferences. Chapter 1 Problem1: The printer LAN port and cable are not 2. Under Show, select the name of the LAN port Basic Procedures connected correctly. where the printer is connected. 3. Open the AppleTalk panel and make sure Solution1: Confirm that the connection of the cable that that Make AppleTalk Active is checked on.
- Page 358 Maintaining the Solution1: When data is sent from NetWare to the printer, Solution3: Use Mac OS 9.0.4 or later if you want to operate Printer the data is sent in the NCP Burst mode, but in the printer with IP Print (Auto).
-
Page 359: Unexpected Printing Results
Unexpected Printing Results Unexpected Printing Results Chapter 1 Basic Procedures If the results you see in the print job are not what you expect, check the items described below. Poor Quality Abnormal Content Other Problems Chapter 2 Using a Variety of Printing is faint Broken lines are visible. - Page 360 Chapter 2 Using a Variety of Problem6: A piece of jammed sheet remains under the Solution1: Check the front and back side of the media. If Media you print on the other side of the media, you will upper cover.
- Page 361 The output assist guides are not pulled out. cutting dust reduction function is set. Chapter 6 Troubleshooting Solution1: Pull out on both sides of the output assist guides. Solution1: If the cutting dust reduction function is not → P.2-31, P.2-39) needed, use the operation panel to switch off this feature for the print media in use.
- Page 362 Basic Procedures after a print job on small size media. Problem1: Standard is selected for Print Quality. Solution1: Clean the part of the platen under the upper Solution1: In the printer driver, select High or Highest for → cover. ( P.4-11)
-
Page 363: Abnormal Content
Problem1: Band Joint is selected. Basic Procedures Broken lines are visible. Solution1: If you want to match size the media feed direction correctly, select Print Length for the Problem1: The printhead has not been aligned correctly. Feed Priority item, then enter the setting for the... - Page 364 → Correct Smear > On. ( P.1-21) not been performed. Solution1: Use the printer driver to adjust the colors with the Image color borders printing thick settings on the Color Settings of the Color Chapter 2 Using a Variety of Mode dialog box.
- Page 365 Chapter 2 Using a Variety of Note 1. Press the Online button to display MAIN Media If you need to adjust dark colors, adjust the Y, M, C, K MENU. inks. 2. Press [ ] or [ ] to select Adjust Printer...
-
Page 366: Other Problems
Network Environ- filling. ment Problem1: The power cord was unplugged with the printer Solution1: The first time the printer used after it is set up or Chapter 6 power on. Troubleshooting moved to a new location, the ink level display... -
Page 367: Removing A Roll Media Jam
Handling Jams Chapter 1 Basic Procedures The printer stops and a Media Jam or Turn Power Off!! Removing a Roll Media Jam message appears on the printer display as soon as a jam occurs. When a jam occurs, use the following procedure to Follow the procedure below to remove a roll media jam. - Page 368 Chapter 1 the cutting groove (a), cut at the edge of the Basic Procedures Move it to the right or left edge of the carriage rail printed area or where the media is wrinkled. before attempting to remove the media.
- Page 369 Basic Procedures with the guideline. The roll media may not feed out straight in some cases. If you pull too much of the roll media out, more of the Chapter 2 Using a Variety of leading sheet than is needed will be cut.
-
Page 370: Removing A Cut Sheet Jam
Push the release lever toward the rear to Removing a Cut Sheet Jam open. Chapter 1 Follow the procedure below to remove a cut sheet jam that Basic Procedures occurs during printing. Hold down the Power button for more than 1... - Page 371 Chapter 7 Operation of the Function Menus Important Contents Be sure to push the carriage to the right. If you push it to the left, the printer may display a carriage error after the printer is switched on. Index 6- 39...
- Page 372 Handling Jams Pull the release lever forward to close, raise the upper cover stopper and release the Chapter 1 lock, then close the upper cover. Basic Procedures Chapter 2 Using a Variety of Media Chapter 3 Printing Methods for Different Objectives Chapter 4 Cut sheet preparation begins.
-
Page 373: Updating The Firmware
Perform the procedure below to confirm the current version of the printer firmware before performing a firmware update. Chapter 5 If the version of the firmware in use is older than the Using the Printer in a downloaded version, perform the firmware update. -
Page 374: Reinstalling The Usb Or Ieee1394 Driver
Reinstalling the USB or IEEE1394 Driver Chapter 1 Basic Procedures If you try to install the USB or IEEE1394 driver with the USB Select only Specify a location then click the or IEEE1394 cable already connected to the printer, the Browse button. -
Page 375: Deleting The Printer Driver
If you uninstall the software from Windows Server Click the Yes button. 2003, Windows XP, Windows 2000, or Windows NT 4.0, you must log in as a member of the Administrators Chapter 3 Confirm that the printer has been deleted Printing Methods for group before the uninstallation. - Page 376 Uninstalling Software Applications Deleting the GARO Status Monitor Deleting the GARO Device Setup Utility Chapter 1 Follow this procedure to delete the GARO Status Monitor Follow this procedure to delete the GARO Device Setup Basic Procedures installed on Windows. Utility installed on Windows.
- Page 377 Replacing the Cutter ....................7-3 Media Functions ..................7-4 Changing the Media Type Settings ............... 7-4 Chapter 3 Printing to the Bottom Margin of the Original ............7-5 Printing Methods for Different Objectives Ink Functions ....................7-6 Replacing an Ink Tank During a Print Job ............. 7-6 Changing the Black Ink Type .................
- Page 378 Chapter 1 Basic Procedures This chapter introduces the commonly used functions of the printer function menus with task oriented procedures and message examples. The necessary procedures and various messages shown on the printer display appear in the diagrams. Chapter 2 Press the Online button once.
-
Page 379: Replacing The Cutter
Cutter Functions Cutter Functions Chapter 1 Basic Procedures The following cutter operations are provided in the printer function menus. Chapter 2 When You Need to Cut Media Replacing the Cutter Using a Variety of Media Execute Force Cutting on the operation panel when you Execute Change Cutter on the operation panel when you need to use the printer cutter to cut the media cleanly. - Page 380 Media Functions Media Functions Chapter 1 Basic Procedures The following media settings are provided in the printer function menus. Chapter 2 Changing the Media Type Settings Using a Variety of Media You can change the settings for each media type to match Online the print results and finish that you want.
- Page 381 Keep Media Size is switched on then this Using a Variety of Weak, Standard, [Setting Values] ensures that the image will not be cut off at the top or Strong, Strongest Media bottom margins. However, the length of the finished image Standard Cutter will be sized by the top and bottom margins.
- Page 382 Chapter 2 Replacing an Ink Tank During a Print Job Using a Variety of Media Execute Rep. Ink Tank on the operation panel when you need to replace an ink tank during a print job. Chapter 3 Printing Printing Methods for...
- Page 383 Changing the Black Ink Type Chapter 1 This printer can use two types of black ink: Photo Black (Bk) and Matte Black (MBk). Execute Change BkInk Type to switch Basic Procedures between the types of black ink and drain the black ink, and then install the new black ink tank.
-
Page 384: Print Quality Functions
Print Quality Functions Print Quality Functions Chapter 1 Basic Procedures You can use the printer function menus to confirm the print quality settings and change the settings to recover poor printing results. Chapter 2 Using a Variety of Determining if the Printhead is Blocked... - Page 385 Correcting Horizontal Banding in Chapter 1 Images If vertical lines are bent, or when colors are faded and Basic Procedures uneven, perform Auto Head Adj. to correct the position of Perform Adjust Band to adjust the amount of line feed and the printhead.
- Page 386 Perform Feed Priority> PrintLength to set the priority in Basic Procedures the print job for the length when the length of the printout is very important to you. However, performing this setting may cause horizontal banding to appear in the prints. To set the...
- Page 387 Printer Information Functions Chapter 1 Basic Procedures You can use the printer function menus to print information about print jobs and printer settings so you can check them. Chapter 2 Checking the Print Job History Checking the Printer Settings Informa-...
- Page 388 Checking the Printer Functions Menu Chapter 1 Information Perform Menu Map so you can have a handy reference Basic Procedures that shows you the items, levels, and sublevels of the Perform Media Details to print the settings for each media printer function menus.
-
Page 389: Printer Part Names
Contents Contents Chapter 1 Basic Procedures How to Use This Guide .........................ii How to Use the Top Page ..........................ii How to Use the Chapter Contents Pages......................iii Chapter 2 Using a Variety of Media Chapter 1 Basic Procedures Chapter 3 Printer Part Names ........................ -
Page 390: Function Menus
The Suitable Black Ink for Media........................2-2 Maintaining the Paper Type ..............................2-4 Printer Media Size..............................2-18 Original data the same as the media......................2-20 Chapter 5 Handling Paper and Other Print Media......................2-25 Using the Printer in a Printing with Rolls ........................2-26... - Page 391 Printing Photos and Illustrations without Borders (Borderless Printing) ............3-13 Chapter 2 Using a Variety of Rotating the Page 90 Degrees for Printing (Conserve Paper) ..............3-22 Media Printing Several Pages on One Sheet (Page Layout) ................. 3-24 Printing Posters (Page Layout)........................3-26 Chapter 3 Using Watermarks ............................
- Page 392 Chapter 2 Using a Variety of Replacing an Ink Tank........................... 4-5 Media Cautions About Using Refilled Ink Tanks for This Printer ............4-8 Switching the Ink Level Detection Function Off ..................... 4-8 Chapter 3 Executing a Print Job............................. 4-9 Printing Methods for Cleaning the Printer ........................
-
Page 393: Printer Driver
Changing the Black Ink Type ....................4-47 Chapter 2 Black Ink Tank Exchange Procedure ......................4-48 Using a Variety of Media Chapter 5 Using the Printer in a Network Environment Chapter 3 Printing Methods for Before Using the Printer ......................5-2 Different Objectives Required System Environment........................ -
Page 394: Printing
Contents Initializing the Settings ......................5-47 List of Network Settings ......................5-48 Chapter 1 Basic Procedures Software Applications that can be used for Network Settings ..........5-51 Chapter 2 Chapter 6 Troubleshooting Using a Variety of Media Responding to Error Messages ....................6-2 Operation Panel Message List ........................ - Page 395 Printing to the Bottom Margin of the Original....................7-5 Chapter 3 Printing Methods for Ink Functions ..........................7-6 Different Objectives Replacing an Ink Tank During a Print Job ..................... 7-6 Changing the Black Ink Type......................... 7-7 Chapter 4 Print Quality Functions ......................7-8 Maintaining the Printer Determining if the Printhead is Blocked......................
-
Page 396: Canceling A Print Job
Colored Coated Paper ..........2-16 Black Ink ............ 2-2, 4-47, 7-7 Confirming print job status ........4-36 Border line ............3-25, 3-91 Conserve Paper ..3-22, 3-38, 3-82, 3-86, 3-88, 3-100 Borderless Printing ........ 2-22, 3-13, 3-77 Contents Consumables ............1-53 Basic operations ......... 3-13, 3-78 Cookies .......... - Page 397 Cutter dust reduction function ........4-45 Function menus ............7-12 Cutter position adjustment dial .........4-30 Chapter 3 Cutting groove ............1-2 Printing Methods for GARO Device Setup Utility .... 3-57, 5-7, 5-34, 5-51 Different Objectives Deleting ..............6-44 Data lamp ..............1-14 Installing ..............5-7 Chapter 4 GARO Printer Driver ..........1-42...
-
Page 398: Loading The Roll Media
Jams .................6-35 Chapter 5 Media Detailed Settings ........3-56, 3-125 Japanese Paper Washi ..........2-16 Using the Printer in a Media Size .....2-18, 2-20, 3-54, 3-55, 3-123, 3-124 Network Environ- JavaScript ..........5-15, 5-25, 5-40 Media Size Options ......3-32, 3-51, 3-121 ment Media size series ...........3-124... -
Page 399: Output Stacker
Printing Methods for Paper Type ..............2-4 Newsprint for Proofing ..........2-13 Different Objectives PCONSOLE .............5-38 No Spaces at Top or Bottom (Conserve Paper) Phase Type ..............5-27 ............3-38, 3-82, 3-100 Chapter 4 Photo Black Ink ..........2-2, 4-47 Novell Directory Service ...........5-37 Maintaining the ping ................5-12... -
Page 400: Specifications
Using a Variety of Printer Driver 2005 ........3-56, 3-126 Remote printer mode ..........5-37 Media Printer Function Priorities .........1-15 Remote UI ..3-57, 3-126, 5-15, 5-25, 5-40, 5-47, 5-51 Printer names ............5-27 Replaceable Printhead ..........1-5 Chapter 3 Printer operation panel ......5-7, 5-25, 5-51 Resolution .............3-41, 3-106... - Page 401 Chapter 5 Using the Printer in a Upper cover Network Environ- ment ... 1-2, 1-5, 2-36, 2-41, 4-11, 4-25, 4-30, 6-35, 6-38 Cleaning inside the printer ........4-11 Chapter 6 Troubleshooting Names of parts inside the printer ......1-4 Upper cover handles ..........4-12 Upper cover rollers ...........4-12...
-
Page 402: Note
Different Objectives Note: This equipment has been tested and found to comply with the limits for class B digital device, pursuant to Part 15 of the FCC Chapter 4 Rules. These limits are designed to provide reasonable protection against harmful interference in a residential installation. This equip-... -
Page 403: Canadian Radio Interference Regulations
Regulations for this product Canadian Radio Interference Regulations This digital apparatus does not exceed the Class B limits for radio noise emissions from digital apparatus as set out in the interference- Chapter 1 Basic Procedures causing equipment standard entitled “Digital Apparatus”, ICES-003 of the Industry and Science Canada. - Page 404 Chapter 2 Using a Variety of Media Chapter 3 Printing Methods for Different Objectives Chapter 4 Maintaining the Printer Chapter 5 Using the Printer in a Network Environ- ment Chapter 6 Troubleshooting Chapter 7 Operation of the Function Menus Contents Index...