Table of Contents
Advertisement
Quick Links
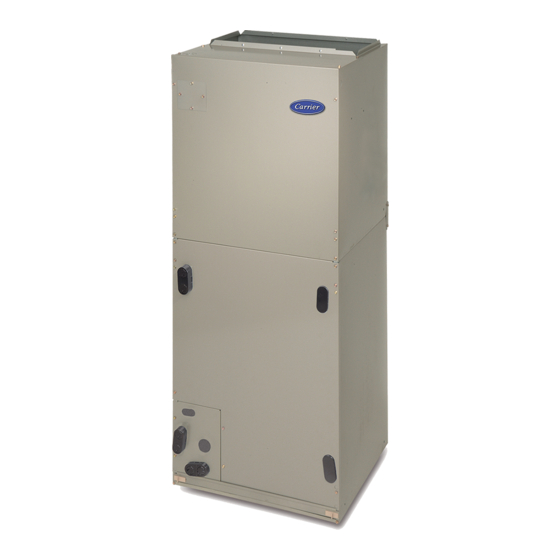
FE5B
Communicating Fan Coil for Puron Advance™ (R-454B) Refrigerant
Sizes 24, 36, 48, 60
NOTE: Read the entire instruction manual before starting the
installation.
Table of Contents
Safety Considerations . . . . . . . . . . . . . . . . . . . . . . . . . . . . . . . . . . . . . 1
Introduction. . . . . . . . . . . . . . . . . . . . . . . . . . . . . . . . . . . . . . . . . . . . . 2
Installation . . . . . . . . . . . . . . . . . . . . . . . . . . . . . . . . . . . . . . . . . . . . . 2
Check Equipment. . . . . . . . . . . . . . . . . . . . . . . . . . . . . . . . . . . . . . 2
Mount Fan Coil . . . . . . . . . . . . . . . . . . . . . . . . . . . . . . . . . . . . . . . 2
Modular Units . . . . . . . . . . . . . . . . . . . . . . . . . . . . . . . . . . . . . . . . 5
Upflow Installation . . . . . . . . . . . . . . . . . . . . . . . . . . . . . . . . . . . . 5
Downflow Installation . . . . . . . . . . . . . . . . . . . . . . . . . . . . . . . . . . 5
Horizontal Installation . . . . . . . . . . . . . . . . . . . . . . . . . . . . . . . . . . 5
Air Ducts. . . . . . . . . . . . . . . . . . . . . . . . . . . . . . . . . . . . . . . . . . . . . . . 6
Duct Work Acoustical Treatment . . . . . . . . . . . . . . . . . . . . . . . . . 6
Electrical Connections . . . . . . . . . . . . . . . . . . . . . . . . . . . . . . . . . . . . 6
Line Voltage Connections . . . . . . . . . . . . . . . . . . . . . . . . . . . . . . . 7
Manufactured Housing. . . . . . . . . . . . . . . . . . . . . . . . . . . . . . . . . . 8
Emergency Mode . . . . . . . . . . . . . . . . . . . . . . . . . . . . . . . . . . . . . . 8
Ground Connections . . . . . . . . . . . . . . . . . . . . . . . . . . . . . . . . . . . 8
Refrigerant Tubing Connection and Evacuation . . . . . . . . . . . . . . . . 8
Mechanical Line Set Connections . . . . . . . . . . . . . . . . . . . . . . . . . 9
Condensate Drains . . . . . . . . . . . . . . . . . . . . . . . . . . . . . . . . . . . . . . . 9
Leak Dissipation System . . . . . . . . . . . . . . . . . . . . . . . . . . . . . . . . . 10
Leak Dissipation System Self-Test . . . . . . . . . . . . . . . . . . . . . . . 11
Troubleshooting . . . . . . . . . . . . . . . . . . . . . . . . . . . . . . . . . . . . . . 12
Unit Start-Up. . . . . . . . . . . . . . . . . . . . . . . . . . . . . . . . . . . . . . . . . . . 12
Low-Voltage Circuit Fusing and Reference . . . . . . . . . . . . . . . . 12
Accessory Installation. . . . . . . . . . . . . . . . . . . . . . . . . . . . . . . . . . . . 12
Accessory Electric Heaters . . . . . . . . . . . . . . . . . . . . . . . . . . . . . 12
Hydronic Heat Applications. . . . . . . . . . . . . . . . . . . . . . . . . . . . . 12
Outdoor Air Thermistor (OAT) . . . . . . . . . . . . . . . . . . . . . . . . . . 13
Electronic Air Cleaner Connections . . . . . . . . . . . . . . . . . . . . . . 13
Humidifier Connections . . . . . . . . . . . . . . . . . . . . . . . . . . . . . . . . 13
System Shutdown Accessories. . . . . . . . . . . . . . . . . . . . . . . . . . . 13
Generator . . . . . . . . . . . . . . . . . . . . . . . . . . . . . . . . . . . . . . . . . . . 13
Ventilation Accessory . . . . . . . . . . . . . . . . . . . . . . . . . . . . . . . . . 13
Start-Up and Troubleshooting . . . . . . . . . . . . . . . . . . . . . . . . . . . . . 13
LED Description: . . . . . . . . . . . . . . . . . . . . . . . . . . . . . . . . . . . . . 13
shooting:. . . . . . . . . . . . . . . . . . . . . . . . . . . . . . . . . . . . . . . . . . . . 14
ECM Motor Troubleshooting. . . . . . . . . . . . . . . . . . . . . . . . . . . . 14
Using Motor LED in Troubleshooting. . . . . . . . . . . . . . . . . . . . . 14
Fan Coil Troubleshooting . . . . . . . . . . . . . . . . . . . . . . . . . . . . . . 14
Emergency Heating and Cooling Modes . . . . . . . . . . . . . . . . . . . 16
Fan Coil Sequence of Operation . . . . . . . . . . . . . . . . . . . . . . . . . . . . 16
Care and Maintenance . . . . . . . . . . . . . . . . . . . . . . . . . . . . . . . . . . . 16
Installation Instructions
Safety Considerations
Improper installation, adjustment, alteration, service, maintenance, or
use can cause explosion, fire, electrical shock, or other conditions which
may cause death, personal injury or property damage. Consult a
qualified installer, service agency, or your distributor or branch for
information or assistance. The qualified installer or agency must use
factory-authorized kits or accessories when modifying this product.
Refer to the individual instructions packaged with kits or accessories
when installing.
Follow all safety codes. Wear safety glasses, protective clothing and
work gloves. Have a fire extinguisher available. Read these instructions
thoroughly and follow all warnings or cautions included in literature and
attached to the unit. Consult local building codes and the current editions
of the National Electrical Code (NEC) NFPA 70.
In Canada, refer to the current editions of the Canadian Electrical Code
CSA C22.1.
Recognize safety information. This is the safety-alert symbol
you see this symbol on the unit and in instruction manuals, be alert to the
potential for personal injury.
Understand the signal words DANGER, WARNING, and CAUTION.
These words are used with the safety-alert symbol. DANGER identifies
the most serious hazards which will result in severe personal injury or
death. WARNING signifies hazards which could result in personal
injury or death. CAUTION is used to identify unsafe practices which
may result in minor personal injury or product and property damage.
NOTE is used to highlight suggestions which will result in enhanced
installation, reliability, or operation.
WARNING
!
PROPERTY OR PERSONAL INJURY
HAZARD
Risk of fire. Flammable refrigerant used.
To be repaired only by trained service personnel. Do
not puncture refrigerant tubing.
Auxiliary devices which may be ignition sources shall
not be installed in the ductwork, other than auxiliary devices listed for
use with the specific appliance. See instructions.
Dispose of refrigerant properly in accordance with federal or local
regulations.
Failure to follow proper R-454B mitigation system installation
instructions can result in property damage, personal injury, or death. If
any fault codes are listed, please troubleshoot to prevent system
malfunction.
. When
Advertisement
Table of Contents
Troubleshooting

Related Manuals for Carrier FE5B


Summary of Contents for Carrier FE5B
-
Page 1: Table Of Contents
FE5B Communicating Fan Coil for Puron Advance™ (R-454B) Refrigerant Sizes 24, 36, 48, 60 Installation Instructions Safety Considerations NOTE: Read the entire instruction manual before starting the installation. Improper installation, adjustment, alteration, service, maintenance, or use can cause explosion, fire, electrical shock, or other conditions which Table of Contents may cause death, personal injury or property damage. -
Page 2: Introduction
Before installing or servicing unit, always turn off all power to unit. FE5B units can stand or lie on floor, or hang from ceiling or wall. Allow There may be more than 1 disconnect switch. Turn off accessory heater space for wiring, piping, proper trapping and servicing unit. - Page 3 FE5B: Installation Instructions A07139A Fig. 1 – Slope Coil Unit in Upflow Application A07140B Fig. 2 – Slope Coil in Horizontal Left Application Manufacturer reserves the right to change, at any time, specifications and designs without notice and without obligations.
- Page 4 FE5B: Installation Instructions FACTORY SHIPPED HORIZONTAL LEFT APPLICATION DISSIPATION SENSOR CABLE ROUTING COIL BRACKET COIL SUPPORT RAIL DRAIN PAN SUPPORT BRACKET DISSIPATION COIL BOARD AIR SEAL BRACKET ASSEMBLY HORIZONTAL DRAIN PAN DISSIPATION SENSOR REFRIGERANT PRIMARY DRAIN CONNECTIONS SECONDARY DRAIN A240079 Fig.
-
Page 5: Modular Units
NOTE: To convert units for downflow applications, refer to Installation Instructions supplied with kit for proper installation. See the Product The FE5B Fan Coil in sizes 36, 48, and 60 are available as 2-piece Data or contact your supplier for the kit number. Use fireproof resilient modular units. -
Page 6: Air Ducts
FE5B: Installation Instructions a. Remove air seal assembly from coil by removing 4 screws a. If fan coil is away from wall, attach pipe strap to top of fan coil (Fig. using no. 10 self-tapping screws. Angle strap down and away b. -
Page 7: Line Voltage Connections
FE5B: Installation Instructions Connect low-voltage leads to User Interface and outdoor unit (Fig. 9 WARNING Fig. 10). NOTE: Where local codes require User Interface wiring be routed ELECTRICAL SHOCK HAZARD through conduit or raceways, splices can be made inside fan coil unit. -
Page 8: Manufactured Housing
Fig. 11 – Emergency Mode Emergency Mode Ground Connections FE5B Units have the capability to be used in an emergency mode with a WARNING non-communicating thermostat. This instance will occur when the User Interface is damaged or inoperable. The emergency mode for the FE5B... -
Page 9: Mechanical Line Set Connections
FE5B: Installation Instructions Condensate Drains CAUTION CAUTION PRODUCT DAMAGE HAZARD Failure to follow this caution may result in product or property damage. UNIT OR PROPERTY DAMAGE HAZARD A brazing shield MUST be used when tubing sets are being brazed to... -
Page 10: Leak Dissipation System
FE5B: Installation Instructions Table 1 – Filter Kits PART NUMBER SIZE USED WITH AFAFLTMED12A FILTER KIT (12 PACK) AFAFLTLRG12A 36, 48 AFAFLTXXL12A Leak Dissipation System FILTER ACCESS PANEL WARNING SECONDARY DRAIN WITH APPROPRIATE TRAP REQUIRED (USE FACTORY KIT OR PERSONAL INJURY OR PROPERTY DAMAGE... -
Page 11: Leak Dissipation System Self-Test
FE5B: Installation Instructions Confirm that the harness routing does not interfere with other fan coil WARNING components. Place special consideration when routing the harness around the blower. Make sure no loose harness can be pulled into the PRODUCT OPERATION / INJURY HAZARD blower. -
Page 12: Troubleshooting
Flashing 4 Accessory Electric Heaters If the code does not clear after power cycling the system, replace the Electric heaters may be installed with FE5B fan coil per instructions dissipation board. supplied with electric heater package. See unit rating plate for Flashing 5 factory-approved electric heater kits. -
Page 13: Outdoor Air Thermistor (Oat)
User Interface. Re-wire thermistor correctly for normal operation. Electronic Air Cleaner Connections When using an electronic air cleaner with FE5B fan coil, use airflow sensor part no. KEAAC0101AAA. The airflow sensor turns on A07121 Fig. 20 – “G” Terminal Accessory Wiring electronic air cleaner when fan coil blower is operating. -
Page 14: Fan Coil Control Start-Up And System Communications Trouble
FE5B: Installation Instructions ECM Motor Troubleshooting The ECM motor used in this product consists of two parts: the Control Module and the motor winding section. Do not assume motor or module is defective if it will not start. Use the designed-in LED information aids... - Page 15 FE5B: Installation Instructions multiple faults can exist at any time, only the highest priority code will 2. If model size data is missing (as is the case when a replacement fan be displayed on STATUS LED. Clearing the indicated fault when...
-
Page 16: Emergency Heating And Cooling Modes
Fan Coil Sequence of Operation from windings to perform this check properly). The FE5B Fan Coil is designed for installation with a communicating 4. Check motor windings section following instructions in Section C. User Interface. This fan coil will not respond to commands provided by ECM Motor Troubleshooting. - Page 17 FE5B: Installation Instructions 3. Inspect blower motor and wheel for cleanliness each heating and CAUTION cooling season. Clean as necessary. 4. Inspect electrical connections for tightness and controls for proper CUT HAZARD operation each heating and cooling season. Service as necessary.
- Page 18 *. These airflows are minimum acceptable airflows as UL listed. Actual airflow delivered will be per airflow delivery chart for Electric Heating Modes. © 2024 Carrier. All rights reserved. Edition Date: 3/24 Catalog No: IM-FE5B-01 A Proud Member of the Carrier Family Replaces: New Manufacturer reserves the right to change, at any time, specifications and designs without notice and without obligations.
Need help?
Do you have a question about the FE5B and is the answer not in the manual?
Questions and answers