Geberit AQUACLEAN MERA COMFORT User Manual
Hide thumbs
Also See for AQUACLEAN MERA COMFORT:
- User manual (52 pages) ,
- User manual (58 pages) ,
- User manual
Table of Contents
Advertisement
Quick Links
Advertisement
Table of Contents
Troubleshooting

Related Manuals for Geberit AQUACLEAN MERA COMFORT


Summary of Contents for Geberit AQUACLEAN MERA COMFORT
- Page 1 GEBERIT AQUACLEAN MERA COMFORT USER MANUAL...
-
Page 2: Table Of Contents
Setting the spray arm position ......Setting the dryer air intensity ........ Saving user profiles ..........Calling up user profiles ......... Saving a personal user profile in the Geberit Home App ............How to program the device ........Overview of the programming options.... - Page 3 Replacing the remote control battery ....Re-assign remote control ........Replacing the ceramic honeycomb filter ....Sustainability ............Geberit Group and sustainability ......Ecodesign – ecobalance ........Tips for reducing the ecological footprint....Disposal..............Disposal of waste electrical and electronic equipment.............
-
Page 4: For Your Safety
For your safety Who is this product suitable for? The Geberit AquaClean shower toilet can be used by children aged 3 years and up, as well as by persons with reduced physical, sensory or mental capabilities or lack of experience and knowledge,... - Page 5 • Always use the current version of the installation manual for installing the device if the Geberit AquaClean has been removed (e.g. if you move house). • The Geberit AquaClean must only be connected to a mains voltage conforming to the specification plate.
-
Page 6: Explanation Of Warning Notes
Explanation of warning notes Warning notes are placed at the location at which the hazard may occur. Warning notes are structured as follows: WARNING Nature and source of the hazard Possible consequences if the hazard is ignored. ▶ Measures to prevent the hazard. The following signal words are used to indicate residual hazards in warning notes and important information. -
Page 7: Register Your Device
Extend the warranty period of your Geberit AquaClean for free. Register for this within 90 days from the installation date. In the third year of the warranty period, Geberit shall supply spare parts free of charge in the event of any material or manufacturing faults, provided the product has been installed and put into operation by an installation company. -
Page 8: Getting To Know Your Device
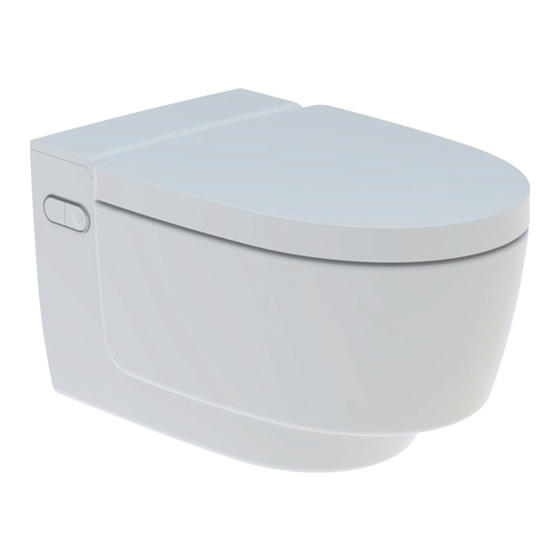
Getting to know your device About Geberit AquaClean devices The Geberit AquaClean device is a WC with integrated shower function. The device also fulfils all the functions of a conventional WC. Additional functions are subject to the design of your product. -
Page 9: The Device At A Glance
Lateral control panel with status LED Dryer arm with dryer nozzle Spray arm with spray nozzle and Lady shower nozzle Ceramic honeycomb filter (art. no. 242.999.00.1) Orientation light Spray shield Geberit AquaClean cleaning set (art. no. 242.547.00.1) Geberit AquaClean descaling agent (art. no. 147.040.00.1) - Page 10 Specification plate with serial number Design cover with magnet Power switch Some components and the consumables listed below can be ordered directly via the Geberit Home app, the Geberit spare parts catalogue or via the Geberit Web Shop. Consumables information Art.
-
Page 11: Operating Concept
The shower toilet can be operated via remote control, the lateral control panel on the shower toilet and the Geberit Home App. The remote control function of the Geberit AquaClean shower toilet is deactivated while the shower toilet is connected to the Geberit Home App. -
Page 12: Rear Side Of The Remote Control
• No function via the three preset buttons • No function via the OK button To be able to use all functions, carry out a firmware update with the Geberit Home app (firmware version ≥ v 28.0). Battery compartment Ink display <Temperature>... -
Page 13: Status Leds On The Orientation Light And On The Remote Control
Flashes red [error message]. Follow the instructions on the display. If the LED continues to flash red, contact, Geberit customer service. • The device is now descaling. It is not possible to use the shower toilet for the duration of the descaling procedure. -
Page 14: Lateral Control Panel
/ smartphone shows the [error message]. Follow the instructions on the display. If the Flashes red LED continues to flash red, contact, Geberit customer service. ▶ The ceramic honeycomb filter must be replaced. → See Replacing the ceramic honeycomb filter. -
Page 15: Switching On The Device
Switching on the device Wait at least 30 seconds between the switch-off and switch-on procedures. Open the design cover. Turn on the power switch to start initialisation. ✓ The blue status LED flashes during initialisation. - Page 16 Close the design cover. Result ✓ When the blue status LED goes out, initialisation is complete.
-
Page 17: Switching Off The Device
Switching off the device Wait at least 30 seconds between the switch-off and switch-on procedures. Close the WC lid. Open the design cover. Press the power switch. - Page 18 Close the design cover.
-
Page 19: Geberit App
Geberit App Checking compatibility To ensure you can use the Geberit App to its full extent, you will need a smartphone with an up-to-date Android or iOS version. You may need to check the permissions (Bluetooth®, location sharing) and confirm them. -
Page 20: Using The Geberit Home App
Using the Geberit Home App The Geberit Home app communicates via a Bluetooth® interface with the Geberit AquaClean shower toilet. The remote control function of the Geberit AquaClean shower toilet is deactivated while the shower toilet is connected to the Geberit Home App. Please note that your device may not offer remote control or individual functions may not be available. -
Page 21: How To Use The Device
How to use the device Getting started When using the device, the following functions should take place. When you enter the detection range of the device, • the orientation light switches on. • the WC lid opens. • the WC seat ring heating activates. •... -
Page 22: Using The Anal Shower
Using the anal shower Prerequisite – You are sitting down on the WC seat ring. Press the <Shower> button on the remote control. Or: press the <Shower> button on the lateral control panel. Result ✓ The shower procedure starts with the oscillating motion. You can stop the shower procedure early by pressing the <Shower>... -
Page 23: Switching The Oscillating Motion Of The Anal Shower On And Off
Switching the oscillating motion of the anal shower on and off The oscillating motion of the spray arm increases the cleaning effect. Prerequisite – The shower procedure is running. ▶ Press the <up> and <down> arrow keys at the same time to switch the oscillating motion off and on during the shower procedure. -
Page 24: Using The Lady Shower
Using the Lady shower The woman's intimate area is a very sensitive zone and requires special and prudent care. The Lady shower must be set to your ergonomic conditions to achieve an optimal cleaning result. The position of the spray nozzle and the spray intensity must be selected so that the shower spray cannot penetrate the vagina. -
Page 25: Using The Dryer
Using the dryer Prerequisite – You have ended the shower procedure. ▶ Press the <Dryer> button on the remote control. Result ✓ The drying procedure starts. You can stop the drying procedure early by pressing the <Dryer> button once again. -
Page 26: Adjusting The Shower Procedure To Your Personal Needs
Adjusting the shower procedure to your personal needs Setting the spray intensity Prerequisite – The shower procedure is running. Press the <+> button to increase the spray intensity. Press the <–> button to decrease the spray intensity. Or: press the <top> or <bottom> button on the lateral control panel. -
Page 27: Setting The Spray Arm Position
Setting the spray arm position Female users should set the spray arm position of the spray functionality to their ergonomic conditions so that it does not compromise the natural protection of the vaginal area. Prerequisite – The shower procedure is running. ▶... -
Page 28: Setting The Dryer Air Intensity
Setting the dryer air intensity Prerequisite – The drying procedure is running. ▶ Press the <+> button to increase the dryer air intensity. Press the <–> button to decrease the dryer air intensity. Result ✓ The dryer air intensity becomes stronger/ weaker. -
Page 29: Saving User Profiles
Saving user profiles Three different user profiles can be stored via the <user profile> buttons on the remote control. User profiles allow you to access your personal settings directly. Select your user profile as soon as you sit down. Enter your personal settings. Press one of the 3 <user profile>... -
Page 30: Calling Up User Profiles
Calling up user profiles User profiles allow you to access your personal settings directly. Select your user profile as soon as you sit down. Prerequisite – Personal user profiles are saved to the <User profile> buttons. → See Saving user profiles. -
Page 31: Saving A Personal User Profile In The Geberit Home App
Saving a personal user profile in the Geberit Home Prerequisite – The current version of the Geberit Home app is installed on your smartphone. – The Geberit Home app is running. – You are within the detection range of the shower toilet. User recognition does not have to be activated. -
Page 32: How To Program The Device
How to program the device Overview of the programming options The device settings can be configured using the back of the remote control. Press any button on the rear side of the remote control to activate the display. To save the battery, the display deactivates after 30 seconds. -
Page 33: Device Settings Main Menu
Device settings main menu Access the [device settings] main menu using the <Home> button on the back of the remote control. Home [Device settings] Personal settings Care & maintenance Help ✓ Use the <up>/<down> arrow keys to access the next menu item. ✓... -
Page 34: Device Settings Menu
Device settings menu Spray intensity Shower Spray arm position Lady shower Shower water heating Oscillating spray Dryer functionality Function settings Dryer Dryer air intensity Dryer heating Odour extraction unit Odour extraction unit Run-on of od extr unit Activation Device settings Orientation light Colour Brightness... -
Page 35: Function Settings Menu
Function settings menu Spray intensity Shower Spray arm position Lady shower Shower water heating Oscillating spray Dryer functionality Function settings Dryer Dryer air intensity Dryer heating Odour extraction unit Odour extraction unit Run-on of od extr unit Activation Device settings Orientation light Colour Brightness... - Page 36 Table 1: Function settings – shower / Lady shower Display in the Display in the Setting display / menu display / submenu [Spray intensity] Function settings of the anal [Shower] Lady shower shower Dryer [Spray intensity] of the Lady Function settings shower Shower [Lady shower]...
- Page 37 Table 2: Function settings – dryer Display in the Display in the Setting display / menu display / submenu [On] = The dryer Function settings functionality Shower Lady shower starts auto- [Dryer] matically after the spray functionality. [Off] = The dryer functionality is deactivated.
- Page 38 Table 3: Function settings – Odour extraction Display in the Display in the Setting display / menu display / submenu [On] = The Function settings odour extraction [Odour extraction unit] Orientation light unit starts as WC seat ring heating soon as a user is detected on the WC.
- Page 39 Table 4: Function settings – Orientation light Display in the Display in the Setting display / menu display / submenu [On] = The Function settings orientation light Odour extraction unit [Orientation light] stays on WC seat ring heating permanently. [Off] = The orientation light is deactivated.
- Page 40 Table 6: Function settings – WC lid position Display in the Display in the Setting display / menu display / submenu Sensor range of Function settings the lid lifter. [WC lid] Autom. flush actuation WC lid Sensor range [Detection range] Open automatically Close automatically [Save with OK] [On] = The WC...
- Page 41 Table 7: Function settings – Automatic flush actuation Display in the Display in the Setting display / menu display / submenu [Autom. flush This menu only actuation] appears if the (optional) optional interface module Function settings for the external WC lid [Autom.
-
Page 42: System Settings Menu
System settings menu Device settings Water hardness System settings Demo mode Set WC lid Factory settings reset Table 8: System settings – Water hardness Display in the Display in the Setting display / menu display / submenu System settings Water hardness Water hardness soft [Water hardness]... - Page 43 Table 11: System settings – Factory settings Display in the Display in the Setting display / menu display / submenu [Yes] = The System settings factory setting is Water hardness Demo mode The language is adopted. Set WC lid not reset when [No] = The [Factory settings reset] resetting to...
-
Page 44: Personal Settings Main Menu
Personal settings main menu Access the [Personal settings] main menu using the <Home> button on the back of the remote control. Home Device settings [Personal settings] Care & maintenance Help ✓ Use the <up>/<down> arrow keys to access the next menu item. ✓... -
Page 45: User Menu
User menu Spray intensity Shower Spray arm position Lady shower Shower water heating Oscillating spray Dryer functionality User 1 Dryer Dryer air intensity Dryer heating Odour extraction unit Odour extraction unit Run-on of od extr unit Personal settings WC seat ring heating User User Table 12:... -
Page 46: Care And Maintenance Main Menu
Care and maintenance main menu Access the [Care and maintenance] main menu using the <Home> button on the back of the remote control. Home Device settings Personal settings [Care & maintenance] Help ✓ Use the <up>/<down> arrow keys to access the next menu item. ✓... -
Page 47: Care And Maintenance Menu
Care and maintenance menu Descaling Care & maintenance Spray/dryer arm rinsing Replace filter Table 13: Care and maintenance – Descaling Display in the Display in the Setting display / menu display / submenu Care & maintenance Descaling [Descaling] WC due for descaling Spray/dryer arm rinsing Duration approx. -
Page 48: Help Main Menu
Help main menu Access the [Help] main menu using the <Home> button on the back of the remote control. Home Device settings Personal settings Care & maintenance [Help] ✓ Use the <up>/<down> arrow keys to access the next menu item. ✓... -
Page 49: Help Menu
Help menu Android Geberit Home App Help Manuals (PDF) Home page Error message Table 16: Help – Geberit Home app Display in the Display in the Setting display / menu display / submenu → See Help Geberit Home App Downloading the... -
Page 50: Cleaning And Descaling The Device
▶ Remove water drops with a soft, Daily lint-free cloth to avoid limescale stains. ▶ Clean the WC ceramic appliance with Geberit AquaClean cleaning agent. → See Care instructions for sanitary ceramic appliances. ▶ Clean all surfaces and corners thoroughly. → See... -
Page 51: Targeted Disinfection
▶ Use Geberit AquaClean cleaning agents. ▶ Pay attention to the cleaning and care instructions. Using the Geberit AquaClean cleaning set is recommended, as this set includes a ready-made cleaning agent that is ideal for cleaning all Geberit AquaClean surfaces. - Page 52 Recommended properties of suitable cleaning agents and cleaning equipment for best cleaning results: Symbol Properties of suitable cleaning agents Skin-friendly Cleaning agents are permitted to have a low acid content, e.g. diluted citric acid Low-foaming Liquid Water-dilutable Symbol Suitable cleaning equipment Soft, fine-pored sponges Lint-free, soft cloths which are free of dust...
-
Page 53: Care Instructions For Smooth Surfaces
The Geberit AquaClean cleaning set (art. no. 242.547.00.1) includes a ready-made cleaning agent that is optimal for cleaning all Geberit AquaClean surfaces. Care instructions for sanitary ceramic appliances • Use standard cleaning agents only in compliance with the respective manufacturer’s information. - Page 54 Dirt Care measures Organic deposits (brown to black in colour): ▶ Clean the affected areas with a standard chlorine cleaner. Note the information provided by the cleaning agent manufacturer. The application time of the chlorine cleaner may not exceed 2 h. ▶...
-
Page 55: Care Instructions For Wc Seat
Care instructions for WC seat Please note the following when cleaning the WC seat: • Ensure that the WC seat is opened or dismounted during the application time of cleaning agents. • Never use cleaning agents that contain chlorine or acid or that are corrosive. - Page 56 Slide the release button to the right and lift the WC seat ring out of the right-hand bracket. Slide the WC seat ring out of the left-hand hinge. During dismantling and cleaning, take care to ensure that the cable does not become kinked or damaged.
- Page 57 Spray the surfaces with Geberit AquaClean cleaning agent. Wipe the surfaces with a soft, lint-free, damp cloth. Then dry the surfaces with a soft, lint-free cloth. After cleaning is complete, re-assemble the device in reverse order of disassembly. Take care to ensure that the cable is guided back correctly into the device and that it does not become kinked or damaged during this process.
-
Page 58: Cleaning The Wc Lid And Housing
Cleaning the WC lid and housing Be careful not to scratch the surface of the WC seat. Always place the components on a soft, non-scratching underlay. Open the design cover. Gently lift the WC lid to activate the lid lifter. ✓... - Page 59 Lift the WC lid vertically out of its position. Spray the surfaces with Geberit AquaClean cleaning agent. Wipe the surfaces with a soft, lint-free, damp cloth. Then dry the surfaces with a soft, lint-free cloth. After cleaning is complete, re-assemble the...
-
Page 60: Cleaning Shower And Dryer Arm Via Remote Control Display
Cleaning shower and dryer arm via remote control display • For cleaning, use a soft, lint-free cloth. • Geberit AquaClean cleaning agent is particularly suitable for all surfaces of the device. Launch the [Care & maintenance] main menu using the buttons on the rear side of the remote control. - Page 61 <OK> button. Disassembly Pull off the spray nozzle [Cont. with OK] Spray the shower arm and spray nozzle with Geberit AquaClean cleaning agent. Then rinse both parts with water and confirm with the <OK> button. Cleaning Clean spray nozzle and...
- Page 62 Attach the spray nozzle to the shower arm and confirm with the <OK> button. Assembly Push spray nozzle onto spray arm [Cont. with OK] ✓ Make sure that the spray nozzle is mounted correctly. Fit the shower arm and confirm with the <OK> button.
- Page 63 Disassembly Unlock dryer nozzle and pull it out [Cont. with OK] Spray the dryer arm and dryer nozzle with Geberit AquaClean cleaning agent. Then rinse both parts with water and confirm with the <OK> button. Cleaning Clean dryer nozzle and dryer arm [Cont.
- Page 64 Cleaning is complete. The display shows Cleaning completed Spray nozzle/arm and dryer nozzle/arm are clean [Home with OK] Confirm with the <OK> button.
-
Page 65: Cleaning The Shower And Dryer Arm Via The Side Control Panel Or Buttons On The Remote Control
Cleaning the shower and dryer arm via the side control panel or buttons on the remote control • For cleaning, use a soft, lint-free cloth. • Geberit AquaClean cleaning agent is particularly suitable for all surfaces of the device. Open the WC lid. - Page 66 Pull out the spray nozzle for cleaning and descaling. Replace the spray nozzle if it can no longer be completely cleaned and descaled. Spray the spray arm with Geberit AquaClean cleaning agent. Then rinse the spray arm with water. Dry both parts carefully before re-assembling and re-fitting the spray arm.
- Page 67 Unlock the dryer arm by turning it 90° to the left. Pull the dryer arm out. Press the unlock button on the rear side of the dryer arm and pull out the dryer nozzle. Clean the dryer arm and dryer nozzle. Dry both parts carefully before re-assembling the dryer arm.
- Page 68 Press the <Shower> button on the lateral control panel. Or: Press the <Shower> button on the remote control. ✓ The dryer arm retracts completely. Result ✓ The cleaning procedure is now complete.
-
Page 69: Descaling The Device
ATTENTION Aggressive descaling agents Unsuitable descaling agents may cause damage to the device. ▶ Only use Geberit AquaClean descaling agents to descale the device. ▶ Refer to the “Descaling the device” section. The descaling procedure should not be cancelled after adding the descaling agent because it would otherwise be flushed away unused. - Page 70 Remove the stopper and confirm with the <OK> button. Descaling Pull out plug and prepare descaler [Cont. with OK] Pour a bottle (125 ml) of Geberit AquaClean descaling agent into the filling opening Descaling Add 125 ml of descaler [Cont. with OK] Cancel Confirm with the <OK>...
- Page 71 Reinsert the stopper and confirm with the <OK> button. Descaling Reinsert the plug [Cont. with OK] Remove splashes of descaling agent immediately with a damp cloth. ✓ Wait until the device is ready. The display shows Descaling Close the cover behind the WC seat [Cont.
-
Page 72: Device Descaling Message
Device descaling message During installation, the device was configured for the local water hardness in accordance with the following table. This adaptation prevents unnecessary descaling procedures and helps protect the environment. Nevertheless, regular descaling of the device is required. Area °fH °dH °e... -
Page 73: Troubleshooting
Troubleshooting Troubleshooting The table below explains what you need to do in the event of a fault: • Carry out the steps one after the other until the device is no longer demonstrating any faults or is working as normal again. •... -
Page 74: The Shower Toilet Is Without Function
The shower toilet is without function The following table will help you with troubleshooting if the shower toilet is without function. DANGER Electric shock Incorrect maintenance work or troubleshooting can lead to serious injury or death. ▶ In case of malfunctions, the device must immediately be switched off at the power switch and the customer service must be contacted. - Page 75 Description of Cause Fault clearance problem ▶ Trip the fuse or residual-current device in the electrical distributor. The product ▶ has an Malfunction Disconnect the unknown mains plug (if technical occurred available). ▶ defect. contact customer service. ▶ Have the power supply tested by a skilled person.
-
Page 76: Other Functional Errors
Other functional errors The following table will help you with troubleshooting if individual functions of the shower toilet have failed. The shower toilet can be used as a normal toilet even in the event of a malfunction. The spray arm and dryer arm must be fully retracted. You start the toilet flush as usual by pressing the buttons on the cistern. - Page 77 Description of Cause Fault clearance problem ▶ Descaling the device. ▶ Switch off the When using shower toilet at the the shower power switch for function, the 30 seconds. shower toilet Shower no longer toilet dirty reaches the Result usual ✓ The device temperature.
-
Page 78: Troubleshooting For The Remote Control
• It is not possible to control the shower toilet with the remote control. The remote control is inactive while the Geberit Home App is in use. Should the remote control fail to function, you can use the lateral control panel instead. - Page 79 Step Description of Fault clearance problem ▶ Restore remote control to factory settings. Press the <Home> and <Care The remote control and maintenance> display is set to a preset buttons simul- language that taneously for cannot be read. 5 seconds. ▶ Reassign the remote control.
-
Page 80: Replacing The Remote Control Battery
Replacing the remote control battery Prerequisite – During the entire procedure, the remote control must be located in the reception range of the shower toilet. Remove the dead batteries. Dispose of the dead batteries in the correct way. Insert a new CR2032 battery. -
Page 81: Re-Assign Remote Control
Re-assign remote control Switch on the device. - Page 82 Press the <+> button on the remote control for approx. 20 seconds until [Connection established] appears on the display.
- Page 83 The WC lid cannot be inserted The closing mechanism of the lid lifter was activated, although the WC lid was not installed. Press the <Shower> button on the remote control to reset the hinge position. Insert the WC lid vertically. Press the <Shower>...
-
Page 84: Replacing The Ceramic Honeycomb Filter
Replacing the ceramic honeycomb filter CAUTION Possible health hazard Impurities in the filter could lead to contamination of the breathing air. ▶ Replace the filter annually. The ceramic honeycomb filter is located on the bottom right side of the device. It is fastened with a catch spring. - Page 85 The display shows Replace filter Bend catch spring to side & remove filter [Cont. with OK] Confirm with the <OK> button. Bend the catch spring gently to the side to unfasten the ceramic honeycomb filter. At the same time, remove the used filter from the bracket.
- Page 86 The display shows Replace filter Insert new filter [Cont. with OK] Confirm with the <OK> button. Insert the new filter. ✓ The catch spring is used to fasten the new filter. Confirm with the <OK> button. The display shows Filter replaced Odour neutralisation is active again [Home with OK]...
-
Page 87: Sustainability
A company management geared to sustainability helps to save costs while minimizing risks at the same time. Geberit aims to act as a role model and set standards for its customers, suppliers and other partners. This means creating water-saving... -
Page 88: Disposal
(WEEE) must be disposed of separately and not with other non-recyclable waste. End users are legally obliged to return old equipment to public waste disposal authorities, distributors, or Geberit for proper disposal. Many distributors of electrical and electronic equipment are obliged to take back WEEE free of charge. -
Page 89: End User Warranty
(‘Geberit’). The contact information and web address of Geberit can be found on the list. 1. Geberit warrants to the end user that the product is free from material defects and manufacturing faults. The warranty is valid for a period of two years, calculated from the installation date of the product at the end customer’s site. - Page 90 4. To assert rights under this warranty, Geberit must be notified either verbally or in writing via the contact information provided in the list or on the...
-
Page 91: Technical Data And Conformity
Inc. and are under licence by Geberit. Simplified EU Declaration of Conformity Geberit International AG hereby declares that the radio equipment type Geberit AquaClean Mera is in compliance with Directive 2014/53/EU. The full text of the EU declaration of conformity is available at the following Internet address: https://doc.geberit.com/968881000.pdf. -
Page 92: Contact
Schachenstrasse 77 8645 Jona Schweiz / Suisse / Svizzera T +41 848 882 982 service.ch@geberit.com www.geberit-aquaclean.ch www.geberit.ch Europe (AT) Geberit Vertriebs GmbH & Co. KG Gebertstrasse 1 3140 Pottenbrunn / St. Pölten Oesterreich T +43 2742 401-500 aquaclean.at@geberit.com www.geberit-aquaclean.at www.geberit.at (BE) - Page 93 (DE) Geberit Vertriebs GmbH Kundendienst/Servicestelle Theuerbachstrasse 1 88630 Pfullendorf Deutschland T +49 75 52 934 10 11 service.de@geberit.com www.geberit-aquaclean.de www.geberit.de (DK) Geberit A/S Lægårdsvej 26 8520 Lystrup Danmark T +45 86 74 10 86 F +45 86 74 10 98 service.dk@geberit.com...
- Page 94 (GR) Geberit Greece S.M.P.C 572 Vouliagmenis Avenue 16452 Argyroupoli Athens Hellas sales.gr@geberit.com www.geberit.gr (HR / BA) Geberit prodaja d.o.o. , Ruše Podružnica Zagreb Samoborska cesta 218 10090 Zagreb Hrvatska T +385 1 3867 800 service.hr@geberit.com www.geberit.hr (HU) Geberit Kft.
- Page 95 Luhrtoppen 2 1470 Lørenskog Norge T +47 67 97 82 00 gacservice.no@geberit.com www.geberit-aquaclean.no www.geberit.no (PL) Geberit Sp. z o.o. ul. Postępu 1 02-676 Warszawa T +48 22 376 01 01 lub T +48 801 17 17 17 info.pl@geberit.com www.geberit-aquaclean.pl www.geberit.pl (PT) Geberit Tecnologia Sanitária, S.A...
- Page 96 Sector 5, Bucuresti România T +40 21 330 30 80 info.ro@geberit.com www.geberit.ro (RS / MK / ME) Geberit prodaja d.o.o. Predstavništvo za Srbiju Crnu Goru i Severnu Makedoniju Vojvode Skopljanca 24 RS -11000 Beograd Serbija T + 381 11 30 96 430 service.rs@geberit.com...
-
Page 97: Africa And Middle East
(TR) Geberit Tesisat Sistemleri Tic Ltd. Şti. İçerenköy Mah. Engin Sok. No: 10 34752 Ataşehir-İstanbul Türkiye T +90 216 340 82 73 F +90 216 340 82 79 service.tr@geberit.com geberit.com.tr Africa and Middle East (AE / BH / KW / OM / QA / SA) -
Page 98: Asia
(SG / TH / JP / PH / KR / VN / KH / MY / TW / ID / HK / MO) Geberit South East Asia Pte Ltd 8 Kallang Avenue, #17-09, Aperia Tower 1 Singapore 339509 Singapore T +65 6250 4011 sales.sg@geberit.com... - Page 99 Geberit International AG Schachenstrasse 77, CH-8645 Jona documentation@geberit.com www.geberit.com...
Need help?
Do you have a question about the AQUACLEAN MERA COMFORT and is the answer not in the manual?
Questions and answers