
Related Manuals for Yamaha MGP12X


Summary of Contents for Yamaha MGP12X
- Page 1 Owner’s Manual Precautions pages 4, 5 Quick Start Guide pages 12 to 14 Troubleshooting page 27...
-
Page 2: Important Safety Instructions
Protect the power cord from being walked on or pinched dropped. particularly at plugs, convenience receptacles, and the point where they exit from the apparatus. WARNING TO REDUCE THE RISK OF FIRE OR ELECTRIC SHOCK, DO NOT EXPOSE THIS APPARATUS TO RAIN OR MOISTURE. (UL60065_03) MGP16X/MGP12X Owner’s Manual... -
Page 3: Table Of Contents
(page 20) Accessories • AC power cord (1) The mixer has a built-in USB port (at top) for connection to an iPod/ • Rack mount kit (1) (MGP12X only) iPhone. Digital audio output from the iPod/iPhone can be directly input •... -
Page 4: Precautions
Yamaha service personnel. CAUTION Always follow the basic precautions listed below to avoid the possibility of physical injury to you or others, or damage to the device or other property. These precautions include, but are not limited to, the following: Power supply/Power cord •... -
Page 5: About This Manual
AC outlet. Then have the device inspected by qualified Yamaha service personnel. • Do not rest your weight on the device or place heavy objects on it, and avoid use excessive force on the buttons, switches or connectors. -
Page 6: Making The Most Of Your Mixer
With properly as well as to connect the mixer’s outputs to a power amplifier or designed receiving circuitry cables with this type of connector related gear: balanced or unbalanced. -
Page 7: Level Adjustment For Optimum Mix
HIGH end up a bit. Or you can boost the bass a little if you feel the low end is lack- Output ing. During recording it’s better to use EQ sparingly for compen- 0 (Min) sation only. -
Page 8: Setup
Setup Setup Examples : iPod/iPhone signal CH15/16 1. Sound Reinforcement for (MGP16X) USB : iPod/iPhone signal CH11/12 (MGP12X) USB Live Performance iPod/ iPhone CD player Computer/Audio interface Powered monitor speakers Headphones Synthesizer Exciter Bass Effect processor Portable recorder... - Page 9 Setup 2. For Events and Parties : iPod/iPhone signal CH15/16 (MGP16X) USB : iPod/iPhone signal CH11/12 (MGP12X) USB iPod/ iPhone DJ mixer DVD player (voice) CD player Headphones Computer/Audio interface Instrument, Microphone CH8 (for MC) * MGP12X: CH4...
-
Page 10: Rack Mounting
Precautions for Rack Mounting This unit is rated for operation at ambient temperatures ranging from 0 to 40 degrees Celsius. If you install this unit along with other devices in a poorly ventilated rack, the ambient temperature inside the rack may rise, resulting in inefficient performance. -
Page 11: Security Cover Mounting
MGP12X Security Cover Mounting Prepare the included rack-mount kit (2 sup- In order to prevent the control knobs of the front panel from being ports and 6 screws). operated inadvertently, you can attach a protective cover using four screw holes on the unit. (Size: M3; horizontal spacing: 410mm for MGP16X and 311mm for MGP12X;... -
Page 12: Quick Start Guide
See page 18 for details. • Be sure to turn the power on/off in the order given in Step 3 above every time you use the device. Failure to do so may result in loud noise bursts that can damage your equipment, your ears, or both. -
Page 13: Step 4 Getting Sound To The Speakers
To select a reverb effect, use the knobs, and set FX1 to any program, or FX2 to one of the programs 1 to 5. NOTE To use the level meter to get an accurate reading of the incom- Turn on ( ) the FX1/FX2 ON button. -
Page 14: Step 6
It’s always a good idea to choose around “0” (nominal). a reverb program that gives you the depth you want without detracting from the clarity of the mix.Using The Ducker Function -
Page 15: Controls And Connectors
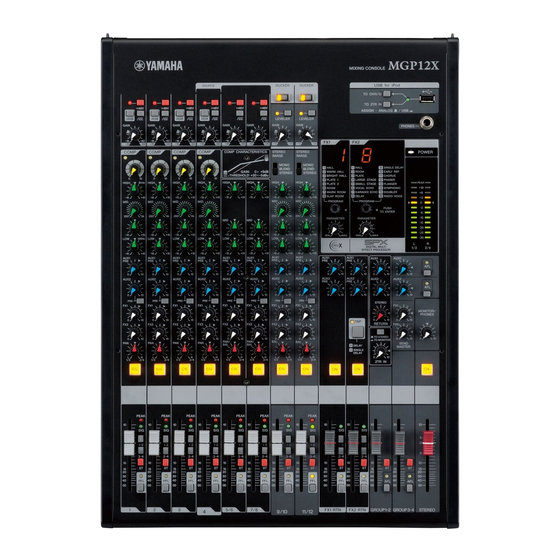
Front Panel * Throughout this manual, all panel illustrations show the panel of the MGP16X. On the MGP12X, there are four channels in the mono input section (see 1 below) and 12 channels in the channel I/O connectors section (see 10 on the next page). -
Page 16: Rear Panel
Controls and Connectors Rear Panel Rear Input/Output Block 10. Channel I/O connectors section ....... page 25 11. Master I/O connectors section......page 26 12. Power section ........... page 26 MGP16X/MGP12X Owner’s Manual... -
Page 17: Where Your Signal Goes Once It's Inside The Box
Where Your Signal Goes Once It’s Inside the Box The purpose of configuring an audio system around a mixer is to collect signals from all channels and mix their levels and other settings to achieve a good balance. The following simplified mixer block diagram shows how the input signal flows once it’s inside the mixer. For an overall block diagram of the MGP, see page 33. -
Page 18: Channel Control Block
( ), the mixer supplies DC +48V Mono input section power to pins 2 and 3 of all XLR input jacks. Turn this switch on when using one or more phantom-powered condenser Mono and stereo input section microphones. -
Page 19: Gain Control
NOTE are mixed in a certain percentage for a more nat- • To send the signal to the bus engage the ON switch (!4 ) . ural stereo image. • On stereo channels, the LINE L (odd) and LINE R (even) •... -
Page 20: Master Control Block
The BAL control knob sets the balance between left and right stereo channels. For example, rotate the knob toward L to increase the volume level of the left or Groups 1 and 3, and decrease the level of the right or Groups 2 and 4. -
Page 21: About The Detailed Setting Mode
The mixer saves the settings, and then exits the detailed setting mode. NOTE • The mixer retains the last setting made, even after the power is turned off. • To restore the default settings, press the TAP button while in the condition of step 3 above. -
Page 22: Sig Indicator
To restore the initial factory settings for the internal effects, turn The average interval will be set (the average of a, b, and c) on the power while holding the TAP button (t) and the ON button (y). -
Page 23: Meter/Phones Section
NOTE Connect a pair of headphones to this TRS phone jack. The If you supply a signal to the RETURN L (MONO) jack only, the PHONES jack outputs the same signal as the MONITOR mixer sends the same signal to both the L and R Stereo buses. -
Page 24: Send Master Section
GROUP1-2 or 3-4 fader. The Group 1 and 3 signal AFL switch are on. To monitor the post-fader signal, make goes to Stereo L and the Group 2 and 4 signal goes to Stereo sure to turn off all PFL switches. -
Page 25: Rear Input/Output Block
(tip = send/out; ring = return/in; sleeve = ground). NOTE On any given channel, you may use either an XLR or phone NOTE jack, but not both. Connection to an INSERT I/O jack requires a special insertion cable as illustrated below. -
Page 26: Stereo Out
NOTE • These jacks can also be used as an auxiliary stereo input. • If you connect to the L (MONO) jack only, the mixer will rec- ognize the signal as monaural and will send the identical sig- nal to both the L and R jacks. -
Page 27: Troubleshooting
Check that the switch for the desired bus in the FX1/FX2 RTN bus assign switches is turned on. When an effect device is connected to the FX1 or FX2 jack, is the FX1 or FX2 control on the SEND MASTER set to appropriate levels? ... -
Page 28: Appendix
Cutoff Offset 0 – 127 ter to change the frequency range to be emphasized. * “LFO” stands for Low Frequency Oscillator. An LFO is normally used to modulate another signal, determining the modulation speed and waveform shape. MGP16X/MGP12X Owner’s Manual... -
Page 29: Jack List
TRS Phone Jack PHONES Ring: R Sleeve: Ground RETURN Tip: Hot LINE (stereo channels) Sleeve: Ground Sleeve Phone Jack * These jacks will also accept connection to phone plugs. If you use monaural plugs, the connection will be unbalanced. MGP16X/MGP12X Owner’s Manual... -
Page 30: Specifications
0 dBu=0.775 Vrms, 0 dBV=1 Vrms All faders are set to nominal position if not specified. (Nominal position is adjusted to a position that is 10 dB lower than the maximum position) Output impedance of signal generator(Rs)=150 ohms, Output load impedance=10k ohms (TRS phone output), 600 ohms (XLR output) UNIT 20 Hz–20 kHz, refer to the nominal output level @1 kHz... - Page 31 0 dBu=0.775 Vrms, 0 dBV=1 Vrms *1 Sensitivity: The lowest level that will produce an output of +4 dB (1.23 V), or the nominal output level when the unit is set to maximum level. (All faders and level controls are at their maximum position.) *2 Combo jacks are balanced (1&Sleeve=GND, 2&Tip=HOT, 3&Ring=COLD)
-
Page 32: Dimensions
* Specifications and descriptions in this owner’s manual are for information purposes only. Yamaha Corporation reserves the right to modify products or specifications at any time without prior notice. Since specifications, equipment, and options may not be the same in every locale, please check with your Yamaha dealer. -
Page 33: Block Diagram And Level Diagram
Appendix Block Diagram and Level Diagram CTRL CTRL GROUP GROUP GROUP GROUP STEREO STEREO FX1-IN FX2-IN HIGH STEREO BLEND HIGH MONO HIGH MGP16X/MGP12X Owner’s Manual... - Page 34 MGP16X/MGP12X Owner’s Manual...
- Page 35 [Information on Disposal in other Countries outside the European Union] This symbol is only valid in the European Union. If you wish to discard these items, please contact your local authorities or dealer and ask for the correct method of disposal.
- Page 36 Niederlassung und bei Yamaha Vertragshändlern in den jeweiligen Bestimmungsländern erhältlich. Pour plus de détails sur les produits, veuillez-vous adresser à Yamaha ou au distributeur le plus proche de vous figurant dans la liste suivante. Para detalles sobre productos, contacte su tienda Yamaha más cercana o el distribuidor autorizado que se lista debajo.
Need help?
Do you have a question about the MGP12X and is the answer not in the manual?
Questions and answers