
Related Manuals for Yada ROADCAM PLUS BT532967


Summary of Contents for Yada ROADCAM PLUS BT532967
- Page 1 ROADCAM PLUS 1080P Dashcam with App Control BT532967 User Manual Important, retain for future reference: Read carefully...
-
Page 2: Mounting The Camera
QUICK INSTALLATION GUIDE Before you begin the installation, please gather these items. 1. Mounting the Camera MicroSD Card (Factory-Installed) -
Page 3: Connecting To Power
Recommended mounting position 2. Connecting to Power... -
Page 4: Product Specifications
If you require assistance with camera installation, please feel free to either consult an experienced technician or reach out to YADA customer support at 1.866.294.9244. BEFORE using the camera, please read the safety information in this manual, and always follow the guidelines outlined in it while using the product. -
Page 5: Package Contents
PACKAGE CONTENTS 1. 1 x Roadcam Plus 2. 1 x Windshield Mount 3. 1 x 8GB MicroSD Card (Factory-installed, replaceable) 4. 1 x 12/24V Power Adapter 5. 1 x Adhesive Film 6. 1 x Instruction Manual... -
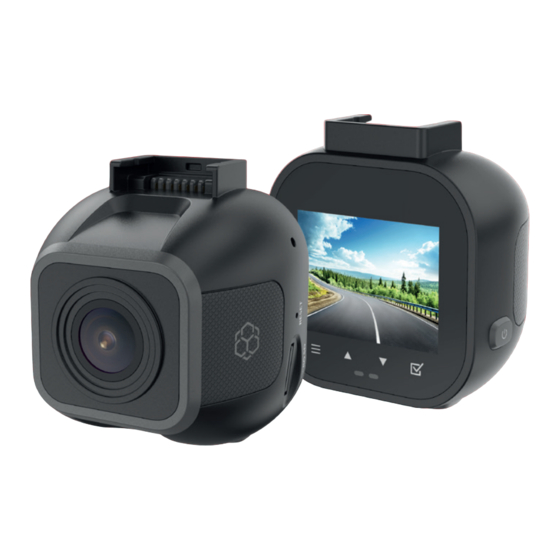
Page 6: Product Overview
PRODUCT OVERVIEW Mounting Socket Microphone Reset Button Camera Lens MicroSD Card Slot (MicroSD Card Factory-Installed) Speaker Display Screen Power Button LED Indicators Function Buttons... -
Page 7: Controlling The Camera
CONTROLLING THE CAMERA Power ON/OFF (press & hold) Screen Save (click once) Menu / Delete/Protect (press & hold) Mode / Lock / Return (click once) Navigation UP (click once) Navigation DOWN / Audio Recording ON/OFF (click once) OK / Record/Stop Recording / Snapshot / Play/Pause (click once) DIMENSIONS 2.26”... -
Page 8: Installing The Camera
INSTALLING THE CAMERA Remove the protective film from the display screen. Attach the windshield mount securely into the socket on the camera. Connect the USB-C power cable to the input port on the windshield mount. NOTE: Please test the camera by connecting it to a power source before mounting. - Page 9 4. Mount the camera onto the windshield. You can power on the camera and view the live screen to find the optimal mounting position. - Apply the adhesive film onto the cleaned windshield and remove the protective film. - Peel off the 3M VHB™ tape backer from the windshield mount and affix the camera to the center of the adhesive film.
-
Page 10: Initial Setup
Set the date & time before using the camera. The date stamps that appear on all future recordings will follow this setting. You may also sync the date & time to your phone by connecting the camera to the YADA Drive APP. Switching Modes Click to switch between video mode, camera mode, and gallery mode. -
Page 11: Gallery Mode
Gallery Mode • Utilize to browse through individual video files or photos in full screen. • Click to select and play the video file. • During video playback, click to pause/resume the video. • Press and hold to select file management options: Delete: Delete the selected file. -
Page 12: Camera Setting
Camera Setting Press and hold in camera mode to access the camera setting page. Resolution: 12M (4032x3024) or 5M (2592x1944). Burst Photo: ON or OFF. Exposure: +2, +1, 0, -1 or -2. Image Stabilization: ON or OFF. Date Stamp: ON or OFF. System Setting Click in video setting page or camera setting page to access the system... -
Page 13: Downloading The App
DOWNLOADING THE APP YADA Drive The auto-sync feature in the YADA Drive APP allows you to 1) Synchronize the camera’s time with your phone’s time, 2) Manage the camera’s functions from your phone, and 3) View and download recorded videos. -
Page 14: Setting Up The App
3. Navigate to the WiFi setting page on your device. 4. Connect to “YADA_DVR17_1080P_xxxxxx” with the default password “12345678”. 5. Run the YADA Drive APP. Click “Allow” in the pop-up message when prompted to allow the APP to access your location. - Page 15 6. Select the “DASHCAM” category. 7. Select ROADCAM PLUS and click “Set Up Device”. 8. Select product from the list of devices. 9. Once connected, you will be able to see the camera’s live view through the APP. NOTE: After the initial sync, the APP remembers your camera’s network so that you can simply click “Connect”...
- Page 16 3. Please make sure Bluetooth, Location Services and Local Network Access are enabled on your device. 4. Run the YADA Drive APP and select the “DASHCAM” category. 5. Select ROADCAM PLUS and click “Set Up Device”. 6. Select product from the list of devices.
- Page 17 9. Scroll to the top and click to enter the WiFi setting page. 10. Connect to “YADA_DVR17_1080P_xxxxxx” with the default password “12345678”. 11. Click “YADA Drive” to return to the APP. 12. Once connected, you will be able to see the camera’s live view through the APP.
-
Page 18: Additional Features
ADDITIONAL FEATURES Automatic ON / OFF When the camera is connected to the vehicle’s power, it will power on and start recording when the vehicle engine starts. When the engine is off, the camera will stop recording and power off automatically. Smart Incident Recording When the G-Sensor detects a sudden impact such as collision, it’ll automatically lock and store the footage in the “Event”... -
Page 19: Battery Level Indications
BATTERY LEVEL INDICATIONS Please refer to the diagram below for battery level indications. Fully charged Battery moderately low Battery low Please charge Charging NOTE: The camera is intended to be powered on when the vehicle is running. The built-in battery’s primary purpose is to ensure the camera shuts down correctly when you turn off the vehicle, rather than running the camera extensively. - Page 20 FAQs 1) Problem: The camera is unable to take pictures or record videos. Solution: Please try formatting the MicroSD card (Menu – System Setting – Format). 2) Problem: The camera is showing that the memory card is full. Solution: Please 1) Switch the G-Sensor to “Medium” or “Low”, 2) Turn off the Motion Detection, and 3) Take the MicroSD card out and clear the “Event”...
-
Page 21: Safety Information
SAFETY INFORMATION IMPORTANT SAFETY INSTRUCTIONS 1. SAVE THESE INSTRUCTIONS – This manual contains important safety and operating instructions of the 12/24V cigarette lighter adapter for Model BT532967. 2. Before using the product, read all instructions and cautionary markings. 3. Do not expose cigarette lighter adapter to rain, moisture, or snow. 4. - Page 22 WARNING: A failure to read and follow these warnings and instructions may result in a serious accident, including damaged property or a serious injury, including loss of life. • The Roadcam Plus is designed as an aid to the driver in detecting large stationary objects to help avoid damaging the vehicle.
- Page 23 • Never allow children to play with the device. Small parts may be a choking hazard. • There is a plastic cover over the Roadcam Plus. Do not scratch the cover when cleaning dirt or snow from it. • If the temperature changes rapidly, the system may not operate normally. •...
-
Page 24: Maintenance And Warranty
Safety Around and Behind Other Vehicles Using a Roadcam Plus is not enough to completely overcome a vehicle’s blind spot. Many preventable injuries and deaths occur in driveways or parking lots when drivers do not see children, pets, or others near their vehicles. -
Page 25: Warranty
YADA warrants, to the original purchaser, that its products are free from defects in material and workmanship for 1 year from the date of original purchase. Where permitted by law, YADA’s liability shall be limited to that set forth in this limited express warranty. This limited express warranty shall be the exclusive remedy of the purchaser and YADA makes no other warranty of any kind aside from the limited express warranty stated above. - Page 26 Return Authorization and instruct on how to get a new unit. YADA makes no other warranty of any kind aside from the limited express warranty stated herein. DISCLAIMER OF WARRANTIES, INCLUDING WARRANTY OF...
- Page 27 YADA and/or its affiliates are not responsible for a user’s intended or actual use of the Roadcam Plus. In no event shall YADA and/ or its affiliates have any liability for any losses (whether direct or indirect, in contract, tort or otherwise) incurred in connection with the Roadcam Plus, including but not limited to damaged property, personal injury and/or loss of life.
-
Page 28: General Information
Customer Service/Contact IF YOU ARE EXPERIENCING ANY ISSUES WITH THE PRODUCT DURING OPERATION, DO NOT RETURN THE PRODUCT TO THE STORE. CONTACT YADA DIRECTLY FOR INSTRUCTIONS ON HOW TO RETURN/ EXCHANGE THE PRODUCT. FCC Compliance Statement: This device complies with Part 15 of the FCC rules. Operation is subject... -
Page 29: Rf Exposure Information
Android is a trademark of Google Inc. iPhone, iPad, Mac and iPod touch are trademarks of Apple Inc. Roadcam Plus 1080P Dashcam with App Control BT532967 Responsible Party: YADA 2975 Red Hill Ave., Ste. 100, Costa Mesa, CA 92626 Tel: 1.866.294.9244... - Page 30 Product code / Code de produit / Código del producto : BT532967 Register this product within 30 days of purchase to receive one (1) additional year of warranty coverage (beyond the standard 1-year warranty), along with special product offers and announcements. Enregistrez ce produit dans les 30 jours suivant l’achat pour recevoir une couverture supplémentaire de 1 AN (au-delà...
- Page 31 CONNECT @letsyada WITH US 2975 Red Hill Ave., Ste. 100, Costa Mesa, CA 92626 1.866.294.9244 | customercare@horizon-brands.com © 2023 ADC Solutions Auto, LLC. www.letsyada.com ML-532967E_V1...
Need help?
Do you have a question about the ROADCAM PLUS BT532967 and is the answer not in the manual?
Questions and answers
How do I set the time and date?
To set the time and date on the Yada ROADCAM PLUS BT532967, follow these steps:
1. Access the system setting page by clicking in the video or camera setting page.
2. Select "Date/Time."
3. Set the date and time as needed.
This answer is automatically generated