Advertisement
Quick Links
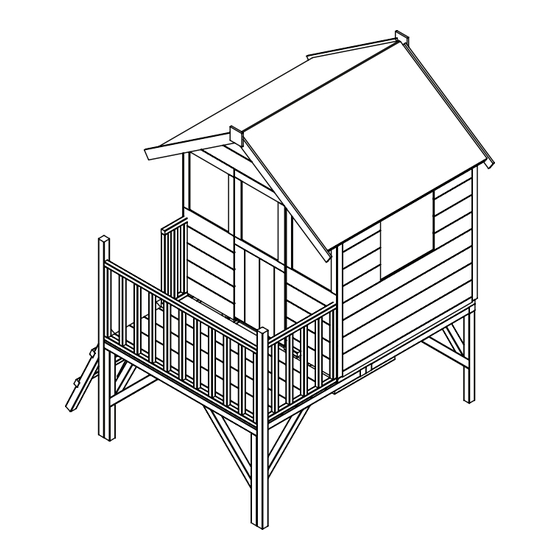
Bunny Max with Tower and Slide Playhouse Building Instructions
WARNINGS
1) Only for domestic use.
2) Outdoor use only.
3) Not suitable for children
under 36 months - Small parts.
Choking Hazard
50kg
MAXIMUM USER
ADULT ASSEMBLY ONLY
MINIMUM 2 PEOPLE
WEIGHT
Pre - Treated
BEFORE
YOU
START
Please read the instructions carefully
and please retain for future reference
Please note that all images are for illustration purposes only.
For Queries and Help please contact Product Support: 01909 768 858
1) Take 5
yourself with the
minutes
parts, QTy's and
and have
Sizes on the
a coffee.
PACKING LIST.
3) Read the
2) Reacquaint
instructions
thoroughly and
then re-read if
necessary.
MANUFACTURING ADDRESS:
Kybotech, Claylands Avenue, Worksop S81 7BQ
CODE:
INS-0069
V3.3-220120
Advertisement

Related Manuals for Billyoh Bunny Max with Tower and Slide Playhouse


Summary of Contents for Billyoh Bunny Max with Tower and Slide Playhouse
- Page 1 Bunny Max with Tower and Slide Playhouse Building Instructions Please read the instructions carefully and please retain for future reference Please note that all images are for illustration purposes only. For Queries and Help please contact Product Support: 01909 768 858 WARNINGS 1) Only for domestic use.
-
Page 2: Important Safety Notices
For Queries and Help please access our Support Centre: IMPORTANT SAFETY NOTICES www.gardenbuildingsdirect.co.uk/help GARDEN BUILDINGS: THESE PRODUCTS ARE INTENDED FOR DOMESTIC AND OUTDOOR USE ONLY. These products have been designed as an a ordable solution to most popular light domestic uses. GENERAL RECOMMENDATIONS Thank you for purchasing this building. -
Page 3: Troubleshooting Guide
www.gardenbuildingsdirect.co.uk/help For Queries and Help please access our Support Centre: PRODUCT MAINTENANCE CHECK LIST: PANEL ORIENTATION TROUBLE SHOOTING GUIDE CLADDING STYLE Wooden Sheds / Playhouses / Summerhouses It is essential to ensure that the panels of your Overlap: This style of cladding is Pre-Assembly: building are in the correct orientation. - Page 4 www.gardenbuildingsdirect.co.uk/help For Queries and Help please access our Support Centre: PARTS LIST: Floor Options Building No Tower HGA - Hinge (Antique) WC - Window Crosses CS - Cloaking Strip (325mm QTY x 2) GB - Glazing Block (ID14460 QTY x 4) F - Felt 3m WC - Window Crosses HA - Handle (Antique)
- Page 5 For Queries and Help please access our Support Centre: www.gardenbuildingsdirect.co.uk/help WARNING: Only use accessories compatable with this playhouse. Options indicated on this page are compatable ‘Provided they are assembled correctly’. OPTIONAL TOWER OPTIONAL FENCE Fitting Instructions Stages 34-35 Fitting Instructions Stages 1-8 & 29-33 21586 Picket Fence (Option A) Assembled Tower for Building Only Small Picket Fence 293...
- Page 6 www.gardenbuildingsdirect.co.uk/help For Queries and Help please access our Support Centre: S100 S100 S100 S100 If you building does not have a tower, please skip to stage 9. If your Once the Tower Platforms are fixed together, take the Floor Joist Once the Floor Joist Blocks (TWR-FJB) are fitted, turn the Platform building has a tower, position the Tower Boarded Platform Blocks (TWR-FJB) and position them across where the platforms...
- Page 7 www.gardenbuildingsdirect.co.uk/help For Queries and Help please access our Support Centre: 12mm Gap Front FSB/ Flush If you have a Solid Sheet Floor (FSS) you can fix the floor straight If you have a Slatted Boarded Floor (FSB) or a Tongue and Groove If your building does not come with a tower, build you playhouse onto the Tower Plain Platform (TWR-PP).
- Page 8 www.gardenbuildingsdirect.co.uk/help For Queries and Help please access our Support Centre: Flush Peel the film off both sides of the Glazing (GL) and place in the Use one 30mm screw (S30) per Glazing Block (GB) to hold the Place the Centre Purlin (CP) on the ground and fix the two L window frame.
- Page 9 www.gardenbuildingsdirect.co.uk/help For Queries and Help please access our Support Centre: Use (S25) black screws to fix two Hinges (HGA) to the Door (HGD). Place the Cloaking Strip (CS) along the edge of the Gables and fix in Pilot drill two holes in the bottom of all of the wall panels Ensure they are sitting level with the edge of the door frame.
- Page 10 www.gardenbuildingsdirect.co.uk/help For Queries and Help please access our Support Centre: Front View (2 PIECES OF FELT) Fix the small metal Magnetic Catch (MC) to the Half Glazed Door Lay the first piece of Roof Felt (F) over the Roof Panels (RSS) so that Lay the second piece of Roof Felt (F) over the other side of the roof (HGD).
- Page 11 Fitting Recommended Options - please see For Queries and Help please access our Support Centre: www.gardenbuildingsdirect.co.uk/help page 3 for more details on the parts used S50 S50 If you do not have a slide with your building place the Medium If your building has a slide (SL), place the slide between the Large Your building is now complete.
- Page 12 01909 768 858 For Queries and Help please call Product Support: Floor Fixing Stage (T&G) Roof Fixing Stage (T&G) Cut and lay the board (L=1235mm) aligned to the tip of the Gable. Fix the Slot the remaining (L-1172mm) board using 30mm Screws (S30). See the image above.
Need help?
Do you have a question about the Bunny Max with Tower and Slide Playhouse and is the answer not in the manual?
Questions and answers