Table of Contents
Advertisement
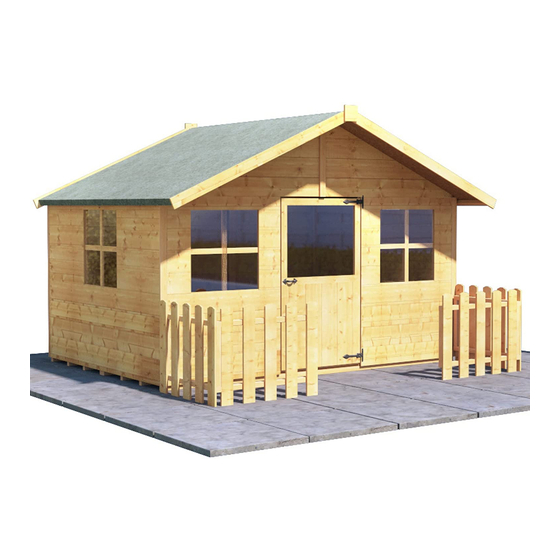
Lollipop Max Playhouse Building Instructions
WARNINGS
1) Only for domestic use.
2) Outdoor use only.
3) Not suitable for children
under 36 months - Small parts.
Choking Hazard
50kg
MAXIMUM USER
ADULT ASSEMBLY ONLY
MINIMUM 2 PEOPLE
WEIGHT
Pre - Treated
BEFORE
YOU
START
Please read the instructions carefully
and please retain for future reference
Please note that all images are for illustration purposes only.
For Queries and Help please contact Product Support: 01909 768 858
1) Take 5
yourself with the
minutes
parts, QTy's and
and have
Sizes on the
a coffee.
PACKING LIST.
3) Read the
2) Reacquaint
instructions
thoroughly and
then re-read if
necessary.
MANUFACTURING ADDRESS:
Kybotech, Claylands Avenue, Worksop S81 7BQ
CODE:
INS-0072
V7.3-220120
Advertisement
Table of Contents

Related Manuals for Billyoh Lollipop Max Playhouse


Summary of Contents for Billyoh Lollipop Max Playhouse
- Page 1 Lollipop Max Playhouse Building Instructions Please read the instructions carefully and please retain for future reference Please note that all images are for illustration purposes only. For Queries and Help please contact Product Support: 01909 768 858 WARNINGS 1) Only for domestic use.
- Page 2 For Queries and Help please access our Support Centre: IMPORTANT SAFETY NOTICES www.gardenbuildingsdirect.co.uk/help GARDEN BUILDINGS: THESE PRODUCTS ARE INTENDED FOR DOMESTIC AND OUTDOOR USE ONLY. These products have been designed as an a ordable solution to most popular light domestic uses. GENERAL RECOMMENDATIONS Thank you for purchasing this building.
- Page 3 For Queries and Help please access our Support Centre: www.gardenbuildingsdirect.co.uk/help PRODUCT MAINTENANCE CHECK LIST: PANEL ORIENTATION TROUBLE SHOOTING GUIDE CLADDING STYLE Wooden Sheds / Playhouses / Summerhouses It is essential to ensure that the panels of your Overlap: This style of cladding is Pre-Assembly: building are in the correct orientation.
- Page 4 www.gardenbuildingsdirect.co.uk/help For Queries and Help please access our Support Centre: PARTS LIST: TRU - Truss (14443 - QTY x 1) PGR - Plain Gable Apex Right WC - Window Cross PGL - Plain Gable Apex Left DGL-Door Glazing GL- Glazing (14403 - QTY x 2) 14865 - QTY x 4 (14402 - QTY x 2)
- Page 5 www.gardenbuildingsdirect.co.uk/help For Queries and Help please access our Support Centre: WARNING: Only use accessories compatable with this playhouse. Options indicated on this page are compatable ‘Provided they are aasembled correctly’ . OPTIONAL FENCE OPTIONAL BASE Fitting Instructions Stages 31-34 Fitting Instructions Stages 1-6 & 29+30 21587 Picket Fence (Option B) 21542 9x7 Base ts 5x7 Building 15737 - Eze Base 7ft Gable...
- Page 6 01909 768 858 For Queries and Help please call Product Support: What you need Where to find everything Recommend Woodkits - contains all strips, x2 for speed framing, fixings and Instruction for the building size. Glazing,strips and fixings found in packs. 1.
- Page 7 www.gardenbuildingsdirect.co.uk/help For Queries and Help please access our Support Centre: S100 2105mm S100 15737 S100 S100 15737 S100 S100 S100 15734 S100 15734 S100 15734 S100 15734 15734 15737 15734 S100 15734 S100 S100 Front 15734 S100 Front S100 S100 If you have not purchased our playhouse Eze Base platform please skip to the next page.
- Page 8 For Queries and Help please access our Support Centre: www.gardenbuildingsdirect.co.uk/help Rear 300mm 300mm 300mm 300mm 300mm Front The oor panels (FSS) are made up of 4 Floor Joists (FJ) and 1 solid sheet board each. Fix the rear Plain Gable Apex (made from PGL and PGR) sections together with 4 Floor Joists (FJ) are evenly spaced out underneath the boards and xed in place with On the ground x the three rear Plain Panels (PP) together with 50mm screws (S50).
- Page 9 For Queries and Help please access our Support Centre: www.gardenbuildingsdirect.co.uk/help PLAIN GABLE FLOOR As with the opposite side hold the second side Window Panel (WP) adjacent to the Plain Use 50mm screws (S50) to x the Door Threshold (DT) to the oor of the building Place the Door Gable (DG) between the two side walls and x them together with between the two Window Panels (WP).
- Page 10 For Queries and Help please access our Support Centre: www.gardenbuildingsdirect.co.uk/help Door Gable Top View A: Use 25mm black screws (S25) to x two Hinges (HGA) to the Door (HGD). Use 25mm Place each Roof Panel (RSS) one at a time on to the building and use 30mm nails (N30) black screws to x the glazing blocks (GB) to the door frame.
- Page 11 For Queries and Help please access our Support Centre: www.gardenbuildingsdirect.co.uk/help Metal Catch is xed to Metal Catch is xed to the inside of the door. the inside of the door. OUTSIDE INSIDE Antique Handle is xed Antique Handle is xed to outside of the door.
- Page 12 For Queries and Help please access our Support Centre: www.gardenbuildingsdirect.co.uk/help Picket Fence On Base Side Fence sits on base Fit tightly against the 21524 front of the building Side Base 21524 Ensure there Fit tightly WARNING! is a 24mm gap This dimension is required against the 24mm...
- Page 13 01909 768 858 For Queries and Help please call Product Support: Cut and lay the board (L=1758mm) Cut and lay the board (L=1758mm) aligned to the tip of the Gable. Fix the aligned to the tip of the Gable. Fix the board using 30mm Screws (S30).
Need help?
Do you have a question about the Lollipop Max Playhouse and is the answer not in the manual?
Questions and answers