
Related Manuals for Gamry Instruments Interface 1010


Summary of Contents for Gamry Instruments Interface 1010
- Page 1 Interface 1010 Potentiostat/Galvanostat/ZRA Operator’s Manual Copyright © 2014–2024 Gamry Instruments, Inc. Revision 1.51 June 7, 2024 988-00063...
-
Page 3: If You Have Problems
Please have your instrument model and serial numbers available, as well as any applicable software and firmware revisions. If you have problems in installation or use of a system containing an Interface 1010, call from a phone next to your computer, where you can type and read the screen while talking to us. -
Page 4: Disclaimers
Disclaimers Disclaimers Gamry Instruments, Inc. cannot guarantee that the Interface 1010 Potentiostat/Galvanostat/ZRA will work with all computer systems, operating systems, and third-party software applications/hardware/software. The information in this manual has been carefully checked and is believed to be accurate as of the time of printing. -
Page 5: Table Of Contents
Types of Interface 1010 instruments ...................... 25 Authorization Codes and Label ......................26 Firmware Update ..........................26 The Interface 1010 Customization Label ....................26 Introduction to the Interface 1010 Customization Label ..............26 Label Sheet Provided with Each Interface 1010 ................27... - Page 6 Length and Construction of the Cell Cable ..................63 Lead Placement ..........................63 Cell Construction .......................... 64 Reference Electrode ........................64 Instrument Settings ........................64 EIS Speed ............................64 Ancillary Apparatus ........................64 Floating Operation ..........................65 Appendix A: Interface 1010 Specifications ....................67...
- Page 7 Potentiostat/Galvanostat Power Model ....................85 Discharging a Battery ..........................86 Single Interface 1010 ..........................87 Vertical Stacks ............................87 Interface Power Hub Systems ........................ 87 Appendix G: Capabilities of Various Models of Interface 1010 ............... 89 Appendix H: Index ............................93...
-
Page 9: Chapter 1: Safety Considerations
AC adapter (power brick), which outputs 48 V DC, which in turn powers the Interface 1010. The Interface 1010’s AC Adapter is rated for operation from 100 to 240 V AC, 47 to 63 Hz. It should therefore be useful throughout the world. -
Page 10: Grounding In The Interface 1010
The Interface 1010 is normally provided with an AC line cord suitable for your location. This AC line cord connects the AC mains to the AC power adapter. If your Interface 1010 has been provided without an AC line cord, or a cord that is not compatible with your local AC mains socket, obtain a line cord certified for use in your country. -
Page 11: Temperature And Ventilation
The User I/O connector can be connected to earth-grounded apparatus without earth-grounding the Interface 1010, if the cabling is done carefully. The metal shell on the Interface 1010 User I/O Connector is connected to the instrument’s chassis, which is a floating ground. In a system that needs isolation from earth ground, the shield of a User I/O cable must not connect the D-connector’s metal shell to earth ground. -
Page 12: Environmental Limits
Safety Considerations – Environmental Limits • It has been subjected to environmental stress (corrosive atmosphere, fire, etc.). Do not use your Interface 1010 or any other apparatus if you think it could be hazardous. Have it checked by qualified service personnel. Environmental Limits There are environmental limit conditions on the storage, shipping, and operation of this equipment. -
Page 13: Service
Always remove the power connection before opening the Interface 1010 case. RF Warning The Interface 1010 has been tested for both radiated and conducted RF interference and for immunity to RF fields and has been found to be in compliance with FCC Part 18 and EN 61326:1998—Electrical equipment for measurement, control, and laboratory use—... -
Page 14: Ce Compliance
Gamry Instruments, Inc. has designed and tested the Interface 1010 to comply with these standards. The relevant CE regulations include EN 61010 and EN 61326. RoHS Compliance The Interface 1010 has been built using lead-free components and lead-free solder. It is in compliance with the European RoHS initiative. -
Page 15: Chapter 2: Introduction
This manual covers the installation, safety, and use of the Gamry Instruments Interface 1010 Potentiostat/Galvanostat/ZRA. This manual describes use of an Interface 1010 with Revision 7 (and later revisions) of the Gamry Framework software. It is equally useful when setting up a newly purchased potentiostat or modifying the setup of an older potentiostat for use with new software. -
Page 16: Software And Applications
In this type of system, each Interface 1010 is powered by an individual AC Adapter, which in turn can be powered by a multiple output AC power strip. The multiple USB connections for the system can be obtained from an inexpensive commercial USB hub. -
Page 17: Front Panel Customization
The Interface 1010 supports a flexible labeling scheme for identifying potentiostats in a multiple potentiostat (multichannel) system. A clear window in the plastic overlay on the Interface 1010’s front panel lets you create your own identification of each potentiostat in a system. -
Page 19: Chapter 3: Installation
Power switch Initial Visual Inspection After you remove your Interface 1010 from its shipping carton, check it for any signs of shipping damage. If you note any damage, please notify Gamry Instruments, Inc. and the shipping carrier immediately. Save the shipping container for possible inspection by the carrier. -
Page 20: Computer Requirements
Installation – Computer Requirements If you do place your Interface 1010 within an enclosed space, make sure that the internal temperature within that space does not exceed 45°C, the maximum ambient temperature for the Interface 1010. Be particularly careful if a computer or other heat-dissipating equipment is mounted in the same enclosure as the Interface 1010. -
Page 21: Power Cord And Power Connection
DC power input jack on the rear of the Interface 1010. The external power supply provided with the Interface 1010 is rated for operation from 100 to 240 V AC, at frequencies from 47 to 63 Hz. It should therefore be useable worldwide. -
Page 22: Power Up Test
This process could take as long as 15 seconds. The Interface 1010 fan runs at low speed once the Power light stops flashing. If you do not see four or five blinks and then a steady blue color, see Appendix D for a table of blink codes. -
Page 23: Multiple Potentiostat Systems
USB. You can also safely remove the USB cable without powering down the Interface 1010 and your computer. Be aware, however, that this may have undesirable consequences if the system is currently taking data or performing an electrochemical experiment. -
Page 24: Cell Cable Installation
Front Panel USB LED The front panel USB LED provides a simple test of two aspects of normal Interface 1010 USB operation. It has four normal states: Unlit The USB cable is disconnected, or the USB connection is disabled by the host computer. -
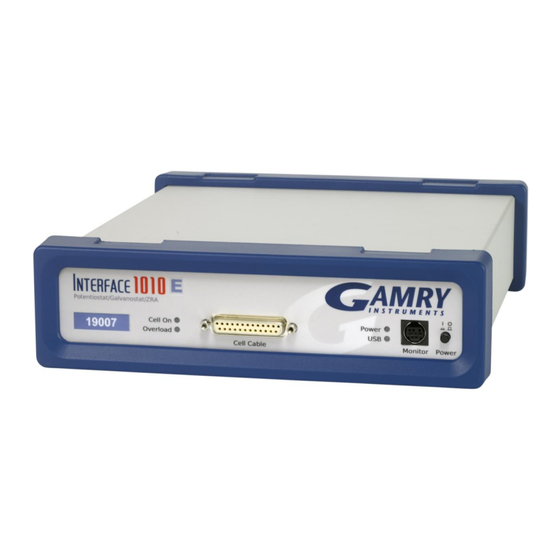
Page 25: Types Of Interface 1010 Instruments
The Interface 1010 comes in three models, the Interface 1010T, Interface 1010B, and Interface 1010E. You can purchase an upgrade from one version to the next. To use the upgraded Interface 1010, enter a new authorization code using Instrument Manager. See Appendix G for a full list of each model’s capabilities. -
Page 26: Authorization Codes And Label
Caution: Interrupting a firmware update can cause a catastrophic failure of your system. Do not turn off the Interface 1010, do not unplug the USB cable, and do not stop the operation of the host computer when the USB LED is a continuous red color. -
Page 27: Label Sheet Provided With Each Interface 1010
• Pstat 1 through Pstat 16 on a red background You can cut any of these labels from the sheet and insert as the Interface 1010 Customization Label. The white labels are provided to allow you to handwrite a label. - Page 28 7) Your Interface 1010 family instrument should now look like Figure 3-6 (the front bezel is removed). Notice the blue tab on the left side on the instrument. This is part of the old label; it is blue on the instrument in the photo.
- Page 29 Installation – The Interface 1010 Customization Label Figure 3-5 Instrument with Bezel Removed - Label Tab is Visible...
-
Page 31: Chapter 4: Calibration
Calibrate each potentiostat installed in your system. A calibration utility is provided with the Gamry Framework. The calibration for the Interface 1010 is divided into two sections: Instrument DC Calibration and cable calibration. Gain access to these calibration procedures via the Utility selection on the Framework’s Experiment drop-down menu. -
Page 32: Cable Calibration
• The system is being run in an environment that is very different from the previous operating environment. For example, if the Interface 1010 was calibrated at 15°C and you are now operating it at 30°C, you should recalibrate. Figure 4-2 2 kΩ... -
Page 33: Procedure To Calibrate The Cable
Calibration – Cable Calibration Procedure to calibrate the cable 1) Connect the Chassis Ground on the back of your potentiostat to a known, good earth ground. 2) Connect the cell cable to the correct color-coded receptacles on the 2 kΩ Calibration Cell. 3) Place the Calibration Cell inside the Calibration Shield, close the lid, and connect the black floating- ground lead of your cell cable to the Shield’s grounding post:... - Page 34 Calibration – Cable Calibration 4) Open Gamry Framework™ software. Select Experiment > Named Script... The Select a script to run window appears. From the list of scripts, choose calcable.exp, then click the Open button. 5) The Cable Capacitance Calibration window appears. In the Cable Tag field, enter a unique name for the cable you are calibrating.
- Page 35 Calibration – Cable Calibration 7) The Cell Required window appears. Make sure that the correct Calibration Cell is attached, then click the OK button. The calibration runs. 8) The Done window appears. Click the OK button to acknowledge completion.
-
Page 37: Chapter 5: Cell Connections
The black pin jack is connected on the Interface 1010 end to Chassis Ground. This is the circuitry ground for the analog circuits in the Interface 1010. In most cases, leave this terminal disconnected at the cell end. When you do so, take care that its metal contact does not touch any of the other cell connections. -
Page 38: Zra-Mode Cell Connections
Caution: If any electrode in your cell is at earth ground, never connect the Interface 1010 chassis to earth ground. Autoclaves, stress apparatus, and field measurements may involve earth-grounded electrodes. A binding post on the rear panel of the Interface 1010 is provided for this purpose. A water pipe can be a suitable earth ground. -
Page 39: Membrane Cell Connections
A/D noise and offset create a small potential signal with a value very close to zero. Membrane Cell Connections The Interface 1010 can be used with membrane cells. In this type of cell, a membrane separates two electrolyte solutions. Two reference electrodes are used: one in each electrolyte. Each electrolyte also contains a counter electrode. -
Page 41: Chapter 6: Panel Indicators And Connectors
Power Switch The Power button is on the far right side of the Interface 1010 Front Panel. It is a push-push switch: push once to turn the instrument on and push again to turn the instrument off. The switch’s button latches: the button is closer to the front panel when the instrument is on than when it is off. -
Page 42: Cell Cable Connector
It is normally used with a Gamry Instruments supplied cell cable. In addition to the pins used for cell connections, the Interface 1010 Cell Connector also uses four pins to read a cell cable ID. Gamry software can compensate for the cell cable characteristics for optimal system performance, especially in EIS (Electrochemical Impedance Spectroscopy). -
Page 43: Cell On Led
The USB LED indicates a continuous red in one special condition: when a firmware update occurs. Interrupting a firmware update can cause a catastrophic failure of your system. Do not turn off the Interface 1010, do not unplug the USB cable, and do not stop the operation of the host computer when the USB LED is a continuous red color. -
Page 44: Overload Led
The Overload LED is just below the Cell On LED. Overload LED The Overload LED is normally unlit. When it glows red, a circuit in the Interface 1010 has exceeded its normal operating limit. Conditions that generate Overloads include: •... -
Page 45: Customization Label Area
Customization Label Area The left side of the Interface 1010 front panel has a transparent area in its plastic overlay. A paper label behind this area allows a custom appearance. This is especially important when the instrument is in a multiple- potentiostat system. -
Page 46: Chassis Ground
USB Port The USB port on the rear panel of the Interface 1010 is a Type B connector as defined in Revision 1.1 and 2.0 of the USB Specification. Use a standard, shielded, Type A/B cable to connect this port to a computer’s USB port or a USB hub (preferably an externally powered hub). -
Page 47: Sync Port
Sync port Sync Port The Sync Port is used when several Interface 1010 instruments need to be operated with a common clock and simultaneous data acquisition. It is an 8-pin mini-DIN connector. Simultaneous operation is only required when several instruments are connected to a single electrochemical cell. -
Page 49: Chapter 7: Instrument Circuitry
The following figures are partly schematic diagrams and partly block diagrams. They are intended to show the basic principles of the Interface 1010 without the confusion of the full circuitry details. The complexity of the Interface 1010 can be quite daunting: the Interface 1010 circuit boards contain more than 2000 components connected by almost 5000 circuit nets. - Page 50 Calibration components are not shown. • Overload protection and overload detection are not shown. Good engineering practice demands that any possible misconnection of the cell leads will not damage the instrument. This practice has been followed in the design of the Interface 1010.
- Page 51 Instrument Circuitry – Interface 1010 Schematic/Block Diagrams Figure 7-2 Interface 1010 Signal-Generation Circuitry Notes for Figure 7-2: • All the resistors summing voltages into the Summing Amplifier input do not have values shown because their values depend on scaling factors too complex for this simplified diagram.
- Page 52 Instrument Circuitry – Interface 1010 Schematic/Block Diagrams Figure 7-3 One A/D Signal Chain in the Interface 1010 Notes for Figure 7-3: • This diagram shows one of two identical ADC channels. One channel is dedicated to measurement of the potentiostat’s current signal and the other is used to measure the voltage signal.
- Page 53 The UARTs send data at 6 Mbits/second. • The Interface 1010 has local non-volatile data storage. This is used to save calibration data and board- revision information. Interface 1010 calibration data is stored in the instrument, not in a data file.
- Page 54 Caution: Do not use a DC power source other than the AC adapter provided with your Interface 1010 or a Gamry-supplied alternative. Other power sources may void the performance and/or safety characteristics of the Interface 1010. Power input voltages less than 40 V or greater than 52 V can damage the Interface 1010’s power supply.
-
Page 55: Chapter 8: Stability In Potentiostat Mode
Whenever you see sharp breaks in the current recorded on the system, you should suspect oscillation. The Interface 1010 has been tested for stability with cell capacitors between 10 pF and 3000 F. In all but its fastest control amplifier speed-setting, it is stable on any capacitor in this range—as long as the impedance in the reference electrode lead does not exceed 20 k. - Page 56 Stability in Potentiostat Mode – Improving Potentiostat Stability Figure 8-1 Fast Combination Reference Electrode White Cell Lead 100 pF to 10 nF Platinum Electrolyte • Provide a high-frequency shunt around the cell. A small capacitor between the red and white cell leads allows high-frequency feedback to bypass the cell, see Figure 8-2) The capacitor value is generally determined by trial and error.
- Page 57 Stability in Potentiostat Mode – Improving Potentiostat Stability This resistor has no effect on the DC accuracy of the potentiostat. It can create problems in high-speed experiments such as fast CV scans or EIS, which need high bandwidth. Figure 8-3 Resistor Added for Stability Resistor White...
-
Page 59: Chapter 9: Measurement Of Small Signals
−15 2 000 000 electrons per second! The small currents measured by the Interface 1010 place demands on the instrument, the cell, the cables and the experimenter. Many of the techniques used in higher-current electrochemistry must be modified when used to measure pA currents. In many cases, the basic physics of the measurement must be considered. -
Page 60: Johnson Noise In Z
Measurement of Small Signals – Measurement System Model and Physical Limitations Figure 9-1 Equivalent Measurement Circuit R shunt C shunt Icell R in C in Unfortunately, technology limits high-impedance measurements because: • Current measurement circuits always have non-zero input capacitance, i.e., C >... -
Page 61: Finite Input Capacitance
AC signal by more than a factor of 10. The Interface 1010 uses an input amplifier with an input current of around 1 pA. Other circuit components may also contribute leakage currents. You therefore cannot make absolute current measurements of very low pA currents with the Interface 1010 n practice, the input current is approximately constant, so current differences or AC current levels of less than one pA can often be measured. -
Page 62: Voltage Noise And Dc Measurements
∙ water films can be a real problem, especially on glass. Shunt capacitance and resistance also occur in the potentiostat itself. Specifications for the Interface 1010 in Potentiostat Mode, in Appendix A, contain equivalent values for the potentiostat’s R and C . -
Page 63: Avoid External Noise Sources
Try to avoid AC-powered or computerized apparatus within your Faraday shield. Length and Construction of the Cell Cable The Interface 1010 is shipped with a 60 cm shielded cell cable. We also offer extended length cables and a special cable for low-impedance cells as choices at extra cost. -
Page 64: Cell Construction
Z · f < 10 Ω∙Hz Ancillary Apparatus Do not use the Interface 1010 with ancillary apparatus connected directly to any of the cell leads. Ammeters and voltmeters, regardless of their specifications, almost always create problems when connected to the Interface 1010 cell leads. -
Page 65: Floating Operation
Measurement of Small Signals – Floating Operation Floating Operation The Interface 1010 is capable of operation with cells where one of the electrodes or a cell surface is at earth ground. Examples of earth-grounded cells include: autoclaves, stress apparatus, pipelines, storage tanks, and battleships. -
Page 67: Appendix A: Interface 1010 Specifications
Appendix A: Interface 1010 Specifications All specifications are at an ambient temperature of 22°C, with the Interface 1010 powered using the external power supply shipped with the unit, a standard shielded 60 cm cell cable, and the cell enclosed in a Faraday shield. -
Page 68: Differential Electrometer
Interface 1010 Specifications Unity Gain Bandwidth 980, 260, 40, 4, 0.4 Notes 3, 4 Slew Rate 10, 4.5, 0.6, 0.06, 0.006 V/µs Notes 3, 4 Differential Electrometer Max Input Voltage ±12 volts Note 5 Input Current Note 6 Input Resistance... -
Page 69: Current To Voltage Converter
Interface 1010 Specifications Current to Voltage Converter Maximum Full-scale Range 1000 Note 13 Minimum Full-scale Range Note 13 100 (after ×100 gain) Voltage across Rm mV at Note 14 full scale Output Voltage V at full scale (at Monitor and ADC in) -
Page 70: Potentiostatic Mode
Interface 1010 Specifications Potentiostatic Mode Applied Voltage Range ±12 volts Accuracy Note 18 DC zero offset mV % setting Gain mV % setting DC Bias ±8 Scan DAC ranges ±6.4, ±1.6, ±0.4 Drift <20 µV/C Note 19 Noise and Ripple... - Page 71 4) Measured with an external function generator connected to the Ext Sig In BNC. 5) The A/D and signal-processing chain in the Interface 1010 allows measurement of voltage signals as large as ±13.107 V. The voltage on the working sense lead can be as high as ±0.4 V when measuring 1 A using a 60 cm cell cable.
- Page 72 Interface 1010 Specifications 16) Drift can be approximated by simple drift in the Range Zero Error. In reality all three terms in the equation above can have drift. 17) The Current-to-Voltage converter bandwidth is a function of the current range, the cell cable, and the IEStability setting.
- Page 73 Interface 1010 Specifications...
-
Page 74: Appendix B: Interface 1010 Cell Connector
Multiple pins assigned to the same signal are connected together on the Interface 1010’s Potentiostat board. If you need to connect this signal outside the Interface 1010, you need a wire connected to any one of the D- connector pins. - Page 75 Interface 1010 Cell Connector Designing cell cables for a 1 MHz potentiostat is not a trivial task. Gamry Instruments does not recommend user-designed cables (except as a last resort). In many cases we can build a custom cable to meet your specific needs. We’ll also be happy to discuss your cable requirements and give you...
-
Page 76: Appendix C: I/O Connectors
The details of these connectors are described here. User I/O Connector This connector contains a number of signals used to interface the Interface 1010 to external apparatus. It is the miniature 15-pin female D-shaped connector on the rear panel of the Interface 1010. -
Page 77: Sync Port
Monitor Connector The Monitor connector is located on the Interface 1010 Front Panel. It is an 9-pin round mini-DIN connector. One possible mating connector is from CUI Inc. part number MD-80. The pin-out signals of the Monitor... -
Page 78: I Monitor Signal
[not connected] I Monitor Signal The I Monitor signal represents the output of the Interface 1010 current measurement circuit. It can be treated as a two-wire differential signal with the negative side connected to the Interface 1010 Signal Ground. With the exception of the filtering described below, it is the raw signal with no offset or gain applied. -
Page 79: Temperature Monitor Signal
BNC. Its output impedance is approximately 1 kΩ in parallel with 47 pF. Temperature Monitor Signal The Interface 1010 offers temperature testing in the range of –50 to 600°C. A 1000 Ω (at 0°C) platinum RTD (resistance temperature detector) according to European standard (DIN/IEC 60751 or simply IEC751) is used for the temperature measurement. - Page 80 I/O Connectors The signal generator output is directly connected to the potentiostat’s input. When the cell is turned on in potentiostat mode, the feedback is such that a negative signal-generator output creates a positive differential electrometer signal, which corresponds to a negative working electrode versus reference electrode voltage. The polarity of the External Signal In signal is inverted at the signal generator’s output.
-
Page 81: Appendix D: Power Led Blink Codes
If you receive one of the above codes, please call Gamry Instruments Service Department for assistance. Error Messages and Limitations The Interface 1010 has a subtype, Interface 1010T, which may generate error messages under certain run-time conditions: Error Message This instrument is not authorized for Freq= The Interface 1010T is able to perform EIS at frequencies 20 kHz or lower. -
Page 82: Error Message This Instrument Is Not Authorized For Ierange
Power LED Blink Codes Error Message This instrument is not authorized for IERange= The Interface 1010T is able to operate at currents of 100 mA or lower. Higher currents generate this error message. Decrease the current to continue. Error Message This instrument is not authorized for ScanRate= The Interface 1010T is able to scan at rates of 1 V/s or lower. -
Page 83: Appendix E: Certifications
According to ISO/IEC Guide 22 and EN ISO/IES 17050-1:2014 Manufacturer's Name and Location: Gamry Instruments 734 Louis Drive Warminster, PA 18974 This declaration is for the Gamry Instruments product model: Interface 1010 Potentiostat/Galvanostat/ZRA The declaration is based upon compliance with the following directives: • EMC Directive 2014/30/EC •... -
Page 84: Declaration Of Conformity: No. Doc-2021-Ukca
Manufacturer's Name and Location: Gamry Instruments 734 Louis Drive Warminster, PA 18974 This declaration is for the Gamry Instruments product model: Interface 1010 Potentiostat/Galvanostat/ZRA The declaration is based upon compliance with the following directives: • Electromagnetic Compatibility Regulations 2016 •... -
Page 85: Appendix F: Heat In Interface 1010 Multichannel Systems
Heat in Interface 1010 Multichannel Systems Appendix F: Heat in Interface 1010 Multichannel Systems Introduction to Device Power-Dissipation All electronic devices require power to operate. In most cases, this power generates heat within the device. The simplest model for device power assumes the device can be modeled as a simple resistor across the power supply inputs. -
Page 86: Discharging A Battery
If we only have a single battery and its voltage is 5 V, the maximum power dissipation is 37 W. • If the battery stack has a voltage equal to the largest measurable Interface 1010 cell voltage (12 V), the maximum power dissipation in the instrument is 44 W. -
Page 87: Single Interface 1010
Single Interface 1010 Gamry has tested a single Interface 1010 operating at its most extreme condition: discharge of a 20 V cell at 1 A current. The unit was run in its normal horizontal position, with 1 A cell current and a 20 V cell voltage. The air-flow though the unit was unimpeded. -
Page 89: Appendix G: Capabilities Of Various Models Of Interface 1010
Capabilities of Various Models of Interface 1010 Appendix G: Capabilities of Various Models of Interface 1010 Below is a table of the various types of Interface 1010 potentiostats, and their respective capabilities. Interface Interface Interface Technique 1010T 1010B 1010E Electrochemical Impedance Spectroscopy Potentiostatic Impedance Spectroscopy ●... - Page 90 Capabilities of Various Models of Interface 1010 Physical Electrochemistry Cyclic Voltammetry ● ● ● Linear Sweep Voltammetry ● ● ● Chronopotentiometry ● ● ● Chronocoulometry ● ● ● Chronoamperometry ● ● ● Repeating Chronoamperometry ● ● ● Repeating Chronopotentiometry ●...
- Page 91 ● ● eChem Toolkits Virtual Front Panel ● ● ● eChemBasic ● ● ● eChemDC ● ● ● eChemAC ● ● ● Available techniques are restricted to the instrument’s specified limits. Refer to the Interface 1010 specifications in Appendix A.
-
Page 93: Appendix H: Index
Index Appendix H: Index 25 pin D, 24 environmental limits, 12 AC adapter, 9 environmental stress, 12 ADC channels, 52 Experiment drop-down menu, 31 air-cooling, 11 External Signal In, 78, 79, 80 alligator clip, 38 fan speed, 11 ancillary apparatus, 65 Faraday shield, 38, 62 auxiliary electrode, 37 filters, 52... - Page 94 Index power brick, 9 stability, 55 Power Connection, 21 state-machine, 52 Power Cord, 21 static electricity, 13 Power Dissipation, 85 storage, 12 Power In, 45 support, 3 Power In jack, 45 Sync port, 16, 47, 77 Power LED, 22, 41, 81 telephone assistance, 3 power line transient, 14 temperature, 11...
Need help?
Do you have a question about the Interface 1010 and is the answer not in the manual?
Questions and answers