
Related Manuals for NEFF D86E21N0GB


Summary of Contents for NEFF D86E21N0GB
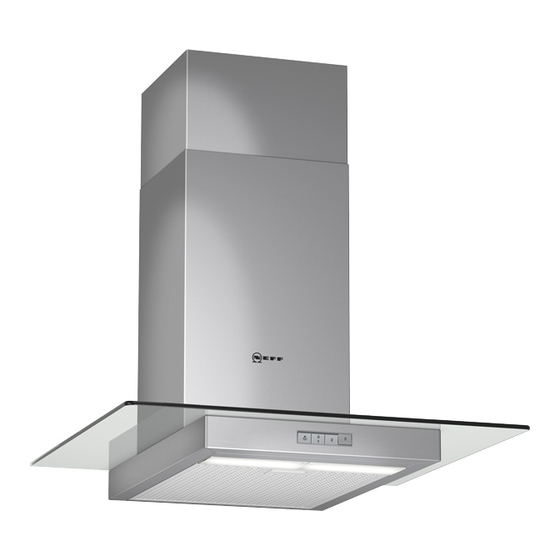
- Page 1 Installation instructions and how to use and look after your built-in cooker hoods NEFF (UK) Ltd...
- Page 2 Fig. 1 Abb. 1 ELECTRO...
-
Page 3: Operating Modes
filter and activated carbon filter of the same chimney (such as gas, oil or and then conveyed back into the coal-fired heaters, continuous-flow heaters, kitchen. -
Page 4: Before Using For The First Time
IIf you have any questions or if a fault load. occurs, please call Customer Service. Due to the effect of the heat there is a risk of (See list of Customer Service burns if the surfaces of the housing are representatives). -
Page 5: Safety Instructions
filter. Overheated fat or oil can easily catch fire. If you are cooking with fat or oil, e.g. chips, etc., never leave the cooker unattended. Do not use the appliance if damaged. The appliance may be connected to the mains by a qualified technician only. -
Page 6: Operating Procedure
finished cooking. Setting the required fan speed: Light Fan settings Intensive Press the corresponding button. setting Lighting: The light can be switched on at any time, even though the fan is switched off. Light Fan settings Light Fan settings... -
Page 7: Filters And Maintenance
Important: By cleaning the metal grease filters at appropriate intervals, the possibility of them catching fire as a result of a build-up of heat such as occurs when deep-fat frying or roasting is taking place, is reduced. Cleaning the metal grease filters: 2. - Page 8 As the filter becomes more and more mesh grease filters"). saturated with grease, there is an increased 2. Insert the activated carbon filter. risk of fire and the function of the extractor hood may be impaired. Important: Change the activated carbon filter promptly to prevent the risk of fire from the...
-
Page 9: Cleaning And Care
Cleaning and care Isolate the extractor hood by pulling out Stainless steel surfaces: the mains plug or switching off the fuse. Use a mild non-abrasive stainless steel cleaner. Do not clean the extractor hood with Clean the surface in the same direction abrasive sponges or with cleaning agents as it has been ground and polished. -
Page 10: Replacing The Light Bulbs
20 Watt, G4 cap). bulb holder). Caution: Refer for plug-in lampholder. Take hold of the bulb with a clean cloth. 4. Re-insert the bulb ring. 5. Plug the appliance into the mains or switch it on at the fuse box. -
Page 11: Installation Instructions
Only one side of the extractor hood Please ask your dealer or inquire at your may be installed next to a high-sided unit local authority about current means of or high wall. Gap at least 50 mm. -
Page 12: Prior To Installation
flue that is interlocking, etc. currently used for other purposes, nor into a shaft that is used for ventilating rooms in If the air intake is inadequate, there is a which stoves or fireplaces are also located. - Page 13 Connecting a l 150 mm exhaust-air pipe: Short, smooth air exhaust pipe. Mount the pipe As few bends in the pipe as possible. directly onto the Diameter of pipe to be as large as air outlet on the possible and no tight bends in pipe.
-
Page 14: Electrical Connection
Prior to installation Electrical connection Preparing the wall If you fit your own plug, the colours of these wires may not correspond with the The wall must be flat and perpendicular. identifying marks on the plug terminals. Make sure that the wall can bear the This is what you have to do: applied loads. -
Page 15: Installation Preparations
Operating Instructions). installation aid, leaving them projecting by approx. 5 mm. 2. Draw a line on the wall from the ceiling to the lower edge of the hood at the centre of the location where the hood is going to be mounted. -
Page 16: Installation
10. Put on the enclosed protective extractor hood. cardboard for the glass plate. Attach the extractor hood, align and 11. Put on the glass plate and remove screw tightly into place. protective cardboard. 12. Screw glass plate tightly into place. -
Page 17: Installing The Flue Ducts
Exhaust-air mode: Slots of the inner flue duct downwards. Circulating-air mode: Slots of the inner flue duct upwards. 5. Use 2 screws to attach the sides of the inner flue duct to the fixing bracket. 6. Insert the grease filter (refer to Operating Instructions). - Page 18 Notes...
- Page 19 Notes...
- Page 20 Notes...
- Page 21 Notes...
- Page 22 Notes...
- Page 23 Z5131X5...
- Page 24 NEFF (UK) Ltd. Grand Union House, Old Wolverton Road, Old Wolverton Milton Keynes, MK12 5PT Tel: 01908 328300 9000 418 307 Fax: 01908 328399 Printed in Germany 0109 Es.
Need help?
Do you have a question about the D86E21N0GB and is the answer not in the manual?
Questions and answers