Advertisement
Table of Contents
- 1 Appliance Description
- 2 Operating Modes
- 3 Before Using for the First Time
- 4 If You Encounter a Problem
- 5 Operating Procedure
- 6 Filters and Maintenance
- 7 Cleaning and Care
- 8 Replacing the Light Bulbs
- 9 Installation Instructions
- 10 Prior to Installation
- 11 Exhaust-Air Mode
- 12 Electrical Connection
- 13 Circulating-Air Mode
- 14 Electrical Data
- 15 Installation
- Download this manual
Advertisement
Table of Contents

Summary of Contents for NEFF D8002N0GB
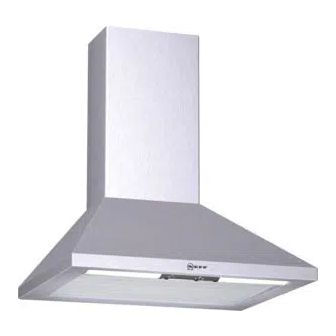
- Page 1 Installation instructions and how to use and look after your built-in cooker hoods D80 . . / D86 . . / D87 . . / D89 . . NEFF (UK) Ltd...
- Page 2 Fig. 1 Abb. 1 ELECTR. mind. mind.
-
Page 3: Appliance Description
Light / fan technical measures, such as reciprocal switches interlocking, etc. If the air intake is inadequate, there is a risk of poisoning from combustion gases which are drawn back into the room. An air-intake/exhaust-air wall box by itself is no guarantee that the limiting value will not be exceeded. -
Page 4: Before Using For The First Time
Use carefully. They contain important you may find descriptions of individual information concerning your personal features that do not apply to your safety as well as on use and care of the specific appliance. appliance. This extractor hood complies with all Please retain the operating and relevant safety regulations. -
Page 5: Operating Procedure
Ventilator settings By cleaning the metal grease filters at appropriate intervals, the possibility of them catching fire as a result of a build-up of heat Switching ON: such as occurs when deep-fat frying or Slide the right slide switch to the desired roasting is taking place, is reduced. - Page 6 filters"). inwards and fold the filters down. 2. Insert an activated carbon filter on the right and left of the fan motor and rotate the filters until they lock into position. 3. Insert the grease filters (see removal and installation of the metal-mesh grease filters).
-
Page 7: Cleaning And Care
1. Switch off the extractor hood and pull electricity supply by pulling out the out the mains plug or switch off the mains plug or switching it off at the fuse electricity supply at the fuse box. box. 2. Remove the grease filters (see Filters and At the same time as you clean the Maintenance). -
Page 8: Installation Instructions
Only one side of the extractor hood Please ask your dealer or inquire at your may be installed next to a high-sided unit local authority about current means of or high wall. Gap at least 50 mm. -
Page 9: Prior To Installation
flue that is interlocking, etc. currently used for other purposes, nor into a shaft that is used for ventilating rooms in If the air intake is inadequate, there is a which stoves or fireplaces are also located. - Page 10 flap should be mounted inside the section that equates to that of round extractor hood unless there is already one pipes. fitted in the outlet duct or wall ventilation There should be no sharp bends. box. l 100 mm approx. 178 cm If no one-way flap was enclosed with the...
-
Page 11: Electrical Connection
Electrical data: Preparing the wall Are to be found on the name plate inside the appliance after removal of the filter The wall must be flat and perpendicular. frame. Ensure that the wall is capable of providing a firm hold for mounting... -
Page 12: Installation
5. Screw on the 2 brackets for fixing the Operating Instructions). upper and lower flue ducts. 2. Draw a line on the wall from the ceiling 6. In order to help fix the hood onto the to the lower edge of the hood at the... - Page 13 Take care not to damage the stainless steel surfaces which are susceptible to scratches etc. 12. Screw the upper flue duct to the sides of the fixing bracket with 2 short screws. 13. Position the lower flue duct on the extractor hood and screw the extractor hood to the flue duct from below with...
- Page 14 Notes...
- Page 15 Z5115X5 353121...
- Page 16 NEFF (UK) Ltd. Grand Union House, Old Wolverton Road, Old Wolverton Milton Keynes, MK12 5PT Tel: 01908 328300 5750 204 491 Fax: 01908 328399 Printed in Germany 1204 Es.


Need help?
Do you have a question about the D8002N0GB and is the answer not in the manual?
Questions and answers